Table of Contents
Advertisement
Quick Links
Advertisement
Table of Contents

Related Manuals for Rangemaster RC77


Summary of Contents for Rangemaster RC77
-
Page 1: Ceramic Hob
RC77 Ceramic Hob User Guide & Installation & Service Instructions U109916 - 02... -
Page 2: Table Of Contents
Contents Before You Start... Ceramic Hob Overview Cleaning Your Hob Troubleshooting Installation Circuit Diagram Technical Data Warranty/After Sales Service... -
Page 3: Before You Start
1. Before You Start... Thank you for buying a Rangemaster hob. It should give you many years trouble-free cooking if installed and operated correctly. It is important that you read this section before you start, particularly if you have not used a ceramic hob before. -
Page 4: Cleaning Your Hob
Hob Care Never cook directly on the hob surface. Do not use the hob surface as a cutting board. Do not leave utensils, foodstuffs or combustible items on the hob when it is not is use (e.g. tea towels, frying pans containing oil). -
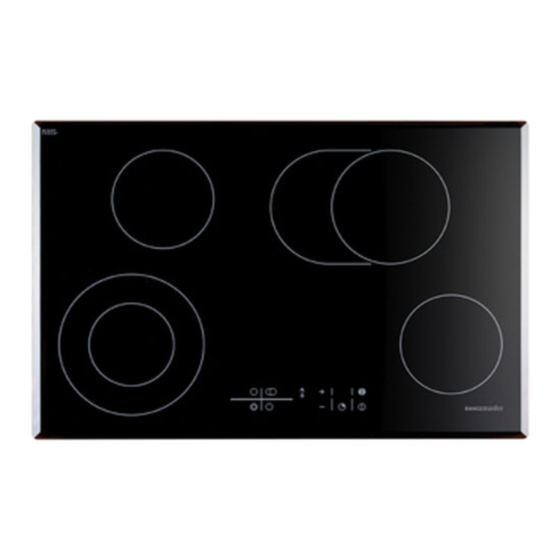
Page 5: Hob Overview
(Fig.2-4). Using smaller pans wastes heat, and any spillage will be burnt on. Art No. 315-0007 RC77 hob ����������������������������� ArtNo.312-0004 Correct pans ceramic ArtNo.312-0005 Curved ArtNo.312-0006 Correct pan sizes DocNo.022-0002 - Overview - RC77 ceramic Fig.2-1 ���������������������������� ����������������������������������������� �������������������������������������� �������������������������� Fig.2-2 Fig.2-3... -
Page 6: The Control Panel
60°C the ‘H ’ will go out. The Control Panel The control panel consists of touch controls to operate the Art No. 315-0009 RC77 Selecting a zone 4 cooking zones, the dual elements, the timer and child lock features (Fig.2-5). - Page 7 Use the ‘–‘ key to set the preset power level (Fig.2-10). When the ‘A’ alternates with the selected power setting the preheat function is in operation. ������������������� ������������������ Art No. 315-0011 RC77 dual element Art No. 315-0010 RC77 prehea Fig.2-8 Art No. 315-0009 Fig.2-9...
-
Page 8: Timer Function
Fig.2-11 Art No. 315-0012 RC77 Timer on Fig.2-12 ����������������������������� Art No. 315-0013 RC77 Timer set Fig.2-13 ����������������������������� To adjust the preheat power level: Select the cooking zone (make sure the dot is illuminated) and then press the ‘+’ key to increase the power level. Pressing the ‘–‘... -
Page 9: Automatic Safety Shutdown
Turning off the timer alarm: At the end of the cooking time the hob will beep steadily for 2 minutes. Press any key to stop the alarm. Deactivating the timer: Make sure that none of the cooking zones has been selected. Press the timer and ‘–‘... -
Page 10: Cleaning Your Hob
We have developed a range of cleaning products that give maximum performance without damaging the hob surfaces. More information is available through the Cookware Collection brochure supplied with your cooker and our website, www. rangemaster.co.uk. Regular cleaning is recommended. For easier cleaning, wipe away any spillages immediately. Hotplate Burners The burner heads and caps can be removed for cleaning. -
Page 11: Cleaning Table
Cleaning Table Refer to the cleaning tables (Table 3-1 and Table 3-2) for details on cleaning the hob. The cleaners listed are available from supermarkets or electrical retailers. For enamelled surfaces use a cleaner that is approved fro use on vitreous enamel. The Vitreous Enamel Association has a list of approved suppliers. -
Page 12: Troubleshooting
4. Troubleshooting If there is an installation problem and I don’t get my original installer to come back to fix it, who pays? You do. Service organisations will charge for their call- outs if they are correcting work carried out by your original installer. -
Page 13: Installation
In case of doubt, do not use the appliance and contact the retailer. Never leave the packaging materials (cardboard, plastic bags, polystyrene foam, etc.) within children’s reach since they could become potential sources of danger. DocNo.062-0002 - Installation - RC77 ceramic... -
Page 14: Fixing The Hob
Check the appliance is electrically safe when you have finished. Fig.5-1 ��� ������������������������� �������������������������� ArtNo.315-0031 - RC77 cut-out dimensions Fig.5-2 ��������� �������� Fig.5-3 ArtNo 315-0015 77cm hob clearances ����� ��� INSTALLATION Positioning the Hob The hob should be fitted into a work surface, which is at ������... -
Page 15: Customer Care
Check the appliance is electrically safe you have finished. Electrical Connections This appliance must be installed by a qualified electrician to comply with the relevant Institute of Electrical Engineers (I.E.E.) regulations and also the local electricity supply company requirements. WARNING: THIS APPLIANCE MUST BE EARTHED ... -
Page 16: Circuit Diagram
� � � � � � �� �� ��� �� �� �� �� � �� � � DocNo.092-0002 - Circuit diagram - RC77 ��� � � ��� �� � �� � � �� � � � � � �� ���... -
Page 17: Technical Data
220 – 240V 50Hz Ratings Maximum electric load at 230V 50Hz: 5.8kW ��������� ��������������������� ����������������������� ����������������������� DocNo.102-0002 - Technical data - RC77 Overall: 45mm; (65mm including connection box) 770mm; see ‘Positioning of the hob’ 510mm See ‘Positioning of the hob’ 600mm Art No. -
Page 18: Warranty/After Sales Service
8. Warranty/After Sales Service DocNo.111-0001 Warranty If consultation or technical assistance is needed, please provide the local authorised service agent with the purchase invoice and the product code/serial number. The 2 years free maintenance for the operation of the appliance started from the date of purchase of this product. Any cosmetic damage to the appliance must be reported within 90 days of delivery. - Page 20 DocNo.000-0001 - Back cover Rangemaster �������������� ����������� ������� ����� w w w.ra n g e m a s t e r.c o .u k ArtNo.000-0003 CE logo...