Table of Contents
Advertisement
Quick Links
Advertisement
Table of Contents

Related Manuals for Rangemaster RC90


Summary of Contents for Rangemaster RC90
-
Page 1: Ceramic Hob
RC90 Ceramic Hob User Guide & Installation & Service Instructions U109917 - 02... -
Page 2: Table Of Contents
Contents Before You Start... Ceramic Hob Overview Cleaning Your Hob Troubleshooting Installation Circuit Diagram Technical Data Warranty/After Sales Service... -
Page 3: Before You Start
1. Before You Start... Thank you for buying a Rangemaster hob. It should give you many years trouble-free cooking if installed and operated correctly. It is important that you read this section before you start, particularly if you have not used a ceramic hob before. -
Page 4: Hob Care
Hob Care Never cook directly on the hob surface. Do not use the hob surface as a cutting board. Do not leave utensils, foodstuffs or combustible items on the hob when it is not is use (e.g. tea towels, frying pans containing oil). -
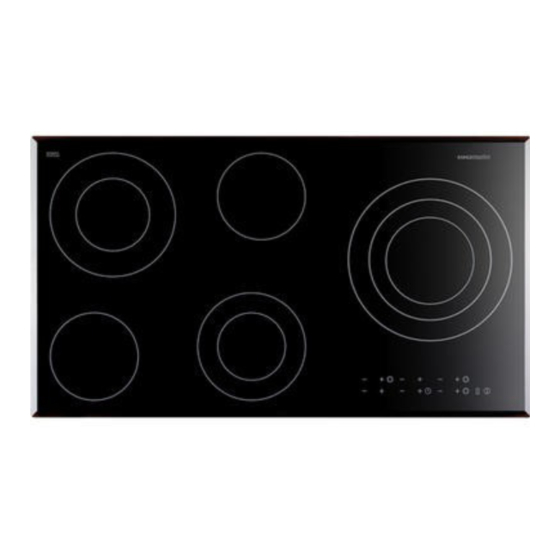
Page 5: Ceramic Hob Overview
2. Hob Overview �������������� ���������������������������� ���������������������������� �������������� ��������������������� The ceramic hob comprises of five cooking zones containing heating elements of different ratings and diameters, each with a residual heat indicator. Two of the zones contain single cooking elements, two contain double elements and one contains a triple element (Fig.2-1). -
Page 6: The Control Panel
3. Cooking element ‘–’ key 6. Triple element selector key 4. Cooking zone digital display Fig.2-6 ArtNo.315-0017 RC90 controls ON Fig.2-7 ArtNo.315-0019 RC90 zone set to 4 Fig.2-8 ArtNo.315-0019 RC90 zone set to 4 � � � ArtNo.315-0016 RC90 control panel �... - Page 7 ‘+’ key to increase the power level and the ‘–‘ key to reduce the power level. ArtNo.315-0021 RC90 Rapid shutdown ���������������� ������������������ ArtNo.315-0024 RC90 Triple element key ArtNo.315-0025 RC90 Preheat indicator Fig.2-9 Fig.2-10 ArtNo.315-0022 RC90 H Fig.2-11...
-
Page 8: Minute Timer
Fig.2-14 ��������������������� ArtNo.315-0026 RC90 Setting the zone timer Fig.2-15 ArtNo.315-0027 RC90 Setting the zone timer Timer Function The timer has two settings: • • Zone timer This allows any one of the cooking zones to be programmed to cook up to a maximum of 99 minutes at a set power level. -
Page 9: Automatic Safety Shutdown
Deactivating the timer: Press and hold the timer key. The timer display will reset to ‘00’ and after a few seconds go out. Child Lock Function IMPORTANT: Make sure that all cooking zones are switched off before operating the child lock. If the lock is operated when any cooking zones are active they will remain on. -
Page 10: Cleaning Your Hob
Ceramic Hob Cleaner set with scraper. More information is available in the Cookware Collection brochure supplied with your hob and on our website, www. rangemaster.co.uk. Regular cleaning is recommended. For easier cleaning, wipe away any spillages immediately. -
Page 11: Troubleshooting
4. Troubleshooting If there is an installation problem and I don’t get my original installer to come back to fix it, who pays? You do. Service organisations will charge for their call- outs if they are correcting work carried out by your original installer. -
Page 12: Installation
Check the appliance is electrically safe when you have finished. 5. Installation Dear Installer Before you start your installation, please complete the details BELOW. Should your customer have a problem relating to your installation they will be able to contact you easily. ����������������... - Page 13 Locate the bracket to the slot on the hob base and then tighten the retaining screw until it is locked to the worktop. INSTALLATION ��� ������������������������� �������������������������� ArtNo.315-0032 - RC90 cut-out dimensions ��������� �������� ������������������� ArtNo 315-0029 RC90 hob clearances ���������...
-
Page 14: Customer Care
Check the appliance is electrically safe when you have finished. Fig.5-4 ������� ����� ������ ������� ������� ����� ������� Fig.5-5 ArtNo.317-0017 Connection box INSTALLATION Electrical Connections ��� This appliance must be installed by a qualified electrician to comply with the relevant Institute of Electrical Engineers (I.E.E.) regulations and also the local electricity supply company requirements. -
Page 15: Circuit Diagram
�� �� � � � � �� �� �� � � �� �� �� �� �� �� � ArtNo.080-0011 - RC90 circuit diagram � � �� �� � � � �� � � � � ���� � ���� �� ��... -
Page 16: Technical Data
��������������������� ������������� 45mm; (65mm including connection box) 900mm; see ‘Positioning of the Hob’ See ‘Positioning of the Hob’ �������������� ������������� �������������� ������������� ArtNo.315-0028 RC90 kW rating DocNo.102-0003 - Technical data - RC90 Above worktop 5mm; Below worktop 40mm 510mm 600mm... -
Page 17: Warranty/After Sales Service
8. Warranty/After Sales Service DocNo.111-0001 Warranty If consultation or technical assistance is needed, please provide the local authorised service agent with the purchase invoice and the product code/serial number. The 2 years free maintenance for the operation of the appliance started from the date of purchase of this product. Any cosmetic damage to the appliance must be reported within 90 days of delivery. - Page 20 DocNo.000-0001 - Back cover Rangemaster �������������� ����������� ������� ����� w w w.ra n g e m a s t e r.c o .u k ArtNo.000-0003 CE logo...