
Related Manuals for Rangemaster RMB60HPECGL


Summary of Contents for Rangemaster RMB60HPECGL
-
Page 1: Ceramic Hob
RMB60HPECGL/ Ceramic Hob User Guide & Installation & Service Instructions U110604-01... -
Page 3: Table Of Contents
Contents Before You Start... Hob Overview Cleaning Your Hob Troubleshooting Installation Circuit Diagram Technical Data Warranty/After Sales Service... -
Page 5: Before You Start
1. Before You Start... Personal Safety Thank you for buying a Rangemaster hob. It should give you many years trouble-free cooking if installed and operated Accessible parts will become hot during use and will correctly. It is important that you read this section before you retain heat even after you have stopped cooking. - Page 6 Hob Care Cleaning Never cook directly on the hob surface. The ceramic surface should be washed after use in order to prevent it from becoming scratched or dirty. Do not use the hob surface as a cutting board. In the interests of hygiene and safety, the hob should be kept Do not leave utensils, foodstuffs or combustible items on clean at all times as a build up in fats and other foodstuffs the hob when it is not in use (e.g.
-
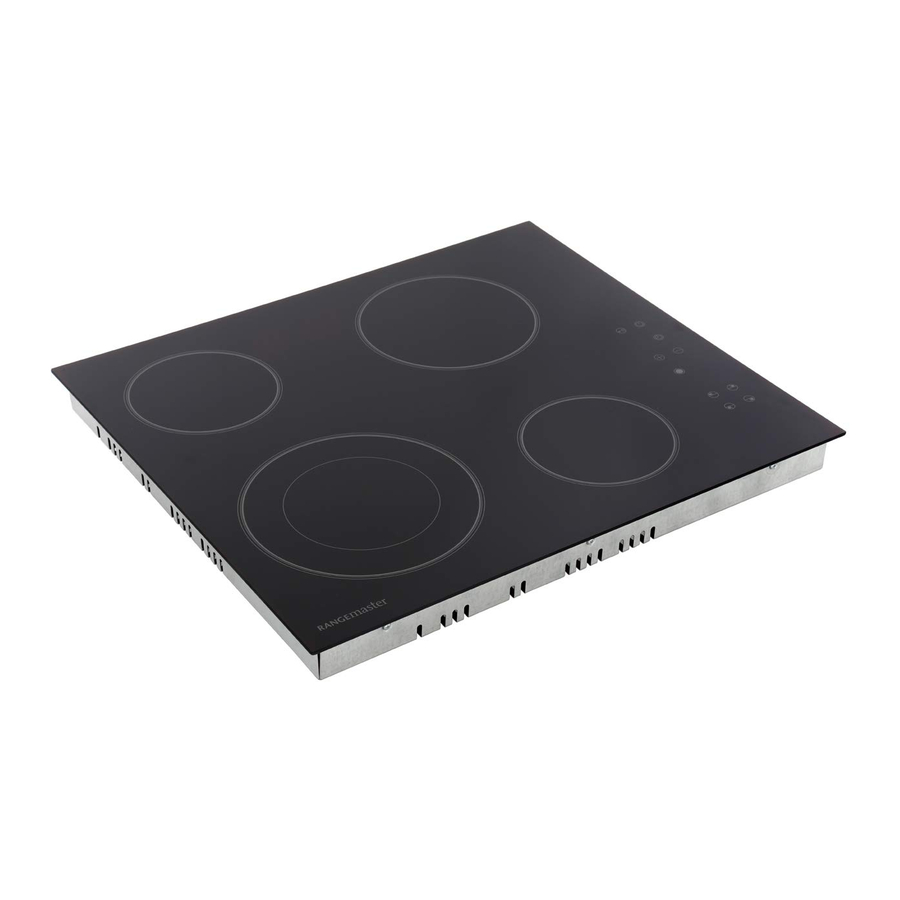
Page 7: Hob Overview
2. Hob Overview DocNo.023-0002 - Overview - RI77 hob The ceramic hob comprises of four cooking zones containing Zone 2 Zone 3 Fig. 2.1 radiant elements with different ratings and diameters (Fig. Diameter: 140 mm Diameter: 180 mm 2.1), each with a pan detector and residual heat indicator. Max: 1.2 kW Max: 1.8 kW Each zone is controlled via the touch sensitive controls with... -
Page 8: Heat Settings
Heat Settings The exact setting will depend on several factors, including your cookware and the amount you are cooking. Residual Heat Indicator, ‘H’ After use, a cooking zone will remain hot for a while as heat dissipates. When a cooking zone is switched off the residual heat indicator symbol ‘H’... - Page 9 Rapid shutdown Power Level Default operating hours There are two ways to shutdown the hobs: All of the cooking zones can be switched off by pressing the On/Off button. Any ‘hot‘ zones that were in use will show the Risdual Heat Indicator ‘H’ in the display. Keep any loose clothing, material, jewellery away from the ceramic zones when shutting down the hob.
-
Page 10: Timer Function
Timer Function Time multiple zones You have one zone timed and now you would like another The timer has three settings: cooking zone to be timed. • Time a single zone Press the desired cooking zone and follow the same •... -
Page 11: Cleaning Your Hob
3. Cleaning Your Hob • DocNo.042-0001 - Cleaning - BI hob ceramic Scrape major spills or melted material from the cooking zone Fig.3-1 and push into a cold area. Then turn the unit ‘OFF’ and allow it to cool before cleaning further. After the cooking surface cools down and the residual heat indicator lights go off, follow the ‘Daily care’... -
Page 12: Troubleshooting
4. Troubleshooting DocNo.052-0001 - Troubleshooting ceramic & induction If there is an installation problem and I don’t get my original installer to come back to fix it, who pays? You do. Service organisations will charge for their call- outs if they are correcting work carried out by your original installer. -
Page 13: Installation
INSTALLATION Check the appliance is electrically safe when you have finished. 5. Installation Dear Installer Location of the Hob Before you start your installation, please complete the details The hob may be installed in a kitchen/kitchen diner but NOT BELOW. in a room containing a bath or shower. - Page 14 INSTALLATION Check the appliance is electrically safe when you have finished. Positioning the Hob Fig. 5.1 The hob should be fitted into a work surface, which is at 510 mm 580 mm least 600mm deep. In position, the hob has a maximum thickness of 5mm from the top of the work surface, and an overall thickness of 45mm (65mm max depth including the connection block).
-
Page 15: Customer Care
INSTALLATION Check the appliance is electrically safe when you have finished. Secure the hob to the worktop using the brackets supplied. Fig. 5.3 The positioning of the bracket (and sleeve) is dependent on the thickness of the worktop as shown in (Fig. 5.3). Worktop Note: Slide the optional sleeve onto the bracket if fitting to 30 mm... -
Page 16: Circuit Diagram
6. Circuit Diagram... -
Page 17: Technical Data
7. Technical Data INSTALLER: Please leave these instructions with the user. DATA BADGE LOCATION: Base of the hob. COUNTRY OF DESTINATION: GB, IE. Dimensions Overall height 45 mm Overall width 580 mm Overall depth 510 mm Space for fixing See ‘Positioning of Hob’ Minimum space above hotplate 750 mm Connections... - Page 18 Hotplate Efficiency Data Brand Rangemaster Model Identification RMB60HPECGL/ Size (mm) Type Ceramic Type of Hob Radiant Number of electric zones Zone 1 - Ø cm Heating Technology Radiant Plates Energy Consumption (ECElectric cooking) - Wh/kg 194.7 Zone 2 - Ø cm...
-
Page 19: Warranty/After Sales Service
8. Warranty/After Sales Service DocNo.111-0003 Warranty No.10 If consultation or technical assistance is needed, please provide the local authorised service agent with the purchase invoice and the product code/serial number. The 2 years free maintenance for the operation of the appliance started from the date of purchase of this product. - Page 20 Notes...
- Page 21 Notes...
- Page 22 Notes...
- Page 23 Notes...
- Page 24 Clarence Street, Royal Leamington Spa, Warwickshire, CV31 2AD, England. Tel: +44 (0) 800 8046261 E-mail: consumers@agarangemaster.co.uk...