Table of Contents
Advertisement
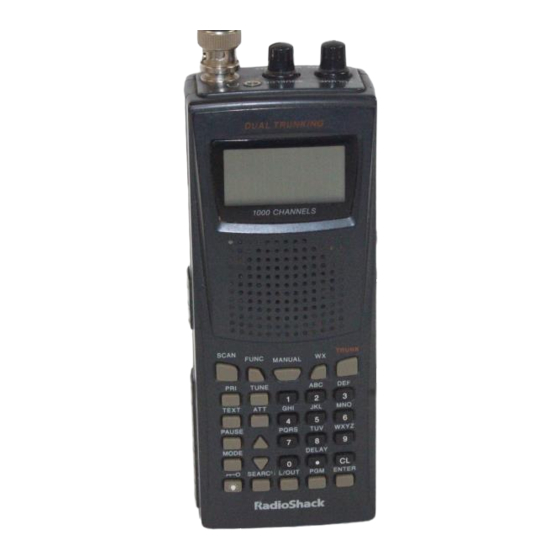
PRO-95 Dual Trunk-Tracking
Handheld Scanner
20-525
OWNER'S MANUAL - Please read before using this equipment.
!
!
IMPORTANT
If an icon appears at
the end of a
paragraph, go to the
box on that page with
the corresponding
icon for pertinent
information.
o
-
Warning
-
Caution
!
-
Important
Ó
-
Hint
Ô
- Note
CONTENTS
Features ................. 2
to Know .................. 6
Legally ............... 7
Preparation ............ 9
Power Sources .. 9
Power ............... 11
Earphone/
Headphones .... 13
Extension
Speaker ........... 14
Clip .................. 15
a PC ................ 15
EDACS is a registered trademark of GE/Ericsson Inc.
SCAN
TRUNK
FUNC
WX
MANUAL
PRI
TUNE
ABC
DEF
1
2
TEXT
ATT
GHI
JKL
MNO
4
5
PAUSE
PQRS
TUV
WXYZ
7
8
MODE
DELAY
0
CL
SEARCH
L/OUT
PGM
ENTER
© 2003 RadioShack Corporation.
All Rights Reserved.
RadioShack, RadioShack.com, Hypersearch,
Hyperscan, and Adaptaplug are
trademarks used by
RadioShack Corporation.
Motorola, Smartnet and Privacy Plus
are registered trademarks of Motorola Inc.
3
6
9
Advertisement
Table of Contents

Related Manuals for Radio Shack PRO-95


Summary of Contents for Radio Shack PRO-95
-
Page 1: Table Of Contents
PRO-95 Dual Trunk-Tracking Handheld Scanner 20-525 OWNER’S MANUAL — Please read before using this equipment. IMPORTANT If an icon appears at the end of a paragraph, go to the box on that page with the corresponding icon for pertinent information. -
Page 2: Features
FEATURES About Your Scanner ... 15 Your RadioShack Handheld About the Scanner is one of a new Keypad ... 16 generation of scanners designed Quick Start ... 19 Understanding to track Motorola Banks ... 19 (such as Smartnet Channel Storage... - Page 3 This scanner gives you direct access to over 59,000 frequencies including those used by police and fire departments, ambulance services, government agencies, air, and amateur radio services. Your scanner includes these...
- Page 4 Clearing All Talk Data Cloning — lets you transfer Group IDs in the programmed data to another One Bank ... 67 PRO-95 scanner. You can also Changing the upload or download the Open/Closed programmed data to or from a PC Mode ...
- Page 5 Priority Channel — lets you set the scanner to check one channel every 2 seconds so you do not miss transmissions. Attenuate — lets you program your scanner to reduce the scanner's sensitivity to strong local signals, to reduce interference or noise caused by these signals.
-
Page 6: The Fcc Wants You To Know
Supplied Trunking Guide — provides a quick reference to public safety trunking radio systems in the United States. Your scanner can receive these frequencies: • 25 – 54 MHz • 108 – 136.9875 MHz • 137 – 174 MHz •... -
Page 7: Scanning Legally
1. This device may not cause harmful interference. 2. This device must accept any interference received, including interference that may cause undesired operation. CANNING EGALLY Your scanner covers frequencies used by many different groups including police and fire departments, ambulance services, government agencies, private... - Page 8 Do not open your scanner's case to make any modifications that could allow it to pick up transmissions that are illegal to monitor. Doing so could subject you to legal penalties.
-
Page 9: Preparation
In some areas, mobile use of this scanner is unlawful or requires a permit. Check the laws in your area. PREPARATION OWER OURCES You can power your scanner from any of three sources: • internal non-rechargeable batteries or rechargeable batteries (not supplied — see “Using Batteries”). - Page 10 1. Press in on the battery to recharge them. compartment cover on the back of the scanner and slide CAUTION the cover down to remove it. • The battery holder fits only one way.
-
Page 11: Using Ac Power
AC P SING OWER You can power the scanner using a 9V, 300 mA AC adapter and a size B Adaptaplug (neither supplied). Both are available at your local RadioShack store. WARNING... -
Page 12: Connecting The Antenna
Using Vehicle Battery its plug must fit Power the scanner's You can power the scanner from a PWR DC 9V jack. vehicle’s 12V power source (such Using an adapter as cigarette-lighter socket) using a that does not... -
Page 13: Connecting An
Connecting an Optional Antenna The antenna connector on your scanner makes it easy to use the scanner with a variety of antennas, such as an external mobile antenna or outdoor base station antenna. Your local RadioShack store sells a variety of antennas. -
Page 14: Connecting An
(not supplied), available NOTE at your local RadioShack store, You must use an amplified speaker might provide more comfortable with this scanner. listening. Plug the speaker cable's Non-amplified -inch (3.5 mm) mini-plug into speakers do not your scanner's provide sufficient volume for comfortable listening. -
Page 15: Using The Belt Clip
ATA TO AND FROM NOTHER CANNER OR A You can transfer the programmed data to and from another PRO-95 scanner using a connecting cable which has -inch phone plugs on both ends (not supplied). Connect the cable between each scanner's jacks. -
Page 16: About The Keypad
You can then scan the channel-storage banks to see if there is activity on the frequencies stored there. Each time the scanner finds an active frequency, it stays on that channel until the transmission ends. ABOUT THE KEYPAD Here is a brief overview of your scanner's keys and their functions. - Page 17 TUNE and allows you to fine tune a frequency along with (Attenuate) — turns attenuation on to reduce the scanner's sensitivity and block extremely strong signals, or turns it off to increase sensitivity. — selects the scan or search direction.
- Page 18 — enters a 1, or inputs characters 0 through 9 in text mode. — enters a 2, or inputs characters A, B, or C. — enters a 3, or inputs characters D, E, or F. — enters a 4, or inputs characters G, H, or I.
-
Page 19: Quick Start
— allow you to listen to frequencies and decide which frequencies you want to store when you are ready to program the scanner. See “Searching a Preprogrammed Frequency Range” on Page 32. Manual Tuning — allows you to manually scan through the entire range of available frequencies without programming. -
Page 20: Search Banks
To make it easier to identify and select the channels you want to listen to, your scanner divides the channels into 10 banks ( 100 ( total of 1,000 channels. You can use each channel-storage bank to group frequencies, such as those... -
Page 21: Am Mode
VHF. Each receive mode affects how your scanner operates when scanning and receiving transmissions, and also affects what transmissions you receive when you set the scanner to the closed mode. See “Changing the Ô Receive Mode” on Page 49. AM M... - Page 22 Motorola mode, it first decodes the talk group ID data included with the transmission. In the open mode, the scanner stops on the transmission and displays the talk group ID on the bottom line of the display. In the closed mode, the...
-
Page 23: Edacs Mode
Type I/II hybrid systems use both fleet-subfleet and 5-digit formats Ô for talk group IDs. EDACS M You can set your scanner so it decodes the talk group IDs used with EDACS (GE/Ericsson) trunking systems. This setting is called the EDACS mode. - Page 24 Logical Channel Number (LCN). For the scanner to correctly switch to an active frequency, you must program the frequencies in LCN order, starting Memory 01 with . EDACS talk group IDs are entered as a 4-digit decimal number from 0001 to...
-
Page 25: Open And Closed Modes
(such as Motorola Ô and EDACS systems). You can set each of the scanner's channel storage banks to open or closed mode. In open mode, the scanner scans signals transmitted in all systems. -
Page 26: Operation
URNING ON THE in channels, turn CANNER AND SQUELCH further clockwise. QUELCH • If the scanner 1. To turn on the scanner, turn picks up unwant- VOLUME ed, partial, or very To Dual Trunking weak trans- about 3 seconds, you might missions, turn hear a hissing sound. -
Page 27: Frequencies Into
sure to get a current copy. Also see the supplied Trunking Guide. Follow these steps to store Ô frequencies into channels. 1. Press , enter the MANUAL bank (0–9) and channel number (00–99) where you want to store a frequency, then press again. -
Page 28: Channels
4. Press ENTER ENTER. Start frequency into the channel. again from Step 3. Ô • Your scanner automatically 5. If necessary, press rounds the change the receiving mode. entered frequency to the nearest 6. If desired, program a text tag valid frequency. -
Page 29: Storing Text Tags
7. If necessary, press MODE change the receiving mode. TORING You can customize your scanner by storing text tags (up to 12 characters) for easy identification of channel transmissions, trunk IDs, or banks. Assigning a Text Tag to a Channel 1. -
Page 30: Finding And Storing Active Frequencies
• “H” is the second letter associated with 4 on the keypad. Press • “A” is the first letter associated with 2 on the keypad. Press • “M” is the first letter associated with 6 on the keypad. Press • “Space.” Press •... -
Page 31: Text Input Chart
Assigning a Text Tag to a Bank 1. Select a channel within the desired bank by pressing and entering the MANUAL bank number ( for bank 0 for bank 2, for example). Press again. MANUAL 2. Press 3. Press then . -
Page 32: Frequency Range
INDING AND “Using the Delay Function” on CTIVE Page 45. You can search for transmissions • The scanner does in the scanner’s preprogrammed not search locked- search bank. The search bank is out frequencies divided into six search bands. You while searching ranges. - Page 33 After 2 seconds (if the delay feature is on), the received frequency appears and the scanner starts searching. 5. When the scanner finds an active frequency, it stops searching.
-
Page 34: Band Charts
Band Charts Search bank: SR0 Marine band Receive mode: FM Frequency Channel Channel (MHz) 156.050 156.3000 156.4000 156.5000 156.6000 156.7000 156.8000 156.9000 157.0000 161.6000 157.1000 157.2000 161.8000 157.3000 161.9000 157.4000 162.0000 156.2250 160.825 156.3250 156.4250 156.5250 156.6250 156.7250 156.9250 157.0250 157.1250 157.2250 161.8250... - Page 35 Two frequencies are assigned in one channel in some Marine frequencies. For example, 157.000 and 161.600 are assigned in Channel 20. Search bank: SR1 CB band Receive mode: AM Frequency Channel Channel (MHz) 26.9650 26.9850 27.0150 27.0350 27.0650 27.0850 27.1150 27.1350 27.1650 27.1850...
- Page 36 Search bank: SR2 Police/Fire band Receive Mode: FM Group Frequency (MHz) 33.420–33 980 37.020–37.420 39.020–39.980 42.020–42.940 44.620–45.860 45.940–46.060 46.080–46.500 153.770–154.130 154.145–154.445 154.650–154.950 155.010–155.370 155.415–155.700 155.730–156.210 158.730–159.210 Step (kHz) 45.880 45.900 166.250 170.150 453.0375– 12.5 453.9625 458.0375– 12.5 458.9625 460.0125– 12.5 460.6375 465.0125–...
- Page 37 Search bank: SR3 Aircraft Receive mode: AM Step Frequency (MHz) (kHz) 108.000–136.9875 12.5 Search bank: SR4 Ham band Receive mode: FM Step Group Frequency (MHz) (kHz) 28.0000–29.7000 50.0000–54.0000 144.0000– 148.0000 222.0000– 225.0000 420.0000– 12.5 450.0000 1240.0000– 6.25 1300.0000 Search bank: SR5 Programmable limit search Receive mode: FM (Default setting)
- Page 38 When you turn this feature off, scanner stops when it detects an active signal. Zeromatic functions only in search banks 2, 3, 4 and 5.
-
Page 39: Listening To The Weather Band
Manually Tuning a Frequency You can manually set the scanner to move through all receivable frequencies, or select a specific frequency as a starting point. TUNE 1. Press and the TUNE current frequency appears. -
Page 40: Listening To A Weather Channel
(or beep) a digitally-encoded SAME signal for five minutes. when an alert is broadcast, the Then the alert scanner will show the type of alert stops and the being broadcast such as scanner beeps Watch Statement... -
Page 41: Using Frequency Copy
2 seconds while DIG WX STBY appears. The display indicates the type of message, and the scanner sounds an alert or series of beeps. The beeps automati- cally change every 3 seconds. 2. Press any key except stop test sound mode. - Page 42 Copying a Frequency into a Vacant Channel in a Specified Bank You can copy a frequency into a vacant channel in a specified bank when the scanner stops on the frequency during search or tune mode. 1. Press FUNC when you find a frequency you want to copy.
-
Page 43: Scanning The Channels
Copying a Frequency into the Priority Channel You can copy a frequency into the priority channel (see “Priority” on Page 47) when the scanner stops on the frequency during Search, Scan, Manual, Tune, or WX mode. Press then when the FUNC frequency is on the display. -
Page 44: Deleting Frequencies From Channels
To turn off banks while scanning, press the bank's number key so the bank's number disappears. For example, to turn off bank 1, press . The scanner does not scan any of the channels within the banks you turned off. Selected for Scanning in... -
Page 45: Special Features
To avoid missing a reply, you can program a 2-second delay into any of your scanner's channels. Then, when the scanner stops on the channel, appears and the scanner continues to monitor the channel for 2 seconds after the transmission stops before it resumes scanning or searching. -
Page 46: Locking Out Frequencies
When you finish reviewing locked-out channels, press Locking Out Frequencies To lock out a frequency during a search, press scanner stops on that frequency. The scanner locks out the frequency, then continues searching. Reviewing Locked-Out Frequencies To review the frequencies within a search bank that you locked out: Ô... -
Page 47: Priority
Clearing a Locked-Out Frequency To clear a locked-out frequency, select that frequency (see “Reviewing Locked-Out Frequencies” on Page 46), then press If all locked-out frequencies are Empty. cleared within a bank, Lockout list appears. Clearing All Locked-Out Frequencies in a Search Bank 1. - Page 48 With the priority feature, you can scan through programmed channels and still not miss an important or interesting transmission on a specific channel. When priority is turned on, the scanner checks that channel every 2 seconds, and stays on the channel if there is activity until the activity stops.
-
Page 49: Changing The Receive Mode
Ô To turn off the priority feature, press HANGING THE ECEIVE The scanner is preset to the most common AM or FM receive mode for each frequency range. The preset mode is correct in most cases. However, some amateur radio transmissions and trunked systems do not operate in the preset mode. -
Page 50: Using The Attenuator
EDACS Trunking System (with 4-digit decimal ID code or 5-digit AFS code) SING THE To reduce interference or noise caused by strong signals, you can reduce the scanner's sensitivity to these signals. Ô Ô NOTE There are two attenuator modes in MO (MOT) and ED your scanner. -
Page 51: Turning The Key Tone On And Off
Each time you press any of the scanner's keys, the scanner sounds a tone. To turn the scanner's key tone off or on: 1. If the scanner is on, turn VOLUME OFF/MAX counterclockwise until it clicks to turn the scanner off. -
Page 52: Using The Keylock
You can select the amount of time the light stays on. Follow these steps to change the illuminated time: 1. If the scanner is on, turn it off and back on again. Dual Trunking Welcome to Dual Trunking 2. While... -
Page 53: Changing The Display Contrast
ENTER display contrast. LONING THE ROGRAMMED You can transfer the programmed data to and from another PRO-95 scanner using an optional connecting cable with -inch phone plugs on both ends (not supplied, available at your local Ô... -
Page 54: Trunking
Frequencies into Channels” on Page 26) and input ID codes in the ID memory (see “Storing Talk Group IDs” on Page 62). Your PRO-95 automatically calculates Motorola voice channel frequencies when it decodes the control channel. This eliminates to send the data to... -
Page 55: Understanding Trunking
(Refer to the supplied Trunking Guide.) When the scanner decodes the Motorola control channel and finds the voice channel, the scanner displays the control channel... -
Page 56: Programming Trunking Frequencies
You 2-way radio user's transmission on can, however, mix a control channel. conventional channels and Your scanner lets you easily hear frequencies in a both the call and response bank. transmissions for that 2-way radio • If you are... -
Page 57: Mode
PGM, FUNC then until you reach the desired bank. • If you select trunked instead of , or , the scanner does not scan trunked frequencies. Instead, trunked. Press mode appears. Bank 0 Not trunked Press mode. -
Page 58: Programming
ROGRAMMING selecting the bank OTOROLA and channel, pressing PGM and YSTEMS entering the new You can program the scanner to frequency. receive transmissions in the UHF- Programming Motorola Trunking Lo band (406-512 MHz) of the Systems (UHF-Lo) Motorola trunking system. You can... - Page 59 then 1. Press TRUNK enter the ID program mode. 2. Press and press (or FUNC hold) to select the bank. 3. Press and select MODE 4. Press then . The FUNC Base freq.: display indicates 406.0000 the first line, on the Offset: 380 second line, on the...
-
Page 60: System
ROGRAMMING Ô Ô NOTE OTOROLA • On the 800 MHz (800 MH YSTEM trunking band, you can select a base Follow these steps to program 800 frequency (normal MHz band Motorola trunking. or offset). • On the 900 MHz 1. Press trunking band, you enter the ID program mode. - Page 61 then 1. Press TRUNK 2. For each bank you want to program, repeatedly press . Then FUNC select the bank. 3. Press . Then press FUNC Block 0 size code. Use 15 for type II. S—00 appears. 4. Enter the size code supplied with the Type I system information, referring to the instruction that appears on...
-
Page 62: Talk Group Ids
ID. In the open mode, the scanner always stops on a transmission, but it displays the ID's text tag if you have stored the ID. - Page 63 If the ID has already been stored ID was when you press TRUNK Ô saved appears. Follow these steps to manually store talk group IDs or to edit a stored ID. 1. Press 2. Press TRUNK 3. To select the bank where you want to store the ID, repeatedly press then...
-
Page 64: Talk Group Id Hold
AFS format. To cancel the operation, ENTER. press Duplication ROUP You can set your scanner to follow a trunking signal that you want to track during scanning. While the scanner is stopped on a voice channel ( until TRUNK... -
Page 65: Turning An Id Sub-Bank On Or Off
4 on or off, press . Then FUNC OCKING ROUP Ô 1. Press 2. Press TRUNK Ô Ô NOTE You can only lock out talk group IDs when the scanner is in the closed mode (see “Open and Closed Modes” on Page 25). -
Page 66: Delay Function In Id Indication Mode
6. To remove the lockout from a trunking ID, manually select the ID memory, and press until L/OUT You can confirm the ID code while the scanner shows the text when the received signal is a voice channel. 1. Press TEXT is receiving the voice channel and indicating the text name. -
Page 67: Reviewing Locked-Out Talk Group Ids
EVIEWING OCKED ROUP You cannot clear all lockouts from a talk group at the same time. 1. Press then TRUNK 2. Press . Then . The FUNC L/OUT locked out ID appears. If the ID memory bank has no locked-out ID, you hear the low beep tone. -
Page 68: Changing The Open/Closed Mode
— or vice versa. 4. Repeat Steps 2 and 3 for each bank. Confirm then to clear all talk group List cleared . The scanner returns LOSED then Bank OPEN. then appears. After... -
Page 69: A General Guide To Frequencies
A GENERAL GUIDE TO FREQUENCIES Reception of the frequencies covered by your scanner is mainly “line-of-sight.” That means you usually cannot hear stations that are beyond the horizon. US W EATHER REQUENCIES 162.400 162.425 162.450 162.475 162.500 162.525 162.550 ADIO... - Page 70 126.9750 129.0250 134.7625 140.2500 VHF Low Band (MHz) 25.5000 UHF High Band (MHz) 812.7000 867.20625 1246.2500 To find the birdies in your scanner, begin by disconnecting the SQUELCH 420.7500 433.5000 459.0000 471.7500 484.5000 497.2500 510.0000 116.7375 119.8125 123.9750 124.2000 126.8250 126.9000 127.0500 127.5000...
-
Page 71: Guide To The Action Bands
Make sure that no other nearby radio or TV sets are turned on near the scanner. Use the search function and scan every frequency range from its lowest frequency to the highest. - Page 72 UHF Band U.S. Government 70-cm Amateur Low Range FM-TV Audio Broadcast, Wide Band 800 band Law Enforcement Conventional Systems Conventional/ Trunked Systems Public Safety Trunked Private/ General 25-cm Amateur RIMARY As a general rule, most of the radio activity is concentrated on the following frequencies: Activities 2-Meter...
-
Page 73: Band Allocation
LLOCATION To help decide which frequency ranges to scan, use the following listing of the typical services that use the frequencies your scanner receives. These frequencies are subject to change, and might vary from area to area. For a more... - Page 74 Abbreviation FIRE GOVT MARI MARS NEWS Service Fire Department Amateur (Ham) Radio Federal Government General Mobile Radio General Trunked Industrial Services (Manufacturing, Construction, Farming, Forest Products) Military Amateur Radio Maritime Limited Coast (Coast Guard, Marine Telephone, Shipboard Radio, Private Stations) Military Affiliate Radio System Emergency/Medical...
- Page 75 Abbreviation Service Road & Highway ROAD Maintenance Radio/TV Remote Broadcast Pickup TAXI Taxi Services Telephone TELM Maintenance Tow Trucks TRAN Transportation Services (Trucks, Tow Trucks, Buses, Railroad, Other) Trunked Systems FM-TV Audio Broadcast Government USXX Classified Power & Water UTIL Utilities WTHR Weather...
- Page 76 35.020-35.980... BUS, PUB, IND, ... TELM 36.000-36.230... GOVT, MIL 36.230-36.990...Oil Spill Cleanup, ... GOVT, MIL 37.020-37.980... PUB, IND 38.000-39.000... GOVT, MIL 39.020-39.980...PUB 40.000-42.000... GOVT, MIL, MARI 42.020-42.940...POL 42.960-43.180...IND 43.220-43.680...TELM, IND, PUB 43.700-44.600... TRAN 44.620-46.580... POL, PUB 46.600-46.990...GOVT 47.020-47.400...PUB 47.420 ...American Red Cross 47.440-49.580...
- Page 77 152.870-153.020...IND, MOV 153.035-153.725... IND, OIL, UTIL 153.740-154.445... PUB, FIRE 154.490-154.570... IND, BUS 154.585...Oil Spill Cleanup 154.600-154.625...BUS 154.655-156.240...MED, ROAD, ... POL, PUB 156.255-157.425... OIL, MARI 157.450... MED 157.470-157.515... TOW 157.530-157.725... IND, TAXI 157.740...BUS 158.130-158.460...BUS, IND, OIL, ...TELM, UTIL 158.730-159.465... POL, PUB, ROAD 159.480...
- Page 78 ULTRA HIGH FREQUENCY (UHF) — (300 MHz-3 GHz) U. S. Government Band (406-420 MHz) 406.125-419.975... GOVT, USXX 70-Centimeter Amateur Band (420-450 MHz) 420.000-450.000... HAM Low Band (450-470 MHz) 450.050-450.925... RTV 451.025-452.025... IND, OIL, TELM, ... UTIL 452.0375-453.00... IND, TAXI, ... TRAN TOW, NEWS 453.0125-454.000...
- Page 79 Conventional Systems Band — Locally Assigned (in 6.25 kHz steps) Frequency Range Service 851.0125–855.9875 MHz Conventional/Trunked Systems Band — Locally Assigned (in 6.25 kHz steps) Frequency Range Service 856.0125–860.9875 MHz CTSB Trunked Systems Band — Locally Assigned (in 6.25 kHz steps) Frequency Range Service 861.0125–865.9875 MHz...
-
Page 80: Frequency Conversion
Private Trunked Band (in 6.25 kHz steps) Frequency Range Service 935.0125–939.9875 MHz General Trunked Band (in 6.25 kHz steps) Frequency Range Service 940.0125–940.9875 MHz 23-Centimeter Amateur Band (in 6.25 kHz steps) Frequency Range Service 1240.000–1300.000 MHz FREQUENCY CONVERSION The tuning location of a station can be expressed in frequency (kHz or MHz) or in wavelength (meters). - Page 81 To convert from kHz to MHz, divide the number of kilohertz by 1,000: 127.800 (kHz) / 1,000 = 127.8 To convert MHz to meters, divide 300 by the number of megahertz: 300/50 MHz = 6 meters...
-
Page 82: Troubleshooting
Avoid programming frequencies listed under “Birdie Frequencies” on Page 69 or only listen to them manually. Turn the scanner off then on again, or reset/ initialize the scanner (see “Resetting/ Initializing the Scanner” on Page 83). Turn SQUELCH clockwise. -
Page 83: Resetting The Scanner
RESETTING/ INITIALIZING THE SCANNER If the scanner's display locks up or does not work properly after you connect a power source, you might need to reset or initialize it. ESETTING THE CANNER 1. Turn off the scanner, then turn it on again. -
Page 84: Care
CARE Keep the scanner dry; if it gets wet, wipe it dry immediately. Use and store the scanner only in normal temperature environments. Handle the scanner carefully; do not drop it. Keep the scanner away from dust and dirt, and wipe it with a damp cloth occasionally to keep it looking new. - Page 85 ID memory banks... 10 Sub-banks per bank... 5 Number of memory IDs per sub-bank ... 20 Sensitivity (20 dB S/N): 25–54 MHz ... 0.3 V 108 –136.9875 MHz ... 0.3 V 137–174 MHz ... 0.5 V 216–225 MHz ... 0.5 V 406–512 MHz ...
- Page 86 Intermediate Frequencies (IF): 1st ... 380.8 MHz 2nd ... 21.4 MHz 3rd... 455 kHz Priority Sampling... 2 seconds Operating Temperature ... -14 to 140° F IF Rejection 380.8 MHz at 154.1 MHz ... 60 dB 21.4 MHz at 154.1 MHz ... 100 dB Squelch Sensitivity: Threshold (FM and AM) ...
-
Page 87: Parts And Accessories
800 MHz Antenna Connect to your scanner’s external antenna jack for crisp, clear reception of 800 MHz signals. RG-8/RG-58 50-Ohm Coaxial Cable Use to connect your scanner to an external antenna. - Page 88 PC Interface Cable Use to connect your scanner to a PC so you can transfer data between them. 9V, 300 mA AC Adapter Use to connect your scanner...
- Page 89 NOTES...
- Page 92 Limited One-Year Warranty This product is warranted by RadioShack against manufacturing de- fects in material and workmanship under normal use for one (1) year from the date of purchase from RadioShack company-owned stores and authorized RadioShack franchisees and dealers. EXCEPT AS PROVIDED HEREIN, RadioShack MAKES NO EXPRESS WARRAN- TIES AND ANY IMPLIED WARRANTIES, INCLUDING THOSE OF MERCHANTABILITY AND FITNESS FOR A PARTICULAR PUR-...