Table of Contents
Advertisement
www.radioshack.com
OWNER'S MANUAL —
Please read before using this equipment.
If an icon appears at the end of a paragraph, go to the box on that page
with the corresponding icon for pertinent information.
o
— Warning
©
2004 RadioShack Corporation. All Rights Reserved.
RadioShack, RadioShack.com, Hypersearch, Hyperscan, and Adaptaplug are
SM
!
IMPORTANT
!
— Important
Ó
— Hint
trademarks used by RadioShack Corporation.
PRO-99 Deluxe
Compact Race
!
Ô
— Note
Scanner
20-515
— Caution
Advertisement
Table of Contents

Related Manuals for Radio Shack PRO-99


Summary of Contents for Radio Shack PRO-99
- Page 1 — Warning Ó — Hint © 2004 RadioShack Corporation. All Rights Reserved. RadioShack, RadioShack.com, Hypersearch, Hyperscan, and Adaptaplug are trademarks used by RadioShack Corporation. PRO-99 Deluxe Compact Race IMPORTANT — Important Ô — Note Scanner 20-515...
-
Page 2: Table Of Contents
Understanding the Scanner . 14 A Look at the Keypad ... 15 Understanding Banks ... 17 Operating Your Scanner ... 18 Turning On the Scanner .. 18 Function Menu ... 18 Car Number Operation ... 22 About the Preloaded Car Numbers and Frequencies... -
Page 3: Frequency Range (Mhz)
Thank you for purchasing the RadioShack 500-Channel VHF/ Air/UHF/800 MHz Handheld Race Scanner. It lets you in on all the action in the pits or on the track at the big race. This scanner gives you direct access to over 47,000... - Page 4 (IF) images, so you hear only the frequency you select. HyperSearch HyperScan — Set the scanner to search at up to 62 steps per second and scan at up to 50 channels per second, to quickly find interesting transmissions.
- Page 5 The supplied stub antenna helps your scanner receive strong local signals and makes the scanner easy to carry and use at events. The supplied flexible antenna provides excellent reception of weaker signals and is designed to help prevent antenna breakage.
-
Page 6: Fcc Notice
(using optional adapters). Your scanner can receive all of these frequencies: 28-54 MHz 108-136.9875 MHz 137-174 MHz 406-512 MHz 806-823.9875 MHz 849-868.9875 MHz 894-960 MHz This Owner’s Manual also includes the section “A General Guide To Scanning” on Page 60 to... -
Page 7: Scanning Legally
• contacting your local RadioShack store for help If you cannot eliminate the interference, the FCC requires that you stop using your scanner. This device complies with Part 15 of the FCC Rules. Operation is subject to the following conditions:... -
Page 8: Preparation
Do not open your scanner’s case to make any modifications that could allow it to pick up transmissions that it is not legal to listen to. Doing so could subject you to legal penalties. - Page 9 Batteries Your scanner has a built-in charging circuit that lets you charge rechargeable batteries while they are in the scanner. To charge rechargeable batteries, you need to use an AC adapter which supplies 6V (RadioShack Cat. No. 273-1758) or a DC adapter which supplies 6V (RadioShack Cat.
-
Page 10: Using Ac Power
B Adaptaplug™ adapter (neither supplied). Both are available at your local RadioShack store. To power the scanner using an AC adapter, attach the Adaptaplug to the AC adapter so the tip reads positive (+), then insert the Adaptaplug into the scanner’s... -
Page 11: Connecting An Antenna
The supplied stub antenna helps your scanner receive most strong transmissions at events and makes the scanner easier to carry and use. The supplied flexible antenna provides slightly better reception and helps your scanner receive strong local signals. -
Page 12: Connecting An Earphone/Headphones
Once you choose an antenna, follow the mounting instructions supplied with the antenna, after removing a supplied antenna. Then route the antenna’s cable to the scanner and connect the cable to the scanner’s antenna jack. ONNECTING AN ARPHONE For private listening, you can... -
Page 13: Listening Safely
• If you use an earphone or headphones with your scanner while riding a bicycle, be very careful. Do not listen to a continuous transmission. Even though some earphones or headphones let you hear... -
Page 14: Connecting An Extension
Once you understand a few simple terms used in this manual and familiarize yourself with your scanner’s features, you can put the scanner to work for you. You simply determine the type of communications you want to receive, then set the scanner to scan them. -
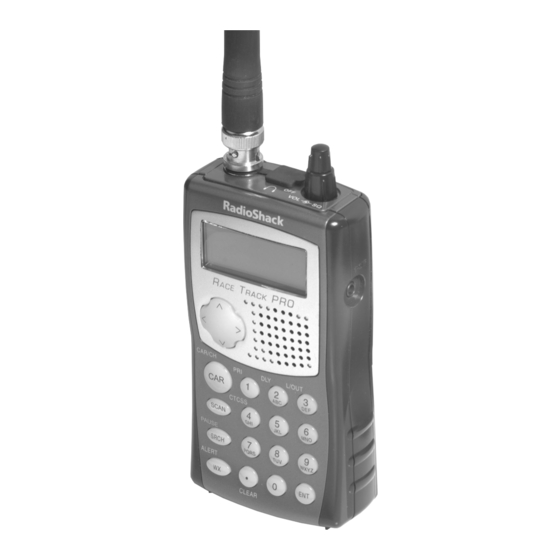
Page 15: A Look At The Keypad
OOK AT THE If your scanner’s keys seem confusing at first, the following information should help you understand each key’s function.Ô FUNC — Lets you use various functions by pressing this key in combination with other keys. When using the FUNC key, press... - Page 16 SRCH/PAUSE — Lets you search the seven search banks, or pauses search or tune operation. WX/ALERT — Scans the scanner’s preprogrammed weather channels, or turns the WX alert mode on and off. 1/PRI — Enters a 1, or inputs characters 0 through 9 in text mode.
-
Page 17: Understanding Banks
8 — Enters a 8, or inputs characters T through V in text mode. 9 — Enters a 9, or inputs characters W through Z in text mode. ./CLEAR — Enters a decimal point (necessary when programming frequencies), spaces in text mode, clears an incorrect entry, or returns to the previous menu. -
Page 18: Operating Your Scanner
(see “Searching a Preprogrammed Frequency Range” on Page 40).Ô OPERATING YOUR SCANNER URNING CANNER 1. To turn on the scanner, turn clockwise. RadioSahck Race Track PRO appears. After 3 seconds, Input Car# appears. 2. To turn off the scanner, turn counterclockwise to .Ô... - Page 19 5:ARCA 2:Display 1:Car# Display (Car number mode) 2:Channel Disp. (Channel number mode) 3:PGM Car# number) The following sub menu appears after you input the car number and frequency (or press 1:Program Freq. 2:Program Text 3:Set Tone Code 4:Tone SQ 1. On 2.
- Page 20 4:PGM CH (Program channel) The following sub menu appears after you input the channel number). 1:Program Freq. 2:Program Text 3:Program Car# 4:Set Tone Code 5:Tone SQ 1. On 2. Off 6:Delay 1. On 2. Off 7:Lockout 1. On 2. Off 8:Next Channel 5:PGM PRI CH channel)
- Page 21 2. Off 6:PGM Limit SRCH (Program limit search) 1:Change Freq. 2.Program Text 3:Tone SQ 1: On 2: Off 4:Delay 1: On 2: Off 7:Recall Lockout 1:Conventional CH 2:SR0 Car Band 3:SR1 Marine 4:SR2 FRS/GMS/MU 5:SR3Police/Fire 6:SR4 Aircraft 7:SR5 Ham 8:SR6 Limit SRCH 8:System Data 1:Back Light (Set backlight timer setting)
-
Page 22: Car Number Operation
You can store a car number and frequency in each of the scanner's channels, associate one or more frequencies stored in channels with a car number, and recall any... -
Page 23: About The Preloaded Car Numbers And Frequencies
Frequency” on Page 46 • frequencies you already know Then, you store a car number and the frequencies associated with that car number in the scanner's channels and display the car number as you listen to those frequencies by using the information in “Viewing... -
Page 24: Frequency
TORING A REQUENCY You can store a car number and frequency in each of the scanner's channels, and you can recall any frequencies associated with the car number by entering the number. You can store one car number in each channel (for up to 500 car numbers).Ô... -
Page 25: Adding A Car Number To The Channel
The scanner C.Fr shows (Call Frequency) to recall and the number P.Fr appears. CLEAR , and then ^ to Ô Ô NOTES When the scanner is not programmed with frequencies without the car number, the scanner sound an error tone. - Page 26 0.00000 MHz. • When the specified car number was set to lockout, Locked out appears, the scanner shows A.Fr (All Frequency mode), the car number and the frequency. Car# - - - at the top line. Then...
- Page 27 ^ or v — Moves through car numbers. If a car number is locked out, the scanner does not recall the locked out car number. < — Enters the text input mode. > — Moves through frequencies in the selected car number.
- Page 28 To save the new number, press . To cancel, press ^ and v — Returns the scanner to normal car operation mode if a new number has been saved. Otherwise this results in an error tone.
- Page 29 You can program a frequency 0.00000 MHz when is displayed. If the car number frequency is locked out, the scanner will still recall the locked out frequency will be displayed at the upper right corner. < — Enters the text input mode...
-
Page 30: Storing Frequencies Into Channels
4. Press frequency into the channel. If you made a mistake in entering the frequency, Invalid Freq. and the scanner beeps when you press frequency again. If you enter a frequency that has already been entered elsewhere in the same bank, the scanner sounds an error Dupl.Freq. -
Page 31: Storing Text Tags
./ CLEAR correct frequency. If the dual entry is intentional, press to accept. 5. By default, the scanner will configure the channels you enter for a two second delay after a transmission is received. This is indicated by appearing in the top row of the display. -
Page 32: Text Input Chart
Press Character ./CLEAR P Q R S W X Y Z . - # _ @ + * & / , "H" is the second letter associated with 4 on the keypad. Press "A" is the first letter associated with 2 on the keypad. -
Page 33: Channels
3. Press and then frequency is cleared, appears in the display. Clearing All Channels 1. Set the scanner to the conventional channel mode Bank number appear. 2. Press and hold All 500 Channels Clear? press Press 1 key ->YES Other key ->... -
Page 34: Initializing The Scanner
If you want to clear all the scanner’s memory, initialize the scanner. 1. Press and hold about 2 seconds. 2. Press Do not turn off the scanner until the initialization is complete. SCANNING CHANNELS 1. Set the scanner to the... -
Page 35: Turning Channel Storage Banks Off And On
Monitoring a Single Channel You can monitor a single channel with your scanner by navigating to that channel while in manual mode. The scanner will receive traffic on the selected frequency. To monitor a single channel,... -
Page 36: Using Ctcss
"sleep" briefly while waiting for a call on the selected channel. USING CTCSS When your scanner stops on a frequency that is configured for CTCSS, it checks for a match between the transmitted CTCSS (quiet) code and the code that is stored with the channel memory. - Page 37 There are two ways you can program your scanner to operate with CTCSS. If you know the CTCSS code that is used on a particular frequency, you can manually enter the code when you are programming the scanner, or any time afterwards.
-
Page 38: Turning On Or Off The Ctcss
127.3 URNING CTCSS 1. Select the channel or the car number frequency. 2. Press The scanner turns on or off the CTCSS in the selected channel (or the car number frequency). Finding the Quiet Code on a Frequency 1. First, select the frequency of... -
Page 39: Searching And Tuning
(except SR1 and SR4). While searching through a band, press then FUNC CTCSS appears. When the scanner finds a frequency with a quiet code, the quiet code frequency flashes. To turn off the CTCSS feature, press then... -
Page 40: Searching A Preprogrammed Frequency Range
When appears at the left most position of the second line or the scanner stops on a frequency, you can directly select a channel (refer to “Search Band Charts” on Page 42). Use the numeric... - Page 41 After 2 seconds (if the delay feature is on), the scanner starts searching. 5. When the scanner finds an active frequency, it stops searching, and resumes when the transmission ends. If delay is programmed with the...
-
Page 42: Search Band Charts
Sub-Group Frequency Channel 156.0500 156.2500 156.3000 156.3500 156.4000 156.4500 156.5000 156.5500 156.6000 156.6500 156.7000 156.7500 156.8000 Search Band Charts Search bank: SR0 Car number band Frequency (MHz) 150.9875 – 152.0000 152.8700 – 153.7250 154.4825 – 154.5050 154.5100 – 154.525 154.5275 – 154.54625 154.5475 –... - Page 43 Frequency Channel Search bank: SR2 FRS/GMRS/MURS band Channel Channel (MHz) 156.8500 156.9000 156.9500 157.0000 161.6000 157.0500 157.1000 157.1500 157.2000 161.8000 157.2500 161.8500 157.3000 161.9000 157.3500 161.9500 157.4000 162.0000 Frequency Channel (MHz) 462.5625 462.5875 462.6125 462.6375 462.6625 462.6875 462.7125 467.5625 467.5875 467.6125 467.6375 467.6625...
- Page 44 Channel Sub-Group Frequency (MHz) 108.0000 – 136.9875 Frequency Channel (MHz) 467.6875 467.7125 Search bank: SR3 Police/Fire department band Frequency (MHz) 33.4200 – 33.9800 37.0200 – 37.4200 39.0200 – 39.9800 42.0200 – 42.9400 44.6200 – 45.8600 45.8800 45.9000 45.9400 – 46.0600 46.0800 –...
- Page 45 4. Press to set the lower limit frequency. The cursor moves to upper frequency field. If the entered frequency is incorrect, appears in the scanner's display. Frequency (MHz) 29.0000 – 29.7000 50.0000 – 54.0000 144.0000 – 148.0000 420.0000 – 450.000...
-
Page 46: Using Zeromatic
If the scanner stops on a signal before it reaches the correct center frequency, you can step up or down to the correct frequency using the ^ or v key. -
Page 47: Using Frequency Copy
4. Press to store the frequency and start tuning. 5. While automatic tuning, press to change the direction of the tune. When the scanner finds an active frequency, it stops on the frequency.Ô SING REQUENCY You can easily copy a frequency into a vacant channel in a specified bank. -
Page 48: Listening To Wx Channel
2. If you want to copy the frequency into bank 0, press . It is stored in the first available vacant channel in the bank. Or press your desired bank number to store, then press... -
Page 49: Special Features
National Weather Service broadcaster in your area broadcasts a weather alert tone. To set the scanner so it sounds an alarm when a weather alert tone is broadcast, press while you are listening WX/ALERT to the WX channel. -
Page 50: Delay
). The scanner checks the priority channel every 2 seconds and stays on the channel if there is activity. the frequency appear whenever the scanner is set to the priority channel. To turn off the priority feature, press then FUNC... -
Page 51: Locking Out Channels Or Frequencies
Locking Out Car Number Frequencies To lock out a car number frequency, press . If the scanner is in the car 3/L/OUT number All Frequency mode, appears on the top line. If the scanner has other frequencies in the same car number, the next frequency appears. - Page 52 SCAN number frequency. 3. Press FUNC Locking Out Channels To lock out a channel while scanning, press when the scanner stops 3/L/OUT on the channel. To lock out a channel manually, select the channel and then press FUNC 3/L/OUT display.
-
Page 53: Locking Out Search Frequencies
Clearing All Lockout Channels 1. Set the scanner to the conventional channel manual mode. 2. Press and hold then press 3/L/OUT out Channels Clear? Press 1 key ->YES Other key ->NO 3. Press to clear the all lockout channels, or press any key... - Page 54 Frequencies” on Page 53), and then press 3/L/OUT If all locked-out frequencies are cleared within a search bank, List Empty appears in the scanner's display. Clearing All Locked-Out Frequencies in a Search Bank 1. Press and hold about 2 seconds.
-
Page 55: Using Backlight
L/O List ChXX display. 4. Press and hold about 2 seconds. The scanner will display Confirm list clear? 1 -> YES. Other key -> NO. 5. Press to clear all locked-out frequencies. appears. Press any key other than cancel clear. -
Page 56: Key Lock
Key unlocked. the scanner's display. URNING THE N AND The scanner is preset to sound a tone each time you press one of its keys (except õ/î). You can turn the key tone off or back on. 1. Press and hold about 2 seconds. -
Page 57: Contrast
SING LONE You can transfer the contents of the scanner’s memory to and from another PRO-99 scanner using an optional connecting cable with -inch (3.5 mm) phone plugs on both ends (use RadioShack part number 42-2420 available at your local RadioShack store). -
Page 58: On-Air Programming
5. The scanner sends the data. Do not disconnect the PC/IF cable or interrupt power to either scanner while the transfer is taking place. -
Page 59: Using On-Air Programming
Ready to Receive press appears on the display. 4. Send the data from the PC. Start Program being received by the scanner appear in the order they are received. 5. When the scanner successfully receives all data, All Data Correct XX finished received correct channel number) appears. -
Page 60: A General Guide To Scanning
Frequencies 162.400 162.425 162.475 162.500 162.550 Birdie Frequencies Every scanner has birdie frequencies. Birdies are signals created inside the scanner’s receiver. These operating frequencies might interfere with transmission on the same frequencies. If you program one of these frequencies, you hear only noise on that frequency. -
Page 61: Guide To The Action Bands
862.000 To find the birdies in your individual scanner, begin by disconnecting the antenna and moving it away from the scanner. Make sure that no other nearby radio or TV sets are turned on near the scanner. Use the search... -
Page 62: Primary Usage
Aircraft U.S. Government 2-Meter Amateur High Range U.S. Government 70-cm Amateur UHF-Low Band UHF-T Band System Inputs System Outputs Trunked Private / General Activities 2-Meter Amateur Band Government, Police and Fire Emergency Services Railroad Activities 70-cm Amateur Band FM Repeaters Land-Mobile “Paired”... -
Page 63: Band Allocation
LLOCATION To help decide which frequency ranges to scan, use the following listing of the typical services that use the frequencies your scanner receives. These frequencies are subject to change, and might vary from area to area. For a more... - Page 64 Abbreviation NEWS ROAD TAXI TELM TRAN USXX UTIL WTHR Service Emergency/Medical Services U.S. Military Motion Picture/Video Industry New Mobile Narrow Relay Press (Newspaper Reporters) Oil/Petroleum Industry Police Department Public Services (Public Safety, Local Government, Forestry Conservation) Public Safety Private Trunked Road &...
- Page 65 29.900-30.550... GOVT, MIL 30.580-31.980... IND, PUB 32.000-32.990... GOVT, MIL 33.020-33.980... BUS, IND, PUB 34.010-34.990... GOVT, MIL 35.020-35.980... BUS, PUB, IND, ... TELM 36.000-36.230... GOVT, MIL 36.230-36.990...Oil Spill Cleanup, ... GOVT, MIL 37.020-37.980... PUB, IND 38.000-39.000... GOVT, MIL 39.020-39.980...PUB 40.000-42.000... GOVT, MIL, MARI 42.020-42.940...
- Page 66 150.815-150.980... TOW, ...Oil Spill Cleanup 150.995-151.475... ROAD, POL 151.490-151.955... IND, BUS 151.985 ... TELM 152.0075 ... MED 152.270-152.480...IND, TAXI, BUS 152.870-153.020...IND, MOV 153.035-153.725... IND, OIL, UTIL 153.740-154.445... PUB, FIRE 154.490-154.570... IND, BUS 154.585 ...Oil Spill Cleanup 154.600-154.625...BUS 154.655-156.240...MED, ROAD, ... POL, PUB 156.255-157.425...
- Page 67 173.225-173.5375... MOV, NEWS, ... UTIL, MIL 173.5625-173.5875... MIL ... Medical/Crash Crews 173.60-173.9875... GOVT ULTRA HIGH FREQUENCY (UHF) — (300 MHz-3 GHz) U. S. Government Band (406-420 MHz) 406.125-419.975... GOVT, USXX 70-Centimeter Amateur Band (420-450 MHz) 420.000-450.000... HAM Low Band (450-470 MHz) 450.050-450.925...
- Page 68 Conventional Systems Band — Locally Assigned (in 6.25 kHz steps) Frequency Range 851.0125–855.9875 MHz Conventional/Trunked Systems Band — Locally Assigned (in 6.25 kHz steps) Frequency Range 856.0125–860.9875 MHz Trunked Systems Band — Locally Assigned (in 6.25 kHz steps) Frequency Range 861.0125–865.9875 MHz Public Safety Band —...
-
Page 69: Frequency Conversion
To convert MHz to meters, divide 300 by the number of megahertz: 300/50 MHz = 6 meters CARE Keep the scanner dry; if it gets wet, wipe it dry immediately. Use and store the scanner only in room temperature environments. -
Page 70: Service And Repair
ERVICE AND EPAIR If your scanner is not performing as it should, take it to your local RadioShack store for assistance. To locate your nearest RadioShack, use the store locator feature on RadioShack's website (www.radioshack.com), or call... -
Page 71: Troubleshooting
If your scanner is not working as it should, these suggestions might help you eliminate the problem. If the scanner still does not operate properly, take it to your local RadioShack store for assistance. Problem The scanner is totally inoperative... -
Page 72: Specifications
SPECIFICATIONS Frequency Coverage (MHz): Frequency Range (MHz) ...Programming/Search Step Value 28-54 ...5 kHz 108-136.9875 ...12.5 kHz 137-174 ...5, 6.25 or 7.5 kHz 406-512 ...6.25 kHz 806-823.9875 ...6.25 kHz 849-868.9875 ...6.25 kHz 894-960 ...6.25 kHz Channels of Operation ..500 channels Sensitivity ... - Page 73 Tight (AM) ... (S+N)/N=20 dB Antenna Impedance... 50 Ohms Audio Output Power (10% THD)... 150 mW nominal (Using Batteries), BLT Built-In Speaker ... 1 Operating Temperature... 14 to 140 °F ... (-10 to 60 °C) Power Requirements ...4.5 Volts DC, 3 AA Batteries External Power ...6 Volts, 300 mA/Size B Adaptaplug adapter Current Drain (Squelched) ...
- Page 74 NOTES...
- Page 75 NOTES...
- Page 76 Limited One-Year Warranty This product is warranted by RadioShack against manufacturing defects in material and workmanship under normal use for one (1) year from the date of purchase from RadioShack company-owned stores and authorized RadioShack franchisees and dealers. EX- CEPT AS PROVIDED HEREIN, RadioShack MAKES NO EX- PRESS WARRANTIES AND ANY IMPLIED WARRANTIES, INCLUDING THOSE OF MERCHANTABILITY AND FITNESS FOR A PARTICULAR PURPOSE, ARE LIMITED IN DURATION TO THE...