Table of Contents
Advertisement
Advertisement
Table of Contents

Related Manuals for Pyramid 2400AT


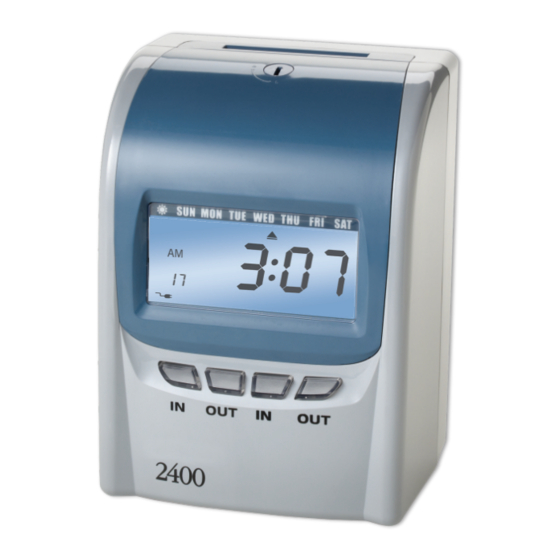
Summary of Contents for Pyramid 2400AT
- Page 1 2400AT I2211AT Rev.B I2211AT Rev. C...
-
Page 2: Table Of Contents
Contents 1. Introduction 2. Components 3. Before operation 4. Setting up your Model 2400AT 4.1 setting the year 4.2 setting date 4.3 setting time 4.4 setting day line change time 4.5 setting card format print and display time format setting printing position setting on/off function for auto-detecting time card 4.9 setting daylight savings time... -
Page 3: Introduction
4) Automatic column change available SETTING UP YOUR MODEL 2400AT TIME RECORDER The Model 2400AT comes with a preset factory program so o n additional set-up may be required. The factory set-up is as follows: 1) Current date, year and Eastern Standard Time (12 hour mode, 60 minute format) 2) Manual column selection (see section 5.3 for automatic column adjustment) - Page 4 9. REPLACING THE RIBBON CARTRIDGE Move SETUP Button to the left to center the ribbon cartridge . Ribbon cartridge Handle View A four Holder Remove old View A Replacing the ribbon cartridge Gentle to the front Always tighten the ribbon by turning the knob clockwise after four replacing the ribbon cartridge.
-
Page 5: Components
2400AT 3. BEFORE OPERATION Remove the Model 2400AT from its box and place it on a firm surface for set-up. Remove all packaging from the unit including the packaging on the card feed slot located on top of the unit. Once all packaging is removed, you can plug your Model 2400AT into any 110 VAC outlet. -
Page 6: Setting Date
8. Press ENTER button to confirm setting 4.2 SETTING DATE - 02 9. Now display turns to day setting (indicator flashing under Sunday) 1. In SETUP mode, press button to choose Press ENTER button and the entire week will be set and skip to step 14 setting number 02 Note: Use steps 10-13 for any days that you want to delete the setting 2. -
Page 7: Setting Day Line Change Time
Press ENTER, ENTER to go to the next feature . top In/Out button to the desired column. Only buy Pyramid Part Number 42426 time cards. 1. In setting mode, press COLUMN button to enter column setting 4.6 PRINT AND DISPLAY TIME FORMAT - 06 2. -
Page 8: Setting Printing Position
5. Press to select desired minute for *sign printing setting 4.7 SETTING PRINTING POSITION - 07 6. Press ENTER button to confirm setting This function is necessary only if adjustment is required to provide proper alignment of the 7. Press to select 01/02 for *sign printing setting print position on the time card within the box outline on the time card . -
Page 9: Setting Minute Print Format
13. Press to select ending hours for day 5. Continue setting numbers 14. Press ENTER button to confirm setting 01 to 11 by pressing or slide the SETUP 15. The setting number now turns to 10 16. Continue to next feature set up or slide the SETUP button to the right button to the right to complete and exit setting.