Table of Contents
Advertisement
• Important operating and
maintenance instructions
included.
WARNING: If the information in these
instructions is not followed exactly, a fi re
or explosion may result causing property
damage, personal injury, or death.
• Do not store or use gasoline or other fl am-
mable vapors and liquids in the vicinity of this
or any other appliance.
• What to do if you smell gas
- Do not try to light any appliance.
Do not touch any electrical switch. Do not
use any phone in your building.
- Immediately call your gas supplier from a
neighbor's phone. Follow the gas supplier's
instructions.
- If you cannot reach your gas supplier, call
the fi re department.
• Installation and service must be performed
by a qualifi ed installer, service agency, or the
gas supplier.
Installation and service of this appliance should be
performed by qualifi ed personnel. Hearth & Home
Technologies suggests NFI certifi ed or factory-trained
professionals, or technicians supervised by an NFI
certifi ed professional.
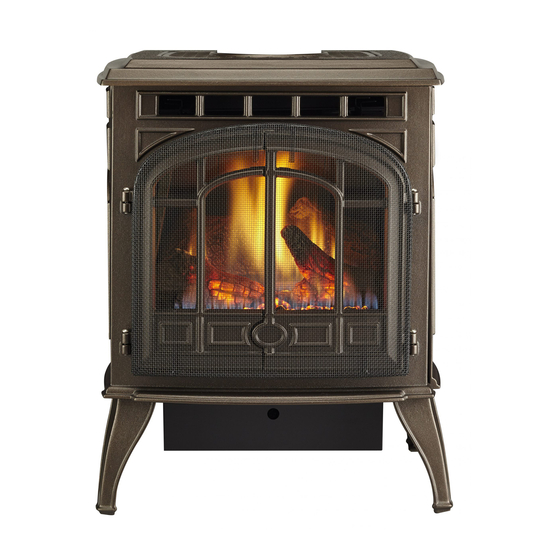
SAPPHIRE GAS STOVE
DIRECT VENT ROOM HEATER
Owner's Manual
Installation and Operation
Model:
SAPPHIRE-MBK
SAPPHIRE-D-MBK
SAPPHIRE-D-PMH
SAPPHIRE-D-CSB
CAUTION
DO NOT DISCARD THIS MANUAL
• Read, understand and
follow these instructions
for safe installation and
operation.
Quadra-Fire • Sapphire • 7055-116 Rev. D • 6/11
• Leave this manual with
party responsible for use
and operation.
WARNING
HOT GLASS WILL CAUSE
DO NOT TOUCH GLASS
NEVER ALLOW CHILDREN
TO TOUCH GLASS.
• Keep children away
• CAREFULLY SUPERVISE children in the same room as
appliance
• Alert children and adults to hazards of high temperatures
High temperatures may ignite clothing or other
fl ammable materials.
• Keep clothing, furniture, draperies and other combustibles away.
In the Commonwealth of Massachusetts:
• installation must be performed by a licensed plumber or gas
fi tter.
See Table of Contents for additional Commonwealth of Mas-
sachusetts requirements.
This appliance may be installed as an OEM installation in manu-
factured home (USA only) or mobile home and must be installed
in accordance with the manufacturer's instructions and the manu-
factured home construction and safety standard, Title 24 CFR,
Part 3280 or Standard for Installation in Mobile Homes, CAN/CSA
Z240MH.
This appliance is only for use with the type(s) of gas indicated on the
rating plate.
R
BURNS.
UNTIL COOLED.
Advertisement
Table of Contents

Related Manuals for Quadra-Fire SAPPHIRE-D-CSB


Summary of Contents for Quadra-Fire SAPPHIRE-D-CSB
-
Page 1: Installation And Operation
Part 3280 or Standard for Installation in Mobile Homes, CAN/CSA Z240MH. This appliance is only for use with the type(s) of gas indicated on the rating plate. Quadra-Fire • Sapphire • 7055-116 Rev. D • 6/11 party responsible for use and operation. WARNING HOT GLASS WILL CAUSE BURNS. - Page 2 F. Minimum Alcove Width A, B & C measurements are from stove top, not side / "A, B & C" mesure est du sommet de poêle, pas le côté HEARTH: A non-combustible hearth pad is not required. However, the floor beneath the appliance must be stable, level, and strong enough to support the appliance without a tipping hazard.
-
Page 3: Table Of Contents
A. Appliance Dimension Diagram ...42 B. Vent Components Diagram ...43 C. Vent Components List ...44 D. Service Parts List ...46 E. Limited LifetimeWarranty ...50 F. Contact Information ...52 Quadra-Fire • Sapphire • 7055-116 Rev. D • 6/11 Embers ...31 ... -
Page 4: Section 1: Listing And Code Approvals
Quadra-Fire • Sapphire • 7055-116 Rev. D • 6/11 Maximum Minimum Orifi ce... -
Page 5: Requirements For The Commonwealth Of Massachusetts
See Gas Connection section for additional Common- wealth of Massachusetts requirements. Quadra-Fire • Sapphire • 7055-116 Rev. D • 6/11... -
Page 6: Section 2: Getting Started
• Installation and/or use of any component part not approved by Hearth & Home Technologies. Any such action may cause a fi re hazard. Quadra-Fire • Sapphire • 7055-116 Rev. D • 6/11 WARNING Inspect appliance and components for damage. Damaged parts may impair safe operation. -
Page 7: Section 3: Appliance Location & Clearances A. Selecting Appliance Location
Check with flooring manufacturer for maximum temperature allowed on flooring surfaces. Model Inches Millimeters Quadra-Fire • Sapphire • 7055-116 Rev. D • 6/11 WARNING Fire Risk Provide adequate clearance: • Around air openings • To combustibles •... -
Page 8: Section 4: Termination Locations
457 mm 0 in. minimum Figure 4.3 Minimum Height from Roof to Lowest Discharge Figure 4.3 specifi es minimum vent heights for various pitched roofs. Quadra-Fire • Sapphire • 7055-116 Rev. D • 6/11 2 FT. 20 INCHES MIN. MIN. LOWEST... - Page 9 CAUTION: IF EXTERIOR WALLS ARE FINISHED WITH VINYL SIDING, IT IS SUGGESTED THAT A VINYL PROTECTOR KIT BE INSTALLED. Quadra-Fire • Sapphire • 7055-116 Rev. D • 6/11 (See Note 2) Electrical Service J or K (powered) air supply inlet...
-
Page 10: Section 5: Vent Information
Figure 4.1 on page 8. • Vertical terminations are measured to the top of the last pipe before termination cap. • Horizontal pipe installed level with 1/4 in.(6mm) rise. Quadra-Fire • Sapphire • 7055-116 Rev. D • 6/11 CAUTION Vertical 8-1/2 in. Horizontal... -
Page 11: How To Use The Vent Graph
• Never allow the vent to run downward. • This could cause high temperatures and may present the possibility of a house or structure fi re. Quadra-Fire • Sapphire • 7055-116 Rev. D • 6/11 3 ft (914mm) 15 ft (5m) when vertical rise is 10 ft (3m 14 in. -
Page 12: Horizontal Termination
Clearance from Figure 5.5 appliance corner to combustible wall Improper support may allow vent to sag or separate. Quadra-Fire • Sapphire • 7055-116 Rev. D • 6/11 WARNING Fire Risk. Exhaust Fume Risk. Impaired Performance of Appliance. Remember to include wall... - Page 13 Using a framing square, draw a 14 in. x 14 in. (356mm x 356mm) square around the pilot hole in the siding. Figure 5.8. Figure 5.8 Quadra-Fire • Sapphire • 7055-116 Rev. D • 6/11 Wood Screw Wall Thimble 8 in.
- Page 14 • Pipe may separate if not properly joined. Do NOT connect a pipe section to a termination cap without using the telescoping fl ue section found on the termination cap. Quadra-Fire • Sapphire • 7055-116 Rev. D • 6/11 1/4 in. (6mm) Sheet Metal Screw...
-
Page 15: Vertical Termination
You may wish to relocate the appliance, or to offset, as shown in Figure 5.13 on page 16, to avoid cutting loadbearing members. When location is determined, drill small hole. Quadra-Fire • Sapphire • 7055-116 Rev. D • 6/11 WARNING Fire Risk. Explosion Risk. - Page 16 In these cases increasing the vent height or switching to the high wind termination cap may solve this problem. Quadra-Fire • Sapphire • 7055-116 Rev. D • 6/11 CAP AND STORM Shingles overlap on COLLAR NOT SHOWN...
- Page 17 Minimum 1 in. (25mm) Clearance Minimum 1 in. (25mm) Clearance Figure 5.17 Quadra-Fire • Sapphire • 7055-116 Rev. D • 6/11 WARNING Fire Risk. Explosion Risk. • Any occupied areas above the first floor, including closets and storage spaces, which the vertical vent passed through must be enclosed.
- Page 18 You may want to predrill the holes for the overlapped sections for ease of installation. Figure 5.20 Quadra-Fire • Sapphire • 7055-116 Rev. D • 6/11 Trim Collar Cathedral Ceiling Support...
- Page 19 Step 7. The connection between the appliance and the retro connector may be completed with sections of direct vent pipe. Quadra-Fire • Sapphire • 7055-116 Rev. D • 6/11 High Wind Termination Sheet Metal Screws Drill Four 1/8 in. (3mm) Diamater...
- Page 20 4 in. (102mm) Flex Liner Alcove Clearance to Combustibles must be maintained. Co-Axial to Co-Linear Connector Quadra-Fire • Sapphire • 7055-116 Rev. D • 6/11 Chimney Liner Termination Cap 30 ft. (9m) of 3 in. (76mm) Flex Liner Exhaust Section...
- Page 21 Connect the flex to the coupler by using four sheet metal screws for each side Figure 5.28 on page Quadra-Fire • Sapphire • 7055-116 Rev. D • 6/11 Cut and bend flashing as needed to fit...
- Page 22 Step 11. The connection between the appliance and the retro connector may be completed with sections of direct vent pipe. Quadra-Fire • Sapphire • 7055-116 Rev. D • 6/11 6 in. (152mm) diameter opening in masonry wall Retro Connector (3) Masonry Bolts...
-
Page 23: Section 6: Gas Information
OVER TIGHTEN. • Re-install the two side bricks and attach with brick clips. • Re-install logs, glass and cast front. Quadra-Fire • Sapphire • 7055-116 Rev. D • 6/11 5/32 Allen Wrench Pilot Injector Use a 5/32 Allen wrench to remove the pilot injec-... - Page 24 Install the enclosed identifi cation label (F) to the valve body Extension Rods where it can be seen. Fill out the conversion label and attach it to the valve cover. Adapter Caps Quadra-Fire • Sapphire • 7055-116 Rev. D • 6/11 Screws Rubber Gasket WARNING Fire Risk.
-
Page 25: Gas Pressures
You must supply a manual shut-off valve in a visible location within 3 feet (914mm) of the appliance. Quadra-Fire • Sapphire • 7055-116 Rev. D • 6/11 WARNING Gas Leak Risk. • Support control when attaching pipe to... - Page 26 To identify the proper orifi ce size, check with the local gas utility. If installing this appliance in Canada at an elevation above 4500 feet, check with local authorities. Quadra-Fire • Sapphire • 7055-116 Rev. D • 6/11...
-
Page 27: Section 7: Electrical Information
Max. Length 65 feet 40 feet 25 feet 18 feet Quadra-Fire • Sapphire • 7055-116 Rev. D • 6/11 WARNING Shock hazard. • This appliance is equipped with a three This appliance is equipped with a three pronged (grounding) plug for your protection... -
Page 28: Standing Pilot Ignition System Wiring
Label all wires prior to disconnection when servicing controls. Wiring errors can cause improper and dangerous operation. Verify proper operation after servicing. 28 in. (711mm) 28 in. (711mm) Quadra-Fire • Sapphire • 7055-116 Rev. D • 6/11 CAUTION CAUTION Shock hazard. • Replace damaged wire with type 105 rated wire. -
Page 29: Section 8: Appliance Setup
Place the cover shield and gasket over the top vent and attach with the four screws previously removed. Figure 8.4 Insert the inner collar adapter to the rear vent fl ue. Quadra-Fire • Sapphire • 7055-116 Rev. D • 6/11 CAUTION Sharp Edges • Wear protective gloves and safety glasses during installation. -
Page 30: Baffl E Installation/Adjustment
NOTE: The bricks need to be installed before placing the logs in the fi rebox. Brick - 2 on each side Quadra-Fire • Sapphire • 7055-116 Rev. D • 6/11 Use a 5/32 in. 4mm) Allen wrench to adjust legs This end goes in slot in baffle bracket... -
Page 31: Positioning The Logs
This will assure maximum brightness and effi cient use of the catalyst promoting brighter, cleaner burning embers. NOTE: Do not block gas ports. Quadra-Fire • Sapphire • 7055-116 Rev. D • 6/11 Place left front log (#2) into the depression. The WARNING Explosion Risk. -
Page 32: Glass Door Assembly
Install the snap disc in the bracket. Attach the bracket to the fi rebox with a 5/16 in. wrench. Figure 8.19 disc. Quadra-Fire • Sapphire • 7055-116 Rev. D • 6/11 Attach with 4 Screws Turn off gas supply (if gas is connected), and Install Snap Disc... - Page 33 ON. Use the rheostat/ speed control knob to adjust the fan speed to suit your preferences. RHEOSTAT 4 in. (102mm) WHITE BLOWER Quadra-Fire • Sapphire • 7055-116 Rev. D • 6/11 Cut out the rheostat/speed control cover on rear CORD...
-
Page 34: Intake Fuel Restrictor Adjustment
Improper adjustment can cause sooting in the firebox and/ or on the outside of a house with a horizontal termination. After adjustment, tighten wingnut to lock in place. Quadra-Fire • Sapphire • 7055-116 Rev. D • 6/11 OPEN CLOSE The shutter is located on the underside of the... -
Page 35: Section 9: Operating Instructions
NOTE: If using a remote control wall switch, or thermostat, the On/Off Switch must be left “OFF”. Turning the On/Off Switch to “ON” will keep the appliance on continually. Quadra-Fire • Sapphire • 7055-116 Rev. D • 6/11 WARNING WARNING... -
Page 36: Lighting Appliance
3. Push in gas control knob slightly and turn clockwise LIGHTING INSTRUCTIONS LIGHTING INSTRUCTIONS to the "OFF" to the pilot position. NOTE: Knob cannot be turned unless knob is to "ON". to "OFF" position. Quadra-Fire • Sapphire • 7055-116 Rev. D • 6/11 PILOT HOOD MILLIVOLT THERMOCOUPLE GENERATOR... -
Page 37: After Appliance Is Lit
Noise is caused by metal expanding and contracting as it heats up and cools down, similar to the sound produced by a furnace or heating duct. This noise does not affect the operation or longevity of the appliance. Quadra-Fire • Sapphire • 7055-116 Rev. D • 6/11 CAUTION CAUTION WARNING Fire Risk. -
Page 38: Section 10: Troubleshooting
With the pilot in the ON position, disconnect the thermopile leads from the valve. Take a reading at the thermopile leads. The reading should be 325 millivolts minimum. Replace the thermopile if the reading is below the minimum. Quadra-Fire • Sapphire • 7055-116 Rev. D • 6/11 Corrective Action... - Page 39 Ensure that no debris has been placed at the base of, or in the area of the air holes in the center of the base pan beneath the burner. Ensure that the glass is tightened properly on the appliance, particu- larly on top corners. Quadra-Fire • Sapphire • 7055-116 Rev. D • 6/11 Corrective Action...
- Page 40 • Remove and clean glass assembly. • Replace glass assembly and operate appliance for additional 12 hours. Refer to maintenance instructions. Quadra-Fire • Sapphire • 7055-116 Rev. D • 6/11 CAUTION Handle glass assembly with care. NOTE: Clean glass after initial 3-4 hours operation.
-
Page 41: Maintenance Tasks
4. Inspect for corrosion or separation. 5. Verify weather stripping, sealing and fl ashing remains intact. Remote Controls 1. Verify operation of remote. 2. Replace batteries in remote transmitters and battery-powered receivers. Maintenance Tasks Quadra-Fire • Sapphire • 7055-116 Rev. D • 6/11... -
Page 42: Section 12: Reference Materials
Use for reference only. For clearances refer to Section 3. 27-5/8 in. (701mm) Figure 12.2 8-1/4 in. (211mm) Figure 12.4 Quadra-Fire • Sapphire • 7055-116 Rev. D • 6/11 18 in. (457mm) 16-1/4 in. (414mm) 18-3/4 in. (477mm) 21-7/8 in. (556mm) -
Page 43: Vent Components Diagram
23-3/4 in. (603mm) 12-17 in. (305-432mm) 3-3/4 in. (95mm) SLP36M SLP48M SLP4M SLP24M SLP6AM 4 in. (102 mm) inner pipe 6-5/8 in. (168 mm) outer pipe Figure 12.2 SL-D Series Vent Components Quadra-Fire • Sapphire • 7055-116 Rev. D • 6/11... -
Page 44: Vent Components List
SLP36M 46-DVA-36 SLP36-BK 46-DVA-36B SLP48M 46-DVA-48 SLP48-BK 46-DVA-48B SLP6A-BK SLP6AM 46DVA-08A 46DVA-08AB SLP12A-BK SLP12AM 46DVA-16A 46DVA-16AB 46DVA-16A 46DVA-16AB SLP-FLEX-2 SLP-FLEX-3 SLP-FLEX-5 SLP-FLEX-10 2280 2281 SLP45M SLP45-BK See Swivel 46DVA-E45 46DVA-E45B Quadra-Fire • Sapphire • 7055-116 Rev. D • 6/11 ®... - Page 45 NOTES: Each pipe manufacturer has their own list of parts for kits. SL is not interchangeable with SLP. Stove Adaptor Kit (Vertical Cap Kit) Includes 30’-4” ex, adapters, wall thimble, masonry, ZC ashing, 991DA vertical cap. Simpson HHT SLP Dura-Vent...
- Page 46 SAPPHIRE-D-CSB, SAPPHIRE-D-MBK, SAPPHIRE-D-PMH, Part number list on following page. D. Service Parts Gas Stove SAPPHIRE-D-CWL (6/10-3/11) Log Set Assembly Quadra-Fire • Sapphire • 7055-116 Rev. D • 6/11 SAPPHIRE-D...
- Page 47 Refractory Assembly Glass Assembly Door Assembly Cast Retainer Front Front Front Door Left Additional service parts on following page COMMENTS Quadra-Fire • Sapphire • 7055-116 Rev. D • 6/11 SAPPHIRE-D Stocked at Depot PART NUMBER SRV7055-013 7055-124 7055-125 7055-126 RV-SA-MBK...
- Page 48 Control Rod Back Shield Upper Knob, Rheostat (Black) Switch, Rocker, On/Off Piezo Ignitor Additional service parts on following page COMMENTS Qty 2 req Quadra-Fire • Sapphire • 7055-116 Rev. D • 6/11 SAPPHIRE-D Stocked at Depot PART NUMBER SRV7055-105CSB SRV7055-105CWL SRV7055-105MBK...
- Page 49 Hardware Packs Pkg of 40 Pkg of 20 Pkg of 2 Pkg of 25 Pkg of 25 Pkg of 24 Pkg of 40 Quadra-Fire • Sapphire • 7055-116 Rev. D • 6/11 SAPPHIRE-D Stocked at Depot PART NUMBER SRV7055-005 SRV7055-009 SRV7055-010...
-
Page 50: Limited Lifetimewarranty
Hearth & Home Technologies Inc. LIMITED LIFETIME WARRANTY Pellet Coal Electric Venting Wood Quadra-Fire • Sapphire • 7055-116 Rev. D • 6/11 Components Covered All parts and material except as covered by Conditions, Exclusions, and Limitations listed Igniters, electronic components,... - Page 51 E. Limited Lifetime Warranty (continued) WARRANTY CONDITIONS: WARRANTY EXCLUSIONS: This warranty is void if: LIMITATIONS OF LIABILITY: 4021-645C 12-29-10 Page 2 of 2 Quadra-Fire • Sapphire • 7055-116 Rev. D • 6/11...
- Page 52 F. Contact Information Please contact your Quadra-Fire dealer with any questions or concerns. • Important operating a n d m a i n t e n a n c e instructions included. We recommend that you record the following pertinent...