Table of Contents
Advertisement
Quick Links
Manufactured by:
Polar Electro Oy
Professorintie 5
FIN-90440 KEMPELE
Tel. +358-8-520 2100
Fax +358-8-520 2300
www.polar.fi
S625X
U S E R M A N U A L
R U N N I N G C O M P U T E R
S725X
C Y C L I N G C O M P U T E R
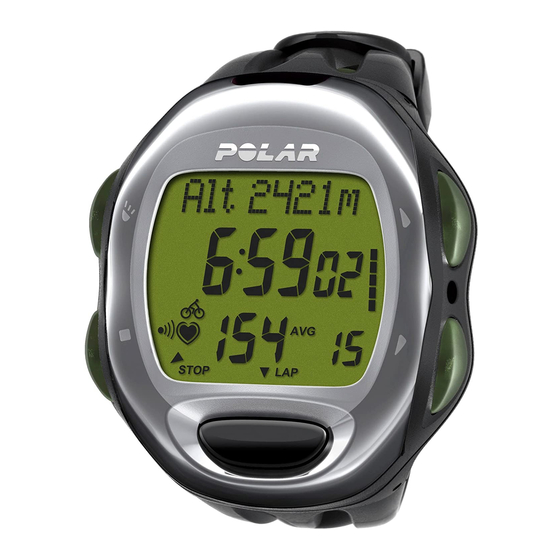
Display symbols
Indicates an ongoing heart rate measurement and flashes to the beat of your heart.
Indicates there has not been heart rate reception for at least 5 seconds.
- - Indicates there is no heart rate reception. Bring the wrist unit up to your chest
near the transmitter's Polar logo.
The wrist unit starts looking for the heart rate signal again.
Options mode: indicates that you are setting the running functions
Time of day/Measuring/Recording mode: indicates that running speed is on.
File mode: indicates running information.
Options mode: indicates that you are setting the bike functions
Time of day/Measuring/Recording mode: indicates that bike 1 or 2 is on.
File mode: indicates cycling information.
In the Time of day display the alarm is on.
Measuring mode: beeps if you are exercising outside your target heart rate zone.
Fitness Test mode: sounds an alarm at the end of the fitness test.
Indicates the Interval Trainer.
Indicates continuous interval (Cont).
Recording mode: indicates the heart rate above the target zone.
E N G
Recording mode: indicates the heart rate below the target zone.
The graphic bar consists of five blocks. A flashing block indicates in which level you are
in the Options settings or File recalling loops. Continuously running bars indicate that
the exercise is recorded.
Indicates low battery.
See the glossary for display text interpretation.
Advertisement
Table of Contents

Related Manuals for Polar Electro S725X


Summary of Contents for Polar Electro S725X
- Page 1 Indicates there has not been heart rate reception for at least 5 seconds. - - Indicates there is no heart rate reception. Bring the wrist unit up to your chest near the transmitter’s Polar logo. The wrist unit starts looking for the heart rate signal again.
- Page 2 User If you want to get even more out of your running/cycling computer during kg/lbs training, check the accessories on page 126 or www.polar.fi for more detailed product support and www.PolarRunningCoach.com or cm/ft inch www.PolarCyclingCoach.com for a personalized exercise program Birthday and diary.
-
Page 3: The Information Specific For Running Features Is In A Blue Text
The information specific for running features is in a blue text. information specific for cycling features is marked with a grey background. Please read this manual carefully to familiarize yourself with the Polar running/ cycling computer. Here is where you can find the information you need to use and maintain your equipment. -
Page 4: Table Of Contents
Easy start ... 8 mode ... 23 How to prepare the wrist unit ... 8 Selecting exercise type ... 23 Installing the Polar S1 Setting exercise sets ... 24 foot pod ... 9 Setting timers ... 26 Assembling the S1 foot pod Setting limits ... -
Page 5: Getting Going
E. Tests ... 85 Recovery information of BasicSet exercise ... 73 Polar Fitness Test ... 85 Exercise distance ... 73 OwnIndex ... 85 Pace information ... 73 Predicted maximum heart rate ... 87 Speed information ... 73 Fitness test settings ... 88 Cadence information ... -
Page 6: Buttons And Their Functions
Buttons and their functions Signal/ Light Turns the beep on or off. Turns the backlight on. Stop Return - Stops measuring the heart rate. Exits the displayed mode and returns to the previous mode level. Returns to the Time of day display from any mode by pressing and holding the stop button. -
Page 7: Easy Start
The estimated average battery life span of the foot pod is 20 hours of use. If you prefer Polar to replace the battery, you can send or take the sensor to a Polar Service Center. There the sensor is tested after the battery is replaced. -
Page 8: Attaching The S1 Foot Pod On Your Shoe
When the green light on the foot pod turns red, you need to replace the battery before your next run. If you are using Polar S725X/S625X with Polar Power Output Sensor, please see the bike mount and sensor installation instructions in the Power Output Sensor user manual. -
Page 9: How To Put The Transmitter On
4. Check that the wet electrode areas are firmly against your skin and that the Polar logo of the connector is in a central, upright position. How to start measuring your heart rate 1. -
Page 10: How To Stop Measuring Your Heart Rate
In addition, you can download a personal logo, user number or user name from Polar Precision Performance software and www.polar.fi. You can also download 7 reminders with alarms. 2. MEASURING MODE (SEE SECTION C. EXERCISE) In this mode your heart rate is displayed, but exercise information is not recorded or stored in the File mode. - Page 11 Tests. Polar Fitness Test estimates your maximal aerobic power (VO shows the result as a Polar OwnIndex value. This test also provides a predicted maximum heart rate value (HR designed to monitor your personal progress. You should do the test regularly to see the changes in your cardiovascular fitness.
-
Page 12: How To Enter Settings
Polar OwnOptimizer test is a perfect tool for all those who want to practice sports, avoiding at the same time all eventual problems caused by incorrect training methods. -
Page 13: User Information Settings
Activity level (Activity) ft/ inch 11. Scroll up or down to select your activity level for Polar Fitness Test. Press OK. month - day - year The activity level is an assessment of your level of physical activity. Select the alternative that best describes the overall amount and intensity of your physical activity in the past half-a-year. -
Page 14: Exercise Settings For Recording Mode
13. Press OK. If you do not know this value, update it in the Fitness Test mode after having carried out the Polar Fitness Test. Maximal oxygen uptake value (VO 2max 14. The wrist unit suggests value 35 for females and value 45 for males as a default setting when you set this value for the first time. -
Page 15: Setting Exercise Sets
Setting exercise sets Preset exercise sets ready for five exercise sets; when you start exercising, just select one of the sets. Interval Training Set BasicSet If you choose interval off, you can set the If you choose interval on, you can following functions to your exercise: set 3 different exercise phases for each exercise set in following order:... -
Page 16: Setting Timers
Setting timers If you start from the Time of day display, repeat steps 1-5. 6. Scroll up or down until desired timer is displayed. Press OK to start setting the timer. 7. Scroll up or down to turn the timer on or off. Press OK. Timer OFF: skip steps 8-9. -
Page 17: Setting Recovery Calculation
Setting recovery calculation You can select 2 optional types of recoveries in a BasicSet: A. Time-based recovery Ends your recovery as you reach the preset time. B. Heart-rate-based recovery Ends your recovery as you reach the preset heart rate. If you start from the Time of day display, repeat steps 1-5 (page 25). 6. -
Page 18: Setting Number Of Intervals And Recoveries
A. Time-based interval 8. Scroll up or down to adjust minutes. Press OK. 9. Scroll up or down to adjust seconds. Press OK. Interval TIMER appears. B. Heart-rate-based interval 8. Scroll up or down to adjust the heart rate that will end your interval. Press OK. -
Page 19: Naming Exercise Sets
C. Rec. Dist is displayed. 10. Scroll up or down to adjust kilometers. Press OK. 11. Scroll up or down to adjust hundreds of meters. Press OK. Recovery DIST appears. To continue your settings, press the stop button or to return to the Time of day display, press and hold the stop button. -
Page 20: Turning Functions On/Off
6. Scroll up or down to set the OwnCal on or off. Press OK. For getting the most accurate OwnCal results, update the VO and the HR not know your clinically measured values perform Polar Fitness Test and update the OwnIndex and HR Options... -
Page 21: Predicted Maximum Heart Rate On/Off
Scroll up or down until the desired altitude is displayed. Press OK. If dirt is blocking the air pressure channels, send the wrist unit to a Polar Service Center. Do not insert any objects into the openings. -
Page 22: Speed Settings
Running settings Calibrating the Polar S1 foot pod It is recommended that you calibrate the foot pod when; you use it for the first time, there are significant changes in your running style or the position of the foot pod on the shoe is dramatically changed. -
Page 23: Calibration Manually
Calibration manually Adjust the SET factor to the value 1000 before manual calibration. The calibration factor is calculated as a ratio of the actual distance to the uncalibrated distance. For example if you ran 1200 meters and the wrist unit shows a distance of 1180 meters, the calibration factor should be adjusted to 1200/1180 x 1000 = 1017. -
Page 24: Cadence On/Off
11. S. length is displayed. Scroll up or down to adjust the span length. - 4 mm Press OK. If you are using the wireless Polar Speed Sensor, set the Power off. You can find more information about the Polar Cadence and Polar Power Output Sensor on page 126 of this manual. -
Page 25: Monitor Settings
Naming bike 1 and bike 2 You can name the bikes with four letters, numbers or marks. The number in the right corner indicates, which bike settings are in use. (-- =Speed OFF, b1=Bike 1, b2=Bike 2) 1. In the Time of day display scroll up or down until OPTIONS is displayed. 2. -
Page 26: Watch Settings
The units settings affect the following features: Units 1: User information kg, cm Date of birth day-month-year Speed km/h Distance km, hundreds of meters Pace minutes/km Altitude meters Meters ascended meters Temperature °C Wheel size Power Chain weight Chain length Span length Turning Help on/off If you start from the Time of day display, repeat steps 1-4. -
Page 27: Setting Time Of Day
9. Scroll up or down to set the reminder on or off. Press OK. You can download 7 reminders, each including time and name, to your wrist unit from Polar Precision Performance software. The reminder sounds an alarm only when time of day is displayed. When the reminder alarm comes on, it will sound for 15 seconds or you can turn it off by pressing any of the buttons except the signal/light button. -
Page 28: Setting Tips
Swap date, user ID number, user name and logo You are able to set a user ID number, user name and logo by Polar Precision Performance software. These settings are shown on the upper row of the Time of day display. You can swap between the user ID, user name, logo and date by pressing and holding the up button. - Page 29 The following displays start to alternate, if you have no speed or altitude settings in use, as you enter the Measuring mode: Exercise name Memory left Speed OFF Altitude OFF Time of day Current heart rate BasicUse (E0)/ Recording rate Exercise set in use (E1-E5) If you are running or cycling, turn the speed settings on by pressing and...
-
Page 30: Recording Mode
If there is - - / 00 reading on the display, there is no heart rate reception. Bring the wrist unit up to your chest near the transmitter’s Polar logo. The wrist unit starts looking for the heart rate signal again. -
Page 31: Turning The Zone Alarm On/Off
• if you start or stop the exercise session • if you store lap information • if you bring the wrist unit near the Polar transmitter (Heart touch) This function is automatically turned off when you return to the Time of the day display. -
Page 32: Storing Lap And Split Time
4. Pace 3. Speed Pace difference 5. Distance 6. Altitude Temperature 7. Power* 8. Stopwatch Time of day For most accurate altitude readings, calibrate the altimeter every time before an exercise. *Optional Polar Cadence Sensor or Polar Power Output Sensor required. -
Page 33: Starting An Exercise Set
You cannot select the same displayed function to the upper and middle row i. e. the option on the middle row is no longer available for the upper row. *Optional Polar Cadence Sensor or Polar Power Output Sensor required. 3. Select the lower row information... -
Page 34: Exercising With Interval Training Set
Exercising with Interval Training Set (Int On, E1-E5) In this mode you can also use the functions described in “Recording mode” section. The Interval Trainer automatically guides you through your exercise. In order to hear the activity sounds when the phase starts and stops make sure the activity sound is on. - Page 35 Interval session 1. First Preset heart rate or pace limits 2 (if set on). 2. Then One of the following is displayed depending on your settings: A. manual, B. time-based, C. heart rate-based or D. distance-based interval. A. Manual interval. Number of set intervals.
-
Page 36: Interrupting An Interval Training Exercise
At the end of recovery A. and B. Recovery duration. Recovery distance. Drop in your heart rate. Cool-down phase 1. First Preset heart rate or pace limits 3 (if set on). 2. Then Countdown timer 3. Heart rate information. Countdown timer starts running if you have set the timer 3 on. If you have set the timer off, press and hold OK to end a phase. -
Page 37: Starting The Recovery Calculation
Starting the recovery calculation To start the recovery calculation, press and hold the OK button. See “Exercising with Interval Trainer”/ “Recovery calculation” for the displayed information during the recovery calculation. After the recovery calculation is done the exercise is paused. You can continue the exercise by pressing the OK button after the recovery calculation. -
Page 38: Interrupting An Interval Or Recovery Calculation
The bigger the file number the more recent it is. There is a two-way communication between the wrist unit and a PC. Polar Precision Performance software offers an easy way to analyze training data, keep training diary, and plan future training. See the CD-ROM for further information. -
Page 39: Exercise Time
Average and maximum speed of the exercise alternate. Tot. Time Cadence information* (Cad. Avg/ Max) Run./Rid. Time Average and maximum cadence of the exercise alternate. Odometer EXE SET *Optional Polar Cadence Sensor or Polar Power Output Sensor LAPS required. SAMPLES... -
Page 40: Altitude
The time spent within/above/below the summary limits can be seen from the exercise file. *Optional Polar Cadence Sensor or Polar Power Output Sensor required. Exercise time within, above and below the target zones Indicates the exercise time, which you have spent within (InZone), above and below each limits. -
Page 41: Total Distance
Total distance (Tot. Dist./Odometer) Measures cumulative total distance of several exercise sessions starting from the previous resetting of the value in records file. In a running file value is indicated as total distance and in a cycling file as odometer. Interval Training information (EXE. -
Page 42: Lap Information
FILE F1-F99 LAPS Lap 1 Lap 99 *Optional Polar Cadence Sensor or Polar Power Output Sensor required. Best Lap Shortest lap time. The number of the best lap. The best lap information is displayed if you have stored at least 3 laps. The best lap can not be the last lap. -
Page 43: Recorded Samples
3. Scroll up or down from one sample to another. 4. Press and hold stop to return to the Time of day display. *Optional Polar Cadence Sensor or Polar Power Output Sensor required. Deleting a file 1. In the Time of day display scroll up or down until FILE is displayed. -
Page 44: Records File
*Optional Polar Cadence Sensor or Polar Power Output Sensor required. Resetting your cumulative counts to zero Once your have reset the cumulative count you cannot retrieve it. -
Page 45: Returning To Your Previous Maximum Value
OK. 5. Press and hold the stop button to return to the Time of day display. *Optional Polar Cadence Sensor or Polar Power Output Sensor required. E. TESTS If you have not set the user information before trying to enter the Tests mode, you will automatically move to the user settings. -
Page 46: Predicted Maximum Heart Rate
OwnIndex is based on resting heart rate, heart rate variability at rest, age, gender, height, body weight and self-assessed physical activity. Predicted maximum heart rate (HR The HR -p definition is carried out simultaneously with the Polar Fitness Test. The HR -p score predicts your individual maximum heart rate value more accurately than the age-based formula (220 - age). -
Page 47: Fitness Test Settings
Fitness test settings To be able to carry out the Polar Fitness Test you need to do the following settings in the Options mode: • Set your personal user information and long-term physical activity level. • Set the Polar Fitness Test on. -
Page 48: Update Ownindex And Hr
Your maximum heart rate value is updated if the HR Fitness classes The Polar Fitness Test result, your OwnIndex, is most meaningful when comparing your individual values and changes in them. OwnIndex can also be interpreted according to your gender and age. Locate your OwnIndex on the table to find out your current cardiovascular fitness classification, compared with those who are of the same age and gender. -
Page 49: Training Optimizer
With an inadequate recovery period, you may experience a decrease in performance as a result of high training volumes, instead of improvement. Polar OwnOptimizer is an easy and reliable way to determine whether your training program is optimally developing your performance. -
Page 50: Baseline Tests
Baseline tests When you start using OwnOptimizer for the first time, six baseline tests should be conducted over a period of two weeks to determine your personal baseline value. These baseline measurements should be taken during two typical basic training weeks, not during heavy training weeks. The baseline measurements should include tests taken after training and after recovery days. -
Page 51: How To Interpret The Results
6. After 3 minutes, the wrist unit gives a signal and Stand up is displayed. Stand up and remain standing still for 3 minutes. 7. After 3 minutes the wrist unit again gives again a signal and the test is finished. - Page 52 Analyzing the result with the PC software If you download the results of the test from your wrist unit to the PC, you can analyze the results with the Polar Precision Performance software. The software offers you various ways to analyze the results and receive more detailed information about your progress.
-
Page 53: Care And Maintenance
(1h/ day, 7 days/ week). If your transmitter stops working, it might be due to the battery running out. We recommend that you have the battery replaced by an authorized Polar Service Center only. You can, however, change the battery yourself by following the instructions below. - Page 54 The estimated average battery life of the speed sensor is 2500 hours of use. We highly recommend you send the speed sensor to an authorized Polar Service Center for battery replacement, where the unit is tested after the battery has been replaced. However, if you prefer changing the battery yourself, please follow these instructions carefully: Detach the sensor from your bicycle.
-
Page 55: Precautions
Polar wrist unit yourself. To ensure the water resistance properties and the use of qualified components, the wrist unit battery should be replaced only by an authorized Polar Service Center. At the same time a full periodic check of the Polar running/cycling computer will be done. - Page 56 Several pieces of exercise equipment with electronic or electrical components such as LED displays, motors and electrical brakes may cause interfering stray signals. To try to tackle these problems, relocate the Polar wrist unit as follows: 1. Remove the transmitter from your chest and use the exercise equipment as you would normally.
-
Page 57: Frequently Asked Questions
Notice to persons with pacemakers, defibrillator or other implanted electronic device. Persons who have a pacemaker use the Polar running/cycling computer at their own risk. Before starting use, we always recommend an exercise test under doctor’s supervision. The test is to ensure the safety and reliability of the simultaneous use of the pacemaker and the running/cycling computer. - Page 58 2. Put the transmitter back and bring the wrist unit up to your chest near the transmitter’s Polar logo. The wrist unit starts looking for a heart rate signal again. Continue your training session normally..heart rate reading becomes erratic or extremely high? You may have come within range of strong electromagnetic signals which cause erratic readings.
-
Page 59: Technical Specifications
4. If the 00 reading is constant, you may have exceeded 2500 riding hours and the battery of the speed sensor needs to be replaced. 5. If you are using the wireless Polar Speed Sensor, check that Power is turned off in the Options mode. - Page 60 Material: Polyurethane, polyamide, nylon, polyester and elasthane Altitude and temperature measurement: The Polar S625X/S725X calculates altitude by using the standard average altitude in certain air pressures according to the ISO 2533. The air pressure is measured and the temperature is compensated every second. The wrist unit displays altitudes between - 448 m - 7590 m or between - 1600 ft - 24900 ft with at least a 1 m / 3 ft resolution.
-
Page 61: Limited Polar International Guarantee
Polar Electro Oy. The names and logos marked with a ™ symbol in this user manual or in the package of this product are trademarks of Polar Electro Oy. The names and logos marked with a ® symbol in this user manual or in the package of this product are registered trademarks of Polar Electro Oy, except that Windows is a registered trademark of Microsoft Corporation. -
Page 62: Disclaimer
• Polar Electro Inc. / Polar Electro Oy makes no representations or warranties with respect to this manual or with respect to the products described herein. Polar Electro Inc. / Polar Electro Oy shall not be liable for any damages, losses, costs or expenses, direct, indirect or incidental, consequential or special, arising out of, or related to the use of this material or the products described herein. -
Page 63: Display Texts
You can continue taking point altitude. lap times or intervals but they won’t be recorded into the file. *Optional Polar Cadence Sensor or Polar Power Output Sensor required. -p: Predicted maximum heart MAX %: Together with a heart rate rate value. - Page 64 Pc: Indicates running pace measured minutes/km or minutes/ mile. *Optional Polar Cadence Sensor or Polar Power Output Sensor required. RecoTime, time-based recovery: You set the recovery time in the Options mode. In the File mode you will see the drop in your heart rate and the recovery duration.
-
Page 65: Index
Index 12h/ 24h time mode ... 48 Heart rate limits on/off ... 27 Activity/ button sound on/off ... 45 Heart rate limits settings ... 26 Alarm settings ... 47 Heart touch function ... 70 All that you can do with your Help on/off ... -
Page 66: Accessories
Mobile connectivity allows you to share your experience with your friends or coach by SMS, or forward your activity data to the Polar PC Software or Web Service for further analysis and longer-term follow-up. Check www.polar.fi/mobilelink to learn more about the Polar MobileLink application;... - Page 67 NOTE...