Table of Contents
Advertisement
Quick Links
Advertisement
Table of Contents

Related Manuals for Planet VC-200S


Summary of Contents for Planet VC-200S
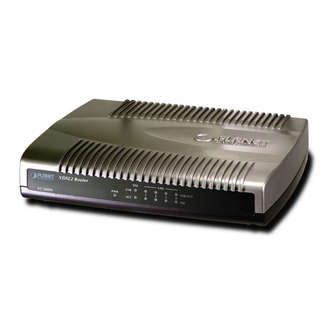
- Page 1 VDSL2 Router VC-200M / VC-200S User’s Manual...
- Page 2 Copyright Copyright© 2008 by PLANET Technology Corp. All rights reserved. No part of this publication may be reproduced, transmitted, transcribed, stored in a retrieval system, or translated into any language or computer language, in any form or by any means, electronic, mechanical, magnetic, optical, chemical, manual or otherwise, without the prior written permission of PLANET.
- Page 3 FCC Caution: To assure continued compliance (example-use only shielded interface cables when connecting to computer or peripheral devices). Any changes or modifications not expressly approved by the party responsible for compliance could void the user’s authority to operate the equipment. This device complies with Part 15 of the FCC Rules.
- Page 4 Revision User’s Manual for VDSL2 Router Model: VC-200M / VC-200S Rev: 2.0 (March 2008) Part No. EM-VC200...
-
Page 5: Table Of Contents
CHAPTER 1 INTRODUCTION ...7 1.1 Feature...7 1.2 Package Contents ...8 1.3 Physical Details ...8 CHAPTER 2 HARDWARE INSTALLATION ...10 2.1 System Requirement ...10 2.2 Hardware Installation ...10 2.3 Configuring the Network Properties ...11 CHAPTER 3 CONFIGURATION ...17 3.1 Determine your connection settings...17 3.2 Connecting the VDSL2 Router to your network...17 3.3 Configuring with Web Browser ...18 3.4 Quick Installation ...18... - Page 6 3.5.5.1 LAN Setting ...37 3.5.5.2 DHCP Client List...38 3.5.6 NAT ...38 3.5.6.1 Virtual Server...39 3.5.6.2 Port Mapping ...40 3.5.6.3 DMZ...41 3.5.7 Route...42 3.5.7.1 Static Route...43 3.5.7.2 Routing Table List ...44 3.5.8 UPnP...45 3.5.8.1 Settings...45 CHAPTER 4 OPERATING THE VDSL2 SYSTEM ...46 4.1 Configuration Settings...46 4.1.1 Channel Configuration ...47 4.1.2 Line Configuration ...48...
-
Page 7: Chapter 1 Introduction
Chapter 1 Introduction The PLANET VDSL2 Router, VC-200M / VC-200S is based on two core networking technologies: Ethernet and VDSL2 (Very High Speed Digital Subscriber Line 2). This technology offers the absolute fastest possible data transmission speeds over existing copper telephone lines without the need for rewiring. -
Page 8: Package Contents
DHCP Server Support. Dynamic Host Configuration Protocol provides a dynamic IP address to PCs and other devices upon request. The VC-200M / VC-200S can act as a DHCP Server for devices on your local LAN. 1.2 Package Contents ‧ VC-200M / VC-200S Unit ‧... - Page 9 Router is trying to establish a connection between VC-200M and VC-200S, or telecom’s network. Successfully connected between VC-200M and VC-200S, or router and telecom's network, and in ready state. Data is being transmitted or received. Data is being transmitted or received via the corresponding LAN port, and in ready state.
-
Page 10: Chapter 2 Hardware Installation
3. 32 MB RAM minimum 4. 20 MB of free disk space minimum 2.2 Hardware Installation This section describes how to connect and configure VC-200M/VC-200S. Power Adapter Step 1. Connect the VDSL2 Line There are two ways to connect VC-200M or VC-2000S. -
Page 11: Configuring The Network Properties
If required, using a standard RJ-45 cable connect to any LAN port of VC-200M / VC-200S with a normal Hub. Any LAN port of VC-200M / VC-200S will automatically function as an "Uplink" port when required. Step 3. Connect the Power Adapter to the Router Connect the power adapter to the port labeled 12V DC on the rear panel of router. - Page 12 3. In the Local Area Connection Status window, click Properties. 4. Select Internet Protocol (TCP/IP) and click Properties.
-
Page 13: Configuring Pc In Windows 2000
5. Select the Obtain an IP address automatically and the Obtain DNS server address automatically radio buttons. 6. Click OK to finish the configuration. Configuring PC in Windows 2000 Go to Start / Settings / Control Panel. In the Control Panel, double-click on Network and Dial-up Connections. - Page 14 Select Internet Protocol (TCP/IP) and click Properties. Select the Obtain an IP address automatically and the Obtain DNS server address automatically radio buttons. Click OK to finish the configuration. Configuring PC in Windows 98/Me 1. Go to Start / Settings / Control Panel. In the Control Panel, double-click on Network and choose the Configuration tab.
- Page 15 3. Select the Obtain an IP address automatically radio button. 4. Then select the DNS Configuration tab. 5. Select the Disable DNS radio button and click OK to finish the configuration. Configuring PC in Windows NT4.0 1. Go to Start / Settings / Control Panel. In the Control Panel, double-click on Network and choose the Protocols tab.
- Page 16 VC-200M’s default LAN IP address is 192.168.1.100, and VC-200S is 192.168.1.200. So please set fix IP address in TCP/IP properties of your network card (show as below), then you can start your Web Browser to login VC-200M or VC-200S (please see Chapter 3.3).
-
Page 17: Chapter 3 Configuration
Chapter 3 Configuration 3.1 Determine your connection settings Before you configure the router, you need to know the connection information supplied by your VDSL2 service provider. 3.2 Connecting the VDSL2 Router to your network Unlike a simple hub or switch, the setup of the VDSL2 Router consists of more than simply plugging everything together. -
Page 18: Configuring With Web Browser
At login prompt will appear, and default password is “admin”, then click 'LOGIN'. 3.4 Quick Installation There are two device modes: Bridge Mode and Router Mode can configure the VC-200M and VC-200S when in different mode, displayed show as below. Bridge Mode... - Page 19 Step1- Click “Bridge Mode” in VC-200M and VC-200S, and then press “APPLY” to submit setting. Step2- Select profile in VC-200M and VC-200S, we suggest select same profile in VC-200M and VC-200S, otherwise the connection won’t synchronously.
- Page 20 Step3- Click “Active” to make the connection is ready. Step4- After successful connect between VC-200M and VC-200S, the information will show on channel status.
- Page 21 Router Mode Step1- Click “Router Mode” in VC-200M and VC-200S, and then press “APPLY” to submit setting.
- Page 22 Step2- Change LAN IP address, e.g. VC-200M is 192.168.1.100, VC-200S is 192.168.99.100. Step3- Select WAN IP address, e.g. we set WAN to the Static IP address.
- Page 23 Step4- Fill in WAN IP address, e.g.VC-200M is set 10.1.1.100, VC-200S is 10.1.1.200, and gateway address should point each other. Step5- Select profile in VC-200M and VC-200S, we suggest select same profile in VC-200M and VC-200S, otherwise the connection won’t synchronously.
-
Page 24: Configuration Menu For Administrator
Step7- After successful connect between VC-200M and VC-200S, the information will show on channel status. Note: Please reference the throughput test for Bridge Mode and Router Mode in Appendix A: Throughput Test for VDSL2 profiles. 3.5 Configuration Menu for Administrator The chapter is only for Administrator. -
Page 25: Setup Wizard
2. Advanced Setup- Advanced setup features allow the user to configure all the functions that are supported by VC-200M/VC-200S like routing, and UPnP. 3.5.1 Setup Wizard The Setup Wizard is designed for ease-of-use in order to quickly configure the most common settings. -
Page 26: System
3.5.3 System The System link can be viewed in the left navigation bar. The following are the options available under system, show as below. Host Name Config System Time Administrator Settings Firmware Upgrade Device Mode System Status System Log Reset 3.5.3.1 Host Name Config To configure System settings, the user has to enter host and domain name. -
Page 27: System Time
The screen contains the following details: Filed Description Host Name Enter the host name of the VC-200M/VC-200S. Domain Name Enter the domain name of the VC-200M/VC-200S. 3.5.3.2 System Time To configure the system time zone, click on the System Time link in the left navigation bar, show as below. -
Page 28: Administrator Settings
The auto-logout time, at least one minute. 3.5.3.4 Device Mode The VC-200M/VC-200S used in the reference system is able to act as either a bridge or a router. Clicking on Device Mode link on the left navigation bar allows the user to... -
Page 29: Firmware Upgrade
Note: By factory default: Device Mode is Bridge Mode. 3.5.3.5 Firmware Upgrade To update the system firmware, click on the Firmware Upgrade link in the left navigation bar, show as below. Click “Browse” to select a specified file name to change the file Name. Click “APPLY”... -
Page 30: System Logs
Click “Release” to release IP Address for the WAN interface. Click “Renew” to renew the IP Address for the WAN interface. 3.5.3.7 System Logs To view the system logs, click on the System Logs link in the left navigation bar, show as below. -
Page 31: Reset
The screen contains the following details: Filed Description Log File This lists all the system events. Click “Download” to download the log file to the computer. Click “Clear” to clear this page. Click “Refresh” to retrieve system event and update the log file. 3.5.3.8 Reset To restart the system, click on the Reset link in the left navigation bar, show as below. -
Page 32: Wan
3.5.4 WAN The WAN settings can be viewed in the left navigation bar. The following are the options available under WAN, show as below. Dynamic IP Static IP PPPoE 3.5.4.1 Dynamic IP To configure the WAN interface to dynamically obtain an IP Address, click on the Dynamic IP link in the left navigation bar, show as below. -
Page 33: Static Ip
The screen contains the following details: Click “APPLY” to save the information that has been entered. Click “CANCEL” to exit from this page. 3.5.4.2 Static IP To configure the WAN interface to use a Static IP Address, click on the Static IP link in the left navigation bar, show as below. -
Page 34: Pppoe
Enter the password to reconfirm. Service Name Enter a service name. Description Enter the IP Address of VC-200M/VC-200S. Enter the Subnet Mask of VC-200M/VC-200S. Enter the Gateway address of VC-200M/VC-200S. Provides more IP Addresses of the WAN interface. Select the check box to enable this option. -
Page 35: Dns
If no packets are transmitted between LAN port and WAN port or between VC-200M/VC-200S and WAN, the connection is disconnected after the “Maximum Idle Time” If the Auto-reconnect check box is selected, the PPP... -
Page 36: Lan
The screen contains the following details: Filed Domain Name Server(DNS) Address Secondary DNS Address(optional) Click “CANCEL” to exit from this page without saving the changes. Click “APPLY” to save the information that has been entered. 3.5.5 LAN The LAN setting can be viewed in the left navigation bar. The following are the options available under LAN, show as below. -
Page 37: Lan Setting
Description IP Address Enter the LAN interface IP Address of VC-200M/VC-200S Subnet Mask Enter the LAN Subnet Mask of VC-200M/VC-200S The Gateway acts as Enable or disables the DHCP Server of the of DHCP Server VC-200M/VC-200S. Select the check-box to enable this option. -
Page 38: Dhcp Client List
IP Pool Ending Enter the ending IP Address of the DHCP server. (When Address Enable DHCP Server) Lease Time Select the lease time of the DHCP server. (When Enable DHCP Server) Local Domain Name Enter the Domain Name of the DHCP server. (When Enable DHCP Server) Click “CANCEL”... -
Page 39: Virtual Server
The NAT Settings can be viewed in the left navigation bar. The following are the options available under NAT, show as below. Virtual Server Port Mapping 3.5.6.1 Virtual Server You can configure the Router as a virtual sever so that remote users can access services such as the Web or FTP server at your local site via public IP address. -
Page 40: Port Mapping
The screen contains the following details: Filed Description Private IP Enter a private IP Address of specified entry. Private Port Enter a private Port number of the specified entry. Type Select virtual server protocol type of the specified entry. Public Port Enter a public Port number of the internet user to access the virtual server. -
Page 41: Dmz
The screen contains the following details: Filed Description Server IP Enter the IP Address of a specified local machine. Mapping Port Assign a range of port or specific port number to route the packets. e.g. 8080-8081,21 Enabled Enable a specified entry of the Port Mapping. Click “CANCEL”... -
Page 42: Route
The screen contains the following details: Filed Description Enable Enable or disable the DMZ setting of VC-200M/VC-200S.Select the check box to enable this option. IP Address Enter IP Address of the DMZ host. Click “CANCEL” to exit from this page without saving the changes. -
Page 43: Static Route
3.5.7.1 Static Route The static routing function determines the path that data follows over your network before and after it passes through your router. You can use static routing to allow different domain users to access the Internet through this Router. To setup Static Routing, click on the Static Routing link in the left navigation bar, show as below. -
Page 44: Routing Table List
PC2 can go to Internet through VC-200M/VC-200S, so please reference as below to fill in static routing table. Interface: LAN Destination IP: 203.67.31.0 Subnet mask: 255.255.255.0 Gateway: 192.168.1.3 3.5.7.2 Routing Table List To view the Routing entry table list of VC-200M/VC-200S, click on the Routing Table by link in the left navigation bar, show as below. -
Page 45: Upnp
3.5.8 UPnP UPnP (Universal Plug and Play) is a distributed, open networking standard that uses TCP/IP for simple peer-to-peer network connectivity between devices. An UPnP device can dynamically join a network, obtain an IP address, convey its capabilities and learn about other devices on the network. In turn, a device can leave a network smoothly an automatically when it is no longer in use. -
Page 46: Chapter 4 Operating The Vdsl2 System
Enable UPnP To enable or disable UPnP Setting. Select the check box to Enable or Disable the UPnP function of VC-200M/VC-200S. Click “CANCEL” to exit from this page without saving the changes. Click “APPLY” at any time during configure to save the information that you have been entered. -
Page 47: Channel Configuration
4.1.1 Channel Configuration To set direction, Min Data Rate, Max Date Rate, and Max Interleve Delay of channl1, click on the ChannelConfig in the left navigation bar, show as below. The screen contains the following details: Setting Description Direction To which direction shall the settings apply? Min Date Rate Minimum Payload Date Rate, by factory default is 64 kbps. -
Page 48: Line Configuration
4.1.2 Line Configuration Signal-to-Noise Ratio, often written S/N or SNR, is a measure of signal strength relative to background noise. The ratio is usually measured in decibels (dB). If the incoming signal strength in microvolts is V microvolts, is V , then the signal-to-noise ratio, S/N, in decibels is given by the formula If V... -
Page 49: Profile Configuration
It uses up to 4096 tones which are spaced 4 kHz or 8 kHz apart. Each tone can be used for either downstream or upstream. However VC-200M/VC-200S provide 10 VDSL2 profiles: 8a, 8b, 12a, 12b, and 17a... - Page 50 frequency bands. Table 1 list 8a, 8b, 21a, 12b, and 17a standard VDSL2 profile about the bandwidth, tones, tone spacing, and line power. <Table 1> To select VDSL2 profile, click on the ProfileConfig link in the left navigation bar, show as below. The screen contains the following details: Setting Description...
-
Page 51: Active
Note: By factory default is VDSL2 Profile 17a-Bandplan ITU AnnexB_B12. 4.1.4 Active To enable or disable VDSl2, click on the Active link in the left navigation bar, show as below. The screen contains the following details: Setting Description Line Activate or deactivate the line. Click “CANCEL”... -
Page 52: Version Information
4.1.6 Version Information To view the version information is about Web UI, API Library, Chipset FW, Chipset HW, and DSL Driver. -
Page 53: Appendix A Throughput Test For Vdsl2 Profiles
Appendix A Field Throughput for VDSL2 profiles Router Mode Band Profile Distance 400 Meter (1312 feet) 1000 Meter (3281 feet) Bridge Mode Band Profile Distance 400 Meter (1312 feet) 1000 Meter (3281 feet) The actual data rate will vary on the quality of the telephone line and environment factors. -
Page 54: Appendix B Glossary
Appendix B Glossary DHCP DHCP stands for Dynamic Host Configuration Protocol. This protocol automatically configures the TCP/IP settings of every computer on your home network. DNS Server Address DNS stands for Domain Name System, which allows Internet host computers to have a domain name (such as www.planet.com.tw) and one or more IP addresses (such as 192.34.45.8). - Page 55 Internet Service Provider. An ISP is a business that provides connectivity to the Internet for individuals and other businesses or organizations. Local Area Network. A LAN is a group of computers and devices connected together in a relatively small area (such as a house or an office). Your home network is considered a LAN.
- Page 56 TCP/IP Transmission Control Protocol/Internet Protocol. This is the standard protocol for data transmission over the Internet. Specify the WAN connection type required by your Internet Service Provider, then click "Apply" to provide detailed configuration parameters for the selected connection type. Specify one of the first five options to configure a WAN connection through the RJ-45 port.