
Related Manuals for Planet 2-Bay SATA NAS RAID Server NAS-7200


Summary of Contents for Planet 2-Bay SATA NAS RAID Server NAS-7200
- Page 1 2-Bay SATA NAS RAID Server NAS-7200 User’s Manual Version: 1.00 Date: July. 2008...
- Page 2 Copyright Copyright © 2008 by PLANET Technology Corp. All rights reserved. No part of this publication may be reproduced, transmitted, transcribed, stored in a retrieval system, or translated into any language or computer language, in any form or by any means, electronic, mechanical, magnetic, optical, chemical, manual or otherwise, without the prior written permission of PLANET.
- Page 3 use it. However, special attention must be paid to the dangers of electric shock and static electricity when working with electrical equipment. All guidelines of this and of the computer manufacture must therefore be allowed at all times to ensure the safe use of the equipment CE Mark Warning This is a Class B product.
-
Page 4: Table Of Contents
Table of Content Introduction... 4 1.1 Overview ... 4 1.2 Features ... 4 1.3 Package Contents ... 5 Basic Installation & Setup ... 6 2.1 Front Panel ... 6 2.2 Rear Panel... 8 2.3 HDD Install... 9 2.4 HDD Remote ... 10 2.5 Hardware Installation ... -
Page 5: Introduction
1. Introduction Thank you for purchasing PLANET SATA NAS Server, NAS-7200. In this installation guide, it illustrates the simply installation for user to install a HDD and install NAS-7200 to Windows system. 1.1 Overview This user’s manual explains how to operate the NAS-7200 from a computer. Basically, the user’s manual is written to be read on the computer display. -
Page 6: Package Contents
1.3 Package Contents User can find the following items in the package: • NAS-7200 • Quick Installation Guide • Setup CD • Ethernet Cable • Power Adapter with Power Core • EMI core NOTE: 1. If any of the above items are missing, please contact your dealer immediately. 2. -
Page 7: Basic Installation & Setup
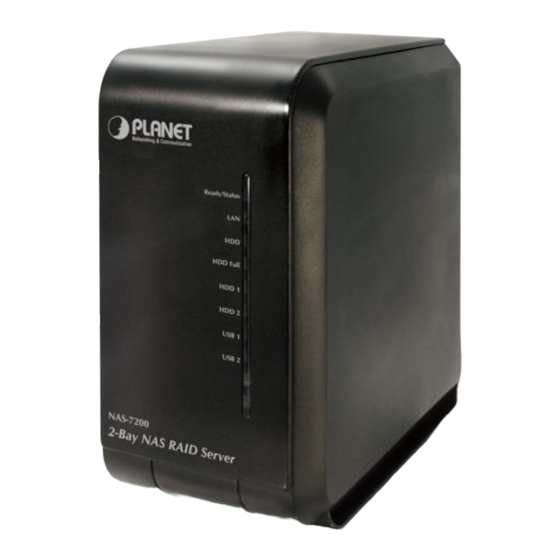
2. Basic Installation & Setup This chapter provides details of installing and configuring the NAS. 2.1 Front Panel Ready/Status Ready (Green) ON – Normal operation. OFF – No power. Blinking – This LED blinking during startup and shutdown. Status (Amber) ON –... - Page 8 HDD Full ON - Disk is completely full. No more data can be stored on this disk OFF -Normal operation, disk is not full. Blinking - Disk is 98% full (The Buzzer will also beep 3 times.) HDD 1 ON – Disk 1 installed OFF –...
-
Page 9: Rear Panel
2.2 Rear Panel Power Switch This is a spring-loaded "Soft Switch". If power is Off, press once to turn On. If power is On, press once to start the Shutdown sequence. During Shutdown, the Ready LED will blink. When Shutdown is completed, all LEDs will turn off. -
Page 10: Hdd Install
2.3 HDD Install The NAS-7200 supports two 3.5-inch Serial-ATA (SATA) hard drives. NAS-7200 does not support low profile or half high hard drive. 1. Make sure the NAS-7200 is powered off 2. Open rear cover of NAS-7200 3. Make sure your hard drive is SATA interface and make sure you back up all pre-existing data before use it on NAS-7200 4. -
Page 11: Hdd Remote
6. Put the rear cover of NAS-7200 back to finish HDD install 7. Secure the 2 HDDs by mounting 4 screws as figure below. 2.4 HDD Remove 1. Make sure the NAS-7200 is powered off with DC-plug removed 2. Remove the screws that fix the HDD you want to remove 3. -
Page 12: Hardware Installation
2.5 Hardware Installation 1. Connect the network cable to the NAS. 2. Connect the network cable to the LAN port on the rear of the NAS. Connect the other end to your hub or switch. 3. Connect the USB device to USB port 4. - Page 13 Remove the USB device. Removing a USB device - Method B Run the Windows utility Select "Safely Remove Drive" Select the desired NAS Click the "Eject" button. Wait for the "USB" LED turn off. (The Windows program will also display a message when it is safe to physically detach the USB device.) Remove the USB device.
-
Page 14: Configuration Nas
2.7 Configuration NAS • This procedure only needs to be done ONCE, by the NAS’s Administrator. • Other LAN users should follow the advice given in using your NAS described in the following section. Quick Setup with the NAS Wizard 1. - Page 15 4. The following screen will then be displayed. You can set the IP settings in this screen. Please click “Next” after the configured. Select this only if your LAN has a DHCP Server. Obtain an IP address automatically (DHCP Client) This option is recommended.
- Page 16 6. Please check the configured settings of this screen, if all the configure are correct. Please click “Save” button. 7. After click "Save", you will see the dialog box to prompt you again. Please click “OK” to save or click “Cancel to check the settings. 8.
-
Page 17: Basic Installation & Setup
3. Basic Installation & Setup Supported versions of Windows are: Windows 95/98/ME or later Windows NT 4.0, Windows 2000, Windows 2003, Windows XP and Windows Vista The following items need to be checked or configured: Network Logon (Windows 95/98/ME only) Locating the NAS on your LAN. -
Page 18: Using The Nas Server's Storage
3.2 Using the NAS Server’s Storage To use the NAS Server's storage, you should "Map" a drive letter to each folder on the NAS folder, which you wish to access. The "Network Drive" will then be available to all Windows programs. - Page 19 This drive will now be available in Windows Explorer, and from the File- Open or File-Save As dialog in all Windows applications. Note: If the USB device is not removed, it will not be re-connected. You must remove and re-insert the USB device to have it re-connected. When you try to access a folder, you may be prompted for a password, as shown below: If your Windows logon name is the same as your user name on the NAS, but the...
- Page 20 Select which share folder you want to map and select a drive letter for this share folder then click “Map” button. This drive will now be available in Windows Explorer, and from the File- Open or File-Save As dialog in all Windows applications. If you would like to map to NAS-7100 again when you have finish some configuration.
-
Page 21: Using The Nas Server's Printer
3.3 Using the NAS Server’s Printer Find out what printer is connected to the printer port on the NAS. Use Network Neighborhood (or My Network Places) to locate the NAS, as shown in Network Browse earlier. Double-click the NAS icon. A printer icon should be shown. Right-click the printer icon, and select Install, as shown above. -
Page 22: Using The Web File Sharing
3.4 Using the Web File Sharing You can access and download files on the NAS using your Web Browser, even from non-Windows platforms. To access data stored on the NAS using your Web Browser: Start your WEB browser. In the Address box, enter "HTTP://" and the NAS Server's IP Address. Note: If the port number used by the NAS has been changed (on the System screen) from the default (80), you must specify the correct port number when you connect. -
Page 23: Changing Your Password
3.5 Changing Your Password Although the Administrator of the NAS must create your User Name and initial password, you can then change your own password whenever you wish, as follows: To change your password, click on the "Change Password" link on home page. The following screen will be displayed. -
Page 24: Web-Based Management
4. Web-based Management This chapter provides setup details of the NAS’s Web-based Interface. 4.1 Introduction This Chapter describes using the Web-based Administration interface. For details on using the Windows utility, see the Basic Installation & Setup Chapter. 4.2 The Web-based Administrator Interface To access the Administration interface, click the "Administration"... -
Page 25: Setup Menu - User Screen
4.3 Setup Menu - User Screen Start-up screen will be as follow no matter an ordinary users or an administrator. This is the first screen that appears after selecting "Administration". This screen allows you to manage the Users, which exist on the NAS Server. The "guest,"... - Page 26 Name User Name. Note that punctuation and other special characters (e.g. * / | \ ) cannot be used in the name. Comment Enter a comment if you wish. (Optional) Password Enter the user's password in these fields. Verify password These fields are also used to change an existing user's password, as follows: Select the desired user...
- Page 27 Buttons Groups Clicking this button will display the Groups of which the selected user is a member. You can then add this user to other Groups, or remove existing membership. Delete Click this button to delete the selected user. Clear Use this button to clear the form, preparing the form for the entry of a new user.
- Page 28 Group button To click Group button, it will pop up following screen: This screen allows you to check which Groups this user is a member of, and to add or revoke membership. User Name The name of the User being modified is shown at the top of the screen. Member of The "Member of:"...
-
Page 29: Setup Menu - Status Screen
4.4 Setup Menu - Status Screen This screen used to check the details and status of NAS System Server Name - Current name of the NAS. This name will be shown in "Network Neighborhood" or "My Network Places". The NAS has one default server name. - Page 30 Printer The NAS supports USB printer, and it can share the printer after you connect one printer into one USB port. • Current Status - Possible states are On Line, Off Line, and or No Printer. • No. of Print Jobs - The total number of print jobs in the Print Queue, waiting to be printed.
- Page 31 Buttons Shutdown Now Shutdown the Server immediately. This will break all existing connections, including this one. Clicking this button does NOT save any data you have entered. Restart Now Restart (reboot) the Server. This will break all existing connections, including this one. The NAS Server will immediately restart, but could take a few minutes before it is available again.
-
Page 32: Setup Menu - Network Screen
4.5 Setup Menu - Network Screen This screen allows you to set the IP Address and related information required for TCP/IP networks. Obtain IP Address Do NOT select this unless you have a DHCP Server on your LAN. A automatically DHCP Server can provide an IP Address to PCs and other devices (DHCP Client) when they boot. - Page 33 The Network Attached Storage can act as a DHCP (Dynamic Host Configuration Protocol) Server, providing IP Addresses and related data to PCs and other devices. Enable Use this to Enable/Disable the DHCP Server. If you already have a DHCP Sever, do not enable this feature. Start Address Enter the beginning of the range of IP Addresses to be allocated by the DHCP Server.
- Page 34 Backup 2 IP Address of the DNS Server to be tried if the second server is busy. Enable WINS Enable this if your LAN has a WINS Server. If enabled, this device will register with the WINS Server. This will allow users on the LAN to locate this device through a Router.
-
Page 35: Setup Menu - System Screen
4.6 Setup Menu - System Screen This screen contains some basic information about your NAS. After initial configuration, no changes should be required. Name If you wish, you can change the name of the NAS Server. Note that punctuation and other special characters (e.g. * " / \ [ ] : ; | = , + ? < > ' ` ( ) # $ %) cannot be used in the name. - Page 36 Time Zone Select the correct time zone for your location. Change System Date Check this box for data and time update. The date and time setting is and Time as not sent to the server without check this box. Following Local Date Enter the local date.
- Page 37 be performed (for example) at 11.00 pm each day. Sync Now Use this button to synchronize with the NTP server immediately. Language Specify the language environment for FTP clients and Download Environment Manager. Enable Download If enabled, you can use Download Manager function on homepage to Manager download files with FTP and HTTP URLs.
- Page 38 Send E-Mail... Check this to enable the sending of e-mail alerts by the NAS. Alerts will be sent when there is some problem requiring the Administrator's attention. E-Mail Address Enter from 1 to 3 E-Mail Addresses. The messages generated by the NAS will be sent to these destinations.
- Page 39 Authentication enter your login name and password for the SMTP server. This is usually the same as the POP3 server used to receive e-mail. Meanwhile, you need specify the "From Address" as the E-Mail Address that is correlative with the Account Name. Account Name Specify the login name that is used to login the SMTP server.
- Page 40 Environment above. Allow anonymous The FTP server will prompt for a Username and Password when clients FTP login attempt to connect. If this option is Enabled, users will be able to enter "anonymous" as the Username, and any string as the Password. If this option is Disabled, users must provide their correct Name and Password.
- Page 41 Buttons Save Click this button to save the settings on the page. Cancel Click this button to cancel the modifications on the page. Restore to Default Click this button to restore all system and network settings to default. Clear Now Click this button to delete all files that exist in the Recycle Bin immediately.
-
Page 42: Setup Menu - Media Screen
4.7 Setup Menu - Media Screen This screen allows you to configure the settings for media functions. Enable iTunes If enabled, then the user can listen music that stored in the NAS via Server iTunes extensions .mp3, .m4a, and .m4p. And the iTunes Server uses port number 3689. - Page 43 Play by Specify the order that MP3 should be broadcasted. Content Directory Specify the location in which MP3 need be broadcasted. Enable Media If enabled, the NAS can be located by compatible Media Adapters, using Server the UPnP AV standard developed by Intel and its partners. Media content on the NAS (in the Content Directories specified below) can then be accessed and played by the Media Adapters.
-
Page 44: Advanced Menu - Groups Screen
4.8 Advanced Menu – Groups Screen This screen allows you to manage the User Groups that exist on the NAS Server. New Group Use this area to create a new group. Existing Groups This shows the list of all Groups. Two groups - "everyone"... - Page 45 Access Rights Screen This screen allows you to view and modify the Groups which can access this Share. Note: The administrators group ALWAYS has Read/Write (R/W) access to ALL shares. Group Name The name of the Group being modified is shown above the 2 lists of shares.
- Page 46 Group Members This screen allows you to check which users are members of the group, and to add or revoke membership of this group. Note: The "everyone" Group ALWAYS contains all users. You cannot add or remove members. Group Name The name of the Group being modified is shown at the top of the screen.
-
Page 47: Advanced Menu - Shares Screen
4.9 Advanced Menu – Shares Screen This screen allows you to manage the Shares that exist on the NAS Server. A "Share" is a folder (directory) on the NAS Server that a User Group can access. Only the NAS Server Administrators can create Shares. However, within a Share, users who have access to that Share can create other folders (directories) as well as files. - Page 48 Name The current name will be displayed. The Share Name can be changed if you wish. This does not change the name of the folder (directory) associated with the Share. Note that punctuation and other special characters (e.g. " / \ [ ] : ; | = , + * ? <...
- Page 49 Change the Share properties as required. Note that you can NOT change the location. Click the "Save" button to save your changes. Share Access This screen allows you to view and modify the Groups, which can access this share. Note: The administrators group ALWAYS has R/W access to ALL shares Share Name The name of the Share being modified is shown above the 2 lists of Groups.
- Page 50 Operation To Add Access Select the Group or Groups in the right-hand column, then click the "<< Rights Read Access" to provide Read-Only access, or the "<< R/W Access" Button to provide Read-Write access. Multiple Groups can be selected by holding down the CTRL Key while selecting. To Remove Access Select the Group or Groups in the left-hand column, then click the "No Rights...
-
Page 51: Advanced Menu - Backup Screen
4.10 Advanced Menu – Backup Screen There are 2 types of backup: Configuration Backup - This facility allows you to Backup (Download) and Restore (Upload) the NAS's configuration file. The configuration file contains all network information, as well as the User, Group, and Share information. It does NOT include any information about the files stored on the NAS NOTE: Using this feature will overwrite (destroy) any existing configuration information. - Page 52 Date/Time - The date and time of the last backup are shown. Backup Now Run the selected backup job immediately. Status This button will open a sub-window that shows the status of all Backup jobs. Modify This button will open a sub-window where you can change the settings of the selected backup job.
- Page 53 Add Backup Job From this screen, you can add new backup jobs, which be displayed on the Backup screen. Name Enter a suitable name for this job. Backup Type Select the desired backup type. Full - all files will be backed up. Incremental - only changed files will be backed up.
- Page 54 Remote Location Enter the details of the remote device. Name - enter the name of the other device, as seen on the network. Shared Folder - Enter the name of the shared folder. Depending on the direction of the backup, this is either the share to be backed up, or the destination for the backed-up data.
-
Page 55: Advanced Menu - Disk Screen
4.11 Advanced Menu – Disk Screen This screen allows you to maintain the disks in this NAS Disk Mode - Disk mode select: Separate Disk, JBOD/LVM, Raid 0 and Raid 1. Any data on the disk will be lost it if change disk mode! Disk Mode This indicates the current working mode of Internal Disks. - Page 56 Format Disk - use this after installing a new disk. The disk will be partitioned and quick-formatted. Any data on the disk will be lost! Format This includes status of Internal Disk and USB Disks. Internal Disk: No Installed - No disk is inserted, or connection or disk has failed. Not Formatted - Disk has been detected, but it is not ready for use.
- Page 57 Scandisk - running the Scandisk (Disk Check) program will check the file system, and correct any errors found. This program should be run regularly. The Scandisk program will also run automatically if an error condition is detected, such as an abnormal shutdown due to loss of power.
- Page 58 S.M.A.R.T. - S.M.A.R.T. (Self-Monitoring, Analysis, and Reporting Technology) can warn of impending problems with the Hard Disk, before it actually fails. This test should be performed regularly. S.M.A.R.T. This can have any of the following values: Not Installed - No disk is available. Not Checked - No S.M.A.R.T.
- Page 59 Buttons Change Click this button to enter the screen of changing Disk Mode. Format Use this button to format the disk. This will partition and quick-format the new disk. WARNING! This will destroy any data on the disk. Once started, this process can NOT be halted or reversed.
-
Page 60: Advanced Menu - Upgrade Screen
4.12 Advanced Menu – Upgrade Screen The Upgrade facility allows you to upgrade the NAS Server's software. You need to obtain the upgrade file from your dealer or supplier. Note that the NAS Server is unavailable during the upgrade process, and all connections will be lost, including this one. -
Page 61: Download Manager
5. Download Manager Download manager allow you to download file via FTP, HTTP or BT without PC. Just set on NAS and will base on your setting to download file automatically. 5.1 The Web-base Download Management Interface To access the Download Manager interface, click the "Download Manager" link on the home page. -
Page 62: Download Management Screen
5.2 Download Management Screen This screen allows you manage your download tasks. Manager Status Status of the Download Manager, it can be 'Enabled' or 'Disabled'. Owner Name of the user that logins the Download Manager. File Name Name of the saved file in the NAS for the task. File Size Total size of the downloaded file for the task. - Page 63 Action Task Details View the detailed information of the task. Run Task Start to run the selected task. Stop Task Stop the selected task. Delete Task Delete selected tasks. Move Up Increase the priority of the task. Move Down Decrease the priority of the task. Logout Leave the screen of Download Manager.
-
Page 64: Add New Task Screen
5.3 Add New Task Screen This screen allows you define download task of Download Manager. Type Specify type of the file to be downloaded. It can be HTTP/FTP or BT (Bit Torrent). URL (HTTP/FTP) Specify the URL if type is HTTP/FTP. Torrent File Specify the torrent file with which you need download files. - Page 65 Share Folder Select name of the share where downloaded file will be saved. Subdirectory Select the subdirectory under the selected share where downloaded file will be saved. Action Save Save the new task. Cancel Cancel the modifications on the web page. Close Close the window.
-
Page 66: Download Manager
6. Download Manager If your LAN is connected to the Internet, typically by a Broadband Gateway/Router and Broadband modem, you can make the NAS available via the Internet. Features available to Internet users include: Using a Web browser to view and download files. Remote management 6.1 Making the NAS available via the Internet If your LAN is connected to the Internet via a Router or Gateway, you can make the NAS... -
Page 67: Using Web Browser From The Internet
"Web" entry for /Port Forwarding / Virtual Server must then use the port number specified on the NAS System screen. To connect to the NAS, Internet users need to know and use the Internet IP address of your Router/Gateway. (If the port number is not 80, they also need to know the port number.) If you have a domain name, users can connect using the domain name instead of the IP address. -
Page 68: Printing Via Ipp (Internet Printing Protocol)
6.3 Printing via IPP (Internet Printing Protocol) To print to the NAS via the Internet, the port used for IPP (TCP port 631) must be associated with the NAS. The NAS is an IPP Server. To use IPP, your PC must be an IPP client. Windows 2000 and XP have built-in support for IPP, so there is no need to use the provided IPP client program. - Page 69 Click "Next" If the connection can be established, and the printer on that port is on-line, the following dialog will be displayed. Click "OK", and then select the printer manufacturer and model to match the printer connected to the port on the IPP Server. Click "Next", and complete the Wizard.
- Page 70 Configure this screen as follows: IPP Server Enter the Internet IP address used to connect to the NAS, as follows. http://ip_address:631/printers/printer_name Where: IP_address represents the IP Address used to access the NAS. (As explained earlier, this may be the Internet address of a Gateway, rather than the NAS itself.) Printer_name is the name of the printer, as set on the NAS System screen.
-
Page 71: Remote Management
Changing the IPP Port Settings After the IPP port is created, you can reach the IPP Port screen via the Windows Port Settings button: Open the Printers folder (Start - Settings - Printers) Right-click the IPP Printer, and select Properties. Locate and click the Port Settings button (on the Details or Port tab, depending on your version of Windows). -
Page 72: Appendix A: Licenses
Appendix A: Licenses Overview Many software components are covered by the GNU GPL (General Public License). Some are covered by the BSD License. The following table provides details of the various components. The text of both Licenses is below. Package Name bash bftpd BusyBox... - Page 73 quota Samba server sh-util smtpclient sysVinit telnet-server textutils thttpd Tinylogin Ucsc-smartsuite udhcp upnpsdk util-linux vixie-cron XFS patch xfsdump xfsprogs xinetd BSD License BSD License Information BSD or GPL Distributable Distributable...
- Page 74 Copyright (c) 2002. All rights reserved. Redistribution and use in source and binary forms, with or without modification, are permitted provided that the following conditions are met: Redistributions of source code must retain the above copyright notice, this list of conditions and the following disclaimer.
- Page 75 To protect your rights, we need to make restrictions that forbid anyone to deny you these rights or to ask you to surrender the rights. These restrictions translate to certain responsibilities for you if you distribute copies of the software, or if you modify it. For example, if you distribute copies of such a program, whether gratis or for a fee, you must give the recipients all the rights that you have.
- Page 76 b) You must cause any work that you distribute or publish, that in whole or in part contains or is derived from the Program or any part thereof, to be licensed as a whole at no charge to all third parties under the terms of this License.
- Page 77 4. You may not copy, modify, sublicense, or distribute the Program except as expressly provided under this License. Any attempt otherwise to copy, modify, sublicense or distribute the Program is void, and will automatically terminate your rights under this License. However, parties who have received copies, or rights, from you under this License will not have their licenses terminated so long as such parties remain in full compliance.
- Page 78 countries, so that distribution is permitted only in or among countries not thus excluded. In such case, this License incorporates the limitation as if written in the body of this License. 9. The Free Software Foundation may publish revised and/or new versions of the General Public License from time to time.
-
Page 80: Ec Declaration Of Conformity
*Model Number NAS-7200 * Produced by: Manufacturer‘s Name : Planet Technology Corp. Manufacturer‘s Address : 11F, No. 96, Min Chuan Road, Hsin Tien, Taipei, Taiwan, R.O.C. is herewith confirmed to comply with the requirements set out in the Council Directive on the Approximation of the Laws of the Member States relating to Electromagnetic Compatibility (89/336/EEC, 92/31/EEC, 93/68/EEC).