Table of Contents
Advertisement
Available languages
Available languages
Advertisement
Chapters
Table of Contents

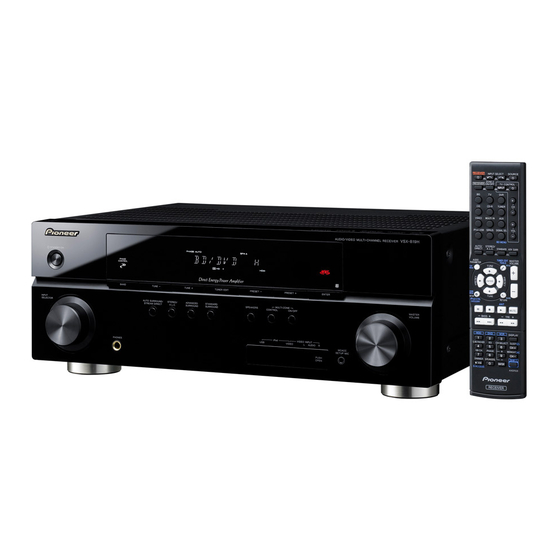
Related Manuals for Pioneer VSX-819H-S


Summary of Contents for Pioneer VSX-819H-S
- Page 1 VSX-819H -S/-K...
-
Page 2: Operating Environment
L or coloured RED. How to replace the fuse: Open the fuse compartment with a screwdriver and replace the fuse. Thank you for buying this Pioneer product. Please read through these operating instructions so you will know how to operate your model properly. - Page 3 Voltage selector You can find the voltage selector switch on the rear panel of multi-voltage models. The factory setting for the voltage selector is 220-240 V. Please set it to the correct voltage for your country or region. • Saudi Arabia operates on 127 V and 220 V mains voltage.
- Page 4 (2) this device must accept any interference received, including interference that may cause undesired operation. Product Name: AUDIO/VIDEO MULTI-CHANNEL RECEIVER Model Number: VSX-819H-K / VSX-819H-S Responsible Party Name: PIONEER ELECTRONICS SERVICE, INC. Address: 1925 E. DOMINGUEZ ST. LONG BEACH, CA 90801-1760, U.S.A. Phone: 1-800-421-1404 D8-10-1-2_A1_En...
-
Page 5: Table Of Contents
Contents 01 Before you start Checking what’s in the box ....7 Loading the batteries....7 Installing the receiver . - Page 6 10 Controlling the rest of your system Setting the remote to control other components ......52 Selecting preset codes directly .
-
Page 7: Before You Start
Before you start Chapter 1: Before you start Checking what’s in the box Please check that you’ve received the following supplied accessories: • Setup microphone • Remote control • Dry cell batteries (AAA size IEC R03) x2 • AM loop antenna •... -
Page 8: 02 5 Minute Guide
5 minute guide Chapter 2: 5 minute guide Introduction to home theater Home theater refers to the use of multiple audio tracks to create a surround sound effect, making you feel like you’re in the middle of the action or concert. The surround sound you get from a home theater system depends not only on your speaker setup, but also on the source and the sound settings of the receiver. -
Page 9: Automatically Setting Up For Surround Sound
5 minute guide Play a BD/DVD, and adjust the volume. Make sure that BD/DVD is showing in the receiver’s display. If it isn’t, press BD on the remote to set the receiver to the BD/DVD input. There are several other sound options you can select. - Page 10 5 minute guide Follow the instructions on-screen. • Make sure the microphone is connected. • Make sure the subwoofer is on and the volume is turned up. • See below for notes regarding background noise and other possible interference. Wait for the test tones to finish. A progress report is displayed on-screen while the receiver outputs test tones to determine the speakers present in your setup.
-
Page 11: Other Problems When Using The Auto Mcacc Setup
5 minute guide Other problems when using the Auto MCACC Setup If the room environment is not optimal for the Auto MCACC Setup (too much background noise, echo off the walls, obstacles blocking the speakers from the microphone) the final settings may be incorrect. -
Page 12: Connecting Up
Connecting up Chapter 3: Connecting up Making cable connections Make sure not to bend the cables over the top of this unit (as shown in the illustration). If this happens, the magnetic field produced by the transformers in this unit may cause a humming noise from the speakers. -
Page 13: Analog Audio Cables
Connecting up Analog audio cables Use stereo RCA phono cables to connect analog audio components. These cables are typically red and white, and you should connect the red plugs to R (right) terminals and white plugs to L (left) terminals. Analog audio cables Right (red) Left (white) -
Page 14: Connecting A Tv And Blu-Ray Disc Player Or Dvd Player
Connecting up Connecting a TV and Blu-ray Disc player or DVD player This page shows you how to connect your BD/DVD player and TV to the receiver. VIDEO IN ANALOG AUDIO OUT Connect the HDMI output on your BD/DVD player to the HDMI BD/DVD IN input on this receiver. -
Page 15: Connecting The Multichannel Analog
Connecting up Connect the composite video output and the stereo analog audio outputs BD/DVD player to the BD/DVD inputs on this receiver. Use a standard RCA video cable RCA phono cable for the connection. • If your BD/DVD player has multichannel analog outputs, see Connecting the multichannel analog outputs below for how to connect it. -
Page 16: Connecting A Satellite Receiver Or Other Digital Set-Top Box
Connecting up Connecting a satellite receiver or other digital set-top box Satellite and cable receivers, and terrestrial digital TV tuners are all examples of so-called ‘set-top boxes’. This receiver HDMI HDMI BD/DVD TV/SAT TV/SAT DVR/VCR If your set-top box has an HDMI output, connect it to an HDMI TV/SAT IN on this reciever. -
Page 17: Connecting Other Audio Components
Connecting up Connecting other audio components The number and kind of connections depends on the kind of component you’re connecting. Follow the steps below to connect a CD-R, MD, DAT, tape recorder or other audio component. If your component has a digital output, connect this to a digital input on the receiver as shown. -
Page 18: Connecting An Hdd/Dvd Recorder, Vcr And Other Video Sources
Connecting up Connecting an HDD/DVD recorder, VCR and other video sources This receiver has audio/video inputs and outputs suitable for connecting analog or digital video recorders, including VCRs and HDD/DVD recorders. This receiver HDMI OUT If your video component has an HDMI output, connect it to an HDMI DVR/VCR IN on this receiver. -
Page 19: Using The Component Video Jacks
Connecting up Using the component video jacks Component video should deliver superior picture quality when compared to composite video. A further advantage (if your source and TV are both compatible) is progressive-scan video, which delivers a very stable, flicker-free picture. See the manuals that came with your TV and source component to check whether they are compatible with progressive-scan video. -
Page 20: Connecting To The Front Panel Video Terminal
Connecting up Connecting to the front panel video terminal Front video connections are accessed via the front panel using the INPUT SELECTOR or VIDEO button on the remote control. There are standard audio/video jacks. Hook them up the same way you made the rear panel connections. •... -
Page 21: Using External Antennas
Connecting up Using external antennas To improve FM reception Connect an external FM antenna as shown below. 75 Ω coaxial cable ANTENNA J-shaped plug (not supplied) LOOP To improve AM reception Connect a 5 m to 6 m length of vinyl-coated wire to the AM antenna terminal without disconnecting the supplied AM loop antenna. -
Page 22: Connecting The Speakers
Connecting up Connecting the speakers A complete setup of six speakers (including the subwoofer) is shown here but everyone’s home setup will vary. Simply connect the speakers you have in the manner shown below. The receiver will work with just two stereo speakers (the front speakers in the diagram) but using at least three speakers is recommended, and a complete setup is best for surround sound. -
Page 23: Use The Pre Out Outputs To Connect The Surround Back Speakers
Connecting up Bare wire connections A-Speaker terminals: Twist exposed wire strands together. Loosen terminal and insert exposed wire. Tighten terminal. 10 mm B-Speaker terminals: Twist exposed wire strands together. Push open the tabs and insert exposed wire. Release the tabs. 10 mm Caution •... -
Page 24: Placing The Speakers
Connecting up Placing the speakers To achieve the best possible surround sound, install your speakers as shown below. 5.1 channel surround system: Center Front left Subwoofer 120° Surround left 6.1 channel surround system: Center Front left Subwoofer 120° Surround left Surround Back 7.1 channel surround system: Center... -
Page 25: Switching The Speaker System
Connecting up • If the surround speakers cannot be set directly to the side of the listening position with a 7.1-channel system, the surround effect can be enhanced by turning off the UP Mix function (see Setting the Up Mix function on page 38). -
Page 26: Plugging In The Receiver
Check the power cord once in a while. If you find it damaged, ask your nearest Pioneer authorized independent service company for a replacement. • Do not use any power cord other than the one supplied with this unit. -
Page 27: Controls And Displays
Controls and displays Chapter 4: Controls and displays Front panel STANDBY/ON PHASE CONTROL BAND INPUT SELECTOR PHONES STANDBY/ON INPUT SELECTOR dial Selects an input source. Tuner control buttons BAND Switches between AM, FM ST (stereo) and FM MONO radio bands (page 49). TUNE +/–... -
Page 28: Operating Range Of Remote Control
Controls and displays ADVANCED SURROUND Switches between the various surround modes (page 35). STANDARD SURROUND Press for Standard decoding and to switch between the various 2 Pro Logic II, 2 Pro Logic IIx and NEO:6 options (page 34). SPEAKERS Use to change the speaker system (page 25). 10 MULTI ZONE controls If you’ve made MULTI-ZONE connections (see MULTI-ZONE listening on page 47) use these... -
Page 29: Display
Controls and displays Display PHASE Lights when the Phase Control is switched on (page 11). AUTO Lights when the Auto Surround feature is switched on (see Auto playback on page 34). Lights when a stereo FM broadcast is being received in auto stereo mode. TUNE Lights when a normal broadcast channel is being received. - Page 30 Controls and displays Lights when a source with Dolby Digital Plus encoded audio signals is detected. 2 HD Lights when a source with Dolby TrueHD encoded audio signals is detected. Lights to indicate Dolby Digital EX decoding. 2PLllx Lights to indicate 2 Pro Logic II / 2 Pro Logic IIx decoding (see Listening in surround sound on page 34 for more on this).
-
Page 31: Remote Control
Controls and displays Remote control RECEIVER INPUT SELECT SOURCE ZONE 2 RECEIVER ON/OFF TV CONTROL INPUT CD-R TUNER VIDEO MULTI IN iPod USB DIMMER SIGNAL SEL BD MENU AUTO/ STEREO/ DIRECT A.L.C. STANDARD ADV SURR AUDIO TUNER EDIT MASTER PARAMETER TOOLS VOLUME MENU... - Page 32 Press RECEIVER first to access: BASS –/+ Use to adjust Bass TRE –/+ Use to adjust Treble Press TV first to access: DTV/TV Switches between the DTV and analog TV input modes for Pioneer flat screen TVs.
- Page 33 Controls and displays 12 Number buttons and other component controls Use the number buttons to directly select a radio frequency (page 49) or the tracks on a CD, DVD, etc. There are other buttons that can be accessed after the RECEIVER button is pressed.
-
Page 34: Listening To Your System
Listening to your system Chapter 5: Listening to your system Important • The listening modes and many features described in this section may not be available depending on the current source, settings and status of the receiver. Auto playback The simplest, most direct listening option is the Auto Surround feature. -
Page 35: Using The Advanced Surround Effects
Listening to your system When the surround back speaker is connected. If you connected surround back speakers, see also Using surround back channel processing on page 37. With two channel sources, you can select from: • DOLBY PLIIx MOVIE – Up to 7.1 channel sound, especially suited to movie sources •... -
Page 36: Listening In Stereo
Listening to your system Listening in stereo When you select STEREO you will hear the source through just the front left and right speakers (and possibly your subwoofer depending on your speaker settings). Dolby Digital and DTS multichannel sources are downmixed to stereo. -
Page 37: Using Stream Direct
Listening to your system Using Stream Direct Use the Stream Direct modes when you want to hear the truest possible reproduction of a source. All unnecessary signal processing is bypassed. AUTO/ AUTO/ STEREO/ DIRECT DIRECT A.L.C. STANDARD ADV SURR AUDIO TUNER EDIT MASTER •... -
Page 38: Setting The Up Mix Function
Listening to your system • With a 7.1-channel surround system, audio signals that have undergone matrix decoding processing through surround back channel processing to which the Up Mix function is added are output from the surround back speakers. RECEIVER INPUT SELECT SOURCE ZONE 2 RECEIVER... -
Page 39: Setting The Audio Options
Listening to your system Setting the Audio options There are a number of additional sound settings you can make using the AUDIO PARAMETER menu. The defaults, if not stated, are listed in bold. Important • The AUDIO PARAMETER menu is not available with MULTI IN input (see Selecting the multichannel analog inputs on page 41). - Page 40 Listening to your system Setting What it does Adjusts the level of dynamic range for movie soundtracks (Dynamic Range optimized for Dolby Digital, DTS, Dolby Digital Plus, Dolby Control) TrueHD, DTS-HD and DTS Master Audio (you may need to use this feature when listening to surround sound at low volumes).
-
Page 41: Playing Other Sources
Listening to your system Playing other sources Turn on the power of the playback component. Turn on the power of the receiver. Select the source you want to playback. Use the MULTI CONTROL buttons (INPUT SELECTOR). Start playback of the component you selected in step 1. -
Page 42: The System Setup Menu
The System Setup menu Chapter 6: The System Setup menu Using the System Setup menu The following section shows you how to make detailed settings to specify how you’re using the receiver, and also explains how to fine-tune individual speaker system settings to your liking. -
Page 43: Speaker Setting
The System Setup menu Select ‘Manual SP Setup’ then press ENTER. System Setup 2.Manual SP Setup 1.Auto MCACC a.Speaker Setting 2.Manual SP Setup b.Crossover Network 3.Input Assign c.Channel Level d.Speaker Distance Return Select the setting you want to adjust. If you are doing this for the first time, you may want to adjust these settings in order: •... -
Page 44: Crossover Network
The System Setup menu • Surr. Back – Select the number of surround back speakers you have (one, two Select LARGE if your surround or none). back speakers reproduce bass frequencies effectively. Select SMALL to send bass frequencies to the other speakers or subwoofer. -
Page 45: Speaker Distance
The System Setup menu Select a setup option. • Manual – Move the test tone manually from speaker to speaker and adjust individual channel levels. • Auto – Adjust channel levels as the test tone moves from speaker to speaker automatically. - Page 46 The System Setup menu Press RECEIVER on the remote control, then press the SETUP button. An on-screen display (OSD) appears on your TV. Use /// and ENTER on the remote control to navigate through the screens and select menu items. Press RETURN to confirm and exit the current menu.
-
Page 47: Using The Multi-Zone Feature
Using the MULTI-ZONE feature Chapter 7: Using the MULTI-ZONE feature MULTI-ZONE listening This receiver can power up to two independent systems in separate rooms after you have made the proper MULTI-ZONE connections. An example MULTI-ZONE setup is shown below. SURROUND ZONE2 MONITOR OUT BD/DVD IN TV/SAT IN AUDIO IN... -
Page 48: Using The Multi-Zone Controls
Using the MULTI-ZONE feature Using the MULTI-ZONE controls The following steps use the front panel controls to select sources. See MULTI-ZONE remote controls below. STANDBY/ON PHASE CONTROL BAND TUNE – TUNE TUNER EDIT INPUT AUTO SURROUND/ STEREO/ ADVANCED STANDARD SELECTOR STREAM DIRECT A.L.C. -
Page 49: Using The Tuner
Using the tuner Chapter 8: Using the tuner Listening to the radio The following steps show you how to tune in to FM and AM radio broadcasts using the automatic (search) and manual (step) tuning functions. Once you are tuned to a station you can memorize the frequency for recall later—... -
Page 50: Listening To Station Presets
Using the tuner Press PRESET / to select the station preset you want. You can also use the number buttons. Press ENTER. After pressing ENTER, the preset number stop blinking and the receiver stores the station. Listening to station presets You will need to have some presets stored to do this. -
Page 51: Making Recordings
Making recordings Chapter 9: Making recordings Making an audio or a video recording You can make an audio or a video recording from the built-in tuner, or from an audio or video source connected to the receiver (such as a CD player or TV). Keep in mind you can’t make a digital recording from an analog source or vice-versa, so make sure the components you are... -
Page 52: Controlling The Rest Of Your System
Controlling the rest of your system Chapter 10: Controlling the rest of your system Setting the remote to control other components Most components can be assigned to one of the MULTI CONTROL buttons using the component’s manufacturer preset code stored in the remote. -
Page 53: Controls For Tvs
Press to switch the component assigned to the TV button on or off. DTV/TV Switches between the DTV and analog TV input modes for Pioneer flat screen TVs. TOP MENU Switches TEXT ON/OFF for TVs. HOME MENU Use as the GUIDE button for navigating. -
Page 54: Controls For Other Components
Controlling the rest of your system Controls for other components This remote control can control these components after entering the proper codes or teaching the receiver the commands (see Controlling the rest of your system on page 52 for more on this). Use the MULTI CONTROL buttons to select the component. - Page 55 Controlling the rest of your system Button(s) Function DISPLAY Press to display information. TOP MENU Displays the disc ‘top’ menu of a BD/DVD player. MENU Displays menus for the current BD/DVD or DVR you are using. Pauses the tape. ...
-
Page 56: Preset Code List
JVC 2024, 2041, 2057 2026, 2032, 2036, 2075 Kansai 2095 Philips 2005, 2011, 2022, Kennex 2093 2023, 2031, 2039, 2062 Kenwood 2051 Pioneer 2004, 2012, 2014, KeyPlug 2093 2049, 2120, 2121, 2122, Kiiro 2093 2123, 2124, 2125 Kingavon 2089 Pointer 2093... - Page 57 Controlling the rest of your system AudioTon 0010, 0026, 0114 Ausind 0017 Manufacturer Code Autovox 0017, 0023, 0025, A.R. Systems 0040 0026, 0114 Acme 0026 Awa 0113, 0114 Acura 0027, 0039 Baird 0114 ADC 0025 Bang & Olufsen 0023, Admiral 0023, 0024, 0025, 0115 0030, 0031 Basic Line 0027, 0028,...
- Page 58 0056, 0058, 0059, 0067, 0068, 0080, 0081, 0087, 0090, 0097, 0100 Phoenix 0010, 0023, 0034, 0037, 0040, 0113 Phonola 0023, 0034, 0037, 0040, 0113 Pioneer 0010, 0031, 0033, 0034, 0037, 0040, 0120 Plantron 0025, 0034, 0039, 0040 Playsonic 0114 Poppy 0027, 0039...
- Page 59 Controlling the rest of your system Prandoni-Prince 0017, SBR 0037, 0040 SCHAUB LORENTZ 0031 0030 Precision 0026, 0114 Schneider 0026, 0028, Prima 0027, 0031, 0039 0034, 0037, 0040, 0075, Profex 0027, 0039 0114 Profi-Tronic 0034, 0040 SEG 0025, 0026, 0029, 0032, Proline 0034, 0040 0037, 0039, 0040, 0075, Prosonic 0010, 0026, 0037,...
- Page 60 Interbuy 1005, 1017 Philco 1017 Interfunk 1006 Philips 1006, 1012, 1019 Intervision 1000, 1018 Phonola 1006 Irradio 1005, 1007, 1017 Pioneer 1006, 1120 ITT 1001 Portland 1003, 1004, 1018 ITV 1003, 1005, 1018 Prinz 1000 JVC 1001, 1013 Profex 1007...
-
Page 61: Other Connections
• Features such as the equalizer cannot be controlled using this receiver, and we recommend switching the equalizer off before connecting. • Pioneer cannot under any circumstances accept responsibility for any direct or indirect loss arising from any inconvenience or loss of recorded material resulting from the iPod failure. -
Page 62: Ipod Playback
(e.g., albums). Note 1 The controls of your iPod (excluding iPod touch or iPhone) will be inoperable when connected to this receiver (Pioneer shows in the iPod display). 2 • Note that non-roman characters in the title are displayed as •... -
Page 63: Watching Photos And Video Content
Other connections Button What it does Press repeatedly to switch between Shuffle Songs, Shuffle Albums and Shuffle Off. DISPLAY Press repeatedly to change the song playback information displayed in the front panel display. / When browsing, press to move to previous/next levels. -
Page 64: Connecting A Usb Device
(MP3 players) of format FAT16/32. It is not possible to connect this receiver to a personal computer for USB playback. • Pioneer cannot guarantee compatibility (operation and/or bus power) with all USB mass storage devices and assumes no responsibility for any loss of data that may occur when connected to this receiver. -
Page 65: Compressed Audio Compatibility
Other connections Button What it does / During playback, press to skip to previous/next track. / TOP MENU Press to return to the menu screen. RETURN Press to return to the previous level. Important If a USB Error message lights in the display, try following the points below: •... -
Page 66: Additional Information
Take a look at the other components and electrical appliances being used, because sometimes the problem may lie there. If the trouble isn’t sorted out even after going through the checks below, ask your nearest Pioneer authorized independent service company to carry out repair work. - Page 67 Additional information Problem Remedy Considerable noise in radio • Connect the antenna (page 20) and adjust the position for best reception. broadcasts. • Route any loose cables away from the antenna terminals and wires. • Fully extend the FM wire antenna, position for best reception, and secure to a wall (or connect an outdoor FM antenna).
-
Page 68: Hdmi
Additional information HDMI Symptom No picture or sound. No picture. OSD does not appear. No sound, or sound suddenly ceases. Important information regarding the HDMI connection There are cases where you may not be able to route HDMI signals through this receiver (this depends on the HDMI equipped component you are connecting-check with the manufacturer for HDMI compatibility information). -
Page 69: Ipod Messages
Additional information iPod messages Symptom Cause iPod/USB Error 1 There is a problem with the signal path from the (I/U ERR1) iPod to the receiver. iPod/USB Error 2 The software version being used with the iPod (I/U ERR2) needs to be updated. An iPod not supported by this receiver is connected. -
Page 70: Changing The Tv Format Setting
Additional information Changing the TV format setting If the System Setup menu is not displayed correctly, it may be that the TV system is set incorrectly for your country or region. Switch the receiver into standby. While holding down the ‘TUNE +’ button, press and hold the ... -
Page 71: Cleaning The Unit
• Never use thinners, benzine, insecticide sprays or other chemicals on or near this unit, since these will corrode the surface. Published by Pioneer Corporation. Copyright © 2009 Pioneer Corporation..2 All rights reserved. - Page 72 D3-4-2-1-1_A1_Zhtw D3-4-2-2-2a_A_ChH...
- Page 73 Voltage selector You can find the voltage selector switch on the rear panel of multi-voltage models. The factory setting for the voltage selector is 220-240 V. Please set it to the correct voltage for 127 V your country or region. •...
- Page 74 目錄 01 使用前 清點包裝內容物 ..... . . 6 裝入電池 ......6 安裝接收器...
- Page 75 10 控制您系統的其他設備 設定遙控器控制其他設備 ....51 直接選取預設代碼 ..... 51 刪除所有的遙控器預設代碼.
-
Page 76: 使用前
使用前 第 1 章: 使用前 清點包裝內容物 請清點是否收到以下隨附配件: • 設定麥克風 • 遙控器 AAA IEC R03 • 乾電池 ( 環型天線 • • 線型天線 iPod • 連接線 • 電源線 (確實使用所在國家/地區適用 的正確電源線) : 圓頭 針式、平頭 • 本操作手冊 裝入電池 注意 電池使用不當會導致滲漏及爆炸等危險。請遵 守下列安全注意事項: • 新舊電池切勿混合使用。 • 裝入電池時 , 請正確對照電池匣內的正負極 標示。... -
Page 77: 五分鐘指南
五分鐘指南 第 2 章: 五分鐘指南 家庭劇院介紹 家庭劇院可利用多重音軌製造環繞聲效果,讓 您親身體驗表演或音樂響宴的臨場感。 家庭劇 院所產生的環繞音效除取決於揚聲器的設定方 式外,更著重於聲音來源和接收器的音效設定。 本接收器可根據揚聲器的設定方式,自動進行 Dolby Digital Dolby Surround 多聲道 、 或 等聲音來源的解碼。 您大部分可在完全無須任 何變更的情況下享受逼真的環繞效果;其他情 形 (如利用多聲道環繞音效聆聽 聆聽您的系統 第 頁的 乙節中說明。 聆聽環繞音效 透過以下的快速設定,您便能很快連接好系統, 享受環繞音效。 在多數情況下,可將接收器設 定保留為原廠設定值。 • 接上 電源前 , 請務必完成所有接線工作 。 連接至電視機 、 Blu-ray Disc 播放機或 DVD 播放器。... -
Page 78: 環繞音效的自動設定(Mcacc
五分鐘指南 播放 BD/DVD 並調整音量。 確定接收器的顯示幕上有顯示 BD/DVD 字樣。 如果沒有,請按下遙控器的 BD,將接收器設定 BD/DVD 至 輸入。 另有多種音效可供選擇。 詳情請參閱第 聆聽您的系統 的 乙節。 環繞音效的自動設定(MCACC) MCACC 多聲道自動音場補正 ( 測量聆聽區域內的音場特性、考量周遭環境的 雜訊、揚聲器尺寸和間距,並同時測試聲道延 遲及聲道位準等條件。 在您完成系統隨附麥克 風的設定後,接收器便可利用一連串測試音所 測得的資訊,完成最佳的揚聲器設定及所在房 間的等化處理。 重要 Auto MCACC • 設定功能會將目前所有已完 成的揚聲器設定值重新設定。 Auto MCACC • 使用 iPod USB 功能作為輸入來源。 注意... - Page 79 五分鐘指南 遵循螢幕上指示。 • 確定麥克風接上。 • 請確實將重低音的電源打開並將音量調高。 • 請參閱以下與背景雜訊及其他可能干擾有 關的備註說明。 等待測試音完成測試。 此時螢幕上會顯示進度報告,同時接收器會輸 出測試音以決定揚聲器是否出現在您的設定 中。 進行此項測試時,請儘量保持安靜。 1.Auto MCACC Now Analyzing Environment Check Ambient Noise Speaker YES/NO Return • 為了能正確完成揚聲器的設定 , 切勿在輸出 測試音期間調整音量。 確認揚聲器的配置方式。 顯示在螢幕上的配置方式應能與實際擁有的揚 聲器相符。 • 顯示錯誤訊息時 (例如 Too much ambient noise) , 在檢查環境雜訊後選擇RETRY (請 Auto MCACC 設定使用時...
-
Page 80: Auto Mcacc 設定使用時的其他問題
五分鐘指南 Auto MCACC 設定使用時的其他問題 若房間環境相當不適合使用 定 (背景雜音太多、牆壁造成迴音、揚聲器與 麥克風有阻擋物) ,則最後設定有可能不正確。 請檢查家中的電氣用品 (空調、冰箱、電風扇 等) ,這些設備可能會影響環境,請於必要時 將其關閉。 在前面板顯示幕上如有出現其他指 示,請依照指示執行。 • 有些舊型電視機可能會干擾麥克風的操作 。 若有此一情形出現,請在進行 MCACC 設定時將電視機關閉。 使用相位控制獲得更佳音效 本接收器的相位控制功能使用相位修正測量 值,來確定您的音效來源進入相位的聆聽位置, 可避免音效失真及/或音色變質 (請參閱下 圖) 。 播放多聲道時, (低頻效果)訊號和每個 聲道中的低頻訊號指定至重低音揚聲器或其他 揚聲器和最適用的揚聲器。至少在理論上,這 種處理類型包括隨著頻率改變的群組延遲,造 成與其他聲道衝突而造成延遲或減弱的低頻聲 音相位失真。 附註 若要達到正確的音效重現,相位匹配是非常重要的因素。 如果兩個波形為 「正相」 ,它們會使波峰和波谷,振幅、清晰度和 音訊的呈現達到強化的效果。... -
Page 81: 連接設備
連接設備 第 3 章: 連接設備 連接線 請勿將連接線折彎繞過本機上方(如圖所示) 。 否則本機內部變壓器所產生的磁場可能會使揚 聲器產生嗡鳴的雜音。 重要 • 在接線或更動接線前 , 請關閉電源並將電源 線插頭從 電源插座上拔掉。 • 在拔掉電源線之前,請將電源切換成待機。 HDMI 連接線 HDMI 連接線可以傳輸未壓縮的數位視訊,還有 幾乎每種相容連接設備的數位音訊,包括 video DVD-Audio Dolby Digital Plus 、 、 TrueHD DTS-HD Master Audio 、 VCD/ 來說明中的各種限制) 、 SACD (僅適用於... -
Page 82: 類比音訊線
連接設備 類比音訊線 請使用立體聲 音源線連接類比音訊設備。 此種連接線一般分為紅色和白色,紅色插頭應 插至 (右聲道)端子,而白色插頭則插至 (左聲道)端子。 數位音訊線 請使用一般市面上的同軸數位音訊線或光纖 線,將數位設備連接至本接收器上。 視訊線 標準 RCA 視訊線 此種連接線為最常用類型的視訊接線,主要是 用來連接複合視訊端子。 黃色插頭則是用來區 別視訊線與音訊線。 附註 • 接上光纖線前,在插入插頭時請小心不要損壞保護光纖插槽的遮蓋。 • 光纖線在存放時盤繞不要太緊。 若將連接線折彎繞過尖角,可能會造成損壞。 • 標準 視訊線也可用於同軸數位連接。 Zhtw 色差視訊線 使用色差視訊線能使視訊來源重現最佳的色 彩。 電視機的色彩訊號會分離成亮度 (Y)訊 號及色彩 (P 及 P 來,便能避免訊號之間相互干擾。 有關視訊輸出連接 本接收器未搭載視訊轉換器。... -
Page 83: 連接至電視機、Blu-Ray Disc 播放機或 Dvd 播放器
連接設備 連接至電視機、Blu-ray Disc 播放機或 DVD 播放器 BD/DVD 本頁為說明如何將 播放器及電視機連接至本接收器上。 VIDEO IN ANALOG AUDIO OUT HDMI IN OPTICAL DIGITAL AUDIO OUT 將您的 BD/DVD 播放器的 HDMI 輸出連接 至本接收器的 HDMI BD/DVD IN 輸入。 HDMI 連接時請使用光纖線。 如果 的 播放器上 , 請使用數位音訊連接線連接 同軸或選用的輸出和本機。 附註 在此情況下,您需要讓接收器知道連接播放器所使用的數位輸入 (請參閱第 HDMI •... -
Page 84: 連接多聲道類比輸出
連接設備 將BD/DVD播放器的複合視訊輸出及立體聲 類比音訊輸出 連接至本接收器的 BD/DVD 輸入 上。 請使用標準 視訊線 線連接。 BD/DVD 播放器若有多聲道類比輸出 , 則請 • 連接多聲道類比輸出 參閱下文的 關連接方式的說明。 連接多聲道類比輸出 DVD Audio 要能播放 及 下圖所示方式將多聲道類比輸出連接至本接收器的多聲道輸入上。 BD/DVD DVR/VCR CENTER OUTPUT 附註 BD/DVD 此種連接方式能讓您經由 若播放器也有色差視訊輸出,則可將此輸出一併接上。 詳情請參閱第 在此情況下,您需要讓接收器知道連接電視機所使用的數位輸入 (請參閱第 • 多聲道輸入僅可在選擇 MULTI IN 時使用 (請參閱第 •... -
Page 85: 連接衛星接收器或其他數位機上盒
連接設備 連接衛星接收器或其他數位機上盒 衛星、有線接收器及地面數位電視調諧器,均稱為 「機上盒」設備。 HDMI HDMI BD/DVD TV/SAT TV/SAT COAXIAL DVR/VCR (CD) OPTICAL (AUX) (AUX) (CD-R/TAPE) DIGITAL 如果您的機上盒有 HDMI 輸出,請將它連 接至本接收器的 HDMI TV/SAT IN。 HDMI 如果您的機上盒沒有 輸出,但有數位輸 出,請將其連接至本接收器的數位輸入。 以下範例說明 DIGITAL OPTICAL IN 2 (AUX) 輸 入的光纖連接方式。 附註 在此情況下,必須讓接收器知道連接機上盒所使用的輸入 (請參閱第 若已將電視機接上 TV/SAT 輸入,此時只須選擇其它輸入即可。 然而,為能順利接收訊號,此時則需按下輸入選擇按鍵選擇 用以連接機上盒的輸入。... -
Page 86: 連接其他音訊設備
連接設備 連接其他音訊設備 接線的數量及種類需視連接的設備類型而定。 CD-R 請按照以下步驟連接 錄音機或其他音訊設備。 若設備上有數位輸出 , 請照著右圖將此輸出 連接至本接收器的數位輸入上。 以下範例說明 DIGITAL OPTICAL IN 1 (CD-R/ TAPE) 輸入的光纖連接方式。 必要時 , 將設備的類比音訊輸出連接至本接 收器的備用音訊輸入組上。 您可能會需要在沒有數位輸出的情況下連接設 備,或想經由數位設備進行錄製。 此時請依照 圖中方式使用立體聲 連接錄音機時 , 請將類比音訊輸出連接至錄 音機的類比音訊輸入上。 右例中所示為使用立體聲 CD-R/TAPE 類比輸出插孔的類比連接方式。 附註 請注意,若想在數位設備 (如 Zhtw 、 、 、卡式 音源線連接。... -
Page 87: 連接硬碟 (Hdd) /Dvd 錄影機、Vcr 及其他視訊來源
連接設備 連接硬碟 (HDD) /DVD 錄影機、VCR 及其他視訊來源 本接收器有音訊/視訊輸入及輸出,可適合連接類比或數位錄影機,包括 錄影機等。 HDMI HDMI BD/DVD TV/SAT DVR/VCR (CD-R/TAPE) DIGITAL DIGITAL HDMI OUT 如果您的視訊設備有 HDMI 輸出,請將其 連接至本接收器的 HDMI DVR/VCR IN。 HDMI 如果您的視訊設備沒有 數位音訊輸出,請將其連接至本接收器的數位 輸入。 範例說明將錄影機連接至 DIGITAL OPTICAL IN 2 (AUX) 輸入的方式。 附註 在此情況下,您需要讓接收器知道連接設備所使用的數位輸入 (請參閱第 若視訊設備上也有色差視訊輸出,則可將此輸出一併接上。 詳情請參閱第 CD-R/TAPE DVR/VCR DVR/VCR... -
Page 88: 使用色差視訊插孔
連接設備 使用色差視訊插孔 色差視訊相較於複合視訊,應可帶來更為優異的畫質。 另一項優勢 (若來源及電視機均相容)則 是循序掃描視訊,它可帶來極為穩定、毫無跳動的畫面。 請參閱電視機及來源隨附手冊,進一步 了解它們是否與循序掃描相容。 COMPONENT VIDEO IN 重要 • 使用色差視訊輸入將任何一種來源設備連 接至本接收器時 , 需將電視機一併接至本接 收器的 COMPONENT VIDEO OUT 插孔上 。 將來源設備的色差視訊輸出連接至本接收 器的色差視訊輸入組。 請使用三向色差視訊線連接。 Zhtw HDMI CD-R/TAPE BD/DVD TV/SAT DVR/VCR TV/SAT COAXIAL ASSIGNABLE DVR/VCR (CD) SURROUND CENTER FRONT OPTICAL (AUX) (CD-R/TAPE) -
Page 89: 連接至前面板視訊端子
連接設備 連接至前面板視訊端子 連接前面板視訊可經由前面板利用遙控器上的 INPUT SELECTOR 或 VIDEO 按鍵進行 。 本機上 有標準音訊/視訊插孔。 請以連接後面板的方 式進行連接。 • 按壓 PUSH OPEN 護蓋以連接前面板視訊。 iPod VIDEO INPUT VIDEO AUDIO MULTI-ZONE SPEAKERS CONTROL ON/OFF iPod VIDEO INPUT VIDEO AUDIO MCACC SETUP MIC VIDEO AUDIO/VIDEO OUTPUT 連接天線 請依下圖方式連接 線。... -
Page 90: 使用外部天線
連接設備 使用外部天線 改善 FM 接收效果 請依照下圖的方式將外部 ANTENNA LOOP 改善 AM 接收效果 可連接一條 至 長的乙烯塗裝金屬線連 接至 天線端子,無須將隨附的 線拆離。 為了能獲得最佳的接收效果,請水平懸掛於室 外。 Zhtw 天線接上。 75 Ω 環型天 ANTENNA LOOP... -
Page 91: 連接揚聲器
連接設備 連接揚聲器 下圖所示為六只揚聲器 (含重低音)的完整設 定方式,不過每個人家中的設定方式會有所不 同。 只需按照下圖方式接上所有揚聲器即可。 本接收器僅需兩只立體聲揚聲器就可運作 (如 圖中的前置揚聲器) ,但建議請至少使用三只 揚聲器,再加上完整的設定方式為環繞音效最 好的組合。若不使用重低音,可將前置揚聲器 揚聲器設定 設定 (請參閱第 頁的 更為 LARGE。 請確實將右置的揚聲器接至右側端子,左置的 揚聲器接至左側端子。 SURROUND AUDIO L (Single) BACK PRE OUT ZONE2 SUBWOOFER SUBWOOFER PRE OUT PRE OUT DVR/VCR VIDEO MONITOR OUT BD/DVD IN TV/SAT IN ANTENNA UNBAL 75 Ω... -
Page 92: 使用 Pre Out 輸出連接後環繞揚聲器
連接設備 裸露金屬線之連接方式 A 揚聲器端子: 將裸露的導線捲繞在一起。 鬆開端子,插入裸露的導線。 旋緊端子。 10 mm B 揚聲器端子: 將裸露的導線捲繞在一起。 推開端子,插入裸露的導線。 鬆開端子。 10 mm 注意 • 這些揚聲器端子均帶有危險電壓 。 為避免在 連接或脫離揚聲器線時發生電擊危險 , 在觸 摸任何未絕緣部分之前 , 請先將電源線插頭 拔離。 • 請確定所有裸露的揚聲器導線都已纏繞在 一起,並完全插入揚聲器端子中。 若有任 何裸露的揚聲器金屬線接觸到背面面板 , 則 可能導致電源切斷以策安全。 Zhtw 使用 PRE OUT 輸出連接後環繞揚聲器 連接本機的PRE OUT輸出和另外的擴大機以增... -
Page 93: 揚聲器之擺設
連接設備 揚聲器之擺設 為了能獲得最佳的環繞音效,請按照下圖方式 安裝所有揚聲器。 5.1 聲道環繞系統: 中置 左前置 重低音 ° 左環繞 6.1 聲道環繞系統: 中置 左前置 重低音 ° 左環繞 後環繞 7.1 聲道環繞系統: 中置 左前置 重低音 ° 左環繞 左後環繞 右後環繞 ° 附註 • 這種配置僅能使用於另外的擴大機與本機連接且後環繞揚聲器與擴大機連接時。 詳情請參閱第 連接後環繞揚聲器 乙節。 對於音效的品質來說,您所擺放揚聲器的地方 會有極大的影響 。 以下的指南將會協助您自系 統中得到最佳的音效。 •... -
Page 94: 切換揚聲器系統
連接設備 • 如果環繞聲揚聲器無法直接設定為 道系統的聆聽位置,關於 增強環繞聲效果 (請參閱第 Up Mix 功能 乙節) 。 • 請不要將環繞揚聲器擺在比前置及中置揚 聲器距離聆聽位置更遠的地方。 以免減弱 環繞聲的效果。 注意 • 請確定所有揚聲器均已牢牢安裝 。 這不僅有 助於改善音質 , 更可減少因地震等外力導致 揚聲器翻倒或掉落而造成損壞或使人受傷 的危險。 切換揚聲器系統 請使用 SPEAKERS 按鍵進行三種揚聲器系統的 設定。 • 使用前面板的 SPEAKERS 按鍵選取一揚聲 器系統設定值。 MULTI-ZONE SPEAKERS SPEAKERS CONTROL 重複按選擇揚聲器系統選項:... -
Page 95: 插上接收器電源
連接設備 插上接收器電源 只有在將所有設備連接至本接收器 (包括揚聲 器)時,才能插入接收器。 注意 • 手拿電源線時請握住插頭部分 。 切勿拖著線 將插頭拔出 , 並不可在您手濕的時候觸摸電 線,因為這樣會造成短路或受到電擊。 請 勿將本機 、 傢俱或其他物體放在電源線上或 有任何擠壓到電線的情形發生。 絕不可將 線打結或與其他連接線纏繞在一起。 電源 線在佈置上不可會有腳踩到的情形。 破損 的電源線會引起火災或讓您遭受電擊。 請 每隔一段時間檢查一次電源線。 若您發現 到有破損 , 請洽最近的先鋒授權服務公司尋 求更換。 • 請勿使用不是本機隨附的其他電源線。 • 請勿將電源線用於非下列所述之範圍。 • 不常使用時(例如,休假時) ,本機應把主 電源插頭從牆上插座拔掉將電源切斷。 將隨附的電源線插入接收器背面的... -
Page 96: 控制與顯示
控制與顯示 第 4 章: 控制與顯示 前面板 STANDBY/ON CONTROL INPUT SELECTOR PHONES STANDBY/ON INPUT SELECTOR 旋鈕 可選取一輸入來源。 調諧器控制按鍵 BAND FM ST 切換 、 (立體聲)和 廣播頻段 (第 頁) 。 TUNE +/– 用於搜索無線電頻率 (第 TUNER EDIT 搭配 TUNE +/–、PRESET +/– 和 ENTER 來 記憶並命名方便叫出收聽的電台... -
Page 97: 遙控器的操作範圍
控制與顯示 ADVANCED SURROUND 可於各種環繞模式中進行切換 (第 STANDARD SURROUND Standard 按下可進行 (標準)解碼,並切 Pro Logic II 換各種 2 、2 Neo:6 和 選項 (第 頁) 。 SPEAKERS 用於切換揚聲器系統 (第 頁) 。 10 MULTI-ZONE 控制 MULTI-ZONE 如果您已連接 (請參閱第 MULTI-ZONE 聆聽 的 乙節) ,從主區控制子區 使用這些控制(請參閱第 頁的 ZONE 控制... - Page 98 控制與顯示 顯示 PHASE 相位控制開啟時會亮起 (第 AUTO 自動環繞聲功能開啟時會亮起 (請參閱第 自動播放 頁的 乙節) 。 在自動立體聲道模式中接收到立體聲 時會亮起。 TUNE 接收到正常廣播頻道時會亮起。 ZONE MULTI-ZONE 功能啟用時會亮起(第 揚聲器指示燈 燈亮以顯示目前的揚聲器系統,A 及/或 B (第 頁) 。 睡眠定時器指示燈 接收器進入睡眠模式時會亮起 (第 調諧器預設指示燈 PRESET 在註冊或呼叫預設廣播電台時顯示。 在註冊廣播電台時閃爍。 Zhtw PRESET 資訊或輸入訊號指示燈 頁) 。 顯示調諧器的預設號碼或輸入訊號類型。 10 字元顯示幕 顯示各種系統資訊。...
- Page 99 控制與顯示 Dolby Digital Plus 偵測到含 時會亮起。 2 HD Dolby TrueHD 偵測到含 會亮起。 Dolby Digital EX 在指示 解碼中時亮起。 2PLllx Pro Logic II / 在指示 2 碼中時亮起(如需有關本功能的詳細資訊, 使用環繞音效聆聽 請參閱第 頁的 節) 。 13 ADV.S. 已選取其中一種先進環繞聲模式時會亮起 使用先進環繞聲效果 (詳情請參閱第 頁的 乙節) 。 14 SIGNAL SELECT 指示燈 DIGITAL 選取數位音訊訊號時會亮起。...
-
Page 100: 遙控器
控制與顯示 遙控器 RECEIVER INPUT SELECT ZONE 2 RECEIVER ON/OFF INPUT CD-R TUNER VIDEO MULTI IN iPod USB DIMMER SIGNAL SEL BD MENU AUTO/ STEREO/ DIRECT A.L.C. STANDARD ADV SURR AUDIO TUNER EDIT PARAMETER MENU ENTER HOME MENU SETUP iPod CTRL PTY SEARCH DTV/TV BASS... - Page 101 控制與顯示 ADV SURR 可於各種環繞模式中進行切換 (第 系統設定以及設備控制按鍵 下列按鍵在選取相對的 MULTI CONTROL 按鍵 (BD、TV 等)後即可使用。 首先按下 RECEIVER 以選取: AUDIO PARAMETER 用以選取音訊選項 (第 SETUP 按下可進入系統設定選單 (第 RETURN 確認並退出目前的選單畫面。 首先按下 BD 或 DVR 以選取: TOP MENU BD/DVD 可顯示 的 「上層」選單。 HOME MENU HOME MENU 顯示 畫面。...
- Page 102 控制與顯示 12 數字鍵及其他設備控制 使用數字鍵可直接選擇無線電頻率 (第 或 、 等裝置上的曲目 。 按下 RECEIVER 按鍵後也可使用其他按鍵。 (例如 MIDNIGHT 等) HDD*、DVD*、VCR* 這些按鍵可切換硬碟式 的硬碟、 及 S.RETRIEVER 按下可將 品質的聲音恢復成壓縮音源 (第 頁) 。 按下可開啟/關閉音場補正等化功能設定 值 (第 頁) 。 CH SELECT 連續按可選擇想要的聲道,再用 +/– 按鍵調 整位準 (第 頁) 。 CH SELECT +/– 用於調整聲道位準。...
-
Page 103: 聆聽您的系統
聆聽您的系統 第 5 章: 聆聽您的系統 重要 • 本章節中所說明的聆聽模式及許多功能會 視目前來源 、 設定值及接收器的狀態而可能 無法適用。 自動播放 最簡單、直接的聆聽選擇就是使用自動環繞聲 功能。 藉由此項功能,接收器便可自動偵測播 放來源的種類,並依需要選擇多聲道或立體聲 播放。 AUTO/ AUTO/ STEREO/ DIRECT DIRECT A.L.C. STANDARD ADV SURR AUDIO TUNER EDIT MASTER • 聆聽來源時,按下 AUTO/DIRECT 源的自動播放。 持續按,直到顯示幕出現 AUTO SURROUND (之後便會顯示解碼或播放格式) 。 查看顯示 幕中的數位格式指示燈,確認正在處理的來源。... -
Page 104: 使用先進環繞聲效果
聆聽您的系統 尚未連接後環繞揚聲器時。 若是您有連接後環繞揚聲器,請一併參閱第 使用後環繞聲道處理模式 頁的 若為雙聲道來源 ,可選取的模式如下: • DOLBY PLIIx MOVIE – 可產生 效,特別適合電影來源 • DOLBY PLIIx MUSIC – 可產生 效,特別適合電影來源 • DOLBY PLIIx GAME – 可產生 效,特別適合電玩遊戲 • NEO:6 CINEMA – 可產生 別適合電影來源 • NEO:6 MUSIC – 可產生 適合音樂來源 •... -
Page 105: 以立體聲聆聽
聆聽您的系統 以立體聲聆聽 選取 STEREO 時,只要透過左、右前置揚聲器 (以及重低音揚聲器,不過需視揚聲器設定而 Dolby Digital 定)便能聆聽來源。 道來源均會縮混成立體聲。 在自動音量控制立體聲模式 ( 個聲音位準與以可攜式音訊播放器錄製的音樂 來源不同,本機將等化播放聲音位準。 AUTO/ STEREO/ STEREO/ DIRECT A.L.C. A.L.C. STANDARD ADV SURR AUDIO TUNER EDIT MASTER • 聆聽來源時 , 按下 STEREO/A.L.C. 進行立體 聲播放。 連續按時,可切換下列選項: • STEREO – 聲音可配合環繞音效設定聆聽, 同時還可使用午夜、響度、相位控制、聲音 修正器及音調等功能。... -
Page 106: 使用直流
聆聽您的系統 使用直流 當您想要聆聽最真實重現的聲音來源時,請使 用直流模式。 將省略所有不必要的訊號處理。 AUTO/ AUTO/ STEREO/ DIRECT DIRECT A.L.C. STANDARD ADV SURR AUDIO TUNER EDIT MASTER • 聆聽來源時,按下 AUTO/DIRECT 選擇直 流模式。 • AUTO SURROUND – 請參閱第 動播放 乙節。 • DIRECT – 依照在環繞聲設定 (揚聲器設定 、 聲道位準、揚聲器距離)中的設定,以及雙 單聲道等設定,聆聽聲音來源。 根據訊號中聲道數量的聲音來源。 • PURE DIRECT – 所聽到的類比和 均是未經過任何的數位處理。... -
Page 107: 設定 Up Mix 功能
聆聽您的系統 • 使用 聲道環繞系統時 , 透過後環繞聲道 Up Mix 處理至新增 功能時,從後環繞揚聲 器輸入經過矩陣編碼處理的音訊。 RECEIVER INPUT SELECT SOURCE S.RETRIEVER ZONE 2 RECEIVER ON/OFF TV CONTROL SB CH INPUT • 按下 RECEIVER , 再重複按 SB CH 可輪流切 換後環繞聲道選項。 每次按下時可選取以下選項: • SB CH ON – 開啟用於自環繞設備產生後環繞... -
Page 108: 設定音訊選項
聆聽您的系統 設定音訊選項 在此有許多額外的聲音設定值,讓您可以利用 AUDIO PARAMETER 選單來完成。 如未說明, 預設值均以粗黑體字。 重要 • AUDIO PARAMETER 選單無法搭配 MULTI IN 輸入使用 (請參閱第 道類比輸入 乙節) 。 • 注意,若是有一設定值沒有在 AUDIO PARAMETER 選單中出現,則表示其不適 用於目前的來源、設定值以及接收器的狀 態。 設定值 功能 開啟/關閉音場補正等化功能的效果。 (音場補正等化功能) 某些顯示器在顯示影像時會有一些延遲,因此音效會稍微 S.DELAY 無法與影像同步。 但藉由增加一個位元的延遲,您便能將 (聲音延遲) 音效調整至與影像同步呈現。 可讓您在低音量下聽到強而有力的電影環繞音效。 MIDNIGHT 用於在低音量下自音樂來源取得良好的低音和高音。 LOUDNESS WMA/MP3 S.RTV... - Page 109 聆聽您的系統 設定值 功能 Dolby Digital 調整為 (動態範圍控制) TrueHD 、 原聲配樂的動態範圍位準 (小聲聆聽環繞音效時,可能 需要用到此功能) 。 Dolby Digital LFE ATT 有些 ( 衰減) 請依需要設定 器的聲音失真。 當設定至 10 dB – 時 , 從 聲道輸出音效。 HDMI HDMI 可指定 HDMI ( 音訊) 至電視機或平面電視的路徑。 選取 輸出任何聲音。 此功能將自動修正以 A.DLY (自動延遲)...
-
Page 110: 播放其他來源
聆聽您的系統 播放其他來源 打開播放設備電源。 打開接收器電源。 選擇要播放的來源。 請使用 MULTI CONTROL 按鍵 (INPUT SELECTOR) 。 開始播放步驟 1 中所選擇的設備。 選擇輸入訊號 在本接收器上,可如下所示切換不同輸入的輸 入訊號。 按下遙控器上的 RECEIVER 按鍵。 按下SIGNAL SEL 按鍵選取相對於來源設備 的輸入訊號。 當選擇 DIGITAL 提供所選擇的音訊輸入時,自動選擇 A (類 比) 。 每次按下時可選取以下選項: • A – 選取類比輸入。 • DIGITAL – 選取數位輸入 。 選擇同軸 以用於... -
Page 111: 系統設定選單
系統設定選單 第 6 章: 系統設定選單 使用系統設定選單 以下除會說明如何完成接收器使用方式的詳細 設定,還會說明如何依個人喜好細部調整各項 揚聲器系統的設定值。 AUDIO PARAMETER MENU RECEIVER RECEIVER INPUT SELECT SOURCE ZONE 2 RECEIVER ON/OFF TV CONTROL INPUT HOME MENU SETUP SETUP iPod CTRL PTY SEARCH PTY SEARCH 打開接收器及電視機。 請使用 RECEIVER 按鍵將電源打開。 按下遙控器上的 RECEIVER 按鍵 , 然後按下 SETUP 按鍵。... -
Page 112: 揚聲器設定
系統設定選單 選擇 「Manual SP Setup」 ,然後按下 ENTER。 System Setup 1.Auto MCACC 2.Manual SP Setup 3.Input Assign Return 選取要調整的設定值。 若第一次進行此項設定,則請依序調整每項設 定值: • Speaker Setting – 可指定您所連接揚聲器 的大小及數量 (請參閱下述說明) 。 • Crossover Network – 可指定要傳送至重 低音的頻率 (第 頁) 。 • Channel Level – 可調整揚聲器系統的整體 平衡... -
Page 113: 分頻器
系統設定選單 • Surr. Back – 可選取所擁有的後環繞揚聲器 數量 (一、二或無) 。 若所有後環繞揚聲 器能有效產生低音頻率,選取 LARGE。 或 可選取 SMALL 將低音頻率傳送至其他揚聲 器或重低音上。 若是您沒有連接後環繞揚 聲器,請選擇 NO。 • Subwoofer – 設定為 SMALL 的所有聲道的 訊號及低音頻率,在選擇 YES 時會經由 重低音輸出 (請參閱以下的附註說明) 。 若 希望重低音能持續輸出低音音效或想要更 深沉的低音,可選擇 PLUS 設定值 (一般經 由前置及中置揚聲器輸出的低音頻率也會 傳送至重低音上) 。 若未連接重低音,請選 擇... -
Page 114: 揚聲器間距
系統設定選單 選取設定選項。 • Manual – 可手動將測試音從一揚聲器移 動至另一揚聲器並調整個別聲道位準。 • Auto – 可在測試音從一揚聲器移動至另一 揚聲器時,自動調整聲道位準。 確認所選設定選項。 此時測試音在按下 ENTER 後會開始運作 。 將音 量提高至參考等級,便會輸出測試音。 2c.Channel Level Test Tone [ Manual ] Please Wait . . .20 Caution Loud test tones will be output. 使用 / 按鍵調整每一聲道的位準。 若選擇... - Page 115 系統設定選單 按下遙控器上的 RECEIVER,然後按下 SETUP 按鍵。 此時電視機會出現螢幕操作畫面 ( 使用 /// 按鍵及 ENTER 導覽所有畫面 及選擇選單項目。 按下 RETURN 確認並退出目 前選單。 System Setup 1.Auto MCACC 2.Manual SP Setup 3.Input Assign Return 從 System Setup 選單中選取 「Input Assign」 。 System Setup 1.Auto MCACC 2.Manual SP Setup 3.Input Assign Return 從...
-
Page 116: 使用 Multi-Zone 功能
使用 MULTI-ZONE 功能 第 7 章: 使用 MULTI-ZONE 功能 MULTI-ZONE 聆聽 MULTI-ZONE 正確連接 後,此接收器可以開啟 另外房間中最多二個獨立系統的電源。 以下所 MULTI-ZONE 示為 設定的範例。 AUDIO IN 在兩個區域中可同時播放不同的來源,視您的 需要而定,也可以使用相同的來源。 主區和子 區有獨立的電源 (子區開啟時,可關閉主區電 源) ,而且可使用遙控器或前面板控制子區。 連接 MULTI-ZONE 如果您有一台單獨的用於子區 (ZONE 2)的 揚聲器,則您可進行這些連接。 子區的個別擴大機。 附註 您不可以在子區中使用聲音控制 (例如低音及高音控制或午夜聆聽)或任何沒有獨立擴大機的環繞聲模式。 但您可以使用 子區擴大機可使用的功能。 Zhtw MULTI-ZONE 聆聽選項... -
Page 117: 使用 Multi-Zone 控制
使用 MULTI-ZONE 功能 使用 MULTI-ZONE 控制 下列步驟使用前面板控制鍵來選擇來源。 請參 MULTI-ZONE 遙控控制 閱以下的 STANDBY/ON PHASE CONTROL BAND TUNE – TUNE TUNER EDIT PRESET – INPUT AUTO SURROUND/ STEREO/ ADVANCED STANDARD MULTI-ZONE MULTI-ZONE SPEAKERS SELECTOR STREAM DIRECT A.L.C. SURROUND SURROUND CONTROL CONTROL iPod PHONES MULTI-ZONE SPEAKERS... -
Page 118: 使用調諧器
使用調諧器 第 8 章: 使用調諧器 收聽收音機 以下步驟為說明如何利用自動 (搜索)及手動 (步驟)調諧功能調選 方法。 在完成選台後,可將頻率記憶以便於叫 出收聽 — 更多關於此項操作的說明,請參閱以 儲存預設電台 下的 乙節。 INPUT CD-R TUNER TUNER VIDEO MULTI CH 按下 TUNER 以選取調諧器。 如有必要,使用 BAND 按鍵切換 BAND (FM 或 AM) 。 每次按下可切換 (立體聲或單聲道) 及 兩者之間的波段。 調選電台。 共有三種調選方式:... -
Page 119: 收聽預設電台
使用調諧器 按下 PRESET / 按鍵選取所要的預設電 台。 您也可以利用數字鍵。 按下 ENTER 按鍵。 在按下 ENTER 後,預設數字會停止閃爍,同時 接收器會儲存電台。 收聽預設電台 必須已儲存一些電台才可進行此項操作。 若尚 儲存預設電台 未儲存,則請參閱第 頁的 節。 按下 PRESET / 按鍵選取所要的預設電 • 台。 • 預設電台亦可使用遙控器的數字鍵叫出收 聽。 命名預設電台 為了能更容易識別,您可以將所有預設電台命 名。 選擇要命名的預設電台。 有關此項操作的方式,請參閱上文的 電台 乙節。 按兩下 TUNER EDIT 按鍵。 第一個字元位置上的游標在顯示幕上閃爍。... -
Page 120: 進行錄製
進行錄製 第 9 章: 進行錄製 錄音或錄影 您可經由內建調諧器或連接至本接收器的音訊 或視訊來源,進行錄音或錄影 (如 或電視機) 。 記住,您不能經由類比來源進行數位錄製 (反 之亦然) ,因此請確定所要錄製的設備均已按 照相同方式接上 (更多關於接線的資訊,請參 連接設備 閱第 頁的 乙節) 。 若想錄製視訊來源,則來源的接線亦需使用與 錄影機相同的類型。 例如,您不能利用接上色 差視訊輸出的錄影機,錄製接上複合視訊插孔 的設備 (請參閱第 頁了解更多關於視訊連 接的資訊) 。 RECEIVER INPUT SELECT ZONE 2 RECEIVER RECEIVER ON/OFF INPUT CD-R CD-R TUNER... -
Page 121: 控制您系統的其他設備
控制您系統的其他設備 第 10 章: 控制您系統的其他設備 設定遙控器控制其他設備 多數設備可利用存在遙控器內的設備製造商預 設代碼指定給其中一個 MULTI CONTROL 按 鍵。 然而,請注意有時候即使在指定正確的預設代 碼後,仍僅限定某些功能可供控制;或是遙控 器中的製造商代碼並不適用於所用機型。 附註 • 您可按下RECEIVER隨時取消或結束錄製步 驟。 • 在閒置一分鐘後,遙控器便會自動退出操 作。 直接選取預設代碼 ZONE 2 RECEIVER ON/OFF TV CONTROL INPUT S.RETRIEVER CD-R TUNER SB CH VIDEO VIDEO MULTI IN 附註 電視機代碼... -
Page 122: 電視機控制功能
控制您系統的其他設備 電視機控制功能 本遙控器在輸入正確代碼或授以接收器命令後,即可控制設備 (詳情請參閱第 統的其他設備 乙節) 。 使用 MULTI CONTROL 按鍵以選取設備。 • 遙控器的 TV CONTROL 按鍵是用以控制 TV 按鍵所指定的電視機。 按鍵 功能 TV CONTROL 可開啟或關閉數位電視。 可切換電視或有線電視的待機或開機。 TV CONTROL 可切換電視機輸入。 (不適用於電視機所有機型。) 電視機 INPUT TV CONTROL 可選取頻道。 CH +/– TV CONTROL 可調整電視機音量。 VOL +/– ... -
Page 123: 其他設備控制功能
控制您系統的其他設備 其他設備控制功能 本遙控器在輸入正確代碼或授以接收器命令後,即可控制這些設備(詳情請參閱第 您系統的其他設備 乙節) 。 使用 MULTI CONTROL 按鍵以選取設備。 按鍵 功能 SOURCE 按下可切換設備的待機及開機。 按下可回到目前音軌的開始。 重複按可跳至前一音軌的開始。 按下可前進至下一音軌的開始。 重複按時可跳至下一音軌的開始。 暫停播放或錄製。 開始播放。 按下可快速向前播放。 按下可快速向後播放。 停止播放 (在某些機型上,於光碟已停止時按下,將會使 碟盤開啟) 。 數字鍵 可直接存取節目來源上的音軌。 用於輸入標題/章節/曲目編號。 +10 按鍵 可選取 以上的音軌。... - Page 124 控制您系統的其他設備 按鍵 功能 可選擇光碟。 ENTER 可作 ENTER 按鍵使用。 可顯示 可切換 的播放面。 按下以顯示資訊。 DISPLAY BD/DVD TOP MENU 可顯示 MENU 可顯示目前所有 可暫停錄音帶的播放。 可停止錄音帶的播放。 可開始播放。 ENTER / 可將錄音帶向後/向前快轉。 BD/DVD , 可導覽 & ENTER RETURN HOME MENU 顯示 HOME MENU 可選取頻道。 CH +/–...
-
Page 125: 預設代碼清單
Sunkai 2093 2026, 2032, 2036, 2075 Philips 2005, 2011, 2022, Supervision 2086 Synn 2086 2023, 2031, 2039, 2062 Pioneer 2004, 2012, 2014, Tatung 2035, 2093 TCM 2002 2049, 2120, 2121, 2122, Teac 2067, 2082, 2086 2123, 2124, 2125 Pointer 2093... - Page 126 控制您系統的其他設備 電視機 製造商代碼 A.R. Systems 0040 Acme 0026 Acura 0027, 0039 ADC 0025 Admiral 0023, 0024, 0025, 0030, 0031 Adyson 0026, 0113, 0114 Agashi 0113, 0114 Agazi 0025 Aiko 0026, 0027, 0039, 0040, 0113, 0114 Aim 0040 Aiwa 0084 Akai 0027, 0028, 0034, 0037, 0039, 0040, 0113, 0114 Akiba 0028, 0040...
- Page 127 0037, 0040, 0113 NEI 0034, 0037, 0040 Phonola 0023, 0034, 0037, Neufunk 0039, 0040 0040, 0113 New Tech 0027, 0034, Pioneer 0010, 0031, 0033, 0039, 0040, 0114 0034, 0037, 0040, 0120 New World 0028 Plantron 0025, 0034, 0039, Nicamagic 0026, 0113...
- Page 128 控制您系統的其他設備 Prosonic 0010, 0026, 0037, 0040, 0113, 0114, 0121 Protech 0025, 0026, 0027, 0029, 0034, 0037, 0114 Provision 0037, 0040 Pye 0034, 0037, 0040, 0083 Pymi 0027, 0039 Quandra Vision 0041 Quelle 0025, 0026, 0034, 0037, 0040, 0114 Questa 0032 Radialva 0040 Radio Shack 0040 Radiola 0034, 0037, 0040,...
- Page 129 Tatung 1000, 1001, 1006 Philco 1017 TCM 1002 Philips 1006, 1012, 1019 Teac 1018 Phonola 1006 Tec 1004, 1017, 1018 Pioneer 1006, 1120 Teleavia 1001 Portland 1003, 1004, 1018 Telefunken 1001 Prinz 1000 Teletech 1017, 1018 Profex 1007 Tenosal 1007, 1017...
-
Page 130: 其他連接
其他連接 第 11 章: 其他連接 注意 在接線或更動接線前 • , 請關閉電源並將電源 線插頭從 電源插座上拔掉。 插上設備電源應是系統最後才完成的連接 工作。 • 切勿讓不同端子的揚聲器導線相互碰觸在 一起。 連接 iPod iPod 此接收器有一組 專用端子,它能讓您使用 本接收器的控制功能來控制您 容的播放。 • 按壓 PUSH OPEN 護蓋,插入 iPod 端子。 附註 iPod nano iPod • 本系統與 、 第五代、 而,某些機型可能限制使用部分功能。 注意,但相容性依 iPod iPhone •... -
Page 131: Ipod 播放
ENTER 來瀏覽該項內容。 • 要回到上一層,請按 RETURN。 使用 / 按鍵以瀏覽所選項目的內容 (例 如專輯) 。 附註 iPod iPod touch iPhone 您的 ( 或 除外)控制功能在連接至本接收器後將無法使用 (Pioneer 字樣會出現在 中) 。 • 注意,標題中非羅馬字元會顯示為 。 iPod • 此功能無法在您 上的相片或視訊片段上使用。 iPod ZONE 2 • 無法將 音訊輸出至 。 若是您目前在歌曲項目中,那麼您也可以按下 ENTER 來開始播放。... -
Page 132: 觀賞相片與視訊內容
其他連接 按鍵 功能 請連續按下來變更前面板顯示器中顯示 DISPLAY 的歌曲播放資訊。 / 瀏覽時,請按下移至上/下一層。 / 播放有聲書時,請按下此按鍵來切換播 放速度: 較快 正常 較慢 按下可回到 iPod Top 畫面。 MENU RETURN 請按一下回到上一層。 觀賞相片與視訊內容 iPod 若要觀賞您 上的相片或視訊,由於無法使 用此接收器來控制視訊,因此您必須使用 的控制功能來控制。 重要 iPod • 若要播放您 上的相片或視訊,您必須 連接複合 MONITOR OUT 插孔和電視機。 請按下 iPod CTRL 來切換相片與視訊播放 的... -
Page 133: 連接 Usb 裝置
其他連接 連接 USB 裝置 您可利用本接收器前面板的 聲道音訊。 請按照以下步驟連接 存裝置。 • 按壓 PUSH OPEN 護蓋,插入 USB 端子。 iPod VIDEO INPUT VIDEO AUDIO MULTI-ZONE SPEAKERS CONTROL ON/OFF iPod VIDEO INPUT VIDEO AUDIO MCACC SETUP MIC 將您的 USB 裝置連接至接收器上 打開接收器及電視機。 按遙控器上的 iPod USB 將接收器切換至 iPod USB。... -
Page 134: 壓縮音訊之相容性
其他連接 重要 若顯示幕中的 USB Error 錯誤訊息燈亮起,請 嘗試從下列各點進行了解: • 將接收器關閉後再開啟。 • 在接收器關機時重新接上 • 選取其他輸入來源 (如 BD) ,然後切回至 iPod USB。 • 使用專用的 電源變壓器(隨裝置附上) 提供 電源。 如需有關錯誤訊息的詳細資訊 , 請參閱第 USB 訊息 的 乙節。 若仍無法解決問題,則有可能是 容。 壓縮音訊之相容性 請注意 , 雖然大多數壓縮音訊的標準位元率/取 樣率組合均能相容 , 但也有些不規則的編碼檔案 會無法播放。 以下僅列出屬於相容格式的壓縮 音訊檔案:... -
Page 135: 其他資訊
其他資訊 第 12 章: 其他資訊 疑難排解 錯誤的操作經常被誤以為故障及功能異常。 若認為設備出現問題,可按以下要點進行檢查。 請留 意所使用的其他設備及電氣用品,有時便是問題所在。 若按照以下要點檢查後仍無法找出問題, 請洽當地先鋒所授權的獨立服務公司進行維修。 • 若本機是因為靜電等外力導致無法正常操作,請拔掉插座上的電源插頭再重新插回,以回復正 常的操作狀態。 問題 解決辦法 電源無法打開。 • 將電源插頭從插座上拔掉,然後再插上。 • 確定沒有鬆脫的揚聲器線碰觸到後面板。 否則會造成接收器自動關機。 接收器突然關機。 • 大約一分鐘後 (請勿在這段時間內開機) ,將接收器重新開機。 若訊息仍在,請 洽先鋒所授權的獨立服務公司。 選擇一功能時沒有聲音輸出。 • 請確定設備連接正確 (請參閱第 • 按下遙控器上的 MUTE 按鍵將靜音功能關閉。 • 按下 SPEAKERS 選取正確的揚聲器設定 (請參閱第 節)... - Page 136 其他資訊 問題 廣播節目中有明顯雜音。 無法自動選台。 卡式錄音座播放期間有雜音。 聲音來自其他設備,而非來自 或 播放器。 播放含有 的軟體時,沒有 聲音輸出或有雜音。 播放搜索期間, 相容的 播放器有雜音輸出。 一切設定似乎正確,但播放的 聲音很奇怪。 揚聲器與重低音的輸出之間似 乎有時間延遲。 Auto MCACC 在使用 設定 後,揚聲器的大小設定值 (LARGE 或 SMALL)出現錯 誤。 遙控器無法操作。 顯示幕黑暗或關閉。 Zhtw 解決辦法 • 接上天線 (第 頁)並調整至最佳接收的方位。 • 將鬆散的連接線排放在遠離天線端子及導線的地方。 • 將 線型天線完全展開,調整最佳接收的方位,並固定於牆上 (或接上室外 天線)...
-
Page 137: Hdmi
其他資訊 HDMI 問題狀況 解決辦法 無畫面或音效。 • 若直接將 冊,或聯絡製造商以獲得支援。 無畫面。 • 視來源設備的輸出設定而異,該設備可能是輸出無法顯示的視訊格式。 變更來源 的輸出設定,或使用色差或複合插孔連接。 • 本機為 或複合視訊插孔將這些設備接上。 • 視接上的來源設備而定,有可能對本接收器並不適用 (即使是 時,請使用色差或複合視訊插孔將來源及接收器連接上。 • 若您的電視機或平面電視上未出現視訊影像,請嘗試調整解析度、 設備的其他設定。 • 若要在 器連接至提供 未顯示。 • 如果您已使用 使用色差或複合接線方式。 無音效,或音效突然中止。 • 如果您已另外連接音訊,請確定您已指定類比/數位插孔至設備上相對應的 HDMI • 檢查來源設備的音訊輸出設定。 • 確定音訊選項是設定為 HDMI AMP/THRU (請參閱第 •... -
Page 138: Ipod 訊息
其他資訊 iPod 訊息 問題狀況 原因 iPod iPod/USB Error 1 至接收器的訊號路徑出現問題。 (I/U ERR1) iPod iPod/USB Error 2 目前所使用的軟體版本需要更新。 (I/U ERR2) 連接本接收器不支援的 iPod iPod/USB Error 3 沒有回應。 (I/U ERR3) iPod No Track 在 上所選項目中未儲存任何曲目。 USB 訊息 問題狀況 原因 iPod/USB Error 1 至接收器的訊號路徑出現問題。 (I/U ERR1) iPod/USB Error 3 沒有回應。... -
Page 139: 切換電視機格式設定值
其他資訊 切換電視機格式設定值 若系統設定選單未能正確顯示,則可能是電視 系統的設定不適用於所在國家或地區。 將接收器切換成待機。 按下 「TUNE +」按鍵的同時,按住 STANDBY/ON 按鍵大約兩秒鐘。 此時顯示幕會顯示新的設定值 (PAL 或 NTSC) 。 重新設定主機 使用以下程序可將接收器的所有設定值重新設 回原廠預設值。 請使用前面板控制進行此項操 作。 將接收器切換成待機。 按下 BAND 按鍵的同時,按住 STANDBY/ON 按鍵大約兩秒鐘。 在見到顯示幕出現 RESET? 時,按下 「AUTO SURROUND/STREAM DIRECT」 。 此時顯示幕中會顯示 OK?。 按 「STEREO/A.L.C.」以確認。 此時顯示幕中會顯示 OK 表示接收器已重新設 回原廠預設值。... -
Page 140: 清潔主機
其他資訊 整合的控制區段 . . . ∅ 控制 ( )端子 ..訊號 高啟用 (高等級: 其他資訊 電源需求 ..AC 110 V 127 V/220 V 至 ..... . 285 W 消耗功率... - Page 141 其他資訊 Zhtw...
- Page 142 Enhorabuena por la adquisición de este producto Pioneer. Lea completamente este manual de instrucciones para aprender a operar correctamente el aparato. Después de haber terminado la lectura de las instrucciones, guarde el manual en un lugar seguro para poderlo consultar en el futuro.
- Page 143 Selector de tensión El selector de tensión está situado en el panel posterior de los modelos de tensiones múltiples. El ajuste predeterminado del selector de tensión es de 220-240 V. Ajústelo a la tensión correcta de su país o región. •...
- Page 144 Índice 01 Antes de comenzar Comprobación del contenido de la caja ..6 Instalación de las pilas ....6 Instalación del receptor .
- Page 145 10 Control de otros componentes del sistema Uso del mando a distancia para controlar otros componentes ... . 51 Selección directa de códigos de preajuste ......51 Borrado de todos los ajustes del mando a distancia.
-
Page 146: Antes De Comenzar
Capítulo 1: Antes de comenzar Comprobación del contenido de la caja Compruebe que ha recibido todos los accesorios siguientes: • Micrófono de configuración • Mando a distancia • Pilas secas (tamaño AAA IEC R03) x2 • Antena de cuadro de AM •... -
Page 147: Guía Rápida
Capítulo 2: Guía rápida Introducción al cine en casa El término “cine en casa” hace referencia al uso de múltiples pistas de audio para crear un efecto de sonido envolvente, lo que permite al oyente experimentar la sensación de encontrarse en medio de la acción o en un concierto. - Page 148 Reproduzca un disco Blu-ray/DVD y ajuste el volumen. Asegúrese de que aparece BD/DVD en la pantalla del receptor. Si no aparece, pulse BD en el mando a distancia para seleccionar la entrada BD/DVD en el receptor. Existen otras opciones de sonido que puede seleccionar.
- Page 149 Siga las instrucciones que aparecen en pantalla. • Asegúrese de que el micrófono esté conectado. • Asegúrese de que el subwoofer está encendido y de que el volumen está activado. • Consulte las notas sobre ruido de fondo y otras interferencias posibles a continuación. Espere hasta que finalicen los tonos de prueba.
-
Page 150: Otros Problemas Al Utilizar La Configuración Auto Mcacc Setup
Otros problemas al utilizar la configuración Auto MCACC Setup Si el ambiente de la habitación no es óptimo para la configuración Auto MCACC Setup (si hay demasiado ruido de fondo, ecos producidos por las paredes, obstáculos entre los altavoces y el micrófono), los ajustes resultantes pueden ser incorrectos. -
Page 151: Conexiones
Capítulo 3: Conexiones Conexiones de los cables Asegúrese de no doblar los cables por encima del equipo (como se muestra en la ilustración). Si esto sucede, el campo magnético producido por los transformadores del equipo podrán hacer que los altavoces produzcan un zumbido. -
Page 152: Cables De Audio Analógico
Cables de audio analógico Utilice cables fonográficos RCA estéreo para conectar componentes de audio analógico. Estos cables generalmente tienen una clavija roja y otra blanca; conecte las clavijas rojas a los terminales R (derechos) y las clavijas blancas a los terminales L (izquierdos). Cables de audio analógico Derecho (rojo) Izquierdo (blanco) -
Page 153: Conexión De Un Televisor Y Un Reproductor De Discos Blu-Ray O Dvd
Conexión de un televisor y un reproductor de discos Blu-ray o DVD En esta página se explica cómo conectar un reproductor de discos Blu-ray/DVD y un televisor al reproductor. VIDEO IN ANALOG AUDIO OUT HDMI IN Televisor OPTICAL DIGITAL AUDIO OUT Conecte la salida HDMI de su reproductor de discos Blu-ray/DVD a la entrada HDMI BD/ DVD IN del receptor. -
Page 154: Conexión De Las Salidas Analógicas Multicanal
Conecte la salida de vídeo compuesto y las salidas de sonido analógico estéreo reproductor de Blu-ray/DVD a las entradas BD/DVD del receptor. Utilice un cable de vídeo RCA estándar y un cable fonográfico RCA estéreo para la conexión. • Si su reproductor de BD/DVD dispone de salidas analógicas multicanal, consulte Conexión de las salidas analógicas multicanal más abajo para conocer la... -
Page 155: Conexión De Un Receptor Satélite U Otro Módulo De Conexión Digital
Conexión de un receptor satélite u otro módulo de conexión digital Los receptores satélite o de cable y los sintonizadores de televisor digital terrestre son todos ejemplos de los llamados ‘módulos de conexión’. Este receptor HDMI HDMI BD/DVD TV/SAT TV/SAT COAXIAL DVR/VCR (CD) -
Page 156: Conexión De Otros Componentes
Conexión de otros componentes de audio El número y tipo de conexiones depende del tipo de componente que esté conectando. Siga los pasos siguientes para conectar una grabadora de CD-R, MD, DAT o cinta u otro componente de audio. Si su componente dispone de una salida digital, conéctela a una entrada digital del receptor como se muestra. -
Page 157: Conexión De Una Grabadora De Hdd/Dvd, De Un Vcr Y De Otras Fuentes De Vídeo
Conexión de una grabadora de HDD/DVD, de un VCR y de otras fuentes de vídeo Este receptor tiene entradas y salidas de audio/vídeo adecuadas para conectar videograbadoras analógicas o digitales, incluidos VCR y grabadoras de HDD/DVD. Este receptor HDMI HDMI BD/DVD TV/SAT DVR/VCR... -
Page 158: Uso De Conectores De Vídeo De Componentes
Uso de conectores de vídeo de componentes El vídeo de componentes debería ofrece una calidad de imagen mayor que el vídeo compuesto. Una ventaja adicional (si la fuente y el televisor son compatibles) es el vídeo de barrido progresivo que ofrece una imagen muy estable y sin parpadeos. Para saber si la fuente y el televisor son compatibles con el vídeo de exploración progresiva, consulte los manuales correspondientes. -
Page 159: Conexión Al Terminal De Vídeo Del Panel Frontal
Conexión al terminal de vídeo del panel frontal Puede acceder a las conexiones de vídeo frontales a través del panel frontal mediante el botón INPUT SELECTOR o VIDEO del mando a distancia. Allí encontrará los conectores estándar de audio y vídeo. Conéctelos del mismo modo que las conexiones del panel posterior. -
Page 160: Uso De Antenas Exteriores
Uso de antenas exteriores Para mejorar la recepción en FM Conecte una antena FM exterior, tal como se muestra abajo. 75 Ω cable coaxial ANTENNA LOOP Para mejorar la recepción en AM Conecte un cable con revestimiento de vinilo de 5 a 6 metros de longitud a un terminal de antena AM sin desconectar la antena de cuadro AM suministrada. -
Page 161: Conexión De Los Altavoces
Conexión de los altavoces Aquí se muestra una configuración completa de seis altavoces (incluido el subwoofer), pero la configuración individual de cada usuario puede variar. Simplemente conecte los altavoces que tiene de la forma que se indica a continuación. El receptor funciona con sólo dos altavoces estéreo (los altavoces frontales en el diagrama), pero se recomienda utilizar al menos tres altavoces, o una configuración... -
Page 162: Utilice Las Salidas Pre Out Para Conectar Los Altavoces Traseros De Sonido Envolvente
Conexiones de cables pelados A-Terminales de altavoces: Trence los hilos expuestos del cable. Afloje el terminal e inserte el hilo expuesto. Apriete el terminal. 10 mm B-Terminales de altavoces: Trence los hilos expuestos del cable. Empuje para abrir las pestañas e introduzca los hilos expuestos del cable. -
Page 163: Disposición De Los Altavoces
Disposición de los altavoces Para obtener el mejor sonido envolvente posible, instale los altavoces como se indica a continuación. Sistema de sonido envolvente de 5.1 canales: Central Frontal izquierdo Subwoofer 120° 120° Sonido envolvente izquierdo Sistema de sonido envolvente de 6.1 canales: Central Frontal izquierdo... -
Page 164: Cambio Del Sistema De Altavoces
• Si los altavoces de sonido envolvente no se pueden colocar directamente a un lado de la posición de escucha con un sistema de 7.1 canales, se puede mejorar el efecto envolvente apagando la función UP Mix (consulte Ajuste de la función Up Mix en la página 37). -
Page 165: Conexión Del Receptor
Revise el cable de alimentación cada cierto tiempo. Si encuentra que está dañado, pida un cable de recambio al representante autorizado de Pioneer más cercano. • No utilice ningún cable de alimentación que no sea el suministrado con esta unidad. -
Page 166: Controles E Indicadores
Capítulo 4: Controles e indicadores Panel frontal STANDBY/ON CONTROL INPUT SELECTOR PHONES STANDBY/ON Dial INPUT SELECTOR Selecciona una fuente de entrada. Botones de control del sintonizador BAND Cambia entre las sintonías AM, FM ST (estéreo) y FM MONO (página 48). TUNE +/–... -
Page 167: Alcance Operativo Del Mando A Distancia
ADVANCED SURROUND Alterna entre los diversos modos surround (página 34). STANDARD SURROUND Púlselo para la descodificación Estándar y para alternar entre las distintas opciones 2 Pro Logic II, 2 Pro Logic IIx y NEO:6 (página 33). SPEAKERS Utilícelo para cambiar el sistema de altavoces (página 24). -
Page 168: Pantalla
Pantalla PHASE Se ilumina cuando se enciende Phase Control (página 10). AUTO Se ilumina cuando la función Auto Surround está activa (consulte Reproducción automática en la página 33). Se ilumina durante la recepción de una emisión de FM estéreo en modo estéreo automático. - Page 169 Se ilumina cuando se detecta una fuente con señales de sonido codificadas Dolby Digital Plus. 2 HD Se ilumina cuando se detecta una fuente con señales de sonido codificadas Dolby TrueHD. Se ilumina para indicar la descodificación Dolby Digital EX. 2PLllx Se ilumina para indicar la descodificación 2 Pro Logic II / 2 Pro Logic IIx (consulte...
-
Page 170: Mando A Distancia
Mando a distancia RECEIVER INPUT SELECT ZONE 2 RECEIVER ON/OFF INPUT CD-R TUNER VIDEO MULTI IN iPod USB DIMMER SIGNAL SEL BD MENU AUTO/ STEREO/ DIRECT A.L.C. STANDARD ADV SURR AUDIO TUNER EDIT PARAMETER MENU ENTER HOME MENU SETUP iPod CTRL PTY SEARCH DTV/TV BASS... - Page 171 Pulse RECEIVER primero para acceder: BASS –/+ Utilícelo para ajustar los graves TRE –/+ Utilícelo para ajustar los agudos Pulse TV primero para acceder: DTV/TV Permite alternar entre los modos de entrada de TV analógica y DTV para televisores de pantalla plana Pioneer.
- Page 172 12 Botones de número y otros controles de componentes Utilice los botones de número para seleccionar directamente una frecuencia de radio (página 48) o las pistas de un CD, DVD, etc. Se puede acceder a otros botones después de pulsar RECEIVER. (Por ejemplo, MIDNIGHT, etc.) HDD*, DVD*, VCR* Estos botones alternan entre los controles...
-
Page 173: Uso Del Sistema
Capítulo 5: Uso del sistema Importante • Los modos de escucha y muchas funciones descritas en esta sección pueden no estar disponibles dependiendo de la fuente actual, los ajustes y el estado del receptor. Reproducción automática La opción de escucha más simple y directa es la función Auto Surround. -
Page 174: Uso De Los Efectos De Sonido Envolvente Avanzados
Cuando el altavoz trasero envolvente está conectado. Si ha conectado los altavoces de sonido envolvente traseros, consulte también Uso del procesamiento del canal envolvente trasero en la página 36. Con fuentes de dos canales, puede seleccionar entre: • DOLBY PLIIx MOVIE – Sonido de hasta 7.1 canales, especialmente apropiado para películas •... -
Page 175: Reproducción Estéreo
Reproducción estéreo Al seleccionar STEREO, oirá la fuente únicamente a través de los altavoces frontales izquierdo y derecho (y, posiblemente, del subwoofer, según la configuración de los altavoces). Las fuentes multicanal Dolby Digital y DTS se mezclan a estéreo. En el modo estéreo con control automático de nivel (A.L.C.), esta unidad ecualiza los niveles del sonido reproducido si cada nivel de sonido varía con la fuente de música grabada en un... -
Page 176: Uso De Stream Direct
Uso de Stream Direct Utilice los modos de Stream Direct cuando desee escuchar la reproducción más fiel posible de una fuente. Se omiten todos los procesamientos de señales innecesarios. AUTO/ AUTO/ STEREO/ DIRECT DIRECT A.L.C. STANDARD ADV SURR AUDIO TUNER EDIT MASTER •... -
Page 177: Ajuste De La Función Up Mix
• Con un sistema de sonido envolvente de 7.1 canales, las señales de sonido que han pasado por el procesamiento de decodificación de matriz a través del procesamiento del canal trasero de sonido envolvente al que se añade la función Up Mix, se emiten por los altavoces de sonido envolvente traseros. -
Page 178: Ajuste De Las Opciones De Audio
Ajuste de las opciones de Audio Existe una serie de ajustes de sonido adicionales que se pueden realizar desde el menú AUDIO PARAMETER. Los valores predeterminados, si no se indican, aparecen en negrita. Importante • El menú AUDIO PARAMETER no está disponible con la entrada MULTI IN (consulte Selección de las entradas analógicas multicanal en la página 40). - Page 179 Ajuste Qué hace Ajusta el nivel del margen dinámico para pistas de sonido (Control de margen optimizadas para Dolby Digital, DTS, Dolby Digital Plus, dinámico) Dolby TrueHD, DTS-HD y DTS Master Audio (es posible que tenga que utilizar esta función al escuchar sonido envolvente con el volumen bajo).
-
Page 180: Reproducción De Otras Fuentes
Reproducción de otras fuentes Encienda el componente de reproducción. Encienda el receptor. Seleccione la fuente que desea reproducir. Utilice los botones MULTI CONTROL (INPUT SELECTOR). Inicie la reproducción en el componente seleccionado en el paso 1. Selección de la señal de entrada En este receptor se puede cambiar las señales de entrada para las distintas entradas, tal como se describe abajo. -
Page 181: El Menú System Setup
Capítulo 6: El menú System Setup Uso del menú System Setup En la siguiente sección se explica cómo realizar ajustes detallados para especificar cómo se está usando el receptor, y cómo adaptar un sistema de altavoces específico a su gusto. AUDIO PARAMETER MENU... -
Page 182: Ajuste De Altavoz
Seleccione ‘Manual SP Setup’ y luego pulse ENTER. System Setup 1.Auto MCACC 2.Manual SP Setup 3.Input Assign Return Seleccione la opción que desea ajustar. Si es primera vez que lo hace, le recomendamos ajustar las opciones en orden: • Speaker Setting – Especifique el tamaño y el número de altavoces que ha conectado (véase más abajo). -
Page 183: Red Divisora De Frecuencias
• Surr. Back – Seleccione el número de altavoces de sonido envolvente traseros de los que dispone (uno, dos o ninguno). Seleccione LARGE si los altavoces traseros de sonido envolvente reproducen frecuencias de graves de forma eficaz. Seleccione SMALL para enviar las frecuencias bajas a los otros altavoces o al subwoofer. -
Page 184: Distancia De Altavoces
Seleccione una opción de configuración. • Manual – Para mover el tono de prueba manualmente de altavoz en altavoz y ajustar los niveles de canales individuales. • Auto – Para ajustar automáticamente los niveles de los canales a medida que el tono de prueba se desplaza de un altavoz a otro. - Page 185 Pulse RECEIVER en el mando a distancia y, a continuación, pulse el botón SETUP. Aparecerá una pantalla (OSD) en su televisor. Utilice /// y ENTER en el mando a distancia para desplazarse por las pantallas y seleccionar los elementos del menú. Pulse RETURN para confirmar las opciones seleccionadas y salir del menú...
-
Page 186: Uso De La Función Multizona
Capítulo 7: Uso de la función MULTIZONA Escucha en MULTIZONA Este receptor puede alimentar dos sistemas independientes en distintas habitaciones después de hacer las conexiones MULTIZONA necesarias. Abajo se muestra un ejemplo de configuración MULTIZONA. AUDIO IN Distintas fuentes pueden reproducir en dos zonas al mismo tiempo o, según sus necesidades, se puede utilizar la misma fuente. -
Page 187: Uso De Los Controles Multizona
Uso de los controles MULTIZONA En los siguientes pasos se utilizan los controles del panel frontal para seleccionar fuentes. Consulte Controles a distancia MULTIZONA más abajo. STANDBY/ON PHASE CONTROL TUNE – TUNE PRESET – BAND TUNER EDIT INPUT AUTO SURROUND/ STEREO/ ADVANCED STANDARD... -
Page 188: Uso Del Sintonizador
Capítulo 8: Uso del sintonizador Recepción de radio El siguiente procedimiento describe cómo sintonizar emisiones de radio de FM o AM utilizando las funciones de sintonización automática (búsqueda) y sintonización manual (por pasos). Una vez que haya sintonizado una emisora, podrá memorizar la frecuencia para recuperarla más tarde—para más detalles, consulte Presintonización de emisoras. -
Page 189: Cómo Sintonizar Emisoras Memorizadas
Pulse PRESET / para seleccionar la presintonización de emisoras deseada. También se pueden usar los botones de número. Pulse ENTER. Después de pulsar ENTER, el número de la presintonía deja de parpadear y el receptor almacena la estación. Cómo sintonizar emisoras memorizadas Para poder utilizar esta función, primero deberá... -
Page 190: Grabación
Capítulo 9: Grabación Cómo hacer una grabación de audio o vídeo Puede hacer una grabación de audio o vídeo desde el sintonizador incorporado o desde una fuente de audio o vídeo conectada al receptor (por ejemplo, un reproductor de CD o un televisor). -
Page 191: Control De Otros Componentes Del Sistema
Capítulo 10: Control de otros componentes del sistema Uso del mando a distancia para controlar otros componentes La mayoría de los componentes puede asignarse a uno de los botones MULTI CONTROL utilizando el código de preajuste del fabricante del componente almacenado en el mando a distancia. -
Page 192: Controles Para Televisores
TV de encendido o apagado. DTV/TV Permite alternar entre los modos de entrada de TV analógica y DTV para televisores de pantalla plana Pioneer. TOP MENU Cambia TEXT ON/OFF para televisores. HOME MENU Utilícelo como botón GUIDE para navegar. -
Page 193: Controles Para Otros Componentes
Controles para otros componentes Este mando a distancia puede controlar componentes una vez que se han introducido los códigos apropiados o después de que se programan comandos en el receptor (para más detalles, consulte Control de otros componentes del sistema en la página 51). Utilice los botones MULTI CONTROL para seleccionar componente. - Page 194 Botón(es) Función Púlselo para ver la información. DISPLAY TOP MENU Muestra el menú “superior” del reproductor de BD/DVD. Muestra los menús del BD/DVD o DVR que está utilizando. Reproductor BD/DVD/DVR MENU Para hacer una pausa en la reproducción de la cinta. ...
-
Page 195: Lista De Códigos De Preajuste
2026, 2032, 2036, 2075 Tec 2091 Philips 2005, 2011, 2022, Technika 2093 2023, 2031, 2039, 2062 Telefunken 2088 Pioneer 2004, 2012, 2014, Tensai 2093 2049, 2120, 2121, 2122, Tevion 2002, 2086, 2092 2123, 2124, 2125 Thomson 2003, 2017, Pointer 2093... - Page 196 Alaron 0113 Alba 0010, 0026, 0027, 0028, 0032, 0035, 0037, 0039, 0040, 0075, 0078, 0088, 0113 Alcyon 0017 Allorgan 0114 Allstar 0034, 0040 AMOi 0109 Amplivision 0010, 0026, 0041, 0114 Amstrad 0025, 0027, 0028, 0039, 0040 Anam 0027 Anglo 0027, 0039 Anitech 0017, 0025, 0027, 0039, 0040 Ansonic 0010, 0018, 0027,...
- Page 197 0037, 0040, 0113 Sanyo 0010, 0018, 0026, Phonola 0023, 0034, 0037, 0032, 0039, 0072, 0113, 0040, 0113 0114 Pioneer 0010, 0031, 0033, SBR 0037, 0040 0034, 0037, 0040, 0120 SCHAUB LORENTZ 0031 Plantron 0025, 0034, 0039, Schneider 0026, 0028, 0040...
- Page 198 Siarem 0023, 0029, 0040 Sierra 0034, 0040 Siesta 0010 Silva 0113 Silver 0032 Singer 0023, 0029, 0041 Sinudyne 0023, 0029, 0037, 0040 Skantic 0031 Solavox 0031 Sonitron 0010, 0114 Sonoko 0025, 0026, 0027, 0034, 0037, 0039, 0040, 0114 Sonolor 0031, 0041 Sontec 0010, 0034, 0037, 0040 Sony 0001, 0003, 0027,...
- Page 199 Tenosal 1007, 1017 Philco 1017 Tensai 1000, 1005, 1007, Philips 1006, 1012, 1019 1017 Phonola 1006 Tevion 1002 Pioneer 1006, 1120 Thomson 1001, 1015 Portland 1003, 1004, 1018 Thorn 1001 Prinz 1000 Tokai 1005, 1007, 1017 Profex 1007 Tonsai 1007...
-
Page 200: Otras Conexiones
• Pioneer no se hace responsable, bajo ninguna circunstancia, de ninguna pérdida directa o indirecta como consecuencia de cualquier percance o pérdida de material grabado como resultado de un fallo del iPod. -
Page 201: Reproducción Del Ipod
1 Los controles del iPod (salvo iPod touch o iPhone) estarán desactivados mientras el dispositivo esté conectado al receptor (en la pantalla del iPod aparecerá Pioneer). 2 • Tenga en cuenta que los caracteres no latinos de la lista de reproducción se muestran como •... -
Page 202: Visionado De Fotos Y Vídeos
Botón Qué hace Pulse varias veces para cambiare entre Shuffle Songs, Shuffle Albums y Shuffle Off. DISPLAY Pulse varias veces para cambiar la información de reproducción de canciones en la pantalla del panel frontal. / Al desplazarse, púlselos para pasar al nivel anterior/siguiente. -
Page 203: Conexión De Un Dispositivo Usb
USB. • Pioneer no puede garantizar la compatibilidad (funcionamiento y/o potencia de bus) con todos los dispositivos de almacenamiento de datos USB y no asume ninguna responsabilidad sobre cualquier pérdida de datos que pueda producirse cuando los conecte a este receptor. -
Page 204: Compatibilidad De Sonido Comprimido
Botón Qué hace / Durante la reproducción, púlselo para saltar a la pista anterior/siguiente. / Púlselo para volver a la pantalla del menú. TOP MENU RETURN Pulse para volver al nivel anterior. Importante Si en la pantalla se ilumina un mensaje de USB Error, compruebe los siguientes puntos: •... -
Page 205: Información Adicional
Si no puede solucionar el problema después de realizar las comprobaciones que se indican a continuación, diríjase al centro de servicio técnico Pioneer autorizado más cercano para que lleve a cabo las reparaciones necesarias. - Page 206 Problema Las emisiones de radio contienen una cantidad considerable de ruido. No es posible seleccionar emisoras de radiodifusión automáticamente. Se escucha ruido durante la reproducción de una platina de casete. El sonido proviene de otros componentes, pero no del reproductor de DVD o LD. Cuando se reproduce software con DTS, no se emite ningún sonido ni ningún ruido.
-
Page 207: Hdmi
HDMI Síntoma Solución No hay imagen ni sonido. • Si el problema todavía persiste cuando conecte su componente HDMI directamente al monitor, consulte el manual del componente o del monitor, o bien póngase en contacto con el fabricante para obtener asistencia. No hay imagen. -
Page 208: Mensajes De Ipod Mensajes
Mensajes de iPod mensajes Síntoma Causa iPod/USB Error 1 Existe un problema con la ruta de la señal entre el iPod y el receptor. (I/U ERR1) La versión del software del iPod está iPod/USB Error 2 desactualizada. (I/U ERR2) Se ha conectado un iPod no admitido por este receptor. -
Page 209: Cambio Del Ajuste De Formato De Tv
Cambio del ajuste de formato de TV Si el menú System Setup no se muestra correctamente, puede que el sistema de TV esté ajustado de forma errónea para su país o región. Ponga el receptor en modo de espera. Mientras mantiene pulsado el botón ‘TUNE +’, pulse el botón ... -
Page 210: Limpieza Del Equipo
Publicado por Pioneer Corporation. Copyright © 2009 Pioneer Corporation. Todos los derechos reservados..2... - Page 211 253 Alexandra Road, #04-01, Singapore 159936 TEL: 65-6472-7555 PIONEER ELECTRONICS AUSTRALIA PTY. LTD. 178-184 Boundary Road, Braeside, Victoria 3195, Australia, TEL: (03) 9586-6300 PIONEER ELECTRONICS DE MEXICO S.A. DE C.V. Blvd.Manuel Avila Camacho 138 10 piso Col.Lomas de Chapultepec, Mexico,D.F. 11000 TEL: 55-9178-4270 Published by Pioneer Corporation.