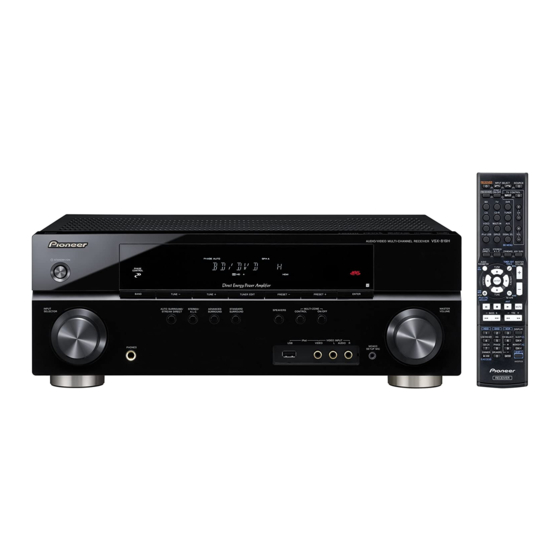
Pioneer VSX-819H-K Operating Instructions Manual
Multi channel audio/video receiver
Hide thumbs
Also See for VSX-819H-K:
- Service manual (102 pages) ,
- Operating instructions manual (71 pages) ,
- Catalog (8 pages)
Table of Contents
Advertisement
Available languages
Available languages
Quick Links
Download this manual
See also:
Service Manual
Advertisement
Chapters
Table of Contents

Related Manuals for Pioneer VSX-819H-K


Summary of Contents for Pioneer VSX-819H-K
- Page 1 VSX-819H -S/-K Discover the benefits of registering your product online at http://www.pioneer.co.uk (or http://www.pioneer.eu).
-
Page 2: Operating Environment
How to replace the fuse: Open the fuse compartment with a screwdriver and replace the fuse. D3-4-2-1-2-2_B_En WARNING Thank you for buying this Pioneer product. To prevent a fire hazard, do not place any naked Please read through these operating instructions so flame sources (such as a lighted candle) on the you will know how to operate your model properly. - Page 3 Information for users on collection and disposal of old equipment and used batteries Symbol for These symbols on the products, packaging, and/or accompanying documents mean equipment that used electrical and electronic products and batteries should not be mixed with general household waste. For proper treatment, recovery and recycling of old products and used batteries, please take them to applicable collection points in accordance with your national legislation.
-
Page 4: Table Of Contents
Contents 01 Before you start 05 Listening to your system Checking what’s in the box ....6 Auto playback ......33 Loading the batteries . - Page 5 10 Controlling the rest of your system Setting the remote to control other components ......52 Selecting preset codes directly .
-
Page 6: Before You Start
Before you start Chapter 1: Before you start Checking what’s in the box Installing the receiver Please check that you’ve received the following • When installing this unit, make sure to put supplied accessories: it on a level and stable surface. •... -
Page 7: 02 5 Minute Guide
5 minute guide Chapter 2: 5 minute guide Connect your speakers and place them for optimal surround sound. Introduction to home theater See Connecting the speakers on page 21. Home theater refers to the use of multiple Where you place the speakers will have a big audio tracks to create a surround sound effect, effect on the sound. -
Page 8: Automatically Setting Up For Surround Sound
5 minute guide Play a BD/DVD, and adjust the volume. Switch on the receiver and your TV. Make sure that BD/DVD is showing in the Connect the microphone to the MCACC receiver’s display. If it isn’t, press BD on the SETUP MIC jack on the front panel. - Page 9 5 minute guide Follow the instructions on-screen. If you see an error message (ERR) in the right side column, there may be a problem with the • Make sure the microphone is connected. speaker connection. If selecting RETRY • Make sure the subwoofer is on and the doesn’t fix the problem, turn off the power and volume is turned up.
-
Page 10: Other Problems When Using The Auto Mcacc Setup
5 minute guide With the Phase Control mode switched on, this Other problems when using the Auto receiver can reproduce powerful bass sound MCACC Setup without deteriorating the quality of the original If the room environment is not optimal for the sound (see illustration below). -
Page 11: Connecting Up
Connecting up Chapter 3: Connecting up Be careful to connect the terminal in the proper direction. Making cable connections Make sure not to bend the cables over the top About HDMI of this unit (as shown in the illustration). If this HDMI (High Definition Multimedia Interface) happens, the magnetic field produced by the supports both video and audio on a single... -
Page 12: Analog Audio Cables
Connecting up Analog audio cables Component video cables Use component video cables to get the best Use stereo RCA phono cables to connect possible color reproduction of your video analog audio components. These cables are source. The color signal of the TV is divided into typically red and white, and you should the luminance (Y) signal and the color (P connect the red plugs to R (right) terminals... -
Page 13: Connecting A Tv And Blu-Ray Disc Player Or Dvd Player
Connecting up Connecting a TV and Blu-ray Disc player or DVD player This page shows you how to connect your BD/DVD player and TV to the receiver. This receiver SURROUND BACK L (Single) PRE O HDMI HDMI CD-R/TAPE ZONE2 BD/DVD DVR/VCR TV/SAT DVR/VCR... -
Page 14: Connecting The Multichannel Analog
Connecting up Connect the composite video output and Connect the analog audio outputs from your TV to the TV/SAT inputs on this receiver. the stereo analog audio outputs on your BD/DVD player to the BD/DVD inputs on this This will allow you to play the sound from the TV’s built-in tuner. -
Page 15: Connecting A Satellite Receiver Or Other Digital Set-Top Box
Connecting up Connecting a satellite receiver or other digital set-top box Satellite and cable receivers, and terrestrial digital TV tuners are all examples of so-called ‘set-top boxes’. This receiver SURROUND AUDIO SPEAKERS BACK L (Single) FRONT PRE OUT HDMI HDMI CD-R/TAPE ZONE2 SUBWOOFER... -
Page 16: Connecting Other Audio Components
Connecting up This receiver Connecting other audio components HDMI CD-R/TAPE CD-R/TAPE BD/DVD The number and kind of connections depends on the kind of component you’re connecting. TV/SAT Follow the steps below to connect a CD-R, MD, DVR/VCR TV/SAT DAT, tape recorder or other audio component. COAXIAL COAXIAL ASSIGNABLE... -
Page 17: Connecting An Hdd/Dvd Recorder, Vcr And Other Video Sources
Connecting up Connecting an HDD/DVD recorder, VCR and other video sources This receiver has audio/video inputs and outputs suitable for connecting analog or digital video recorders, including VCRs and HDD/DVD recorders. This receiver SURROUND AUDIO SPEAKE BACK L (Single) PRE OUT HDMI HDMI CD-R/TAPE... -
Page 18: Using The Component Video Jacks
Connecting up Using the component video jacks Component video should deliver superior picture quality when compared to composite video. A further advantage (if your source and TV are both compatible) is progressive-scan video, which delivers a very stable, flicker-free picture. See the manuals that came with your TV and source component to check whether they are compatible with progressive-scan video. -
Page 19: Connecting To The Front Panel Video Terminal
Connecting up Connecting to the front panel Connecting antennas video terminal Connect the AM loop antenna and the FM wire antenna as shown below. To improve Front video connections are accessed via the reception and sound quality, connect external front panel using the INPUT SELECTOR or antennas (see Using external antennas on VIDEO button on the remote control. -
Page 20: Using External Antennas
Connecting up Using external antennas To improve FM reception Use a PAL connector (not supplied) to connect an external FM antenna. One-touch PAL connector ANTENNA 75 Ω coaxial cable LOOP To improve AM reception Connect a 5 m to 6 m length of vinyl-coated wire to the AM antenna terminal without disconnecting the supplied AM loop antenna. -
Page 21: Connecting The Speakers
Connecting up You can use the speakers connected to the B speaker terminals to listen to stereo playback Connecting the speakers in another room. Make sure to review Placing A complete setup of six speakers (including the the speakers on page 23 when placing the subwoofer) is shown here but everyone’s home speakers in another room. -
Page 22: Use The Pre Out Outputs To Connect The Surround Back Speakers
Connecting up Bare wire connections Use the PRE OUT outputs to connect A-Speaker terminals: the surround back speakers Connect the PRE OUT outputs of the unit and Twist exposed wire strands together. additional amplifier to add a surround back Loosen terminal and insert exposed wire. speaker. -
Page 23: Placing The Speakers
Connecting up Where you put your speakers in the room has Placing the speakers a big effect on the quality of the sound. The To achieve the best possible surround sound, following guidelines should help you to get the install your speakers as shown below. best sound from your system. -
Page 24: Switching The Speaker System
Connecting up • SPB – Sound is output from the two • If the surround speakers cannot be set speakers connected to speaker system B directly to the side of the listening position (only stereo playback is possible). with a 7.1-channel system, the surround •... -
Page 25: Plugging In The Receiver
Check the power cord once in a while. If you find it damaged, ask your nearest Pioneer authorized independent service company for a replacement. • Do not use any power cord other than the one supplied with this unit. -
Page 26: Controls And Displays
Controls and displays Chapter 4: Controls and displays Front panel VSX–819H AUDIO / VIDEO MULTI- CHANNEL RECEIVER STANDBY/ON PHASE CONTROL – – BAND TUNE TUNE TUNER EDIT PRESET PRESET ENTER INPUT AUTO SURROUND/ STEREO/ ADVANCED STANDARD MULTI-ZONE MASTER SPEAKERS CONTROL ON/OFF SELECTOR STREAM DIRECT... -
Page 27: Operating Range Of Remote Control
Controls and displays ADVANCED SURROUND Operating range of remote control Switches between the various surround The remote control may not work properly if: modes (page 34). • There are obstacles between the remote STANDARD SURROUND control and the receiver’s remote sensor. Press for Standard decoding and to switch •... -
Page 28: Display
Controls and displays Display PHASE Lights when the Phase Control is switched on Blinks when a radio station is registered. (page 10). 10 PRESET Information or Input signal AUTO indicator Lights when the Auto Surround feature is Shows the preset number of the tuner or the switched on (see Auto playback on page 33). - Page 29 Controls and displays Lights when a source with Dolby Digital Plus encoded audio signals is detected. Lights when a source with Dolby TrueHD encoded audio signals is detected. Lights when a source with Dolby Digital EX encoded audio signals is detected. 2PLllx Lights to indicate 2 Pro Logic II / 2 Pro Logic IIx decoding (see Listening in...
-
Page 30: Remote Control
Controls and displays INPUT SELECT Use to select the input source. Remote control RECEIVER Switches the receiver between standby and on. RECEIVER RECEIVER INPUT SELECT SOURCE Switches the remote to control the receiver ZONE 2 RECEIVER ON/OFF TV CONTROL INPUT (used to select the white commands above the number buttons (S.RETRIEVER, etc)). - Page 31 Press TUNER first to access: DTV/TV TUNER EDIT Switches between the DTV and analog TV Memorizes/names stations for recall input modes for Pioneer flat screen TVs. (page 48 and 49). BAND Switches between AM, FM ST (stereo) and FM MONO radio bands (page 48).
- Page 32 Controls and displays 13 SOURCE 12 Number buttons and other component controls Press to turn on/off other components Use the number buttons to directly select a connected to the receiver (see page 54 for radio frequency (page 48) or the tracks on a more on this).
-
Page 33: Listening To Your System
Listening to your system Chapter 5: Listening to your system Important Listening in surround sound • The listening modes and many features Using this receiver, you can listen to any source described in this section may not be in surround sound. However, the options available depending on the current source, available will depend on your speaker setup settings and status of the receiver. -
Page 34: Using The Advanced Surround Effects
Listening to your system • DTS NEO:6 – Allows you to hear 6.1 When the surround back speaker is channel playback with DTS encoded connected. sources If you connected surround back speakers, see also Using surround back channel processing Using the Advanced surround effects on page 36. -
Page 35: Listening In Stereo
Listening to your system Listening in stereo Using Front Stage Surround When you select STEREO you will hear the Advance source through just the front left and right The Front Stage Surround Advance function speakers (and possibly your subwoofer allows you to create natural surround sound depending on your speaker settings). -
Page 36: Using Stream Direct
Listening to your system • Press RECEIVER, then press S.RETRIEVER to switch the sound retriever on or off. Using Stream Direct Use the Stream Direct modes when you want to hear the truest possible reproduction of a Listening with Acoustic source. -
Page 37: Setting The Up Mix Function
Listening to your system • With a 7.1-channel surround system, audio signals that have undergone matrix Setting the Up Mix function decoding processing through surround In a 7.1-channel surround system with back channel processing to which the Up surround speakers placed directly at the sides Mix function is added are output from the of the listening position, the surround sound surround back speakers. -
Page 38: Setting The Audio Options
Listening to your system AUDIO AUDIO TUNER EDIT MASTER PARAMETER PARAMETER TOOLS VOLUME MENU Setting the Audio options MENU RECEIVER INPUT SELECT SOURCE There are a number of additional sound ZONE 2 ENTER RECEIVER ON/OFF TV CONTROL settings you can make using the AUDIO INPUT HOME PARAMETER menu. - Page 39 Listening to your system Setting What it does Option(s) Adjusts the level of dynamic range for movie soundtracks AUTO (Dynamic Range optimized for Dolby Digital, DTS, Dolby Digital Plus, Dolby Control) TrueHD, DTS-HD and DTS Master Audio (you may need to use this feature when listening to surround sound at low volumes).
-
Page 40: Playing Other Sources
Listening to your system • HDMI – Selects an HDMI signal. H can be selected for BD/DVD, TV/SAT or DVR/VCR Playing other sources input. For other inputs, HDMI cannot be Turn on the power of the playback selected. component. When set to DIGITAL or HDMI, 2 lights when a Dolby Digital signal is input, and DTS lights Turn on the power of the receiver. -
Page 41: The System Setup Menu
The System Setup menu Chapter 6: The System Setup menu • Auto MCACC – This is a quick and effective automatic surround setup (see Using the System Setup menu Automatically setting up for surround The following section shows you how to make sound (MCACC) on page 8). -
Page 42: Speaker Setting
The System Setup menu Select ‘Manual SP Setup’ then press Select ‘Speaker Setting’ from the ENTER. Manual SP Setup menu. 2a.Speaker Setting System Setup 2.Manual SP Setup 2.Manual SP Setup Front SMALL 1.Auto MCACC a.Speaker Setting a.Speaker Setting 2.Manual SP Setup b.Crossover Network b.Crossover Network Center... -
Page 43: Crossover Network
The System Setup menu • Surr. Back – Select the number of Crossover Network surround back speakers you have (one, two • Default setting: 100Hz Select LARGE if your surround or none). This setting decides the cutoff between bass back speakers reproduce bass frequencies sounds playing back from the speakers effectively. -
Page 44: Speaker Distance
The System Setup menu Select a setup option. Speaker Distance • Manual – Move the test tone manually For good sound depth and separation from from speaker to speaker and adjust your system, you need to specify the distance individual channel levels. of your speakers from the listening position. - Page 45 The System Setup menu Select the component that corresponds Press RECEIVER on the remote control, with the one you connected to that input. then press the SETUP button. Select between BD, TV, DVR, MULTI (MULTI An on-screen display (OSD) appears on your CH IN) or OFF.
-
Page 46: Using The Multi-Zone Feature
Using the MULTI-ZONE feature Chapter 7: Using the MULTI-ZONE feature MULTI-ZONE listening options MULTI-ZONE listening The following table shows what you can listen to in the sub zone: This receiver can power up to two independent Sub Zone Input sources available systems in separate rooms after you have made the proper MULTI-ZONE connections. -
Page 47: Using The Multi-Zone Controls
Using the MULTI-ZONE feature • If you select TUNER, you can use the tuner Using the MULTI-ZONE controls controls to select a preset station (see The following steps use the front panel controls Saving station presets on page 48 if you’re to select sources. -
Page 48: Using The Tuner
Using the tuner Chapter 8: Using the tuner Improving FM stereo sound If the TUNE or ST indicators don’t light when Listening to the radio tuning to an FM station because the signal is The following steps show you how to tune in to weak, press the BAND button to select FM FM and AM radio broadcasts using the MONO and set the receiver to the mono... -
Page 49: Listening To Station Presets
Using the tuner Press PRESET / to select the station • Once you have named a station preset, preset you want. press DISPLAY to show the name. When You can also use the number buttons. you want to return to the frequency display, press DISPLAY several times to Press ENTER. -
Page 50: Searching For Rds Programs
Using the tuner Displaying RDS information AUDIO TUNER EDIT MASTER PARAMETER TOOLS VOLUME Use the DISPLAY button to display the MENU MENU RECEIVER INPUT SELECT SOURCE different types of RDS information available. ZONE 2 RECEIVER ON/OFF TV CONTROL ENTER ENTER INPUT Press DISPLAY for RDS information. -
Page 51: Making Recordings
Making recordings Chapter 9: Making recordings Select the source you want to record. Use the MULTI CONTROL buttons (or INPUT Making an audio or a video SELECT). recording Select the input signal (if necessary). You can make an audio or a video recording Press the RECEIVER button then press from the built-in tuner, or from an audio or SIGNAL SEL to select the input signal... -
Page 52: Controlling The Rest Of Your System
Controlling the rest of your system Chapter 10: Controlling the rest of your system While pressing the RECEIVER button, press and hold the ‘1’ button for three Setting the remote to control seconds. other components Press the MULTI CONTROL button for the Most components can be assigned to one of component you want to control. -
Page 53: Controls For Tvs
Cable TV/Satellite TV/TV/DTV button on or off. DTV/TV Switches between the DTV and analog TV input DTV/TV modes for Pioneer flat screen TVs. TOP MENU Switches TEXT ON/OFF for TVs. HOME MENU Use as the GUIDE button for navigating. Cable TV/Satellite TV/TV/DTV RETURN Use to select closed captioning with DTV. -
Page 54: Controls For Other Components
Controlling the rest of your system Controls for other components This remote control can control these components after entering the proper codes or teaching the receiver the commands (see Controlling the rest of your system on page 52 for more on this). Use the MULTI CONTROL buttons to select the component. - Page 55 Controlling the rest of your system Button(s) Function Components DISPLAY Press to display information. BD/DVD/DVR player TOP MENU Displays the disc ‘top’ menu of a BD/DVD player. BD/DVD/DVR player MENU Displays menus for the current BD/DVD or DVR you are BD/DVD/DVR player using.
-
Page 56: Preset Code List
Philips 2005, 2011, 2022, Supervision 2086 Clatronic 2089 Kennex 2093 Synn 2086 2023, 2031, 2039, 2062 Coby 2095 Kenwood 2051 Pioneer 2004, 2012, 2014, Tatung 2035, 2093 Conia 2082 KeyPlug 2093 TCM 2002 2049, 2120, 2121, 2122, Continental Edison 2094 Kiiro 2093... - Page 57 Controlling the rest of your system AudioTon 0010, 0026, 0114 Contec 0026, 0027, 0032, Expert 0041 Ausind 0017 Exquisit 0040 0039, 0113 Manufacturer Code Autovox 0017, 0023, 0025, Continental Edison 0033 Fenner 0027, 0039 A.R. Systems 0040 Cosmel 0027, 0039 Ferguson 0033, 0037, 0026, 0114 Acme 0026...
- Page 58 0040 0039, 0040, 0114 0040, 0113 Intervision 0010, 0025, Lumatron 0030, 0034, New World 0028 Pioneer 0010, 0031, 0033, Nicamagic 0026, 0113 0026, 0029, 0040, 0114 0037, 0040, 0114 0034, 0037, 0040, 0120 Irradio 0017, 0027, 0028, Lux May 0034...
- Page 59 Controlling the rest of your system Prandoni-Prince 0017, Susumu 0028 Universum 0010, 0017, SBR 0037, 0040 SCHAUB LORENTZ 0031 Sutron 0027, 0039 0030 0025, 0034, 0035, 0037, Precision 0026, 0114 Schneider 0026, 0028, Sydney 0026, 0113, 0114 0040, 0114 Prima 0027, 0031, 0039 Sysline 0037 Univox 0040 0034, 0037, 0040, 0075,...
- Page 60 Teac 1018 De Graaf 1006 Intervision 1000, 1018 Phonola 1006 Tec 1004, 1017, 1018 Decca 1000, 1001, 1006 Irradio 1005, 1007, 1017 Pioneer 1006, 1120 Teleavia 1001 Denko 1017 ITT 1001 Portland 1003, 1004, 1018 Telefunken 1001 Dual 1001, 1006, 1018...
-
Page 61: Other Connections
• Features such as the equalizer cannot be controlled using this receiver, and we recommend switching the equalizer off before connecting. • Pioneer cannot under any circumstances accept responsibility for any direct or indirect loss arising from any inconvenience or loss of recorded material resulting from the iPod failure. -
Page 62: Ipod Playback
(e.g., albums). Off. Note 1 The controls of your iPod (excluding iPod touch or iPhone) will be inoperable when connected to this receiver (Pioneer shows in the iPod display). 2 • Note that non-roman characters in the title are displayed as •... -
Page 63: Watching Photos And Video Content
Other connections About iPod Button What it does Press repeatedly to switch between Shuffle Songs, Shuffle Albums and Shuffle Off. DISPLAY Press repeatedly to change the song playback information displayed in the front panel display. / ‘Made for iPod’ means that an electronic When browsing, press to move to previous/next levels. -
Page 64: Connecting A Usb Device
(MP3 players) of format FAT16/32. It is not possible to connect this receiver to a personal computer for USB playback. • Pioneer cannot guarantee compatibility (operation and/or bus power) with all USB mass storage devices and assumes no responsibility for any loss of data that may occur when connected to this receiver. -
Page 65: Compressed Audio Compatibility
Other connections Other compatibility information Button What it does • VBR (variable bit rate) MP3/WMA/MPEG-4 / During playback, press to skip to AAC playback: Yes previous/next track. / • DRM (Digital Rights Management) TOP MENU Press to return to the menu screen. protection compatible: Yes (DRM-protected RETURN audio files will not play in this receiver). -
Page 66: Additional Information
Take a look at the other components and electrical appliances being used, because sometimes the problem may lie there. If the trouble isn’t sorted out even after going through the checks below, ask your nearest Pioneer authorized independent service company to carry out repair work. - Page 67 Additional information Problem Remedy Considerable noise in radio • Connect the antenna (page 19) and adjust the position for best reception. broadcasts. • Route any loose cables away from the antenna terminals and wires. • Fully extend the FM wire antenna, position for best reception, and secure to a wall (or connect an outdoor FM antenna).
-
Page 68: Hdmi
Additional information HDMI Symptom Remedy No picture or sound. • If the problem still persists when connecting your HDMI component directly to your monitor, please consult the component or monitor manual or contact the manufacturer for support. No picture. • Depending in the output settings of the source component, it may be outputting a video format that can’t be displayed. -
Page 69: Ipod Messages
Additional information iPod messages Symptom Cause Action iPod/USB Error 1 There is a problem with the signal path from the Switch off the receiver and reconnect the iPod to (I/U ERR1) iPod to the receiver. the receiver. If this doesn’t seem to work, try resetting your iPod. -
Page 70: Resetting The Main Unit
Additional information Resetting the main unit Specifications Use this procedure to reset all the receiver’s Audio section settings to the factory default. Use the front Rated power output panel controls to do this. Front, Center, Surround ..130 W per channel (1 kHz, 6 Ω, 1 %) Switch the receiver into standby. -
Page 71: Cleaning The Unit
Power cord ......1 Copyright © 2009 Pioneer Corporation. Warranty card ......1 All rights reserved. - Page 72 Nous vous remercions pour cet achat d’un produit Ce produit est conforme à la directive relative à la Pioneer. Nous vous demandons de lire basse tension 2006/95/CE et à la directive relative à la soigneusement ce mode d’emploi ; vous serez ainsi compatibilité...
- Page 73 Information à destination des utilisateurs sur la collecte et l’élimination des équipements et batteries usagés Ces symboles qui figurent sur les produits, les emballages et/ou les documents Marquage pour les d’accompagnement signifient que les équipements électriques et électroniques et équipements batteries usagés ne doivent pas être jetés avec les déchets ménagers et font l’objet d’une collecte sélective.
- Page 74 Table des matières 01 Préparatifs 04 Commandes et affichages Vérification des accessoires livrés avec Panneau frontal..... . . 26 l’appareil ......6 Portée de la télécommande .
- Page 75 08 Utilisation du tuner Pour écouter la radio ....48 Amélioration du son stéréo FM ..48 Mémorisation de stations préréglées .
-
Page 76: Préparatifs
Chapitre 1: Préparatifs Vérification des accessoires Installation du récepteur livrés avec l’appareil • Lors de l’installation de l’appareil, assurez- vous que ce dernier est posé sur une Veuillez vérifier que les accessoires suivants surface plane et stable. sont livrés avec l’appareil : N’installez pas l’appareil dans les endroits •... -
Page 77: Guide En 5 Minutes
Chapitre 2: Guide en 5 minutes Raccordez vos enceintes et positionnez- les de sorte à bénéficier d’un son surround Présentation de l’appareil de optimal. cinéma à domicile Consultez Raccordement des enceintes à la page 21. Le système de cinéma à domicile repose sur l’utilisation de pistes audio multiples qui Le placement des enceintes aura un grand permettent de créer un son surround, et vous... - Page 78 Lancez la lecture d’un BD/DVD et réglez le Allumez le récepteur et votre téléviseur. volume. Connectez le microphone à la prise Assurez-vous que BD/DVD apparaît sur l’écran du MCACC SETUP MIC sur le panneau avant. récepteur. Si ce n’est pas le cas, appuyez sur la Assurez-vous qu’il n’y a pas d’obstacles entre touche BD de la télécommande pour régler le les enceintes et le microphone.
- Page 79 Si la configuration des enceintes affichée n’est Suivez les instructions à l’écran. pas correcte, utilisez / pour sélectionner • Assurez-vous que le microphone est l’enceinte et / modifier la configuration. connecté. Lorsque vous avez terminé, passez à l’étape • Vérifiez que le caisson de basses est suivante.
-
Page 80: Autres Problèmes Lors De L'utilisation De La Configuration Mcacc Automatique
Autres problèmes lors de Phase Control est sélectionné, ce récepteur peut reproduire des sons graves puissants l’utilisation de la configuration sans détériorer la qualité du son d’origine (voir MCACC automatique l’illustration ci-dessous). Si l’environnement de la pièce n’est pas optimal pour la configuration MCACC automatique Enceinte avant Position... -
Page 81: Raccordements
Chapitre 3: Raccordements À propos de HDMI Raccordements des câbles HDMI (High Definition Multimedia Interface) prend en charge les signaux vidéo et audio sur Veillez à ne pas plier les câbles par dessus une connexion numérique unique, pour les l’appareil (conformément à l’illustration). Dans lecteurs de DVD, la télévision numérique, les ce cas, le champ magnétique produit par les décodeurs et autres appareils AV. -
Page 82: Câbles Audio Analogiques
Câbles audio analogiques Câbles vidéo en composantes Les câbles vidéo en composantes permettent Utilisez des câbles phono stéréo RCA pour d’obtenir la meilleure reproduction couleur raccorder les appareils audio analogiques. Ces possible de votre source vidéo. Le signal câbles sont le plus souvent rouges et blancs ; couleur de votre téléviseur regroupe le signal les fiches rouges doivent être raccordées aux de luminance (Y) et la couleur (les signaux P... -
Page 83: Raccordement D'un Téléviseur Et D'un Lecteur De Disques Blu-Ray (Bd) Ou D'un Lecteur De Dvd
Raccordement d’un téléviseur et d’un lecteur de disques Blu-ray (BD) ou d’un lecteur de DVD Cette page décrit la façon de raccorder votre lecteur de BD/DVD et votre téléviseur au récepteur. Ce récepteur SURROUND BACK L (Single) PRE O HDMI HDMI CD-R/TAPE ZONE2... -
Page 84: Raccordement Des Sorties Analogiques Multicanaux
Raccordez la sortie vidéo en composantes Raccordez les sorties audio analogiques et les sorties audio stéréo analogiques de votre téléviseur aux entrées TV/SAT du votre lecteur de BD/DVD aux entrées BD/ récepteur. Le son pourra alors être émis par le DVD de ce récepteur. -
Page 85: Raccordement D'un Récepteur Satellite Ou D'un Boîtier Décodeur Numérique
Raccordement d’un récepteur satellite ou d’un boîtier décodeur numérique Les récepteurs satellites et par câble, ainsi que les syntoniseurs de téléviseur numérique terrestre sont tous des exemples de ce que l’on appelle boîtiers décodeurs. Ce récepteur SURROUND AUDIO SPEAKERS BACK L (Single) FRONT PRE OUT... -
Page 86: Raccordement D'autres Appareils Audio
Ce récepteur Raccordement d’autres appareils audio HDMI CD-R/TAPE CD-R/TAPE BD/DVD Le nombre et le type de raccordement dépendent des appareils que vous désirez TV/SAT raccorder. Suivez les étapes ci-dessous pour DVR/VCR TV/SAT raccorder un lecteur CD-R, MD, DAT, un COAXIAL COAXIAL ASSIGNABLE magnétophone ou tout autre appareil audio. -
Page 87: Raccordement D'un Enregistreur Hdd/Dvd, Magnétoscope Et Autres Sources Vidéo
Raccordement d’un enregistreur HDD/DVD, magnétoscope et autres sources vidéo Ce récepteur est muni d’entrées et de sorties audio/vidéo adaptées au raccordement d’enregistreurs analogiques ou numériques, tels que des magnétoscopes ou des enregistreurs HDD/DVD. Ce récepteur SURROUND AUDIO SPEAKE BACK L (Single) PRE OUT HDMI HDMI... -
Page 88: Utilisation Des Prises Femelles Vidéo En Composantes
Utilisation des prises femelles vidéo en composantes Les prises femelles vidéo en composantes offrent généralement une qualité d’image supérieure aux prises vidéo composites. De plus, la fonction de balayage progressif permet d’obtenir des images extrêmement stables et sans scintillement (si la source et le téléviseur sont compatibles). Consultez les modes d’emploi de votre téléviseur et de votre appareil source pour vous assurer qu’ils sont compatibles avec la fonction de balayage progressif. -
Page 89: Raccordement À La Borne Vidéo Du Panneau Frontal
Raccordement à la borne vidéo Raccordement des antennes du panneau frontal Raccordez l’antenne cadre AM et l’antenne filaire FM comme indiqué ci-dessous. Pour Les raccordements vidéo avant sont améliorer la réception et la qualité du son, accessibles via le panneau avant à l’aide de la raccordez les antennes externes (consultez touche INPUT SELECTOR ou VIDEO de la Utilisation des antennes externes à... -
Page 90: Utilisation Des Antennes Externes
Utilisation des antennes externes Pour améliorer la réception FM Utilisez un connecteur de type PAL (non fourni) pour raccorder une antenne FM externe. Connecteur PAL simple ANTENNA 75 Ω câble coaxial LOOP Pour améliorer la réception AM Connectez un fil recouvert de vinyle de 5 à 6 mètres de long à... -
Page 91: Raccordement Des Enceintes
Vous pouvez utiliser les enceintes raccordées aux bornes d’enceintes B pour obtenir une Raccordement des enceintes reproduction stéréo dans une autre pièce. Une configuration complète des six enceintes Consultez la section Installation des enceintes (y compris le subwoofer) est illustrée ci-après ; à... -
Page 92: Utilisez Les Sorties Pre Out Pour Raccorder Les Enceintes Surround Arrière
Branchement des fils nus Utilisez les sorties PRE OUT pour Bornes d’enceintes A : raccorder les enceintes surround arrière Torsadez ensemble les brins de fil dénudés. Raccordez les sorties PRE OUT de l’appareil et un amplificateur supplémentaire afin d’ajouter Libérez la borne de l’enceinte et insérez-y une enceinte surround arrière. -
Page 93: Installation Des Enceintes
Installation des enceintes L’emplacement des enceintes dans la pièce d’écoute a une grande influence sur la qualité Pour obtenir le meilleur son surround possible, du son obtenu. Les conseils suivants vous installez vos enceintes conformément à l’illustration ci-dessous. permettront d’obtenir le meilleur son avec votre système. -
Page 94: Permutation Du Système D'enceintes
• Les enceintes surround et surround arrière Appuyez plusieurs fois pour choisir une option doivent être placées 60 cm à 90 cm plus du système d’enceintes : haut que vos oreilles et légèrement • SPA – Le son sort par les enceintes inclinées vers le bas. -
Page 95: Branchement Du Récepteur
électrique. Vérifiez l’état du cordon de temps à autre. Si le cordon est endommagé, demandez-en le remplacement auprès du service après- vente agréé Pioneer le plus proche. • N’utilisez aucun aucun autre cordon d’alimentation que celui fourni avec cet appareil. -
Page 96: Commandes Et Affichages
Chapitre 4: Commandes et affichages Panneau frontal VSX–819H AUDIO/ VIDEO MULTI- CHANNEL RECEIVER STANDBY/ON PHASE CONTROL – – BAND TUNE TUNE TUNER EDIT PRESET PRESET ENTER INPUT AUTO SURROUND/ STEREO/ ADVANCED STANDARD MULTI-ZONE MASTER SPEAKERS CONTROL ON/OFF SELECTOR STREAM DIRECT A.L.C. -
Page 97: Portée De La Télécommande
Portée de la télécommande ADVANCED SURROUND Permet de naviguer entre les divers modes La télécommande ne fonctionnera pas surround (page 34). correctement : STANDARD SURROUND • Si des obstacles se trouvent entre la Appuyez sur cette touche pour le décodage télécommande et le capteur de standard et pour naviguer parmi les télécommande du récepteur. -
Page 98: Affichage
Affichage PHASE 10 Voyant des informations préréglées ou du S’allume lorsque la touche Phase Control est signal d’entrée sélectionnée (page 10). Indique le nombre de canaux préréglé du syntoniseur ou le type de signal d’entrée, etc. AUTO S’allume lorsque l’option Auto Surround est 11 Ecran à... - Page 99 S’allume lorsqu’une source comportant des signaux audio Dolby Digital Plus encodés est détectée. S’allume lorsqu’une source comportant des signaux audio Dolby TrueHD encodés est détectée. S’allume lorsqu’une source comportant des signaux audio Dolby Digital EX encodés est détectée. 2PLllx S’allume pour indiquer qu’un décodage 2 Pro Logic II / 2 Pro Logic IIx est en cours (consultez la section Écoute d’une source en son surround à...
-
Page 100: Télécommande
INPUT SELECT Servent à sélectionner la source d’entrée. Télécommande RECEIVER Cette touche permet d’allumer le récepteur et de le mettre en veille. RECEIVER INPUT SELECT SOURCE RECEIVER ZONE 2 RECEIVER ON/OFF TV CONTROL Allume la télécommande pour commander le INPUT récepteur (s’utilise pour sélectionner les commandes blanches au-dessus des touches... - Page 101 Permet de basculer entre les modes TV stations de radio à rappeler (page 48 et 49). numérique et analogique pour les téléviseurs à écran plat de Pioneer. BAND Permet de naviguer entre les bandes de signaux radio AM, FM ST (stéréo) et FM MONO (page 48).
- Page 102 13 SOURCE 12 Touches numériques et commandes pour Appuyez sur cette touche pour mettre sous/ d’autres composants Les touches numériques permettent d’accéder hors tension d’autres composants connectés directement à une fréquence radio (page 48) au récepteur (voir page 54 pour en savoir plus). ou aux pistes d’un CD, DVD, etc.
-
Page 103: Coute De Sources À L'aide De
Chapitre 5: Écoute de sources à l’aide de votre système Important Écoute d’une source en son • Les modes d’écoute et de nombreuses surround fonctions décrites dans la présente section Ce récepteur permet d’écouter n’importe peuvent ne pas être disponibles en quelle source en son surround. -
Page 104: Utilisation Des Effets Surround Avancés
• DTS NEO:6 – Permet la lecture à 6.1 Lorsque l’enceinte surround arrière est raccordée. canaux des sources DTS encodées Si vous avez raccordé des enceintes surround arrière, reportez-vous également à la section Utilisation des effets surround Utilisation du traitement de canal surround avancés arrière à... -
Page 105: Écoute En Mode Stéréo
Écoute en mode stéréo Utilisation de la fonction Front Stage Surround Advance Lorsque vous sélectionnez STEREO, la source est seulement reproduite sur les enceintes La fonction Front Stage Surround Advance avant droite et gauche (et éventuellement sur vous permet de créer des effets sonores votre caisson de basses (subwoofer) selon vos naturels de type surround en utilisant réglages d’enceintes). -
Page 106: Utilisation Des Modes Stream Direct
• Appuyez sur RECEIVER, puis sur S.RETRIEVER pour sélectionner ou Utilisation des modes Stream désélectionner le rétablisseur de son. Direct Les modes Stream Direct permettent de reproduire une source de la manière la plus Ecoute avec la fonction Acoustic fidèle possible. Toutes les fonctions de Calibration EQ traitement de signal non nécessaires sont contournées. -
Page 107: Réglage De La Fonction Up Mix
• Dans un système surround 7.1 canaux, les signaux audio qui ont subi un décodage de Réglage de la fonction Up Mix type matriciel par traitement du canal Dans un système surround à 7.1 canaux dont surround arrière, avec ajout de la fonction les enceintes surround sont placées Up Mix, sont transmis par les enceintes directement à... -
Page 108: Réglage Des Options Audio
AUDIO AUDIO TUNER EDIT MASTER PARAMETER PARAMETER TOOLS VOLUME MENU Réglage des options audio MENU RECEIVER INPUT SELECT SOURCE De nombreux réglages audio supplémentaires ZONE 2 ENTER RECEIVER ON/OFF TV CONTROL peuvent être effectués à l’aide du menu INPUT HOME AUDIO PARAMETER. - Page 109 Paramètre Fonction Option(s) Permet de régler le niveau de la plage dynamique des AUTO (Dynamic Range bandes son optimisées pour Dolby Digital, DTS, Dolby Control) Digital Plus, Dolby TrueHD, DTS-HD et DTS Master Audio (cette fonction peut être utile pour l’écoute d’un son surround à...
-
Page 110: Lecture D'autres Sources
• HDMI – Permet de sélectionner un signal HDMI. Vous pouvez sélectionner H pour Lecture d’autres sources l’entrée BD/DVD, TV/SAT ou DVR/VCR. Pour ce qui est des autres entrées, vous ne Mettez l’appareil de lecture sous tension. pouvez pas sélectionner HDMI. Mettez le récepteur sous tension. -
Page 111: Menu De Configuration Du Système
Chapitre 6: Menu de configuration du système • Auto MCACC – Il s’agit d’une configuration surround automatique Utilisation du menu de rapide et efficace (voir Configuration configuration du système automatique du son surround (MCACC) à La section suivante décrit de façon détaillée la page 8). -
Page 112: Réglage Des Enceintes
Sélectionnez ‘Manual SP Setup’ puis Sélectionnez ‘Speaker Setting’ dans le appuyez sur la touche ENTER. menu Manual SP Setup. 2a.Speaker Setting System Setup 2.Manual SP Setup 2.Manual SP Setup SMALL 1.Auto MCACC a.Speaker Setting a.Speaker Setting Front Center [ SMALL ] 2.Manual SP Setup b.Crossover Network b.Crossover Network... -
Page 113: Réseau De Recouvrement
• Surr. Back – Sélectionnez le nombre Réseau de recouvrement d’enceintes surround arrière que vous • Réglage par défaut : 100Hz possédez (une, deux ou zéro). Ce réglage établit une coupure entre les sons Sélectionnez LARGE si vos enceintes graves qui sont renvoyés des enceintes réglées surround reproduisent de façon fidèle les sur LARGE, ou du subwoofer, et les sons fréquences graves. -
Page 114: Distance Des Enceintes
Distance des enceintes Sélectionnez une option de configuration. • Manual – Déplacez la tonalité d’essai Pour obtenir une profondeur sonore et un manuellement d’une enceinte à l’autre et détachement parfaits de votre système, vous réglez chaque niveau de canal devez préciser la distance qu’il y a entre vos individuellement. - Page 115 Sélectionnez l’appareil qui correspond à Appuyez sur la touche RECEIVER de la celui que vous avez raccordé à cette entrée. télécommande, puis sur la touche SETUP. Sélectionnez BD, TV, DVR, MULTI (MULTI CH Un affichage à l’écran apparaît sur votre IN) ou OFF.
-
Page 116: Utilisation De La Fonction Multi- Zone
Chapitre 7: Utilisation de la fonction MULTI- ZONE Options d’écoute MULTI-ZONE Écoute MULTI-ZONE Le tableau suivant indique les sources que vous pouvez écouter dans la sous-zone : Ce récepteur peut alimenter jusqu’à deux systèmes indépendants se trouvant dans des Sous-zone Sources d’entrée disponibles pièces séparées une fois que vous avez ZONE 2... -
Page 117: Utilisation Des Commandes
Utilisation des commandes MULTI- • Si vous sélectionnez TUNER, vous pouvez utiliser les commandes du syntoniseur ZONE pour sélectionner une station préréglée Les étapes suivantes font appel aux (reportez-vous à la section Mémorisation de commandes du panneau avant pour la stations préréglées à... -
Page 118: Utilisation Du Tuner
Chapitre 8: Utilisation du tuner Amélioration du son stéréo FM Pour écouter la radio Si le voyant TUNE ou ST ne s’allume pas lors du réglage d’une station FM à cause d’un Les étapes suivantes décrivent la façon de régler les signal faible, appuyez sur la touche BAND pour bandes FM et AM à... -
Page 119: Pour Écouter Les Stations Préréglées
Appuyez sur la touche PRESET / • Une fois que vous avez attribué un nom à pour sélectionner la station préréglée que une station préréglée, appuyez sur vous désirez. DISPLAY pour afficher le nom. Si vous Pour cela, vous pouvez aussi utiliser les voulez afficher de nouveau la fréquence, touches numériques. -
Page 120: Recherche De Programmes Rds
Affichage d’informations RDS AUDIO TUNER EDIT MASTER PARAMETER TOOLS VOLUME MENU La touche DISPLAY permet d’afficher les MENU RECEIVER INPUT SELECT SOURCE différents types d’informations RDS ZONE 2 RECEIVER ON/OFF TV CONTROL ENTER ENTER disponibles. INPUT HOME MENU • Appuyez sur DISPLAY pour plus BAND SETUP iPod CTRL... -
Page 121: Pour Faire Un Enregistrement
Chapitre 9: Pour faire un enregistrement Sélectionnez la source que vous désirez enregistrer. Faire un enregistrement audio Utilisez les touches MULTI CONTROL ou vidéo (ou INPUT SELECT). Vous pouvez faire un enregistrement audio ou Sélectionnez le signal d’entrée vidéo à partir du syntoniseur intégré, ou d’une (si nécessaire). -
Page 122: Commander Le Reste De Votre Système
Chapitre 10: Commander le reste de votre système Tout en appuyant sur la touche RECEIVER, maintenez la touche ‘1’ enfoncée Configurer la télécommande pendant trois secondes. pour commander d’autres Appuyez sur la touche MULTI CONTROL composants pour sélectionner le composant à La plupart des composants peuvent être commander. -
Page 123: Commandes Pour Les Téléviseurs
Téléviseur câblé/Téléviseur Satellite/ SOURCE touche Téléviseur/Télévision numérique Permet de basculer entre les modes TV numérique et Télévision numérique/ DTV/TV Téléviseur analogique pour les téléviseurs à écran plat de Pioneer. Téléviseur TOP MENU Commutateurs TEXT ON/OFF pour téléviseurs. HOME MENU GUIDE Téléviseur câblé/Téléviseur Satellite/... -
Page 124: Commandes Pour Autres Composants
Commandes pour autres composants Cette télécommande peut commander des composants après saisie des bons codes ou bien apprendre au récepteur les commandes (voir Commander le reste de votre système à la page 52 pour en savoir plus). Utilisez les touches MULTI CONTROL pour sélectionner le composant. Touche(s) Fonction Composants... - Page 125 Touche(s) Fonction Composants Appuyez sur cette touche pour afficher des informations. Lecteur de BD/DVD/DVR DISPLAY TOP MENU Affiche le menu ‘supérieur’ du disque d’un lecteur de Lecteur de BD/DVD/DVR BD/DVD. MENU Affiche les menus du BD/DVD ou DVR que vous utilisez. Lecteur de BD/DVD/DVR ...
-
Page 126: Liste Des Codes De Préréglage
Telefunken 2088 AMW 2094 H&B 2089 2023, 2031, 2039, 2062 Tensai 2093 Awa 2094 Haaz 2085, 2086 Pioneer 2004, 2012, 2014, Tevion 2002, 2086, 2092 Bang & Olufsen 2096 HiMAX 2090 2049, 2120, 2121, 2122, Thomson 2003, 2017, Bellagio 2094... - Page 127 Allorgan 0114 0039, 0040, 0065, 0078, ELECTRO TECH 0027 Goodmans 0025, 0027, Allstar 0034, 0040 0114 Elin 0026, 0034, 0037, 0039, 0032, 0034, 0037, 0039, AMOi 0109 Capsonic 0025 0040, 0113 0040, 0107, 0114 Amplivision 0010, 0026, Carena 0040 Elite 0028, 0034, 0040 Gorenje 0010, 0035 0041, 0114 Carrefour 0032...
- Page 128 0032, 0039, 0072, 0113, 0030, 0034, 0037, 0039, Naonis 0030 0040, 0113 0114 0040, 0071, 0074, 0081, NEC 0032, 0114 Pioneer 0010, 0031, 0033, SBR 0037, 0040 0105, 0113, 0114 Neckermann 0010, 0023, 0034, 0037, 0040, 0120 SCHAUB LORENTZ 0031 LG/GoldStar 0014...
- Page 129 Silver 0032 Televiso 0041 Yoko 0010, 0025, 0026, Firstline 1002, 1005, 1007, Singer 0023, 0029, 0041 Tensai 0027, 0028, 0034, 0027, 0028, 0034, 0037, 1017 Sinudyne 0023, 0029, 0037, 0039, 0040, 0114 0039, 0040, 0113, 0114 Flint 1002 0040 Tesmet 0034 Yorx 0028 Formenti/Phoenix 1006 Skantic 0031...
- Page 130 Teletech 1017, 1018 Philco 1017 Tenosal 1007, 1017 Philips 1006, 1012, 1019 Tensai 1000, 1005, 1007, Phonola 1006 1017 Pioneer 1006, 1120 Tevion 1002 Portland 1003, 1004, 1018 Thomson 1001, 1015 Prinz 1000 Thorn 1001 Profex 1007 Tokai 1005, 1007, 1017...
-
Page 131: Autres Raccordements
• La fonction d’égalisation ne peut pas être commandée à l’aide de ce récepteur. Nous recommandons de désactiver l’égaliseur avant de connecter le récepteur. • Pioneer ne peut en aucun cas accepter de responsabilité pour toute perte directe ou indirecte résultant d’un problème ou de la perte de matériel enregistré dus à une panne de l’iPod. -
Page 132: Lecture De L'ipod
1 Les commandes de votre iPod (excepté iPod touch ou iPhone) seront désactivées tant que ce dernier sera raccordé au récepteur (Pioneer s’affiche sur l’écran de l’iPod). 2 • Notez que les caractères non romains du titre s’affichent sous la forme •... -
Page 133: Visualisation De Photos Et De Contenu
À propos d’iPod Touche Fonction Passe successivement à Shuffle Songs, Shuffle Albums et Shuffle Off (pression répétée). DISPLAY Change les informations de lecture du morceau présentées sur l’affichage du panneau avant (pression répétée). / Les accessoires électroniques portant la Pendant la navigation, permet de passer aux niveaux précédents/ mention ‘Made for iPod’... -
Page 134: Raccordement D'un Appareil Usb
à un ordinateur personnel pour lancer une lecture USB. • Pioneer n’est pas en mesure de garantir la compatibilité (fonctionnement et/ou alimentation du bus) avec tous les périphériques de stockage de masse USB existants et n’endosse aucune responsabilité quant à la perte éventuelle de données susceptible de se produire en cas de raccordement de ces périphériques à... -
Page 135: Compatibilité Des Fichiers Audio Compressés
Autres informations sur la compatibilité Touche Fonction • Lecture de fichiers MP3/WMA/MPEG-4 / Pendant la lecture, appuyez sur ces AAC VBR (Variable Bit Rate) : Oui touches pour passer à la piste / précédente/suivante. • Compatibilité avec la protection DRM (Digital Rights Management) : Oui (les Appuyez sur cette touche pour revenir fichiers audio bénéficiant de la protection... -
Page 136: Information Complémentaire
Inspectez les autres appareils électriques raccordés au récepteur car quelquefois, le problème provient d’un autre appareil. Si le problème ne peut pas être résolu grâce à la liste de contrôle ci-dessous, consultez le service après-vente Pioneer indépendant agréé le plus proche pour effectuer la réparation. - Page 137 Problème éventuel Réparation possible Bruit considérable lors de la • Raccordez l’antenne (page 19) et réglez sa position de façon à obtenir une bonne radiodiffusion. réception. • Éloignez tous les câbles détachés des bornes d’antenne et des fils électriques. • Déroulez le fil de l’antenne filaire FM, placez-le de façon à obtenir une bonne réception et fixez-le sur un mur (ou raccordez-le à...
-
Page 138: Hdmi
HDMI Symptôme Réparation possible Pas d’image ni de son. • Si le problème persiste lorsque vous connectez directement votre composant HDMI à votre moniteur, reportez-vous au manuel du composant ou du moniteur ou prenez contact avec le service après-vente du fabricant. Pas d’image. -
Page 139: Ipod Messages
iPod messages Symptôme Cause Action iPod/USB Error 1 Il y a un problème au niveau du parcours du Éteignez le récepteur et reconnectez l’iPod au signal entre l’iPod et le récepteur. récepteur. Si cela ne donne aucun résultat, (I/U ERR1) réinitialisez votre iPod. -
Page 140: Réinitialisation De L'appareil Principal
Réinitialisation de l’appareil Spécifications principal Section audio Respectez cette procédure pour rétablir les Puissance nominale de sortie réglages d’usine du récepteur. Utilisez les Avant, Central, Surround commandes du panneau frontal pour ce faire... . 130 W par canal (1 kHz, 6 Ω, 1 %) . -
Page 141: Nettoyage De L'appareil
Carte de garantie ......1 surface de l’appareil. Ce mode d’emploi Publication de Pioneer Corporation. © 2009 Pioneer Corporation. Remarque Tous droits de reproduction et de traduction •... - Page 144 Содержание 01 Перед началом работы 04 Органы управления и индикаторы Проверка комплекта поставки ... . . 6 Передняя панель ..... . 26 Установка...
- Page 145 08 Использование тюнера Прослушивание радиопередач ... . 48 Повышение качества стереозвука в диапазоне FM ..... . . 48 Сохранение...
-
Page 146: Перед Началом Работы
Глава 1: Перед началом работы Проверка комплекта поставки Установка ресивера Проверьте наличие перечисленных ниже • При установке данного устройства принадлежностей: убедитесь в том, что оно размещено на ровной и твердой поверхности. • Установочный микрофон Не устанавливайте ресивер в следующих • Пульт дистанционного управления местах: •... -
Page 147: Краткое Руководство
Глава 2: Краткое руководство Подключите используемые громкоговорители и разместите их так, Ознакомление с системой чтобы они обеспечивали оптимальное домашнего кинотеатра объемное звучание. С помощью домашнего кинотеатра эффект См. раздел Подключение громкоговорителей объемного звучания создается путем на стр. 21. использования нескольких звуковых дорожек, Места... -
Page 148: Автоматическая Настройка Объемного Звучания (Mcacc)
Отрегулируйте звук при Включите ресивер и используемый воспроизведении диска BD/DVD. телевизор. Убедитесь в том, что на дисплее ресивера Подключите микрофон в гнездо отображается индикация BD/DVD. Если индикация отсутствует, нажмите кнопку BD на пульте MCACC SETUP MIC на передней панели. дистанционного управления, чтобы выбрать в Проверьте, нет... -
Page 149: Speaker System
Следуйте инструкциям Возникновение сообщения об ошибке (ERR (ОШИБКА)) в правом столбце может означать отображаемым на экране. неполадку в подключении громкоговорителя. • Убедитесь в том, что микрофон подключен. Если неполадка не устраняется при выборе • Проверьте, что сабвуфер включен и что пункта... -
Page 150: Другие Проблемы При Использовании Автоматической Настройки Mcacc
Другие проблемы при использовании конфликта с другими каналами. При включенном режиме Phase Control данный автоматической настройки MCACC ресивер может воспроизводить мощный Если условия помещения не подходят для низкочастотный звук без ухудшения качества автоматической настройки MCACC (слишком исходного звука (см. рисунок ниже). сильные... -
Page 151: Подключение
Глава 3: Подключение Будьте внимательны и соблюдайте правильность направления при подключении Подсоединение кабелей разъема. Не перегибайте кабели поверх устройства (как показано на рисунке). В противном случае О HDMI магнитное поле, генерируемое HDMI (High Definition Multimedia Interface – трансформаторами этого устройства, может интерфейс... -
Page 152: Аналоговые Аудиокабели
Аналоговые аудиокабели Кабели компонентного видео Наивысшее качество воспроизведения цвета от Для подключения аналоговых источника видеосигнала обеспечивают кабели аудиокомпонентов используйте компонентного видео. По этим кабелям стереофонические аудиокабели RCA. Эти передается телевизионный цветовой сигнал, кабели имеют стандартную красную и белую разделенный на сигнал яркости (Y) и сигналы маркировку, и... -
Page 153: Подключение К Телевизору Плеера Blu-Ray Или Dvd
Подключение к телевизору плеера Blu-ray или DVD На этой странице показан порядок подключения проигрывателя дисков BD/DVD и телевизора к ресиверу. SURROUND BACK L (Single) PRE O HDMI HDMI CD-R/TAPE ZONE2 BD/DVD DVR/VCR TV/SAT DVR/VCR TV/SAT TV/SAT IN COAXIAL COAXIAL ASSIGNABLE MONITOR OUT BD/DVD IN TV/SAT MONITOR OUT BD/DVD IN DVR/VCR... -
Page 154: Подключение Многоканальных Аналоговых Выходов
Подключите композитный Соедините аналоговые аудиовыходы видеовыход и стереофонические телевизора со входами TV/SAT ресивера. аналоговые аудиовыходы Это позволит осуществлять воспроизведение проигрывателя BD/DVD ко входам BD/ звука со встроенного тюнера телевизора. DVD этого ресивера. Используйте для этого стереофонический Для соединения используйте стандартный аудиокабель... -
Page 155: Подключение Спутникового Ресивера Или Другой Цифровой Приставки
Подключение спутникового ресивера или другой цифровой приставки Спутниковые и кабельные ресиверы, а также цифровые радио ресиверы являются примерами так называемых «приставок». SURROUND AUDIO SPEAKERS L (Single) BACK FRONT PRE OUT HDMI HDMI CD-R/TAPE ZONE2 SUBWOOFER BD/DVD PRE OUT DVR/VCR VIDEO TV/SAT TV/SAT DVR/VCR... -
Page 156: Подключение Других Аудиокомпонентов
Подключение других аудиокомпонентов Количество и тип соединений зависит от типа HDMI CD-R/TAPE CD-R/TAPE BD/DVD подключаемого компонента. Для подключения проигрывателей CD-R, MD, DAT, кассетного магнитофона или других TV/SAT аудиокомпонентов выполняйте действия, DVR/VCR TV/SAT описанные ниже. COAXIAL COAXIAL ASSIGNABLE DVR/VCR ANTENNA Если используемый компонент имеет (CD) (CD) UNBAL... -
Page 157: Подключение Hdd/Dvd Рекордера, Видеомагнитофона И Других Источников Видеосигнала
Подключение HDD/DVD рекордера, видеомагнитофона и других источников видеосигнала Данный ресивер имеет аудио и видео входы и выходы, пригодные для подключения аналоговых или цифровых видео рекордеров/магнитофонов, включая рекордеры/магнитофоны VCR и HDD/ DVD. SURROUND AUDIO SPEAKE BACK L (Single) PRE OUT HDMI HDMI CD-R/TAPE ZONE2... -
Page 158: Использование Разъемов Компонентного Видео
Использование разъемов компонентного видео По сравнению с композитным видео компонентное видео обеспечивает значительно более высокое качество изображения. Еще большими преимуществами обладает видео с прогрессивной разверткой. При условии, что источник сигнала и телевизор поддерживают этот формат, обеспечивается очень устойчивое изображение без мерцания. Узнать, поддерживает ли ваше оборудование... -
Page 159: Подключение К Видеоразъему На Передней Панели
Подключение к видеоразъему на Подключение антенн передней панели Подключите рамочную антенну АМ и проволочную антенну FM, как показано Доступ к передним разъемам видео справа. Для улучшения приема и качества осуществляется с передней панели с помощью звука подключите внешние антенны (см. кнопки... -
Page 160: Использование Внешних Антенн
Использование внешних антенн Улучшение качества приема FM Для подключения внешней FM-антенны используйте PAL-соединитель (приобретается отдельно). ANTENNA Ω LOOP Улучшение качества приема AM Подсоедините провод в виниловой изоляции длиной от 5 м дo 6 м к гнезду AM антенны, не отсоединяя прилагаемую рамочную антенну Для... -
Page 161: Подключение Громкоговорителей
Можно использовать громкоговорители, подключенные к разъемам группы B для Подключение громкоговорителей прослушивания в режиме стерео в другой Полная установка шести громкоговорителей комнате. При размещении громкоговорителей (включая низкочастотный громкоговоритель) в другой комнате убедитесь в том, что вы показана ниже, но для каждого помещения план прочли... -
Page 162: Используйте Выходы Pre Out Для Подключения Тыловых Громкоговорителей
Используйте выходы PRE OUT для Подключение проводов. Разъемы громкоговорителей группы A: подключения тыловых громкоговорителей Скрутите оголенные жилы провода. Подключите выходы PRE OUT на устройстве к Ослабьте зажим контакта и вставьте дополнительному усилителю, чтобы добавить оголенный провод. тыловой громкоговоритель. Зажмите контакт. ANALOG INPUT Разъемы... -
Page 163: Размещение Громкоговорителей
Размещение громкоговорителей Pасположение громкоговорителей в комнате имеет большое влияние на качество звука. Для получения наилучшего качества Следующие рекомендации помогут добиться объемного звучания установите оптимального звучания вашей системы. громкоговорители, как показано ниже. • Сабвуфер можно поместить на полу. В Акустическая система 5.1: идеальном... -
Page 164: Смена Настройки Акустической Системы
• Объемные и тыловые громкоговорители • SPA – звук выводится из следует устанавливать на 60–90 см выше громкоговорителей, подключенных к уровня ушей и слегка наклонить вниз. контактам громкоговорителей A и Убедитесь в том, что громкоговорители не SURROUND BACK PRE OUT (возможно направлены... -
Page 165: Подключение Ресивера К Сети
или поражения электрическим током. Периодически проверяйте кабель питания. Если кабель питания поврежден, обратитесь за сменным кабелем в ближайший уполномоченный независимый сервис-центр Pioneer. • Используйте только кабель питания, входящий в комплект поставки данного устройства. • Используйте прилагаемый кабель питания только по его прямому назначению, как... -
Page 166: Органы Управления И Индикаторы
Глава 4: Органы управления и индикаторы Передняя панель VSX–819H AUDIO/ VIDEO MULTI- CHANNEL RECEIVER STANDBY/ON PHASE CONTROL – – BAND TUNE TUNE TUNER EDIT PRESET PRESET ENTER INPUT AUTO SURROUND/ STEREO/ ADVANCED STANDARD MULTI-ZONE MASTER SPEAKERS STREAM DIRECT A.L.C. SURROUND SURROUND CONTROL ON/OFF... -
Page 167: Дальность Действия Пульта Дистанционного Управления
Дальность действия пульта ADVANCED SURROUND Переключает различные режимы дистанционного управления объемного звучания (стр. 34). Эффективность работы пульта дистанционного управления может снижаться в следующих STANDARD SURROUND случаях: Нажмите для стандартного декодирования • при наличии препятствий между пультом и для переключения между параметрами дистанционного... -
Page 168: Дисплей
Дисплей PHASE Загорается, когда включен фазовый Мигает, когда радиостанция переключатель (стр. 10). зарегистрирована. AUTO 10 Индикатор информации PRESET или Загорается при включенной функции входного сигнала автоматического объемного звучания Отображает предварительно заданный номер (См. раздел Автоматическое воспроизведение тюнера или тип входного сигнала и т. п. на... - Page 169 Загорается при обнаружении источника аудиосигнала в формате Dolby Digital Plus. Загорается при обнаружении источника аудиосигнала в формате Dolby TrueHD. Загорается при обнаружении источника аудиосигнала в формате Dolby Digital EX. 2PLllx Загорается при включенном декодировании 2 Pro Logic II / 2 Pro Logic IIx (см.
-
Page 170: Пульт Дистанционного Управления
INPUT SELECT Используется для выбора источника для входа. Пульт дистанционного управления RECEIVER Используется для включения ресивера или его переключения в режим ожидания. RECEIVER RECEIVER INPUT SELECT SOURCE Переключает пульт ДУ на управление ресивером ZONE 2 RECEIVER (используется для выбора белых команд над ON/OFF TV CONTROL INPUT... - Page 171 Отображение экрана меню «TOOLS» Переключение между режимами входа (Сервис) плеера Blu-ray. DTV (цифровое телевидение) и TV Сначала нажмите TUNER для доступа к: (телевидение) для плоскоэкранных телевизоров Pioneer. TUNER EDIT Запоминает/присваивает названия станциям для последующего вызова (стр. 48 и 49). BAND Переключение...
- Page 172 12 Цифровые кнопки и другие элементы 13 SOURCE управления компонентами Эта кнопка служит для включения/выключения других компонентов, подключенных к Номерные кнопки используются для выбора ресиверу (для получения более подробной частоты вещания напрямую (стр. 48) или информации см.стр. 54). дорожки на диске CD, DVD, и т.д. После нажатия...
-
Page 173: Прослушивание Системы
Глава 5: Прослушивание системы Внимание Прослушивание материала с • Режимы звучания и многие функции, использованием объемного звучания описанные в этом разделе, могут быть С помощью данного ресивера можно прослушивать недоступны при некоторых значениях любой источник с использованием объемного источника, настроек или статуса ресивера. звучания. -
Page 174: Использование Эффектов Дополнительного Объемного Звучания
Использование эффектов Если тыловой громкоговоритель подключен. дополнительного объемного звучания Если подключены тыловые громкоговорители, см. также раздел Использование обработки Функция Advanced surround (Дополнительное заднего тылового канала на стр. 36. объемное звучание) создает множество В случае двухканальных источников можно эффектов объемного звучания. При выбрать... -
Page 175: Прослушивание В Стереофоническом
Прослушивание в Использование функции стереофоническом режиме фронтального расширенного объемного звучания При выборе режимовa STEREO (СТЕРЕО) источник будет воспроизводиться только через Функция фронтального расширенного передние правый и левый громкоговорители объемного звучания (Front Stage Surround (и, возможно, через низкочастотный Advance) позволяет создавать объемные громкоговоритель... -
Page 176: Использование Функции Stream Direct (Прямое Воспроизведение)
Для включения или выключения • функции Sound Retriever нажмите Использование функции Stream RECEIVER и затем нажмите S.RETRIEVER. Direct (Прямое воспроизведение) Используйте режим Stream Direct (Прямое воспроизведение), если необходимо Прослушивание с воспроизведение источника, максимально приближенное к оригиналу. Все излишние использованием эквалайзера цепи... -
Page 177: Настройка Функции Up Mix
• В аудиосистеме 7.1 аудиосигналы, прошедшие обработку с дешифровкой Настройка функции Up Mix матрицы через обработку тылового канала, В акустической системе 7.1 с размещением к которой добавлена функция громкоговорителей объемного звучания микширования up-mix, выводятся на непосредственно по сторонам от позиции задние... -
Page 178: Задание Параметров Звука
AUDIO AUDIO TUNER EDIT MASTER PARAMETER PARAMETER TOOLS VOLUME Задание параметров звука MENU MENU RECEIVER INPUT SELECT SOURCE Имеется ряд дополнительных настроек звука , ZONE 2 ENTER RECEIVER ON/OFF TV CONTROL которые вы можете выполнить с помощью INPUT меню AUDIO PARAMETER. Настройки по HOME MENU BAND... - Page 179 Настройка Назначение Параметр(ы) Регулирует уровень динамического диапазона для AUTO (Управление звуковых дорожек фильмов, оптимизированных для Dolby динамическим Digital, DTS, Dolby Digital Plus, Dolby TrueHD, DTS-HD и диапазоном) DTS Master Audio (вам может потребоваться использование этой функции при прослушивании объемного звука при низкой громкости). Некоторые...
-
Page 180: Воспроизведение Других Источников
• HDMI – выбирает сигнал HDMI. H можно выбрать для входа BD/DVD, TV/SAT или Воспроизведение других источников DVR/VCR. Для других входов выбрать Включите питание компонента для HDMI нельзя. воспроизведения. Если установлено значение DIGITAL или HDMI, 2 загорается при поступлении сигнала Включите... -
Page 181: Меню System Setup (Настройка Системы)
Глава 6: Меню System Setup (Настройка системы) • Auto MCACC – это быстрая и эффективная настройка объемного Использование меню System звучания (см. раздел Автоматическая Setup (Настройка системы) настройка объемного звучания (MCACC) на стр. 8). В следующем разделе описана подробная • Manual SP Setup (Ручная настройка настройка... -
Page 182: Speaker Setting
Выберите пункт «Manual SP Setup» Выберите пункт «Speaker Setting» (Ручная настройка громкоговорителей) (Настройка громкоговорителей) в меню «Manual SP Setup» (Ручная настройка и нажмите кнопку ENTER. громкоговорителей). System Setup 2.Manual SP Setup 1.Auto MCACC a.Speaker Setting 2a.Speaker Setting 2.Manual SP Setup 2.Manual SP Setup b.Crossover Network 3.Input Assign... - Page 183 • Surr. Back – Выберите число имеющихся Crossover Network (Разделительный тыловых громкоговорителей (один, два или нет). фильтр) Выберите LARGE, если ваши тыловые • Значение по умолчанию: 100Hz (100 Гц) громкоговорители эффективно воспроизводят Эта настройка определяет частоту отсечки между низкие частоты. Если выбрать SMALL, низкие низкочастотными...
-
Page 184: Speaker Distance (Расстояние До Громкоговорителей)
Speaker Distance (Расстояние до Выберите параметр настройки. • Manual (Ручная) – переместите тестовый громкоговорителей) звуковой сигнал вручную от одного Для обеспечения хорошей глубины звучания и громкоговорителя к другому и отрегулируйте пространственного ощущения системы следует индивидуальные уровни каналов. указать расстояние от громкоговорителей до •... - Page 185 Выберите тип компонента, Нажмите кнопку RECEIVER (РЕСИВЕР) подключенного к этому входу. на пульте дистанционного управления, Выберите BD, TV, DVR, MULTI (MULTI CH IN), после чего нажмите кнопку SETUP или OFF. (НАСТРОЙКА). • Для этого используйте кнопки / и На экране телевизора появится экранный ENTER.
-
Page 186: Использование Функции Multi- Zone
Глава 7: Использование функции MULTI- ZONE Параметры прослушивания в режиме Прослушивание в режиме MULTI- MULTI-ZONE На таблице ниже описаны возможности ZONE прослушивания в подзоне: Данный ресивер может обслуживать до двух независимых систем в разных комнатах, если Подзона Доступные источники входа правильно... -
Page 187: Использование Элементов Управления Multi-Zone
Использование элементов • Если выбрать TUNER, с помощью элементов управления тюнера можно управления MULTI-ZONE выбрать запрограммированную Ниже описан порядок выбора источников с радиостанцию (инструкции см. в разделе помощью элементов управления на передней Сохранение запрограммированных панели. См. раздел Управление функцией радиостанций на стр. 48). MULTI-ZONE с... -
Page 188: Использование Тюнера
Глава 8: Использование тюнера Повышение качества стереозвука в Прослушивание радиопередач диапазоне FM В приведенных ниже пунктах описывается Если при настройке на FM-радиостанцию процедура настройки на радиостанцию индикаторы TUNE или ST не горят из-за диапазона FM и AM с использованием слабого сигнала, нажмите кнопку BAND для функций... -
Page 189: Прослушивание Запрограммированных Радиостанций
Нажимайте кнопки PRESET / для • Когда запрограммированной станции присвоено название, нажмите DISPLAY для выбора нужной запрограммированной отображения названия. Если вы хотите радиостанции. вернуться к отображению частот, нажмите Также можно использовать цифровые кнопки. DISPLAY несколько раз для отображения Нажмите кнопку ENTER. частоты. -
Page 190: Поиск Программ Rds
Отображение информации RDS AUDIO TUNER EDIT MASTER PARAMETER TOOLS VOLUME Используйте кнопку DISPLAY для MENU MENU RECEIVER INPUT SELECT SOURCE отображения разных типов информации RDS. ZONE 2 RECEIVER ON/OFF TV CONTROL ENTER ENTER Нажмите кнопку DISPLAY для INPUT • HOME получения... -
Page 191: Выполнение Записи На Внешний Источник
Глава 9: Выполнение записи на внешний источник Выберите источник, который Выполнение аудио- или требуется использовать для записи. Используйте кнопки MULTI CONTROL видеозаписи (INPUT SELECT). Аудио- или видеозапись можно выполнить либо с помощью встроенного тюнера, либо с Выберите входной сигнал (если это помощью... -
Page 192: Управление Остальными Частями Системы
Глава 10: Управление остальными частями системы Удерживая нажатой кнопку RECEIVER Настройка пульта нажмите и удерживайте кнопку «1» три секунды. дистанционного управления для работы с другими компонентами Нажмите кнопку MULTI CONTROL для того компонента, управление которым Большинство компонентов могут быть требуется. назначены... -
Page 193: Органы Управления Телевизорами
компонента, назначенного для кнопки TV. тюнер/телевизор/DTV Переключение между режимами входа DTV DTV/TV DTV/Телевизор (цифровое телевидение) и TV (телевидение) для плоскоэкранных телевизоров Pioneer. Переключается в положение TEXT ON/OFF (ТЕКСТ телевизор TOP MENU ВКЛ) для телевизоров. Служит в качестве кнопки GUIDE для навигации. -
Page 194: Органы Управления Другими Компонентами
Органы управления другими компонентами Для управления компонентами с помощью пульта дистанционного управления необходимо ввести их правильные коды или передать ресиверу соответствующие команды (см. раздел Управление остальными частями системы на стр. 52). Используйте кнопки MULTI CONTROL для выбора компонента. Кнопки Назначение Компоненты... - Page 195 Кнопки Назначение Компоненты Нажатие этой кнопки отображает информацию. Проигрыватель BD/DVD/ DISPLAY TOP MENU Отображение «главного» меню проигрывателя дисков Проигрыватель BD/DVD/ BD/DVD. Отображает меню для текущего проигрывателя BD/ Проигрыватель BD/DVD/ MENU DVD или DVR. Пауза воспроизведения ленты. Кассетный магнитофон Остановка...
-
Page 196: Список Предварительно Заданных Кодов
Synn 2086 Clatronic 2089 Kennex 2093 2023, 2031, 2039, 2062 Tatung 2035, 2093 Coby 2095 Kenwood 2051 Pioneer 2004, 2012, 2014, TCM 2002 Conia 2082 KeyPlug 2093 2049, 2120, 2121, 2122, Teac 2067, 2082, 2086 Continental Edison 2094 Kiiro 2093... - Page 197 AudioTon 0010, 0026, 0114 Contec 0026, 0027, 0032, Expert 0041 Ausind 0017 0039, 0113 Exquisit 0040 Производителя Код Autovox 0017, 0023, 0025, Continental Edison 0033 Fenner 0027, 0039 A.R. Systems 0040 0026, 0114 Cosmel 0027, 0039 Ferguson 0033, 0037, Acme 0026 Awa 0113, 0114 Crosley 0017, 0023 0038, 0042...
- Page 198 Interfunk 0010, 0023, 0031, 0037 Neufunk 0039, 0040 0040, 0113 0034, 0037, 0040 Luma 0030, 0037, 0039, New Tech 0027, 0034, Pioneer 0010, 0031, 0033, International 0113 0040 0039, 0040, 0114 0034, 0037, 0040, 0120 Intervision 0010, 0025, Lumatron 0030, 0034,...
- Page 199 Prandoni-Prince 0017, SBR 0037, 0040 Susumu 0028 Universum 0010, 0017, 0030 SCHAUB LORENTZ 0031 Sutron 0027, 0039 0025, 0034, 0035, 0037, Precision 0026, 0114 Schneider 0026, 0028, Sydney 0026, 0113, 0114 0040, 0114 Prima 0027, 0031, 0039 0034, 0037, 0040, 0075, Sysline 0037 Univox 0040 Profex 0027, 0039...
- Page 200 Teac 1018 De Graaf 1006 Intervision 1000, 1018 Phonola 1006 Tec 1004, 1017, 1018 Decca 1000, 1001, 1006 Irradio 1005, 1007, 1017 Pioneer 1006, 1120 Teleavia 1001 Denko 1017 ITT 1001 Portland 1003, 1004, 1018 Telefunken 1001 Dual 1001, 1006, 1018...
-
Page 201: Другие Подключения
• Такие функции, как эквалайзер не могут управляться с ресивера, поэтому перед подключением рекомендуется отключать эквалайзер. • Pioneer при любых обстоятельствах не несет ответственности за прямые и косвенные убытки, возникшие вследствие неудобств и утрату записанного материала, возникшую из-за неисправности iPod. -
Page 202: Воспроизведение С Ipod
Примечание 1 При подключении к данному ресиверу элементы управления iPod (за исключением iPod touch и iPhone) не будут действовать (на дисплее iPod будет отображаться надпись Pioneer). 2 • Учтите, что нелатинские буквы в названиях будут отображаться как • Эта функция недоступна для фотографий и видеороликов, записанных в iPod. -
Page 203: Просмотр Фотографий И Видеоконтента
О формате iPod Кнопка Назначение При последовательном нажатии происходит переключение между режимами Shuffle Songs (Случайная песня), Shuffle Albums (Случайные альбомы) и Shuffle Off (Случайное воспроизведение отключено). Повторно нажимайте для DISPLAY «Made for iPod» означает, что электронный переключения информации прибор был разработан для подключения воспроизведения... -
Page 204: Подключение Устройства Usb
памяти (особенно мобильные накопители) и цифровые аудиопроигрыватели (проигрыватели MP3) формата FAT16/32. Невозможно подключить этот ресивер к ПК для воспроизведения USB. • Компания Pioneer не может гарантировать совместимость (управление и/или мощность шины) со всеми запоминающими устройствами USB и не несет ответственности за потерю данных, возможную при подключении к... -
Page 205: Поддержка Сжатых Аудиосигналов
Дополнительная информация о совместимости Кнопка Назначение • VBR (изменяющаяся скорость передачи Повторно нажимайте для переключения DISPLAY данных) MP3/WMA/MPEG-4 AAC: да информации воспроизведения песни, • Совместимость с защитой DRM (Digital отображаемой на дисплее передней панели. Rights Management (управления цифровыми / Нажмите во время воспроизведения правами)): да... -
Page 206: Дополнительная Информация
• Приблизительно через минуту (в это время включить устройство будет выключается. нельзя) снова включите ресивер. Если сообщение не исчезнет, обратитесь в сервисный центр, уполномоченный компанией Pioneer. После выбора функции звук • Убедитесь в правильности подключения компонента (см. раздел Подключение на... - Page 207 Неполадка Устранение Сильные помехи в • Подключите антенну (стр. 19) и отрегулируйте расположение для радиопередачах. наилучшего приема. • Прокладывайте все свободные кабели на достаточном расстоянии от разъемов и проводов антенны. • Полностью растяните проволочную антенну FM диапазона, расположите для лучшего приема и прикрепите ее к стене (или подключите внешнюю антенну...
-
Page 208: Hdmi
HDMI Неполадка Устранение Изображение или звук • Если при непосредственном подключении компонента HDMI к монитору отсутствует. проблема сохранится, обратитесь к инструкции по эксплуатации компонента или монитора или к изготовителю. Изображение отсутствует. • В зависимости от настроек выхода компонента-источника, он может воспроизводить... -
Page 209: Ipod Сообщения
iPod сообщения Неполадка Причина Действие Проблема с поступлением сигнала от Выключите ресивер и подключите iPod к iPod/USB Error 1 iPod на ресивер. ресиверу заново. Перезапустите iPod, (I/U ERR1) если кажется, что он не работает. Версия программы, работающая с iPod Обновите программное обеспечение iPod iPod/USB Error 2 нуждается... -
Page 210: Сброс Параметров Ресивера (Перезагрузка)
Сброс параметров ресивера Спецификации (перезагрузка) Аудио секция Выполните следующую процедуру для сброса Номинальная выходная мощность всех настроек ресивера до значений по Фронтальный, центральный, объемный умолчанию, установленных на заводе... . 130 Ватт по каждому каналу Используйте... -
Page 211: Чистка Устройства
Проволочная антенна FM....1 © Pioneer Corporation, 2009. Кабель iPod ......1 Bce пpaвa занощищeны. - Page 212 253 Alexandra Road, #04-01, Singapore 159936 TEL: 65-6472-7555 PIONEER ELECTRONICS AUSTRALIA PTY. LTD. 178-184 Boundary Road, Braeside, Victoria 3195, Australia, TEL: (03) 9586-6300 PIONEER ELECTRONICS DE MEXICO S.A. DE C.V. Blvd.Manuel Avila Camacho 138 10 piso Col.Lomas de Chapultepec, Mexico,D.F. 11000 TEL: 55-9178-4270 K002_B_En <5707-00000-186-0S>...