Table of Contents
Advertisement
Advertisement
Table of Contents

Related Manuals for Pioneer BDP-LX52


Summary of Contents for Pioneer BDP-LX52
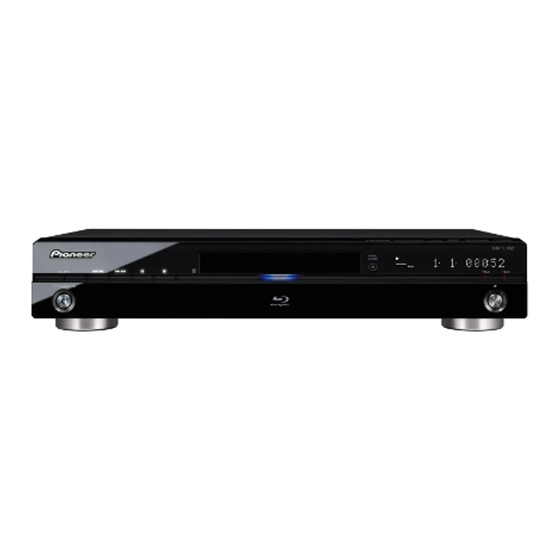
- Page 1 Operating Instructions Blu-ray Disc PLAYER...
- Page 2 Thank you for buying this Pioneer product. Please read through these operating instructions so you will know how to operate your model properly. After you have finished reading the instructions, put them away in a safe place for future reference.
-
Page 3: Operating Environment
A damaged power cord can cause a fire or give you an electrical shock. Check the power cord once in a while. When you find it damaged, ask your nearest PIONEER authorized service center or your dealer for a replacement. For U.K. model: Replacement and mounting of an AC plug on the power supply cord of this unit should be performed only by qualified service personnel. - Page 4 Information for users on collection and disposal of old equipment and used batteries Symbol for These symbols on the products, packaging, and/or accompanying documents mean equipment that used electrical and electronic products and batteries should not be mixed with general household waste. For proper treatment, recovery and recycling of old products and used batteries, please take them to applicable collection points in accordance with your national legislation.
-
Page 5: Table Of Contents
Contents 01 Before you start What’s in the box ....... . 6 Putting the batteries in the remote control. -
Page 6: Before You Start
Chapter 1 Before you start What’s in the box • Remote control x 1 • Video/audio cable (yellow/white/red plugs) x 1 • AA/R6 dry cell batteries x 2 • Warranty card • Operating instructions (this document) • U.K., Australia and New Zealand models: Power cord x 1 Others: Power cord x 2 Putting the batteries in the remote control... -
Page 7: Types Of Discs/Files That Can Be Played
Types of discs/files that can be played Playable discs Discs with the logo marks below indicated on the disc label, package or jacket can be played. Disc type Logo BD-ROM BD-R BD-RE DVD-ROM DVD-R DVD-RW DVD+R DVD+RW CD-DA (Audio CD) CD-R CD-RW CD-ROM... -
Page 8: Discs That Cannot Be Played
Discs that cannot be played • HD DVDs • DVD Audio discs • DVD-RAM discs • SACDs • Video CDs • SVCDs It is possible that some discs other than the ones listed above may not be playable either. Note •... -
Page 9: Playable Files
Playing DVDs This label indicates playback compatibility with DVD-RW discs recorded in VR format (Video Recording format). However, for discs recorded with a record-only-once encrypted program, playback can only be achieved using a CPRM compatible device. The AVCHD is a high definition (HD) digital video camera recorder format recording high-definition onto certain media by using highly efficient codec technologies. -
Page 10: Part Names And Functions
Note ® • This DivX Certified device must be registered in order to play DivX Video-on-Demand (VOD) content. First generate the DivX VOD registration code for your device and submit it during the registration process. [Important: DivX VOD content is protected by a DivX DRM (Digital Rights Management) system that restricts playback to registered DivX Certified devices. -
Page 11: Front Panel
VIDEO SELECT – (page 21) HOME MEDIA GALLERY – (page 31) TOP MENU – Press to display the top menu of the BD- ROM or DVD-Video. 10 /// – Use to select items, change settings and move the cursor. ENTER – Press to execute the selected item or enter a setting that has been changed, etc. -
Page 12: Front Panel Display
COMPONENT VIDEO – (page 16) AC IN – (page 17) CONTROL IN terminal – Use to control this player from the remote sensor of another Pioneer component with a CONTROL OUT terminal and bearing the mark. Connect the CONTROL OUT... -
Page 13: Connecting Up
Chapter 2 Connecting up Be sure to turn off the power and unplug the power cord from the power outlet whenever making or changing connections. After connecting, make the settings at the Setup Navigator menu according to the type of cable connected (page 18). -
Page 14: About Kuro Link Function
DVI device. About KURO LINK function The functions listed below work when a Pioneer KURO LINK-compatible Flat Screen TV, AV system (AV receiver or amplifier, etc.) or HD AV Converter is connected to the player using an HDMI cable. -
Page 15: Connecting A Tv
PQLS: Auto • Also refer to the operating instructions of AV receiver or amplifier. • Please see the Pioneer website for AV receivers or amplifiers that support the PQLS function. Caution • If the output video resolution is switched, the PQLS function may not work. -
Page 16: Connecting Video And Audio Cables
Connecting video and audio cables Note • Make the settings in the Setup Navigator menu according to the type of cable connected (page 18). • To output video signals from this player, connect using one of the following (not including when connected using an HDMI cable): a component video cable or a video cable. -
Page 17: Connecting The Usb (External Storage) Device
• For some Internet service providers, you may have to set the individual network configuration manually. In this case, see page 41. • Pioneer is not responsible for any malfunction of the player due to communication error/malfunctions associated with your network connection and/or your COMPONENT VIDEO connected equipment. -
Page 18: Getting Started
Also, turn on the power of the devices connected to the player before turning on the player’s power. • When using a Pioneer Flat Screen TV or front projector compatible with the KURO LINK function, set KURO LINK to On on the connected device before turning on the player’s power. -
Page 19: Operating The Tv With The Player's Remote Control
12 Checking the picture quality settings or setting the picture quality. If a Pioneer Flat Screen TV or projector is connected to the player and HDMI is selected for Video in step 4, the player sets the picture quality automatically. The automatic picture quality setting screen appears. -
Page 20: Tv Preset Code List
CH +/– – Press to select the TV channel. VOL +/– – Press to adjust the volume. TV Preset code list Manufacturer Code(s) PIONEER 00, 31, 32, 07, 36, 42, 51, ERRES 07 FERGUSON 07, 36, 51 ACURA 44 FINLANDIA 35, 43, 54... -
Page 21: Switching The Video Output Terminal To Be Viewed
Display the TOOLS menu. Press TOOLS. BD PLAYER Angle TOOLS Audio Subtitle Audio Adjust Video Adjust Select and set the item. Use / to select, then press ENTER. Note • Items that cannot be changed are displayed in gray. The items that can be selected depend on the player’s status. - Page 22 • The picture may not be displayed for a while when the resolution is switched. CLEAR SECONDARY AUDIO VIDEO VIDEO SELECT PLAY MODE HOME MEDIA DISPLAY GALLERY Press OUTPUT RESOLUTION. • The current output video resolution setting is displayed on the TV screen and on the player’s front panel display.
- Page 23 About the output video resolution The output video resolution setting and the resolution of the picture that is actually output differ for the different terminals. See the table below. The table below shows the output video resolution for the different terminals when the frame/field frequency of the playback source is 50 Hz on the upper line, the resolutions when the source’s frame/field frequency is 60 Hz and 24 Hz on the lower line.
-
Page 24: Playback
Chapter 4 Playback Playing discs or files This section describes the player’s main operations. For the types of discs that can be played, see Playable discs on page 7. For the types of files that can be played, see Playable files on page 9. Video, image and audio files recorded on discs are played with the Home Media Gallery (page 31). -
Page 25: Forward And Reverse Scanning
Forward and reverse scanning During playback, press or . • The scanning speed switches each time the button is pressed. The speed steps depend on the disc or file (the speed is displayed on the TV screen). • Forward or reverse scanning is also possible by holding the button down. -
Page 26: Switching The Audio And Secondary Audio
subtitle files must be located in the same folder. Only one external subtitle file can be displayed on this player. Use a computer, etc., to delete any external subtitle files you do not want to display from the disc. .srt, .sub, .txt, .smi, .ssa, .ass If the language code is specified for the external subtitle file, the subtitles are displayed with the font corresponding to that language code. -
Page 27: Playback Functions
Playback functions The functions that can be used differ according to the type of disc and file. In some cases, some of the functions cannot be used. Check the usable functions on the table below. Function Forward and reverse scanning Playing specific titles, chapters or tracks Skipping content Playing in slow motion... -
Page 28: Using The Play Mode Functions
Using the Play Mode functions CLEAR SECONDARY AUDIO VIDEO VIDEO SELECT PLAY MODE HOME MEDIA GALLERY DISPLAY TOP MENU ENTER HOME MENU PLAY PREV PAUSE Playing from a specific time (Time Search) During playback, press PLAY MODE to display the Play Mode screen. -
Page 29: Playing Repeatedly (Repeat Play)
Note • A-B Repeat play is canceled in the following cases: – When the angle is switched (for BD-ROM and DVD- Video discs only). – When you search outside the repeat range. – When you start other Repeat Play or Random Play. Playing repeatedly (Repeat Play) Use this procedure to play the currently playing disc, title,... -
Page 30: About Play Mode Types
About Play Mode types The functions that can be used differ according to the type of disc and file. In some cases, some of the functions cannot be used. Check the usable functions on the table below. Play Mode type Playing a specific section within a title or track repeatedly (A-B Repeat) -
Page 31: Playing From The Home Media Gallery
Playing from the Home Media Gallery The Home Media Gallery lets you display a list of the titles, tracks or files recorded on the disc. The discs that can be played from the Home Media Gallery are as shown below (see also page 7). -
Page 32: Playing Audio Files
Select Photos. Use / to select Photos, then press ENTER. Select Folders or All Photos. Use / to select, then press ENTER. • Folders – The files in the selected folder are displayed. • All Photos – All the recorded files are displayed. If you have selected All Photos, proceed to step 6. - Page 33 Select Add to HMG Playlist. Use / to select, then press ENTER. Folders CD-ROM/Music Music001.mp3 Music002.mp3 Music003.mp3 Music004.mp3 Music005.mp3 Music006.mp3 BD PLAYER TOOLS Music007.mp3 Play from Beginning Music008.mp3 Add to HMG Playlist Now Playing 15Items The track or file selected in step 3 is added to the HMG Playlist. To add more tracks or files, repeat steps 3 to 5.
-
Page 34: Adjusting Audio And Video
Select using / according to the TV being used. Video Adjust Adjustments • Pioneer PDP – Select this when connected to a Pioneer plasma TV. • Pioneer LCD – Select this when connected to a Pioneer liquid crystal display TV. -
Page 35: Adjusting The Audio
• Prog.Motion is disabled when Pure Cinema is set to • Black Setup has the effect only for pictures output from the VIDEO output terminals, and for NTSC signals output. • YNR, CNR, BNR and MNR have no effect on 1080/24p video signals output from the HDMI OUT terminal. -
Page 36: Advanced Settings
Chapter 6 Advanced settings Changing the settings CLEAR SECONDARY AUDIO VIDEO VIDEO SELECT PLAY MODE HOME MEDIA DISPLAY GALLERY TOP MENU ENTER HOME MENU PLAY PREV PAUSE Operating the Initial Setup screen When playback is stopped, display the Home Menu screen. HOME MENU. - Page 37 Note • Items that cannot be changed are indicated in gray. The items that can be selected depend on the player’s status. • In Options, the factory default settings are indicated in bold. Setting Options 16:9 (Widescreen) TV Aspect Ratio 4:3 (Standard) Full 4:3 Video Out...
- Page 38 Setting HDMI High Speed Transmission The player’s setting screen is closed if the output video resolution is switched by changing the HDMI High Speed Transmission setting. HDMI Color Space Normally it is recommended to set this to Auto. When set to Auto, the optimum video signals for your TV are output. HDMI Audio Out KURO LINK Display Power On...
- Page 39 Setting Options OSD Language English available languages Audio Language English * For some discs, it may not be possible to change to the available languages selected language. Other If a language not recorded on the BD/DVD is set, one of the recorded languages is automatically selected and played. Subtitle Language English * For some discs, it may not...
- Page 40 Setting Individual/Shared Data Erase Remove the disc from the disc tray when changing the setting. Application Data Erase Remove the disc from the disc tray when changing the setting. Storage Format Remove the disc from the disc tray when changing the setting. Setup Navigator Set Password (Change Password)
- Page 41 Setting the IP address Select and set Network IP Address Next Screen. Use / to select, then press ENTER. Set IP address. Use /// to set the IP address of the player or DNS server, then press ENTER. Network BD PLAYER IP Address...
-
Page 42: Language Setting
The MAC address, IP address, subnet mask, default gateway and DNS server (primary and secondary) settings are displayed. When Auto Set IP Address is set to On, the values obtained automatically are displayed. Note • “0.0.0.0” is displayed when each IP address has not been set. - Page 43 Registering or Changing the password Use this procedure to register or change the code number required for the Parental Lock settings. Select and set Parental Lock Set Password Next Screen. Use / to select, then press ENTER. Input the password.
-
Page 44: Software Updating
Software updating The software of the player can be updated by connecting it to the Internet using a LAN cable. Before updating the software, make sure that you have connected the player to the network and made the necessary settings (pages 17 and 41). Caution •... -
Page 45: About The Audio Output Settings
About the audio output settings The audio signals that are output differ according to the audio format recorded on the disc and the player’s settings. Check on the table below. Caution • When ANALOG AUDIO is selected at Output Terminal, no audio signals are output from the HDMI OUT terminal or DIGITAL OUT terminal (pages 18 and 43). - Page 46 9. If the connected HDMI device is not compatible with DTS-HD Master Audio or DTS-HD High Resolution Audio, the signals are output in linear PCM (2 channels) or DTS Digital Surround bitstream. If the connected HDMI device is not compatible with DTS Digital Surround bitstream, the signals are output in linear PCM (2 channels). 10.
-
Page 47: Language Code Table And Country/Area Code
Language Code Table and Country/Area Code Table Language Code Table Language name, language code, input code Abkhazian, ab/abk, 0102 French, fr/fra, 0618 Afar, aa/aar, 0101 Galician, gl/glg, 0712 Afrikaans, af/afr, 0106 Georgian, ka/kat, 1101 Albanian, sq/sqi, 1917 German, de/deu, 0405 Amharic, am/amh, 0113 Greek, el/ell, 0512 Arabic, ar/ara, 0118... -
Page 48: Additional Information
Chapter 7 Additional information Licenses The licenses for the software used on this player are shown below. libxml2 The MIT License Copyright © <year> <copyright holders> Permission is hereby granted, free of charge, to any person obtaining a copy of this software and associated documentation files (the “Software”), to deal in the Software without restriction, including without limitation the rights to use, copy, modify, merge, publish, distribute,... - Page 49 copyrighted material, only this license, or another one contracted with the authors, grants you the right to use, distribute, and modify it. Therefore, by using, distributing, or modifying the FreeType Project, you indicate that you understand and accept all the terms of this license.
-
Page 50: Gnu General Public License
It appears that the arithmetic coding option of the JPEG spec is covered by patents owned by IBM, AT&T, and Mitsubishi. Hence arithmetic coding cannot legally be used without obtaining one or more licenses. For this reason, support for arithmetic coding has been removed from the free JPEG software. - Page 51 designed to make sure that you have the freedom to distribute copies of free software (and charge for this service if you wish), that you receive source code or can get it if you want it, that you can change the software or use pieces of it in new free programs;...
- Page 52 should have at least the “copyright” line and a pointer to where the full notice is found. <one line to give the program’s name and a brief idea of what it does.> Copyright © <year> <name of author> This program is free software; you can redistribute it and/ or modify it under the terms of the GNU General Public License as published by the Free Software Foundation;...
- Page 53 GNU General Public License. A copy of the corresponding source code can be obtained by being charged the fee for distribution. To obtain a copy, contact your local Pioneer Customer Support Center. See the GNU website (http://www.gnu.org) for details of the...
-
Page 54: Cautions On Use
The player’s lens should not become dirty in normal use, but if for some reason it should malfunction due to dust or dirt, consult your nearest Pioneer authorized service center. Although lens cleaners for players are commercially available, we advise against using them since some may damage the lens. -
Page 55: Troubleshooting
Sometimes the trouble may lie in another component. Inspect the other components and electrical appliances being used. If the trouble cannot be rectified even after checking the points below, ask your nearest Pioneer authorized service center or your dealer to carry out repair work. Playback... - Page 56 Problem Check No picture is displayed or the Is the video cable properly picture is not displayed connected? properly. Is the video cable damaged? If the cable is damaged, replace it with a new one. Is the input setting on the connected TV or AV receiver or amplifier right? Are you viewing the picture...
- Page 57 Problem Check • Picture is stretched. Is the TV’s aspect ratio properly set? • Picture is cropped. • Aspect ratio cannot be Is TV Aspect Ratio properly switched. set? Is 4:3 Video Out properly set? Is DVD 16:9 Video Out properly set? Picture is interrupted.
- Page 58 When listening to the sound from an DIGITAL OUT terminal, set Dolby Digital Out to Dolby Digital 1, DTS Out to DTS 1 (page 37). When a Pioneer AV receiver or amplifier compatible with the PQLS function is connected directly to the player’s HDMI OUT terminal using an HDMI cable, the PQLS function is activated when playing discs.
-
Page 59: Kuro Link
• See About connections to components of other makes supporting the KURO LINK function on page 15. • Even when connected to a Pioneer product compatible with the KURO LINK function, some of the functions may not work. Also refer to the operating instructions of the connected device. -
Page 60: Others
TV, and AV system (AV receiver or amplifier, etc.) and HD AV Converter to switch automatically, set KURO LINK to Off (page 38). If the message appears repeatedly, please ask your nearest Pioneer authorized service center or your dealer to carry out repair work. -
Page 61: Glossary
Problem Check Settings you have made have • Have you disconnected the been cleared. power cord while the player’s power was on? • Has there been a power failure? EXT does not light on the Is the external storage device player’s front panel display properly connected? when a USB (external... -
Page 62: Parental Lock
Dolby Digital Plus Dolby Digital Plus is an audio format for high-definition media. Built on Dolby Digital, it combines the efficiency and flexibility to provide high quality multi-channel audio. With BD-ROMs, up to 7.1 channels of digital sound can be recorded. ... -
Page 63: Specifications
• The specifications and design of this product are subject to change without notice. • This product includes FontAvenue NEC Corporation. BDP-LX52 Blu-ray Disc PLAYER Europe, Australia and New Zealand models: AC 220 V to 240 V Others: AC 110 V to 240 V... -
Page 64: Contact Information
2211 Princes Highway, Mulgrave, VIC 3170, Australia 1800 988 268 http://www.pioneer.com.au Hong Kong Pioneer (HK) Limited - Customer Service Center Unit 2, 17/F, Vanta Industrial Centre, 21-33 Tai Lin Pai Road, Kwai Chung, Hong Kong (852) 3583 3288 https://www.pioneerhongkong.com.hk Singapore...