Pioneer BDP-LX91 Operating Instructions Manual
Hide thumbs
Also See for BDP-LX91:
- User manual (15 pages) ,
- Update instructions (4 pages) ,
- System firmware update instructions (4 pages)

Related Manuals for Pioneer BDP-LX91


Summary of Contents for Pioneer BDP-LX91
- Page 1 Operating Instructions Blu-ray Disc PLAYER...
-
Page 2: Operating Environment
Thank you for buying this Pioneer product. Please read through these operating instructions so you will know how to operate your model properly. After you have finished reading the instructions, put them away in a safe place for future reference. - Page 3 Macrovision Corporation, and is intended the power cord once in a while. When you find it for home and other limited viewing uses only unless damaged, ask your nearest PIONEER authorized otherwise authorized by Macrovision Corporation. service center or your dealer for a replacement.
- Page 4 Information for users on collection and disposal of old equipment and used batteries Symbol for These symbols on the products, packaging, and/or accompanying documents mean that used electrical and electronic products and batteries should not be mixed with equipment general household waste. For proper treatment, recovery and recycling of old products and used batteries, please take them to applicable collection points in accordance with your national legislation.
-
Page 5: Table Of Contents
Contents 01 Before you start Playing from the Home Media Gallery ..... . .34 Playing discs......... . .34 What’s in the box . -
Page 6: Before You Start
Chapter 1 Before you start What’s in the box Putting the batteries in the remote control Remote control x 1 BNC-RCA adapter x 3 Use this to connect an RCA pin type Open the rear cover. STANDBY/ON OPEN/CLOSE cable to the COMPONENT VIDEO terminal. -
Page 7: Types Of Discs/Files That Can Be Played
Types of discs/files that can be played Playable discs Discs with the logo marks below indicated on the disc label, package or jacket can be played. Logo Application format Disc type CD-DA BDAV DVD-Video DVD VR BDMV DATA-DISC DTS-CD ... -
Page 8: Discs That Cannot Be Played
Discs that cannot be played • Non-finalized (Non-closed) BD-R discs in the BDMV format • HD DVDs • DVD Audio discs • DVD-RAM discs • Non-finalized DVD-R/-RW/+R/+RW discs in the DVD-Video Manufactured under license under U.S. Patent #: 5,451,942; format and AVCHD format 5,956,674;... -
Page 9: Playable Files
Playing discs created on computers or BD/ • DVDs recorded in the AVCHD format can be played (finalize them before playing them on this player). DVD recorders • It may not be possible to play discs recorded using a computer due to the application settings or computer’s environment settings. -
Page 10: Part Names And Functions
Part Names and Functions Note • DivX VOD files are protected by DRM. They can only be played on registered devices. Remote Control – You may be requested by the file distributor to input the DivX VOD registration code for authorization of the player in order to play DivX VOD files. - Page 11 Number buttons – Use these to select and play the title/ 19 PLAY MODE chapter/track you want to view or listen to and to select items Press to display/hide the Play Mode screen (page 30). from menus. 20 POP UP MENU/MENU CLEAR –...
-
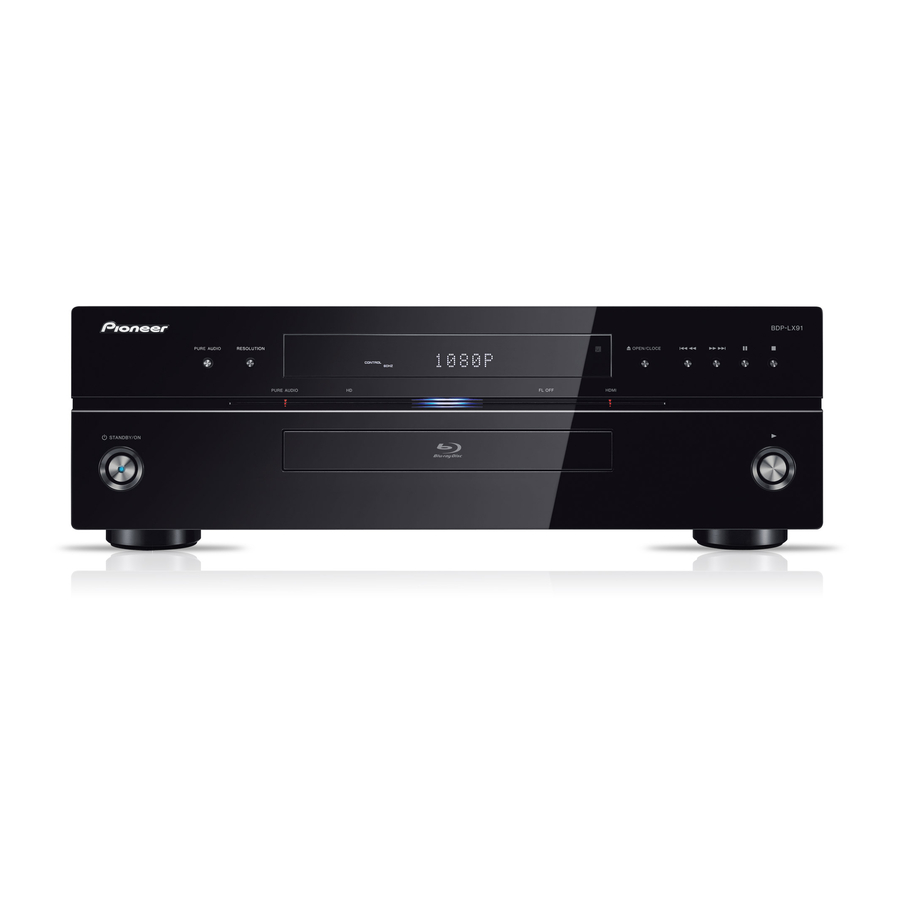
Page 12: Front Panel
Front Panel STANDBY/ON Press to turn the power on and off. Press to start playback. PURE AUDIO – High quality audio signals with any extraneous HDMI indicator noise eliminated are output (page 52). This lights when an HDMI-compatible device is connected to an RESOLUTION –... -
Page 13: Rear Panel
CONTROL IN terminal VIDEO OUT terminals Use to control this player from the remote sensor of another Pioneer component with a CONTROL OUT terminal and bearing the VIDEO – Connect with the video input terminal on a TV, AV receiver or amplifier, etc. -
Page 14: Connecting Up
Chapter 2 Connecting up Be sure to turn off the power and unplug the power cord from the power outlet whenever making or changing connections. After connecting, make the settings at the Setup Navigator menu according to the type of cable connected (page 20). “x.v.Color”... -
Page 15: About Kuro Link Function
When connected to a DVI device • The PQLS function is only activated when a Pioneer AV receiver or amplifier compatible with the PQLS function is connected • It is not possible to connect DVI devices (computer displays, directly to the player’s HDMI OUT (MAIN) terminal using an for example) that are not compatible with HDCP. -
Page 16: Connecting An Av Receiver Or Amplifier
Connecting an AV receiver or Note amplifier • When DTS-HD Master Audio and DTS-HD High Resolution Audio signals are output as linear PCM signals, the DTS Digital Surround signals are converted to linear PCM for output Connect to an AV receiver or amplifier in order to enjoy the surround (page 53). -
Page 17: Connecting Video And Audio Cables
Connecting video and • Depending on the output video resolution setting, the picture may not be output (page 24). audio cables Connecting a TV using a video cable and an audio cable Note • Make the settings in the Setup Navigator menu according to Caution the type of cable connected (page 20). -
Page 18: Connecting An Av Receiver Or Amplifier Using Audio Cables
Connecting an AV receiver or Connecting an AV receiver or amplifier using audio cables amplifier using a digital audio cable When connecting to a 7.1-channel compatible AV receiver or Connect either an optical digital audio cable or a coaxial digital amplifier –... -
Page 19: Network Connection
Network connection • Pioneer is not responsible for any malfunction of the player due to communication error/ malfunctions associated with your network connection and/or your connected equipment. Please contact your Internet service provider or network device The player’s software can be updated over the Internet (page 51). -
Page 20: Getting Started
Chapter 3 Getting Started Making settings using the When a Pioneer Flat Screen TV that is compatible with KURO LINK is connected to this player’s HDMI OUT (MAIN) terminal, language settings are imported from the Pioneer Flat Screen TV’s language Setup Navigator menu settings before Setup Navigator begins. - Page 21 For steps 5 to 8, the step to which you should proceed depends Select the output video resolution from the COMPONENT on the combination of the Video and Audio settings. VIDEO output terminals. Use / to select, then press ENTER. Select and set the HDMI High Speed Transmission setting for the HDMI OUT (MAIN) terminal.
-
Page 22: Operating The Tv With The Player's Remote Control
Go Back TV Preset code list The setup menu comes back in 30 seconds. Manufacturer Code(s) PIONEER 00, 31, 32, 07, 36, 42, 51 GENEXXA 31, 41 ACURA 44 GOLDSTAR 10, 23, 21, 02, 07, 50 To redo the settings from the start, select Go Back. -
Page 23: Using The Tools Menu
Select and set the item. OCEANIC 31, 32, 42 SIAREM 32, 49 Use / to select, then press ENTER. ORION 32, 07, 39, 40 SIEMENS 31 OSAKI 41, 46, 48 SINUDYNE 32, 39, 40, 49 TOP MENU TOOLS OSO 41 SKANTIC 43 OSUME 48 SOLAVOX 31... -
Page 24: Switching The Video Output Terminal To Be Viewed
Switching the video output • The output video resolution depends on the video output terminal. (page 25) terminal to be viewed Video resolution of the Example: currently playing disc Source : 1080/50i Output Video Resolution Use the procedure below to switch the video output signal to be Auto ... - Page 25 About Film material Caution The film material is a video signal with a frame rate of 24 frames/ • 1080/24p signals can only be output from the HDMI OUT second. For example, these materials include 1080/24p, 720/24p, terminals. They cannot be output from other video terminals. etc.
-
Page 26: Playback
Chapter 4 Playback If the disc menu is displayed Playing discs or files For some discs, the disc menu is displayed automatically when playback starts. The contents of the disc menu and the way to This section describes the player’s main operations. operate differ from disc to disc. -
Page 27: Playing Specific Titles, Chapters Or Tracks
To resume normal playback Playing in slow motion Press PLAY. Video files Playing specific titles, chapters or Image files AVCHD Audio files tracks While playback is paused, press and hold / /. Video files Image files PLAY AVCHD Audio files... -
Page 28: Switching The Camera Angles
Switching the camera angles • The subtitles can also be switched by selecting Subtitle from the TOOLS menu. For BD-ROM and DVD-Video discs on which multiple angles are Note recorded, the angles can be switched during playback. • In some cases the subtitle may switch or the switching screen Video files provided on the disc may be displayed immediately, without the Image files... -
Page 29: Switching The Audio Streams/Channels
Switching the audio streams/ Switching the secondary video channels Use the procedure below to switch the secondary video (Picture-in- Picture) recorded on the BD-ROM. For discs or files on which multiple audio streams/channels are recorded, audio streams/channels can be switched during Video files Image files playback. -
Page 30: Using The Play Mode Functions
Using the Play Mode Input the time. Use the number buttons (0 to 9) or / to input the time. Use / to move the cursor. functions Playing from a specific time (Time Search) CLEAR ENTER SECONDARY OUTPUT RESOLUTION AUDIO VIDEO During playback, press PLAY MODE to display the Play VIDEO SELECT PLAY MODE... -
Page 31: Playing A Specific Section Within A Title Or Track Repeatedly
See the table on page 33 for the search types. During playback, press PLAY MODE to display the Play Mode screen. TOP MENU TOOLS VIDEO SELECT PLAY MODE HOME MEDIA ENTER DISPLAY POPUP MENU GALLERY MENU HOME MENU RETURN TOP MENU TOOLS The Play Mode screen can also be displayed by selecting Play Mode from the TOOLS menu. -
Page 32: Playing In Random Order (Random Play)
Playing in random order (Random Select Repeat/Random. Use / to select, then press ENTER. Play) TOP MENU TOOLS Use this procedure to play the tracks or files in random order. ENTER During playback, press PLAY MODE to display the Play Mode screen. -
Page 33: About Play Mode Types
About Play Mode types The functions that can be used differ according to the type of disc and file. In some cases, some of the functions cannot be used. Check the usable functions on the table below. Disc/file type DVD-R Play Mode type Mark DVD-... -
Page 34: Playing From The Home Media Gallery
Playing from the Home Select the title or track to be played. Use / to select, then press ENTER. Media Gallery BD-R BDAV My Favorite TV Program Morning serial drama The Home Media Gallery lets you display a list of the titles, tracks or News at noon Evening movie files recorded on the disc. -
Page 35: Playing Image Files
Select Movies. Use / to select Movies, then press ENTER. Note • It may take a few seconds before playback starts. This is normal. DVD-RW • It may not be possible to play some files properly. • The number of views may be restricted (page 9). Movies Photos Music... -
Page 36: Playing Audio Files
Rotating images Select Folders or All Photos. Use / to select, then press ENTER. Press ANGLE while playing a slideshow. • Folders – The files in the selected folder are displayed. INPUT • All Photos – All the recorded files are displayed. SELECT ANGLE FL DIMMER... -
Page 37: Playing In The Desired Order (Hmg Playlist)
Playing in the desired order (HMG Select Folders or All Songs. Use / to select, then press ENTER. Playlist) • Folders – The files in the selected folder are displayed. • All Songs – All the recorded files are displayed. The discs that can add tracks and files to the HMG (Home Media Music Gallery) Playlist are as shown below. - Page 38 Select HMG Playlist. Press TOOLS to display the TOOLS menu. Use / to select, then press ENTER. HOME MEDIA DISPLAY POPUP MENU GALLERY Home Media Gallery MENU BD PLAYER TOP MENU TOOLS CD-ROM HMG Playlist ENTER Select Add to HMG Playlist. Use /...
-
Page 39: Adjusting Audio And Video
• MNR – Reduces the mosquito noise (distortion along the • Pioneer PDP – Select this when connected to a Pioneer plasma contours of the picture generated upon MPEG compression). • Sharpness High – Adjusts the sharpness of the high-frequency •... -
Page 40: Adjusting The Audio
• Black Setup has the effect only for pictures output from the Select and set Audio DRC. Use / to select, then press ENTER. VIDEO and S-VIDEO output terminals, and for NTSC signals output. Audio Adjust • The items below do not apply to video signals output from the Audio DRC VIDEO and S-VIDEO output terminals, nor to 480i/576i video Channel Level... -
Page 41: Adjusting The Audio Delay (Lip Sync)
Select and set Audio Adjust. During playback, display the TOOLS menu. Use / to select, then press ENTER. TOOLS. Press TOP MENU TOOLS HOME MEDIA GALLERY DISPLAY POPUP MENU MENU TOOLS TOP MENU ENTER HOME MENU RETURN ENTER Select and set Audio Adjust. BD PLAYER Use /... -
Page 42: Advanced Settings
Chapter 6 Advanced settings Changing the settings Operating the Initial Setup screen When playback is stopped, display the Home Menu screen. Press HOME MENU. ENTER HOME RETURN MENU PLAY Select and set Initial Setup. Use / to select, then press ENTER. TOP MENU TOOLS ENTER... - Page 43 Note • Items that cannot be changed are indicated in gray. The items that can be selected depend on the player’s status. • In Options, the factory default settings are indicated in bold. Setting Options Explanation 16:9 (Widescreen) TV Aspect Ratio Select this when connected to a wide (16:9) TV.
- Page 44 Setting Options Explanation 2 Channel Audio Output Mode Select this when the TV’s analog 2-channel (stereo) audio input terminals are connected to the player’s AUDIO OUT (7.1 ch) terminals. * Only valid for the AUDIO OUT (7.1 ch) terminals. Multi-channel Select this when the multi-channel audio input terminals of an AV receiver or amplifier, etc., are connected to the player’s AUDIO OUT (7.1 ch) terminals.
- Page 45 Setting Options Explanation English OSD Language Select this to set the language of the on-screen displays to English. available languages Choose a language for the on-screen displays from the listed languages. Audio Language English Select this to set both the BD-ROM and DVD-Video default audio language to English. * For some discs, it may not be available languages Choose a language from the listed languages to set the default audio language for BD-ROM...
-
Page 46: Changing The Speaker Setup
Changing the speaker setup Select the speaker and adjust the distance. Use / to select, then use / to adjust. Set whether or not speakers are connected to the AV receiver or amplifier, as well as the size of the speakers. This setting is only valid Speaker Distance for the AUDIO OUT (7.1 ch) terminals. -
Page 47: Registering Or Changing The Password
Registering or Changing the password Adjust the output level. Use / to select, / to adjust. Use this procedure to register or change the code number required for the Parental Lock settings. Channel Level BD PLAYER Select and set Parental Lock Set Password Next 0.0 dB Screen. - Page 48 Changing the Parental Lock level for Changing the Age Restriction for viewing viewing DVDs BD-ROMs Some DVD-Video discs containing scenes of violence, for example, For BD-ROMs containing scenes of violence, for example, viewing have Parental Lock levels (check the indications on the disc’s jacket can be restricted by setting an age restriction for the BD-ROMs.
- Page 49 Changing the Country/Area code Set IP address. Use /// to set the IP address of the player or DNS server, Select and set Parental Lock Country Code Next then press ENTER. Screen. Use / to select, then press ENTER. Network BD PLAYER Input the password.
- Page 50 Select and set Server Select Method. When Auto Set IP Address is set to On, the values obtained Use / to change, then press . automatically are displayed. Network BD PLAYER Display Network Config. MAC Address 00 - E0 - 36 - 00 - 00 - 00 IP Address 192 .
-
Page 51: Stretching Widescreen Pictures Vertically (Anamorphic Zoom)
Software updating Stretching widescreen pictures The software of the player can be updated by connecting it to the vertically (Anamorphic Zoom) Internet using a LAN cable. Before updating the software, make sure that you have connected Some discs include movies, etc., with a vertical-to-horizontal picture the player to the network and made the necessary settings (pages 19 rate of 2.35:1 recorded as 16:9 pictures with black bars at the top and and 49). -
Page 52: Eliminating Extraneous Noise To Play With High Quality Sound
Eliminating extraneous noise to Restoring all the settings to the play with high quality sound (Pure factory default settings Audio) Check that the player’s power is turned on. This function suppresses unnecessary signals to reduce noise and When a disc is playing, press to stop playback. output high quality audio signals. -
Page 53: About The Audio Output Settings
About the audio output settings The audio signals that are output differ according to the audio format recorded on the disc and the player’s settings. Check on the table below. Caution • When ANALOG AUDIO is selected at Output Terminal, no audio signals are output from the HDMI OUT or DIGITAL OUT terminals (page 43). -
Page 54: Language Code Table And Country/Area Code Table
Note • Only compatible with 7.1-channel surround back. 6.1-channel surround back is output in 7.1 channels. In other cases, output as audio signals of 5.1-channels or less. • When outputting linear PCM audio signals, if the number of compatible channels of the connected HDMI device is lower, the signals are output with the number of channels for which the device is compatible. -
Page 55: Additional Information
Chapter 7 Additional information Licenses Original SSLeay License Copyright © 1995-1998 Eric Young (eay@cryptsoft.com) All rights reserved. This package is an SSL implementation written by Eric Young The licenses for the software used on this player are shown below. (eay@cryptsoft.com). The implementation was written so as to conform with Netscapes SSL. - Page 56 libpng We specifically permit and encourage the inclusion of this software, with or without modifications, in commercial products. We disclaim all warranties COPYRIGHT NOTICE, DISCLAIMER, and LICENSE: covering The FreeType Project and assume no liability related to The FreeType If you modify libpng you may insert additional notices immediately following this Project.
- Page 57 libjpg We welcome the use of this software as a component of commercial products. No royalty is required, but we do ask for an acknowledgement in product The Independent JPEG Group’s JPEG software documentation, as described under LEGAL ISSUES. README for release 6b of 27-Mar-1998 LEGAL ISSUES This distribution contains the sixth public release of the Independent JPEG Group’s...
- Page 58 Wallace article is copyright ACM and IEEE, and it may not be used for commercial Numerous viewing and image manipulation programs now support JPEG. (Quite a purposes. few of them use this library to do so.) The JPEG FAQ described above lists some of A somewhat less technical, more leisurely introduction to JPEG can be found in the more popular free and shareware viewers, and tells where to obtain them on The Data Compression Book by Mark Nelson and Jean-loup Gailly, published by...
-
Page 59: Gnu General Public License
TORT (INCLUDING NEGLIGENCE OR OTHERWISE) ARISING IN ANY WAY OUT OF You may charge a fee for the physical act of transferring a copy, and you may THE USE OF THIS SOFTWARE, EVEN IF ADVISED OF THE POSSIBILITY OF SUCH at your option offer warranty protection in exchange for a fee. - Page 60 License to do so, and all its terms and conditions for copying, distributing or How to Apply These Terms to Your New Programs modifying the Program or works based on it. If you develop a new program, and you want it to be of the greatest possible use to Each time you redistribute the Program (or any work based on the Program), the public, the best way to achieve this is to make it free software which everyone the recipient automatically receives a license from the original licensor to...
- Page 61 license, which gives you legal permission to copy, distribute and/or modify the You may charge a fee for the physical act of transferring a copy, and you may library. at your option offer warranty protection in exchange for a fee. To protect each distributor, we want to make it very clear that there is no warranty You may modify your copy or copies of the Library or any portion of it, thus for the free library.
- Page 62 Otherwise, if the work is a derivative of the Library, you may distribute the exercise of the rights granted herein. You are not responsible for enforcing object code for the work under the terms of Section 6. Any executables compliance by third parties with this License. containing that work also fall under Section 6, whether or not they are linked 11.
-
Page 63: Cautions On Use
General Public License. A copy of the corresponding source code can be obtained by being charged the fee for distribution. To obtain a copy, contact your local Pioneer Customer Support Center. See the GNU website (http://www.gnu.org) for details of the GNU General Public If the player is moved suddenly from a cold place into a warm room License. -
Page 64: Cleaning The Pickup Lens
Sometimes the trouble may lie in another component. Inspect the other components and electrical appliances being used. If the trouble cannot be rectified even after checking the points below, ask your nearest Pioneer authorized service center or your dealer to carry out repair work. - Page 65 Problem Check Remedy No picture is displayed or the Is the video cable properly connected? • Connect the cable properly according to the connected picture is not displayed devices (page 14). properly. • Insert the cable firmly and all the way in. Is the video cable damaged? If the cable is damaged, replace it with a new one.
- Page 66 Problem Check Remedy • Picture is stretched. Is the TV’s aspect ratio properly set? Read the TV’s operating instructions and set the TV’s aspect ratio properly. • Picture is cropped. Is TV Aspect Ratio properly set? Set TV Aspect Ratio properly (page 43). •...
-
Page 67: Software Updating
Sound is fast or slow. When an HDMI cable is connected, are audio signals being When a Pioneer AV receiver or amplifier compatible with the output from devices connected with cables other than HDMI PQLS function is connected directly to the player’s HDMI OUT... -
Page 68: Kuro Link
Pioneer are connected between the KURO LINK-compatible device and the player. • Even when connected to a Pioneer product compatible with the KURO LINK function, some of the functions may not work. Also refer to the operating instructions of the connected device. -
Page 69: Others
“Processing failed.” is If the message appears repeatedly, please ask your nearest displayed. Pioneer authorized service center or your dealer to carry out repair work. BD-J Glossary With BD-ROMs, it is possible to use Java applications to create highly interactive titles, for example including games. -
Page 70: Composite Video Output
Component video output DTS-HD High Resolution Audio This video output terminal provides clearer pictures when DTS-HD High Resolution Audio is an audio format using lossy connected to a TV equipped with component inputs. Component coding. It can record 7.1 channels at 96 kHz/24 bits. video signals consist of three signals, Y, P and P ... -
Page 71: Parental Lock
Linear PCM Secondary audio This is referred as the audio signals that are not compressed, Some BD-ROMs include sub audio streams mixed with the main frequently used for DVD-Video discs containing musicals or music audio. These sub audio streams are called “secondary audio”. On concerts. -
Page 72: Specifications
Specifications Model BDP-LX91 Type Blu-ray Disc PLAYER Rated voltage AC 220 V to 240 V Rated frequency 50 Hz/60 Hz Power consumption 59 W Power consumption (standby) 0.3 W Weight 13.9 kg External dimensions (including projecting parts) 420 mm (W) x 143 mm (H) x 365 mm (D) Tolerable operating temperature +5 °C to +35 °C... - Page 73 253 Alexandra Road, #04-01, Singapore 159936 TEL: 65-6472-7555 PIONEER ELECTRONICS AUSTRALIA PTY. LTD. 178-184 Boundary Road, Braeside, Victoria 3195, Australia, TEL: (03) 9586-6300 PIONEER ELECTRONICS DE MEXICO S.A. DE C.V. Blvd.Manuel Avila Camacho 138 10 piso Col.Lomas de Chapultepec, Mexico,D.F. 11000 TEL: 55-9178-4270 K002_B_En Published by Pioneer Corporation.