Table of Contents
Advertisement
Advertisement
Chapters
Table of Contents

Related Manuals for Synology DiskStation DS216j


Summary of Contents for Synology DiskStation DS216j
- Page 1 Synology DiskStation DS216j Quick Installation Guide...
-
Page 2: Table Of Contents
Table of Contents Chapter 1: Before You Start Package Contents Synology DiskStation at a Glance Safety Instructions Chapter 2: Hardware Setup Tools and Parts for Drive Installation Install Drives Start Up Your DiskStation Chapter 3: Install DSM on DiskStation Install DSM with Web Assistant... -
Page 3: Package Contents
Chapter Before You Start Thank you for purchasing this Synology product! Before setting up your new DiskStation, please check the package contents to verify that you have received the items below. Also, make sure to read the safety instructions carefully to avoid harming yourself or damaging your DiskStation. -
Page 4: Synology Diskstation At A Glance
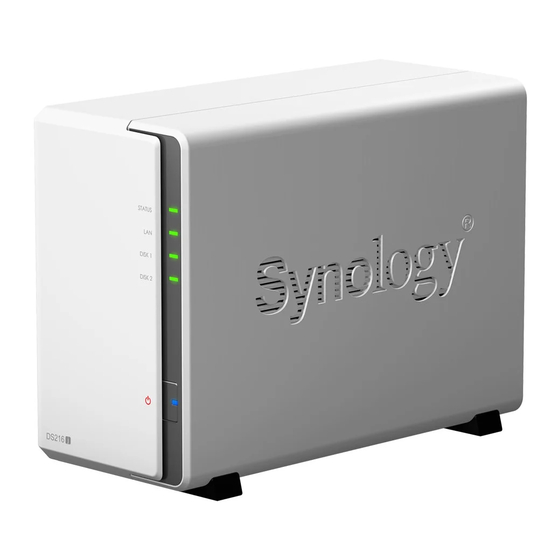
Synology DiskStation at a Glance Article Name Location Description Displays the status of the system. For more information, see "Appendix B: LED Status Indicator Indicator Table". Displays the status of the network connection. For more information, see LAN Indicator "Appendix B: LED Indicator Table". -
Page 5: Safety Instructions
Safety Instructions Keep away from direct sunlight and away from chemicals. Make sure the environment does not experience abrupt changes in temperature or humidity. Place the product right side up at all times. Do not place near any liquids. Before cleaning, unplug the power cord. Wipe with damp paper towels. Do not use chemical or aerosol cleaners. -
Page 6: Chapter 2: Hardware Setup
Chapter Hardware Setup Tools and Parts for Drive Installation • A screwdriver www.synology.com • At least one 3.5” or 2.5” SATA drive (please visit for compatible drive models) Warning: If you install a drive that contains data, the system will format the drive and erase all existing data. Please back up any important data before installation. - Page 7 b Slide the 2.5" Disk Holder into the hard drive bay, and push it all the way until the drive is firmly connected to the SATA connector. Secure the Disk Holder with the provided screws. 3 Repeat the steps above to install the other drive if you have prepared one. 4 The position of drives is as follows: Note: If you want to create a RAID volume, we recommend that all installed drives are of the same size to make the...
- Page 8 Start Up Your DiskStation 1 Connect the AC adapter to the power port of the DiskStation. Connect one end of the AC power cord to the AC power adapter, and the other to the power outlet. 2 Use the LAN cable to connect the DiskStation to your switch, router, or hub. 3 Press the power button to turn on the DiskStation.
-
Page 9: Chapter 3: Install Dsm On Diskstation
Chapter Install DSM on DiskStation After hardware setup is finished, please install DiskStation Manager (DSM) – Synology’s browser-based operating system – on your DiskStation. Install DSM with Web Assistant Your DiskStation comes with a built-in tool called Web Assistant that helps you download the latest version of DSM from the Internet and install it on your DiskStation. -
Page 10: Appendix A: Specifications
• External: ext4, ext3, FAT, NTFS, HFS+ (Read only) • Basic • JBOD • RAID 0 • RAID 1 Supported RAID Types • Synology Hybrid RAID (1-Disk Fault Tolerance) Agency Certifications • FCC Class B • CE Class B • BSMI Class B... -
Page 11: Appendix B: Led Indicator Table
Please try to restart your DiskStation or re-insert the drive(s), and then run the HDD/SSD manufacturer's diagnostic tool to check the health status of the drive(s). If you can log into DSM, please run the built-in S.M.A.R.T. test to scan the drive(s). If the problem remains unresolved, please contact Synology... - Page 12 IMPORTANT–READ CAREFULLY: THIS END USER LICENSE AGREEMENT ("EULA") IS A LEGAL AGREEMENT BETWEEN YOU (EITHER AN INDIVIDUAL OR A LEGAL ENTITY) AND SYNOLOGY, INC. ("SYNOLOGY") FOR THE SYNOLOGY SOFTWARE INSTALLED ONTO THE SYNOLOGY PRODUCT PUCHASED BY YOU (THE “PRODUCT”), OR LEGALLY DOWNLOADED FROM WWW.SYNOLOGY.COM, OR ANY OTHER CHANNEL PROVIDED BY SYNOLOGY...
- Page 13 Section 15. Termination. Without prejudice to any other or other legal action or proceeding to enforce rights or rights, Synology may terminate this EULA if you do not abide remedies under this EULA, the prevailing party will be by the terms and conditions contained herein. In such event,...
- Page 14 SYNOLOGY, INC. LIMITED PRODUCT WARRANTY THIS LIMITED WARRANTY ("WARRANTY") APPLIES TO THE PRODUCTS (AS DEFINED BELOW) OF SYNOLOGY, INC. AND ITS AFFILIATES, INCLUDING SYNOLOGY AMERICA CORP, (COLLECTIVELY, "SYNOLOGY"). YOU ACCEPT AND AGREE TO BE BOUND BY THE TERMS OF THIS WARRANTY BY OPENING THE PACKAGE CONTAINING AND/OR USING THE PRODUCT.
- Page 15 Product specifications; (b) has been repaired, modified Limitation of Liability. SYNOLOGY'S AND ITS or altered by anyone other than Synology or its agent or designee; (c) has been in any way misused, abused, or SUPPLIERS' LIABILITY ARISING OUT OF OR RELATING damaged;...
- Page 16 Nothing in this Section shall be deemed to prohibit or restrict arbitration and will not be conducted on a class-wide or class Synology from seeking injunctive relief or seeking such other action basis. The arbitration shall be held in King County, rights and remedies as it may have at law or equity for any Washington, U.S.A.
- Page 17 Synology NAS User's Guide Based on DSM 6.1 Document ID Syno_UsersGuide_NAS_20170222...
- Page 18 Table of Contents Chapter 1: Introduction Chapter 2: Get Started with Synology DiskStation Manager Install Synology NAS and DSM ............................. 7 Sign into DSM ..................................7 DiskStation Manager Desktop ............................... 8 Open Applications and Packages with Main Menu ......................10 Shutdown, Restart, Logout, or Manage Personal Settings .....................
- Page 19 Storage Overview .................................. 37 SSD Cache .................................... 37 Manage External Disks ................................ 37 Chapter 7: Access your Synology NAS from the Internet Use the EZ-Internet Wizard ..............................38 Set Up Port Forwarding Rules for Router .......................... 39 Register DDNS for the Synology NAS ..........................39 Access DSM Services via QuickConnect ..........................
- Page 20 Back Up Data or iSCSI LUN on Synology NAS ........................ 60 Back Up and Restore System Configurations ........................60 Sync Shared Folder Contents between Synology NAS ....................60 Back Up Data on USB Device or SD Card ........................60 Chapter 12: Host Websites and Print Server Use Web Station to Host Websites ............................
-
Page 21: Chapter 1: Introduction
One of Synology DiskStation Manager’s applications, File Station, can make it possible for users to manage their files on Synology NAS easily through a web interface. You can also access the files stored on Synology NAS with a mobile device. - Page 22 Enjoy Music Anytime and Anywhere Audio Station allows you to listen to music stored on the Synology NAS, from a connected iPod, or even stream Internet Radio stations. In addition, you can stream music from the Synology NAS with a web browser over the Internet.
-
Page 23: Chapter 2: Get Started With Synology Diskstation Manager
Download Center. Sign into DSM After setting up and installing DSM on your Synology NAS, you can sign into DSM using a web browser on your computer. To log in with Web Assistant: 1 Make sure your computer is connected to the same network as the Synology NAS and can access the Internet. -
Page 24: Start Up Your Diskstation
Unpin from Taskbar). Upload Queue: Appears when you start uploading files to the Synology NAS. Click to see more details, like progress and upload speed. 5 Notifications: Displays notifications, like errors, status updates, and package installation notifications. 8 Chapter 2: Get Started with Synology DiskStation Manager... - Page 25 Storage: View the volume usage and disk status of your Synology NAS. System Health: Obtain an overall status of your Synology NAS and all connected devices (if any). You will be advised to take corrective action when system error occurs. 9 Chapter 2: Get Started with Synology DiskStation Manager...
-
Page 26: Open Applications And Packages With Main Menu
To reorder icons: Open Main Menu and drag an icon to any position you want. To create a desktop shortcut: Open Main Menu and drag an icon to the side. 10 Chapter 2: Get Started with Synology DiskStation Manager... -
Page 27: Shutdown, Restart, Logout, Or Manage Personal Settings
(the person-shaped icon at the top right) to shutdown, restart, logout, or manage your personal account settings. To manage personal settings: Select Personal from the drop-down menu to manage personal account settings, like password, 2-step verification, desktop, etc. 11 Chapter 2: Get Started with Synology DiskStation Manager... - Page 28 Account activity displays recent login activity of your DSM account, such as the time your account was accessed or from what IP address. Quota Under Quota, you can view your quota on all Synology NAS volumes set by DSM administrators, as well as the amount of capacity you have used on each volume. Desktop Under Desktop, you can customize the appearance of your desktop by changing the main menu style, icon size, background and text color of the desktop, or uploading images to be used as the desktop wallpaper.
-
Page 29: Chapter 3: Modify System Settings
Modify System Settings Chapter 3: After you have connected to Synology DiskStation Manager (DSM) and learned how to access its functions and customize its appearance, users belonging to the administrators group can begin to modify basic settings. This chapter explains the basics of modifying network settings, display languages, time, and energy saving features. -
Page 30: Change Network Settings
Synology NAS. For more detailed instructions, please see Help. General General tab provides options to edit the name and default gateway of the Synology NAS, as well as configure domain name server, proxy server settings and IPv6 tunneling. Network Interface Network Interface tab provides options to manage the network interfaces with which your Synology NAS connects to the network. -
Page 31: Join Wireless Network
Time Click the Time tab to set up the system time settings of the Synology NAS. You can check the current time, manually set the server's date and time, or automatically set the time using a network time server. Language... -
Page 32: Use Energy Saving Features
Note: The NTP service is required for Surveillance Station and Synology High Availability. Therefore, if you have Surveillance Station installed and run on your Synology NAS, the service cannot be disabled while the package is running. Use Energy Saving Features... - Page 33 UPS-related settings. UPS (Uninterruptible Power Supply) is a backup power device that allows the Synology NAS to continue operating for a short time if power failure occurs. This function helps prevent data loss by giving the Synology NAS enough time to save data and unmount volumes before losing power and shutting off.
-
Page 34: Chapter 4: Perform Advanced Management Tasks
This chapter explains how to comprehend advanced management functions to make sure your Synology NAS is providing the best performance. For detailed instructions, please see Help. Check System Information Info Center provides an overview of the status of the Synology NAS and other connected devices. Go to Control Panel >... -
Page 35: View System Logs
Storage Under the Storage tab, you can check the free or used space of your Synology NAS volumes and check the status of the hard disks. Service Under the... -
Page 36: Monitor System Resources
Help. Analyze System Usage Storage Analyzer allows you to quickly view overall usage trends of your Synology NAS, create tasks to analyze storage spaces, and generate detailed reports on volume usage. For detailed instructions, please see Help. 20 Chapter 4: Perform Advanced Management Tasks... -
Page 37: Scan System Settings
Synology NAS User's Guide Based on DSM 6.1 Scan System Settings Security Advisor allows you to check and scan your DSM settings for any suspicious activities that may present security risks. For detailed instructions, please see Help. Deploy High-Availability Solution High Availability Manager allows you to form two servers into a “high-availability cluster”, in which one assumes... -
Page 38: Automate Tasks
Restore, you can update DSM to a newer version, back-up and restore system configurations or restore Synology NAS device to its original manufacturer settings. You can also set a schedule to install DSM updates automatically to keep your Synology NAS always up-to-date. -
Page 39: Receive Event Notifications
> Indexing Service to automatically scan multimedia files, such as photos, music, and videos stored on your Synology NAS, and compile them into a multimedia library to be used by multimedia applications. For more detailed instructions, please see Help. Reset Admin Password If you forgot the password for admin and are therefore unable to log in to DSM, you can reset the password to blank and set a new password. -
Page 40: Reinstall Synology Nas
Download Center to set up the Synology NAS. Important: The data saved on the Synology NAS will not be erased during the reinstallation. However, for security reason, we strongly recommend that you back up the data first. Enable SNMP Service... -
Page 41: Chapter 5: Manage Storage Space
Manage Storage Space Chapter 5: Before taking advantage of the various features of your Synology NAS, you need to set up at least one storage space. This chapter explains how Storage Manager can help you manage storage spaces, such as volumes, Disk Groups, iSCSI Targets, or iSCSI LUNs, as well as view the status of hard drives. - Page 42 Provides options to allocate specific amounts of capacity for each volume (only when creating Custom multiple volumes on RAID). Recommended for users who want to precisely control storage management on your Synology NAS. Single or Multiple Volumes on RAID When creating a custom volume, the following options are available:...
-
Page 43: Repair Volumes Or Disk Groups
For example, you can create a RAID 1 volume on your Synology NAS, and later change to RAID 5 if you install more hard disks. The sections below provide basic information regarding changing RAID types. For more detailed instructions, please see Help. -
Page 44: Expand Volumes Or Disk Groups
In order to change the RAID type of a volume or Disk Group, there must be a sufficient number of available hard disks installed in your Synology NAS. Please see below for the minimum number of hard disks required for each RAID type. -
Page 45: Raid/File System Scrubbing
For SHR, JBOD, RAID 5, RAID 5+Spare, and RAID 6, the storage capacity of volumes and Disk Groups can be expanded by adding more hard disks if there are empty hard drive bays in your Synology NAS. For more detailed instructions, please see Help. -
Page 46: Manage Hard Disks
LUN snapshots. Manage Hard Disks HDD/SSD tab allows you to monitor the status of the hard disks installed in your Synology NAS, providing options to manage and analyze hard disk performance and health. To see this tab, go to Storage Manager click HDD/SSD. -
Page 47: Ssd Cache
For more detailed information, please see Help. Manage External Disks External USB or eSATA disks can be attached to the USB or eSATA port of your Synology NAS for backup or file sharing purposes. Go to Control Panel >... -
Page 48: Chapter 6: Manage Storage Space With Raid Groups
Manage RAID Groups With your Synology NAS, you may combine multiple hard disks into a single storage unit called a RAID Group. Volumes (up to 200 TB) or iSCSI LUNs (Block-Level) can be created on top of RAID Groups. Before creating a RAID Group, please confirm sufficient hard disks are installed in your Synology NAS (refer to your Synology NAS Quick Installation Guide for instructions regarding hard disk installation). - Page 49 RAID 1 group, and (even size) the total HDD combines all the groups with RAID 0. number) --------- Synology Hybrid RAID (SHR) is not supported on models with RAID Groups. 33 Chapter 6: Manage Storage Space with RAID Groups10F...
-
Page 50: Change Raid Types
To change the RAID type of a RAID Group, there must be available hard disks installed in the Synology NAS. The table below displays supported types of RAID change. For more detailed instructions regarding how to change RAID types, please refer to Help. -
Page 51: Manage Volumes
Manage Volumes Volumes are basic storage spaces on which you can create shared folders, iSCSI LUNs (regular file), save data, or install packages. Before creating a volume on your Synology NAS, please create at least one RAID Group. Create Volumes... -
Page 52: Manage Iscsi Luns
Help. Manage Hard Disks HDD/SSD section of Storage Manager allows you to monitor the status of hard disks installed on your Synology NAS, providing options to manage and analyze hard disk performance and health. To see this section, please go Storage Manager >... -
Page 53: Hot Spare
LUN (Regular Files) on a volume, or iSCSI LUN (Block- Level) on your Synology server. You can now create a read-only cache with one SSD, as well as mount, check SSD compatibility, and view related information by going to Storage Manager >... -
Page 54: Chapter 7: Access Your Synology Nas From The Internet
Access your Synology NAS from the Chapter 7: Internet You can connect to your Synology NAS over the Internet, allowing its services to be accessible from anywhere and anytime. This chapter explains the basics regarding using the Synology EZ-Internet wizard, advanced port forwarding functions, and DDNS hostname registration to connect your Synology NAS to the Internet. -
Page 55: Set Up Port Forwarding Rules For Router
Based on DSM 6.1 Set Up Port Forwarding Rules for Router If your Synology NAS is within the local network, you can set up port forwarding rules for the router to allow your Synology NAS to be accessible over the Internet. -
Page 56: Access Dsm Services Via Quickconnect
Access DSM Services via QuickConnect QuickConnect is a solution that helps client applications (such as DS file, Cloud Station utilities, DS audio, etc.) connect to your Synology NAS via the Internet without setting up port forwarding rules. Go to Control Panel >... -
Page 57: Set Up Vpn Connection
Note: Your Synology NAS cannot be set as a VPN server and client at the same time. 41 Chapter 7: Access your Synology NAS from the Internet... -
Page 58: Chapter 8: Enhance Internet Security
Enhance Internet Security Chapter 8: After your Synology NAS is available on the Internet, you will need to safeguard it against any attacks from Internet hackers. This chapter explains how to set up firewall, enable DoS protection and enable auto block. For more detailed instructions, please see Help. -
Page 59: Automatically Block Suspicious Login Attempts
Synology NAS User's Guide Based on DSM 6.1 Automatically Block Suspicious Login Attempts Auto block allows you to prevent unauthorized login. After enabling the service, an IP address will be blocked if it has too many failed login attempts. Go to Control Panel >... -
Page 60: Chapter 9: Set Up File Sharing
C h a p t e r Set Up File Sharing Chapter 9: Synology NAS can become the file sharing center within the local network or over the Internet, allowing users to access its files anytime and anywhere. For more detailed instructions, please see Help. -
Page 61: Join Synology Nas To Domain/Ldap
Binding to an LDAP Server LDAP allows your Synology NAS to join an existing directory service as an LDAP client, and then retrieve user or group information from an LDAP server (or "directory server"). The profiles option allows you to smoothly connect to different types of LDAP servers, such as standard (Synology Directory Servers or Mac Open Directory), IBM Lotus Domino servers, or customize your own profile settings. -
Page 62: Host Ldap Service With Directory Server
Based on DSM 6.1 Host LDAP Service with Directory Server Directory Server is an add-on package based on LDAP version 3 (RFC2251) that allows your Synology NAS to become an account administration center to centralize the account management of all connecting clients, and provides authentication service for them. -
Page 63: Manage Users And Groups
Synology NAS User's Guide Based on DSM 6.1 Manage Users and Groups Go to Control Panel > User Group to create users or groups, and allow or deny their access to different shared folders. Create Users Click Create to create a user account. The user can log in to edit his/her account info after the user account has been established. - Page 64 To delete the homes folder, the user home service must be disabled first. Create Domain/LDAP User’s Home Folder If you have joined your Synology NAS to a directory service as a Windows domain or LDAP client, you can go to Control Panel >...
-
Page 65: Set Up Shared Folders
> Shared Folder to manage the shared folders, which are the root folders of Synology NAS. You can store data in the shared folders and share them with users or groups with access privileges. 49 Chapter 9: Set Up File Sharing... - Page 66 The AES 256-bit encryption can block off all unauthorized access attempts. Without the encryption key, other people will not be able to use the encrypted data even if they remove the hard drives from your Synology NAS and mount it on their device.
-
Page 67: Define Windows Acl Privileges For Shared Folder
Linux clients to access it. Allow Domain Users or Groups to Access Shared Folders If you have joined your Synology NAS to a directory service as a Windows domain or LDAP client, you can go to Control Panel >... -
Page 68: Chapter 10: Access Files From Anywhere
When you have set up users or groups with proper access privileges to the shared folders, they can share their files with your Synology NAS from anywhere. This chapter explains the ways to access the Synology NAS shared folders within the local network or over the Internet. For more detailed instructions, please see Help. - Page 69 Choose > Connect to Server from the menu bar. Type the IP address or name (appended with .local) of the Synology NAS preceded by smb:// or afp:// in the Server Address field and click Connect. (e.g. smb://EricaWang.local or afp://192.168.0.2) Note: For better performance, it is recommended that you connect to the shared folders via SMB.
-
Page 70: Access Files Via Ftp
Based on DSM 6.1 Access Files via FTP If your Synology NAS is accessible over the Internet, you can use a FTP application to access the shared folders. Note: For more information about making Synology NAS accessible over the Internet, see "Chapter 7: Access your Synology NAS from the Internet". -
Page 71: Access Files Via Webdav
Synology NAS User's Guide Based on DSM 6.1 Access Files via WebDAV By enabling WebDAV or CalDAV, you can remotely manage and edit files or calendars stored on the Synology NAS. Go to Package Center to install the WebDAV package and to enable its services. -
Page 72: Access Files Via File Station
Based on DSM 6.1 Access Files via File Station File Station is DSM's file management tool, allowing DSM users over the Internet to access the Synology NAS folders with their web browsers, or transfer files to another WebDAV/FTP server. By launching two or more File Stations, you can manage all your Synology NAS data by dragging and dropping them between different File Stations. - Page 73 Station actions and properties setting are available for files and folders on Synology NAS only. Share File Links Files or folders stored on your Synology NAS can be shared quickly and easily. Simply right-click a file or folder and select Share file links.
- Page 74 File Station allows you to mount remote folders to access contents shared by network computers or other Synology NAS, or virtual drives to access contents within disc images. That way, you can easily navigate all available network resources or disc images with File Station. For more information about remote folders or virtual...
-
Page 75: Chapter 11: Back Up Data
Synology offers comprehensive backup solutions for your computer and Synology NAS, allowing you to back up data on your computer to Synology NAS. If you are a user belonging to the administrators group, you can also back up the Synology NAS data with local or network backup, or sync shared folder contents between Synology NAS. -
Page 76: Back Up Data Or Iscsi Lun On Synology Nas
Sync Shared Folder Contents between Synology NAS Shared Folder Sync allows you to sync shared folder contents from a source Synology NAS (or "client") to a destination Synology NAS (or "server") over the network. Shared Folder Sync backup tasks can be viewed and... -
Page 77: Chapter 12: Host Websites And Print Server
Enable Web Station With the Web Station, you can create a website with web pages on the Synology NAS. With built-in PHP and MySQL support, you can create dynamic, database-driven website for your business. There is also a variety of 3rd party packages such as Content Management, Customer Relationship Management &... -
Page 78: Set Synology Nas As Print Server
Help. Set up Computer to Access Print Server After the print server is set up on your Synology NAS, Windows, Mac, and Linux clients within the local area network can connect to the print server and access its print/fax/scan service. -
Page 79: Chapter 13: Discover Various Applications With Package Center
Package Center has to offer. Audio Station Audio Station is a web-based audio application, allowing you to access the music library on your Synology NAS, choose available audio sources on the local area network, and add your favorite music to playlists for playback. -
Page 80: Dns Server
Chat is a web-based application that allows you to create a safe and secure place where conversations can be held in real-time. Cloud Station Server Cloud Station Server is a file sharing service that allows you to synchronize files between a centralized Synology NAS and multiple client computers, mobile and Synology NAS devices. Cloud Station ShareSync Cloud Station ShareSync is a file sharing service that allows you to synchronize files between a centralized Synology NAS device and multiple client Synology NAS devices, computer and mobiles. -
Page 81: Install Or Buy Packages
Click Install, or Buy, and follow the onscreen instructions to install packages. You can also click Manual Install and follow the wizard to install packages by uploading .spk files (available at Synology's Download Center or third party websites). 65 Chapter 13: Discover Various Applications with Package Center... -
Page 82: Chapter 14: Communicate With Mobile Devices
Besides, the remote controller feature allows you to control Audio Station's music playback when there is an audio output device connected to the USB port of your Synology NAS, such as a USB speaker, or an external speakers or home stereo equipment connected to the audio dock of Synology Remote (sold separately). -
Page 83: Use Other Mobile Devices
DS finder DS finder allows you to monitor or email the status of your Synology NAS, and request it to perform wake on LAN (WOL), restart, shut down, or play beep sounds (to help you quickly find the its location) with an iOS/Android device or Windows Phone. -
Page 84: Troubleshooting
For any questions about managing your DSM, go to DSM Help or click the Help button (with a question mark) at the top-right corner of every window. For any questions other than that, please visit the Synology Knowledge Base website at help.synology.com for further assistance. - Page 85 IMPORTANT–READ CAREFULLY: THIS END USER LICENSE AGREEMENT ("EULA") IS A LEGAL AGREEMENT BETWEEN YOU (EITHER AN INDIVIDUAL OR A LEGAL ENTITY) AND SYNOLOGY, INC. ("SYNOLOGY") FOR THE SYNOLOGY SOFTWARE INSTALLED ONTO THE SYNOLOGY PRODUCT PUCHASED BY YOU (THE “PRODUCT”), OR LEGALLY DOWNLOADED FROM WWW.SYNOLOGY.COM, OR ANY OTHER CHANNEL PROVIDED BY SYNOLOGY...
- Page 86 Section 15. Termination. Without prejudice to any other or other legal action or proceeding to enforce rights or rights, Synology may terminate this EULA if you do not abide remedies under this EULA, the prevailing party will be by the terms and conditions contained herein. In such event,...
- Page 87 SYNOLOGY, INC. LIMITED PRODUCT WARRANTY THIS LIMITED WARRANTY ("WARRANTY") APPLIES TO THE PRODUCTS (AS DEFINED BELOW) OF SYNOLOGY, INC. AND ITS AFFILIATES, INCLUDING SYNOLOGY AMERICA CORP, (COLLECTIVELY, "SYNOLOGY"). YOU ACCEPT AND AGREE TO BE BOUND BY THE TERMS OF THIS WARRANTY BY OPENING THE PACKAGE CONTAINING AND/OR USING THE PRODUCT.
- Page 88 DAMAGES. the Product specifications; (b) has been repaired, modified or altered by anyone other than Synology or its agent or Limitation of Liability. SYNOLOGY'S AND ITS designee; (c) has been in any way misused, abused, or SUPPLIERS' LIABILITY ARISING OUT OF OR RELATING damaged;...
- Page 89 Nothing in this Section shall be deemed to prohibit or restrict arbitration and will not be conducted on a class-wide or class Synology from seeking injunctive relief or seeking such other action basis. The arbitration shall be held in King County, rights and remedies as it may have at law or equity for any Washington, U.S.A.