Table of Contents
Advertisement
Quick Links
Advertisement
Table of Contents

Related Manuals for Synology DiskStation DS214


Summary of Contents for Synology DiskStation DS214
- Page 1 Synology DiskStation DS214 Quick Installation Guide Synology_QIG_DS214_201307...
-
Page 2: Table Of Contents
Table of Contents Chapter 1: Before You Start Package Contents ................................3 Synology DiskStation at a Glance ............................ 4 Safety Instructions ................................5 Chapter 2: Hardware Setup Tools and Parts for Hard Disk Installation ........................6 Install Hard Disks ................................6 Start Up Your DiskStation .............................. -
Page 3: Package Contents
C h a p t e r Before You Start Chapter 1: Before you start setting up DiskStation, please check the package contents to verify that you have received the items below. Please also read the safety instructions carefully before use to prevent your DiskStation from any damages. -
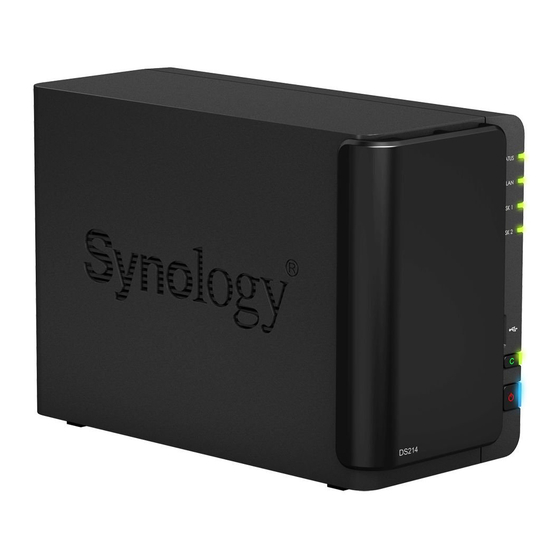
Page 4: Synology Diskstation At A Glance
To turn off Synology DiskStation, press the power button and hold it until you hear a beep sound and the Power LED starts blinking. The fan is built to exhaust waste heat out of Synology DiskStation. If the fan is Back Panel malfunctioning, the system will play beep sounds. -
Page 5: Safety Instructions
Before cleaning, unplug the power cord first. Wipe Synology product with damp paper towels. Do not use chemical or aerosol cleaners to clean it. Do not place the Synology product on a cart, table, or desk, which is not stable to avoid the product from falling over. -
Page 6: Chapter 2: Hardware Setup
A screwdriver At least one 3.5” or 2.5” SATA hard disk (Please visit www.synology.com for compatible hard disk models.) Warning: If you install a hard disk that contains data, system will format the hard disk and erase all data. If you need the data in the future, please back it up before installation. - Page 7 3 Load the hard disk in the hard drive tray. For 3.5” Hard Disk: Remove the fastening panels from the sides of the hard drive tray. Place the hard disk in the hard drive tray. Then insert the fastening panels to secure the hard disk in place. ...
-
Page 8: Start Up Your Diskstation
6 The disks’ positions are numbered as shown below. 7 Replace the hard drive bay cover to finish the installation. Note: If you want to set up a RAID set, it is recommended that all installed hard disks are of the same size to make the best use of hard disk capacity. - Page 9 3 Press the power button to turn on your DiskStation. Your DiskStation is now online and detectable from a network computer. 9 Chapter 2: Hardware Setup...
-
Page 10: Chapter 3: Install Dsm On Diskstation
We highly recommend using Synology’s online Web Assistant for installing DSM from the web browser. Synology Web Assistant automatically downloads the latest available software updates from the Internet and guides you through the installation. You can also use Synology Assistant available in the installation disc in your package to complete DSM installation via personal computer. -
Page 11: Install Dsm From The Installation Disc
1 Insert the installation disc into your computer, and click Start. Follow the onscreen instructions to complete the setup process. 2 Synology Assistant will be installed and launched on your computer. It will search and find your DiskStation Installed. Double-click your DiskStation to start within LAN, and the status of your DiskStation should be the setup process. - Page 12 4 Follow the onscreen instructions to complete the setup process. After the installation process is finished, you can manage your DiskStation with Synology DiskStation Manager (DSM). For more information about managing your DiskStation with DSM, refer to Synology DiskStation User’s...
-
Page 13: For Mac Os X
For Mac OS X 1 Insert the installation disc into your computer, and then double-click the SynologyInstall icon on the desktop. 2 In the window that appears, double-click the MacOSX folder, and then double-click Synology Assistant- [number].dmg. 4.2-3224 3 Double-click the Synology Assistant.app in the window that appears. - Page 14 1 Go to /usr/local and /usr/local/bin and delete the following folders (if any): Synology, SynologyAssistant 2 Insert the installation disc into your computer, and then double-click the SynologyInstall icon on the desktop. 3 In the File Browser window that appears, double-click the Linux folder, and then double-click Synology Assistant-[number].tar.gz. 4.2-3224 4.2-3224...
-
Page 15: Learn More
Run in Terminal in the dialog box that appears. Install DSM on DiskStation When you have activated Synology Assistant, follow step 2 to 4 of the “Install from Windows” section to finish setup. Learn More Congratulations! Your DiskStation is set up now. Refer to the User’s Guide in the installation disc for advanced settings and management. -
Page 16: Appendix A: Specifications
‧EXT4 File System ‧EXT3, FAT, NTFS (External disk only) ‧Basic ‧JBOD ‧RAID 0 ‧RAID 1 Volume Type ‧Synology Hybrid RAID (1-Disk Fault Tolerance) Agency Certifications ‧FCC Class B ‧CE Class B ‧BSMI Class B HDD Hibernation Scheduled Power On/Off Wake on LAN/WAN ‧English ‧Deutsch ‧Français ‧Italiano ‧Español ‧Dansk ‧Norsk ‧Svensk... -
Page 17: Appendix B: Led Indication Table
Static Device detected Copy Green Blinking Copying data No device connected Static Power ready Booting up Power Blue Blinking Shutting down Power off Note: Model specifications are subject to change without notice. Please refer to www.synology.com for the latest information. - Page 18 IMPORTANT–READ CAREFULLY: THIS END USER LICENSE AGREEMENT ("EULA") IS A LEGAL AGREEMENT BETWEEN YOU (EITHER AN INDIVIDUAL OR A SINGLE ENTITY) AND SYNOLOGY, INC. AND ITS AFFILIATES, INCLUDING SYNOLOGY AMERICAN CORP AND SYNOLOGY UK LTD., (COLLECTIVELY, "SYNOLOGY") FOR ANY SYNOLOGY SOFTWARE, TOGETHER WITH ANY OTHER ASSOCIATED FIRMWARE, MEDIA, PRINTED MATERIALS AND "ONLINE"...
- Page 19 Section 16. Termination. Without prejudice to any other threatened breach of any provision of this EULA relating to rights, Synology may terminate this EULA if you do not abide Synology's intellectual property rights. by the terms and conditions contained herein. In such event, you must cease use of the Software and destroy all copies of Section 20.
- Page 20 THIS LIMITED WARRANTY ("WARRANTY") APPLIES TO THE PRODUCTS (AS DEFINED BELOW) OF SYNOLOGY, INC. AND ITS AFFILIATES, INCLUDING SYNOLOGY AMERICA CORP AND SYNOLOGY UK LTD., (COLLECTIVELY, "SYNOLOGY"). YOU ACCEPT AND AGREE TO BE BOUND BY THE TERMS OF THIS WARRANTY BY OPENING THE PACKAGE CONTAINING AND/OR USING THE PRODUCT.
- Page 21 DAMAGES. the Product specifications; (b) has been repaired, modified or altered by anyone other than Synology or its agent or Limitation of Liability. SYNOLOGY'S AND ITS designee; (c) has been in any way misused, abused, or SUPPLIERS' LIABILITY ARISING OUT OF OR RELATING damaged;...
- Page 22 Customers residing within the and the arbitration proceedings shall be conducted in United States and Synology will be resolved exclusively and English or, if both parties so agree, in Mandarin Chinese. finally by arbitration under the current commercial rules of...