Toshiba e-STUDIO5506AC Hardware Troubleshooting Manual
Multifunctional digital color systems /
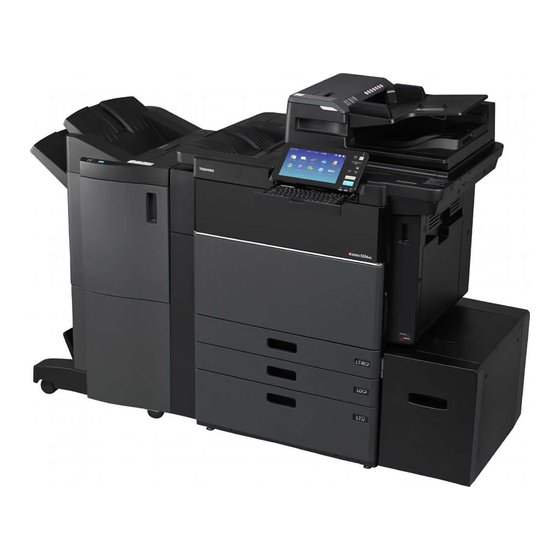
multifunctional digital systems e-studio7506ac series; e-studio8508a series
Hide thumbs
Also See for e-STUDIO5506AC:
- Quick start manual (76 pages) ,
- Imaging manual (331 pages) ,
- Software installation manual (164 pages)

Related Manuals for Toshiba e-STUDIO5506AC


Summary of Contents for Toshiba e-STUDIO5506AC
- Page 1 MULTIFUNCTIONAL DIGITAL COLOR SYSTEMS / MULTIFUNCTIONAL DIGITAL SYSTEMS Hardware Troubleshooting Guide...
- Page 2 © 2016 TOSHIBA TEC CORPORATION All rights reserved Under the copyright laws, this manual cannot be reproduced in any form without prior written permission of TTEC.
-
Page 3: Preface
Preface Thank you for purchasing TOSHIBA Multifunctional Digital Systems. This manual describes how to troubleshoot the problems that could occur while you are using the equipment. Keep this manual within easy reach, and use it to configure an environment that makes the best use of the e-STUDIO’s functions. - Page 4 4 Preface...
-
Page 5: Table Of Contents
CONTENTS Preface..............................3 How to read this manual ............................3 Chapter 1 TROUBLESHOOTING FOR THE HARDWARE When This Screen Is Displayed........................ 8 Messages Displayed on the Touch Panel ....................12 Clearing a Paper Misfeed........................18 Locating a paper misfeed ............................18 Clearing a paper misfeed............................ - Page 6 6 CONTENTS...
- Page 7 TROUBLESHOOTING FOR THE HARDWARE This chapter describes how to troubleshoot problems with paper, toner and other finishing processes. This chapter also describes how to supply the paper, toner and staples. When This Screen Is Displayed .....................8 Messages Displayed on the Touch Panel ................12 Clearing a Paper Misfeed....................18 Locating a paper misfeed ............................18 Clearing a paper misfeed.............................19...
-
Page 8: When This Screen Is Displayed
When This Screen Is Displayed Various screens are displayed on the touch panel depending on the state of the equipment. This section describes how to solve problems with some of the screen examples. Screen Description / Remedy A message appears on the upper part of the screen to notify users of a problem, etc. - Page 9 1.TROUBLESHOOTING FOR THE HARDWARE Screen Description / Remedy An incorrect paper size or “ ” indicates an unsuccessful paper size detection. In this case, check the following items. Check if the paper with an unacceptable size is placed in the drawer.
- Page 10 1.TROUBLESHOOTING FOR THE HARDWARE Screen Description / Remedy The original or copy paper is misfed. Remove it following the guidance on the touch panel. P.18 “Clearing a Paper Misfeed” A cover is open. Check which cover on the touch panel and then close it securely.
- Page 11 1.TROUBLESHOOTING FOR THE HARDWARE Screen Description / Remedy The waste toner box is full. Replace it following the guidance on the touch panel. P.62 “Replacing the Waste Toner Box” The equipment requires adjusting by a service technician. Contact your service representative with the error code displayed on the right side of the touch panel.
-
Page 12: Messages Displayed On The Touch Panel
Messages Displayed on the Touch Panel A message appears on the upper part of the screen to notify users of a problem, etc. The major examples of problems and how to solve them are described in the table below. Message Problem Description Corrective Action Close *** cover. - Page 13 1.TROUBLESHOOTING FOR THE HARDWARE Message Problem Description Corrective Action Change direction of original The orientation of the original Change the orientation of the original by 90 placed on the original glass is degrees and place it on the original glass. incorrect.
- Page 14 1.TROUBLESHOOTING FOR THE HARDWARE Message Problem Description Corrective Action Ready (Check Stapler) Staples in the stapler of the Replace the staple case of the finisher if finisher have almost run out or stapling is not performed for an output have actually done so. document even though the stapling function has been selected.
- Page 15 1.TROUBLESHOOTING FOR THE HARDWARE Message Problem Description Corrective Action Change Drawer to Correct Paper No paper suitable for the Place the suitable size paper for the original in Size original is set. the drawer. The size of the original is not Replace the original while aligning the side detected correctly because the guides of the ADF to its width so that it will be...
- Page 16 1.TROUBLESHOOTING FOR THE HARDWARE Message Problem Description Corrective Action Toner near Empty (***) Toner is running out. “***” Some toner is still left in the toner cartridge indicates the color. while this message is displayed. You do not (The colors are shown in have to replace the toner cartridge yet.
- Page 17 1.TROUBLESHOOTING FOR THE HARDWARE Message Problem Description Corrective Action Check under the Finisher tray An obstruction is placed under Remove the obstruction under the Finisher and reboot the machine. the Finisher tray. tray and reboot the equipment. The number of originals The number of originals to be Reduce the number of originals to be exceeds the limits.
-
Page 18: Clearing A Paper Misfeed
Clearing a Paper Misfeed Locating a paper misfeed The equipment stops copying when the original or copy paper is misfed. Paper misfeeds are notified on the touch panel as follows: Error code Error message Guidance for clearing paper misfeeds Paper misfeed symbols The paper misfeed symbol helps you locate the paper misfeed. -
Page 19: Clearing A Paper Misfeed
1.TROUBLESHOOTING FOR THE HARDWARE 14. Hole Punch Unit (optional) ( P.33) 15. Saddle Stitch Unit (optional) ( P.36) 16. Finisher (optional) ( P.33) The picture of the hardware device shown on the touch panel differs depending on the options installed. ... - Page 20 1.TROUBLESHOOTING FOR THE HARDWARE Do not touch the fuser unit or the metal portion around it. Do not touch the fuser unit or the metal portion around it when you remove the paper misfed in the right side of the equipment. This could burn you or the shock could cause you to get your hand injured in the machine.
-
Page 21: Dsdf (Lower)
1.TROUBLESHOOTING FOR THE HARDWARE DSDF (Lower) Remove the originals on the DSDF and open it. Push the green button to open the lower cover. Turn the inner green dial and remove the misfed original. Remove the misfed originals. Clearing a Paper Misfeed 21... -
Page 22: Dsdf (Upper)
1.TROUBLESHOOTING FOR THE HARDWARE Push the green part to close the lower cover. Close the DSDF. DSDF (Upper) Raise the lever and open the upper cover. Remove the misfed originals. 22 Clearing a Paper Misfeed... - Page 23 1.TROUBLESHOOTING FOR THE HARDWARE If it is not easy to remove the misfed originals under the feed roller unit, take it off. Remove the misfed originals under the feed roller unit. Attach the feed roller unit. Remove the originals under the original feeder tray. Clearing a Paper Misfeed 23...
-
Page 24: External Large Capacity Feeder (Optional)
1.TROUBLESHOOTING FOR THE HARDWARE Close the upper cover. Confirm that the lever of the upper cover is closed firmly. External large capacity feeder (optional) Be careful not to let your fingers be caught between the equipment and the External Large Capacity Feeder. This could injure you. -
Page 25: Drawer Feeding Portion
1.TROUBLESHOOTING FOR THE HARDWARE Pull out the drawer of the External Large Capacity Feeder and remove the misfed paper. Check that there is no folded/curled paper or overloading, and then close the drawer. Be sure that the height of the stacked paper does not exceed the line indicated on the rear side guide. Connect the External Large Capacity Feeder to the equipment. - Page 26 1.TROUBLESHOOTING FOR THE HARDWARE Open the feeder cover on the right. Remove the misfed paper from the drawer. Close the feeder cover. Connect the External Large Capacity Feeder (if attached, optional) to the equipment. Move it slowly placing your hands on the point shown in the figure. 26 Clearing a Paper Misfeed...
-
Page 27: Drawers
1.TROUBLESHOOTING FOR THE HARDWARE Drawers Open the paper source drawer, and remove the misfed paper. Check that the guide width is correct, there is no folded/curled paper or overloading, and then close the drawer. Be sure that the height of the stacked paper does not exceed the line indicated inside of the side guides. ... -
Page 28: Bypass Tray
1.TROUBLESHOOTING FOR THE HARDWARE Check that there is no folded/curled paper or overloading, and then close the drawer of the Large Capacity Feeder. Be sure that the height of the stacked paper does not exceed the line indicated inside of the side guides. ... -
Page 29: Fuser Unit
1.TROUBLESHOOTING FOR THE HARDWARE Remove the misfed paper. Close the duplexing unit putting your hands on the position shown in the figure. Do not put your hand or fingers on the duplexing unit when closing it. They could be caught and this could injure you. ... - Page 30 1.TROUBLESHOOTING FOR THE HARDWARE Check the inside of the fuser unit for the hidden misfed paper when you cannot see it. 1. Open the front cover of the equipment. 2. Check if misfed paper remains inside the fuser unit through the window for checking for paper misfeeds. 3.
-
Page 31: Duplexing Unit
1.TROUBLESHOOTING FOR THE HARDWARE Close the duplexing unit putting your hands on the position shown in the figure. Do not put your hand or fingers on the duplexing unit when closing it. They could be caught and this could injure you. ... - Page 32 1.TROUBLESHOOTING FOR THE HARDWARE Remove the misfed paper. Close the duplexing unit cover. Do not put your hand or fingers on the duplexing unit cover when closing it. They could be caught and this could injure you. Close the bypass tray. 32 Clearing a Paper Misfeed...
-
Page 33: Finisher And Hole Punch Unit (Both Optional)
1.TROUBLESHOOTING FOR THE HARDWARE Finisher and Hole punch unit (both optional) Separate the Finisher from the equipment. 1. Open the front cover of the finisher when the Hole Punch Unit is not installed. Open the Hole Punch Unit cover when the Hole Punch Unit is installed. - Page 34 1.TROUBLESHOOTING FOR THE HARDWARE Raise the lever and open the upper receiving tray of the finisher. Turn the green knob shown in the following figures to send the paper, and then remove the misfed paper. When the Hole Punch Unit is installed, open the front cover of the finisher and turn the 2 knobs at the same time. When the Hole Punch Unit is not installed When the Hole Punch Unit is installed Be sure to turn the knob to the direction indicated by the arrow to remove the misfed paper.
- Page 35 1.TROUBLESHOOTING FOR THE HARDWARE Remove the misfed paper. If the paper is caught by the roller in the exit section, remove it by lifting the roller up with your fingers. Close the upper receiving tray of the finisher. Place your hands on the near and far side of the lever and push to close the tray until it clicks. Be careful not to let your fingers be caught between the finisher body and the upper receiving tray.
-
Page 36: Saddle Stitch Unit (Optional)
1.TROUBLESHOOTING FOR THE HARDWARE Close the Hole Punch Unit cover when it is installed. Close the front cover first, and connect the finisher to the equipment. Move the finisher slowly placing your hands on the positions shown in the figure. Be careful not to let your fingers be caught between the finisher and the equipment. - Page 37 1.TROUBLESHOOTING FOR THE HARDWARE Separate the Finisher from the equipment. 1. Open the front cover of the finisher when the Hole Punch Unit is not installed. Open the Hole Punch Unit cover when the Hole Punch Unit is installed. When the Hole Punch Unit is not installed When the Hole Punch Unit is installed 2.
- Page 38 1.TROUBLESHOOTING FOR THE HARDWARE Move the green knob to the right. Turn the green knob to lower the paper until it is hidden. Return the green knob to the left. Pull out the Saddle Stitch unit until it stops. Do not put your hands in the opening section (A) which is located behind the Saddle Stitch unit. Your hands may be caught, resulting in injury.
- Page 39 1.TROUBLESHOOTING FOR THE HARDWARE Open the transport guide on the right side. Remove the misfed paper. Remove the paper from the inside of the Saddle Stitch unit. Close the transport guide. Holding both green knobs with your fingers, open the transport guide on the left. Clearing a Paper Misfeed 39...
- Page 40 1.TROUBLESHOOTING FOR THE HARDWARE Lower the two green levers. Remove the paper. Raise the two green levers. Holding both green knobs with your fingers, close the transport guide on the left. Return the Saddle Stitch unit to its original position. 40 Clearing a Paper Misfeed...
-
Page 41: Receiving Unit
1.TROUBLESHOOTING FOR THE HARDWARE Close the Hole Punch Unit cover when it is installed. Close the front cover of the finisher, and connect the finisher to the equipment. Move the finisher slowly placing your hands on the positions shown in the figure. Be careful not to let your fingers be caught between the finisher and the equipment. - Page 42 1.TROUBLESHOOTING FOR THE HARDWARE Side receiving tray Remove the paper from the side receiving tray. Clear the paper misfeed in the bridge unit. P.44 “Bridge unit” 42 Clearing a Paper Misfeed...
- Page 43 1.TROUBLESHOOTING FOR THE HARDWARE Receiving tray lower cover Separate the Finisher from the equipment. 1. Open the front cover of the finisher when the Hole Punch Unit is not installed. Open the Hole Punch Unit cover when the Hole Punch Unit is installed. When the Hole Punch Unit is not installed When the Hole Punch Unit is installed 2.
-
Page 44: Bridge Unit
1.TROUBLESHOOTING FOR THE HARDWARE Close the cover under the receiving tray. Close the covers of the finisher and the Hole Punch Unit (when it is installed) first, and connect the finisher to the equipment. Move the finisher slowly placing your hands on the positions shown in the figure. Be careful not to let your fingers be caught between the finisher and the equipment. - Page 45 1.TROUBLESHOOTING FOR THE HARDWARE Open the front cover of the equipment. Putting your hand on the green lever, pull out the bridge unit until it stops. Holding the green lever, open the lower cover and remove any paper under it. Close the lower cover.
-
Page 46: Clearing Paper Misfeeds Caused By A Wrong Paper Size Setting
1.TROUBLESHOOTING FOR THE HARDWARE Close the upper cover. Return the bridge unit to the inside of the equipment. Close the front cover of the equipment. Clearing paper misfeeds caused by a wrong paper size setting Paper misfeeds occur when there is a mismatch between the size of the paper in a drawer or the bypass tray and the size registered for the corresponding drawer or the bypass tray in the equipment. - Page 47 1.TROUBLESHOOTING FOR THE HARDWARE Be sure that the height of the stacked paper does not exceed the line indicated inside of the side guides. Close all the drawers or covers. Press [Yes] when “Cancel print job?” appears. The print job is canceled. If you do not want to cancel the print job To restart the job without canceling it, replace the paper in the drawer with that corresponding to the size set in the equipment after the paper misfeed is cleared.
- Page 48 1.TROUBLESHOOTING FOR THE HARDWARE Press the drawer button indicated in the message. Set the paper size again and press [OK]. For details about how to set the paper size, refer to "Doing Paper Settings" in Chapter 1 of the Paper Preparation Guide.
- Page 49 1.TROUBLESHOOTING FOR THE HARDWARE Misfeed when making copies or prints (using the bypass tray) Clear the paper misfeed following the guidance shown on the touch panel. Then close all the covers. Press [Yes] when “Cancel print job?” appears. The print job is canceled. If you do not want to cancel the print job To restart the job without canceling it, replace the paper on the bypass tray with that corresponding to the size set in the equipment after the paper misfeed is cleared.
- Page 50 1.TROUBLESHOOTING FOR THE HARDWARE Place the paper corresponding to the set size in the drawer. Check that the guide width is correct and there is no folded/curled paper or overloading, and then close the drawer. Be sure that the height of the stacked paper does not exceed the line indicated inside of the side guides. Clear the paper misfeed following the guidance shown on the touch panel.
-
Page 51: Clearing A Staple Jam
Clearing a Staple Jam When a staple jam has occurred in the stapler of the finisher or saddle stitch unit, clear the jam following the procedure below. P.51 “Finisher” P.53 “Saddle Stitch unit” Do not touch the connectors inside the equipment. This could cause a malfunction. ... - Page 52 1.TROUBLESHOOTING FOR THE HARDWARE Remove the top staple sheet. Holding the knob, raise the guide, and return it to its original position. Remove the staples if they have fallen between the staple cartridge and the staple case or in the staple receiver.
-
Page 53: Saddle Stitch Unit
1.TROUBLESHOOTING FOR THE HARDWARE Saddle Stitch unit Open the front cover of the finisher, and pull out the Saddle Stitch unit until it stops. Remove the staple cartridge. Raise the guide while holding the knob. Do not touch the stapling area. The actual needle point could cause you personal injury. - Page 54 1.TROUBLESHOOTING FOR THE HARDWARE Holding the knob, lower the guide, and return it to its original position. Fit the staple cartridge. Insert the cartridge until it is caught by the latch and secured with a click. Return the Saddle Stitch unit to its original position. Close the front cover of the finisher. 54 Clearing a Staple Jam...
-
Page 55: Replacing A Toner Cartridge
Replacing a Toner Cartridge When the toner cartridge runs out, the message “Install New *** (color name) toner cartridge” appears. Replace the toner cartridge following the procedure below when you see this message. Never attempt to incinerate toner cartridges. Dispose of used toner cartridges and waste toner boxes in accordance with local regulations. Do not touch the terminal of the toner cartridge. - Page 56 1.TROUBLESHOOTING FOR THE HARDWARE Shake the new toner cartridge strongly with its label side down to loosen the toner inside. Pull the seal straight out in the direction of the arrow. Insert the new toner cartridge until its front surface aligns to the left side wall. Close the front cover pressing both edges.
-
Page 57: Monochromatic Models
1.TROUBLESHOOTING FOR THE HARDWARE Monochromatic models Open the front cover of the equipment. Put your fingers in the groove and pull out the toner cartridge supporting it with your hand. Never attempt to incinerate toner cartridges. Dispose of used toner cartridges in accordance with local regulations. Shake the new toner cartridge strongly with the label surface down to loosen the toner inside. -
Page 58: Replacing A "Near Empty" Toner Cartridge
1.TROUBLESHOOTING FOR THE HARDWARE Insert the new toner cartridge until its front surface aligns to the left side wall. Close the front cover pressing both edges. Replacing a “Near Empty” toner cartridge The message “Toner near Empty” appears on the touch panel when there is not much toner left in a toner cartridge. Some toner is still left in the toner cartridge while the message “Toner near Empty”... - Page 59 1.TROUBLESHOOTING FOR THE HARDWARE Press [Job Status]. Press the [Toner] tab. Press [Replace Toner Cartridge]. Replacing a Toner Cartridge 59...
- Page 60 1.TROUBLESHOOTING FOR THE HARDWARE To replace a toner cartridge, press [Yes]. To cancel, press [No]. If you press [Yes], go to the next step. If you press [No], the previous screen appears. For color models, press the button for the color you intend to replace. For color models, to replace the toner cartridge, press [Yes].
- Page 61 1.TROUBLESHOOTING FOR THE HARDWARE Press [Finish]. Replacing a Toner Cartridge 61...
-
Page 62: Replacing The Waste Toner Box
Replacing the Waste Toner Box When the waste toner box becomes full, the symbol for replacement of the waste toner box blinks and the message “Dispose of used toner” appears. Replace the waste toner box following the procedure below. Never attempt to incinerate waste toner boxes. Dispose of used toner cartridges and waste toner boxes in accordance with local regulations. - Page 63 1.TROUBLESHOOTING FOR THE HARDWARE Press the button on the waste toner box cover to open it. Take out the waste toner box. Do not place the waste toner box with its collecting port face down. The waste toner may spill out from the box's collecting port. Put the cap on the opening of the waste toner box.
- Page 64 1.TROUBLESHOOTING FOR THE HARDWARE Insert a new waste toner box into the slot until it stops. Close the waste toner box cover. Close the covers of the finisher and Hole Punch Unit (when it is installed) and connect the finisher to the equipment.
-
Page 65: Refilling With Staples
Refilling With Staples Refill with staples according to the following procedures when the staples in the stapler of the finisher and saddle stitch unit run out. P.65 “Finisher” P.66 “Saddle Stitch unit” Do not touch the connectors inside the equipment. This could cause a malfunction. ... -
Page 66: Saddle Stitch Unit
1.TROUBLESHOOTING FOR THE HARDWARE Fit the staple cartridge into the stapler. When fitting the staple cartridge, hold the green-labeled portion of the bracket securely so that the bracket will not move. Insert the cartridge until it is caught by the latch and fixed with a click. Close the front cover of the finisher. - Page 67 1.TROUBLESHOOTING FOR THE HARDWARE After the transparent cover is lifted, take the empty staple case out of the cartridge. Fit the new staple case into the staple cartridge. Insert it to the rear until it clicks. In this step, do not remove the seal bundling the staples. Press down the transparent cover of the cartridge.
- Page 68 1.TROUBLESHOOTING FOR THE HARDWARE Fit the staple cartridge. Insert the cartridge until it is caught by the latch of the staple cartridge and is fixed with a click. Return the Saddle Stitch unit to its original position. Close the front cover of the finisher. 68 Refilling With Staples...
-
Page 69: Cleaning The Hole Punch Dust Bin
Cleaning the Hole Punch Dust Bin When the hole punch dust bin becomes full, dispose of the paper punchings following the procedure below. Open the Hole Punch Unit cover. Pull out the hole punch dust bin. Dispose of the paper punchings. Push back in the hole punch dust bin. - Page 70 1.TROUBLESHOOTING FOR THE HARDWARE 70 Cleaning the Hole Punch Dust Bin...
- Page 71 WHEN SOMETHING IS WRONG WITH THE EQUIPMENT Try the troubleshooting tips in this chapter when you think there is something wrong with the equipment. This chapter also describes the daily care for the equipment. When You Think Something Is Wrong With the Equipment ...........72 General operations ..............................72 Originals and paper .............................73 Regular Maintenance ......................75...
-
Page 72: When You Think Something Is Wrong With The Equipment
When You Think Something Is Wrong With the Equipment If you think there is something wrong with the equipment, check the following items. To see the functions of the equipment such as copy or print, refer to their operator’s manuals (Copying Guide and Printing Guide respectively). -
Page 73: Originals And Paper
2.WHEN SOMETHING IS WRONG WITH THE EQUIPMENT Problem Description Cause Corrective Action The window “Enter The equipment is managed Enter your department code. If you do not know it, Department Code” appears. under the department contact the administrator of the equipment. management function. - Page 74 2.WHEN SOMETHING IS WRONG WITH THE EQUIPMENT Problem Description Cause Corrective Action Sheets are not aligned Sheets are not placed in the Check the printing side of the sheets and place when exiting. drawer with correct side up for them correctly. Information about the printing side this equipment.
-
Page 75: Regular Maintenance
Regular Maintenance We recommend that you clean the following portions weekly so that the originals can always be scanned in unsoiled conditions. Be careful not to scratch the portions when cleaning them. When cleaning the surface of the equipment, do not use such organic solvents as thinner or benzine. - This could warp the shape of the surface or leave it discolored. - Page 76 2.WHEN SOMETHING IS WRONG WITH THE EQUIPMENT 76 Regular Maintenance...
-
Page 77: Index
INDEX Cleaning Waste toner box - replacing ..........62 hole punch dust bin............. 69 Department code ............73 Error messages touch panel ..............12 Near ................. 58 “Near Empty” toner cartridge - replacing...... 58 Paper misfeed ..............18 caused by a wrong paper size setting......46 locating ................ - Page 78 78 INDEX...
- Page 79 FC-5506AC/6506AC/7506AC DP-5508A/6508A/7508A/8508A OME150129A0...
- Page 80 MULTIFUNCTIONAL DIGITAL COLOR SYSTEMS / MULTIFUNCTIONAL DIGITAL SYSTEMS Hardware Troubleshooting Guide 1-11-1, OSAKI, SHINAGAWA-KU, TOKYO, 141-8562, JAPAN R151120R7601-TTEC Ver01 F Issued in Oct. 2016 ©2016 TOSHIBA TEC CORPORATION All rights reserved Patent; http://www.toshibatec.co.jp/en/patent/...