AGFA Drystar 5302 User Manual
Hide thumbs
Also See for Drystar 5302:
- Technical documentation manual (459 pages) ,
- Reference manual (222 pages) ,
- Installation planning (14 pages)
Table of Contents
Advertisement
Advertisement
Table of Contents

Related Manuals for AGFA Drystar 5302


Summary of Contents for AGFA Drystar 5302
- Page 1 Drystar 5302 User manual...
- Page 2 Agfa-Gevaert N.V. shall under no circumstances be liable for any damage arising from the use or inability to use any information, apparatus, method or process disclosed in this document.
-
Page 3: Table Of Contents
Privacy and security ..................15 Operating modes ..................17 Control modes (local and remote) ............... 19 The user interface ..................20 Switching on the Drystar 5302 ..............30 Switching off the Drystar 5302 ..............32 ..........33 Chapter 2: Basic operation (Operator mode) Overview of operator functions ..............34... - Page 4 5302 U RYSTAR SER MANUAL 2831A EN 20041201...
-
Page 5: Chapter 1: Introducing The Drystar 5302
Chapter Introducing the Drystar 5302 This chapter introduces the Drystar 5302 to the user and draws attention to important safety precautions. Drystar 5302 features Safety precautions Security precautions Safety compliance Privacy and security Operating modes Control modes (local and remote) -
Page 6: Drystar 5302 Features
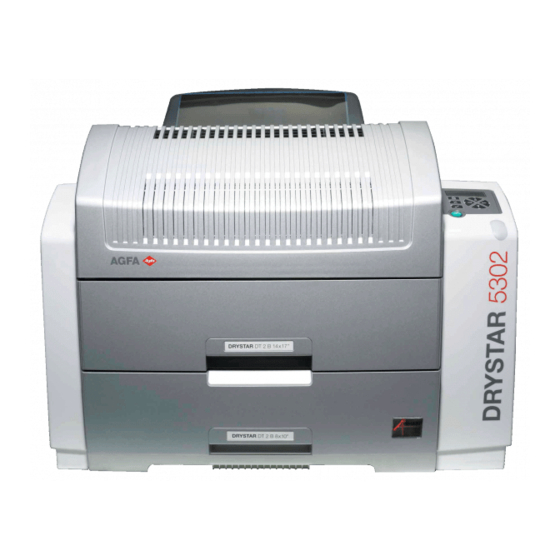
Number of input trays. " The Drystar 5302 is equipped with 2 input trays. Both input trays can use multiple formats (8x10” up to 14x17”). Introducing the Drystar 5302 2831A EN 20041201... -
Page 7: Network Features
Agfa representative. The functionality of the Drystar 5302 is completely controlled via the network. " You can control the working of the Drystar 5302 via the local keypad or via a " remote PC with a functioning web browser. - Page 8 SER MANUAL Customizable features Consumables. " The Drystar 5302 can handle Drystar DT 2B and Drystar DT 2C consumables, both in multiple formats (8x10” up to 14x17”). Software license information The Drystar 5302 uses software developed by the Apache Software Foundation "...
-
Page 9: Safety Precautions
SER MANUAL Safety precautions The Drystar 5302 must only be operated according to its specifications and its intended use. Any operation not corresponding to the specifications or intended use may result in hazards, which in turn may lead to serious injuries or fatal accidents (for example electric shocks). -
Page 10: Transport After Installation
In order to reduce the risk of electric shock, do not remove any covers. Type B equipment: Indicates that the Drystar 5302 complies with the limits for type B equipment. Supplementary protective earth connector: Provides a connection between the Drystar 5302 and the potential equalization busbar of the electrical system as found in medical environments. - Page 11 Agfa recommends having waste Drystar film collected by a licensed company. After its life span, do not dispose of the Drystar 5302 without consideration of local waste disposal regulations. Please consult your local service organization.
-
Page 12: Security Precautions
If the power to the printer is unexpectedly interrupted, ensure that unprinted images are not deleted from the modality prior to printing. To avoid loss of images in such conditions, a UPS (Uninterruptable Power Supply) needs to be supplied to the printer. Introducing the Drystar 5302 2831A EN 20041201... -
Page 13: Safety Compliance
• cause radio interference in which case the user may be required to take adequate measures. Compliances The Drystar 5302 has been tested and found to comply with the following international standards and regulations: the Medical Devices Directive 93/42/EEC •... - Page 14 IEC 61000-4-11 • ETSI 300330 • GB9254-1998(Class A) (for CCC-Mark) • GB17625.1-2003 (for CCC-Mark) • Labels The Drystar 5302 carries the CE, TÜV, cULus and CCC labels. CCC label CE, TÜV and cULus label Introducing the Drystar 5302 2831A EN 20041201...
-
Page 15: Privacy And Security
Insurance Portability and Accountability Act) and to meet the IHE standards (Integrated Healthcare Enterprise) some security features are included in the user interface of the Drystar 5302 (available via the web pages only: under ‘Security tools’. Refer to Chapter 4, ‘Controlling the Drystar 5302 via a remote PC (with browser)’... - Page 16 Imports the device certificate, created by the CA. • Imports the certificates of all peer devices with which communication is • authorized, i.e. creates the list of ‘communication allowed’ device certificates. Introducing the Drystar 5302 2831A EN 20041201...
-
Page 17: Operating Modes
5302 U RYSTAR SER MANUAL Operating modes The Drystar 5302 can be operated in five modes: Operator mode, Key- operator mode, Service mode, Specialist mode and Administrator mode. Operator mode The Operator mode groups all basic functions that are intended for radiographers without special technical skills: Producing diagnostic usable hardcopies;... - Page 18 SER MANUAL Administrator mode (also known as Security) The Administrator mode functions are reserved for the System Administrator. The Administrator mode is password protected and is only accessible by browser via a remote PC. Introducing the Drystar 5302 2831A EN 20041201...
-
Page 19: Control Modes (Local And Remote)
RYSTAR SER MANUAL Control modes (local and remote) You can control the working of the Drystar 5302 via the local keypad or via a network remote PC. The table below gives an overview of the operating modes you can access locally and/or via the remote PC. -
Page 20: The User Interface
Power/Reset button Display Keypad Status indicator LED Film input trays Film output tray Never try to open the printer when the Drystar 5302 is printing a film. Always follow the instructions on the display! Introducing the Drystar 5302 2831A EN 20041201... - Page 21 • To reset the printer. Do NOT press the Power/Reset button without first following the procedure to stop printing when the Drystar 5302 is printing a film. Refer ‘Switching off the Drystar 5302’ on page 32. 2831A EN 20041201...
-
Page 22: Rear Panel
Network • To connect to the hospital network. connector Input/output • To connect a terminal PC (used by the Service connector engineer). Power connector • To connect the printer power cord. Introducing the Drystar 5302 2831A EN 20041201... - Page 23 • Inserting a CF-card To insert a CF-card in the Drystar 5302 (the slot is located at the rear side): Hold the CF-card vertically with the connector holes in front of the slot and with the flat surface pointing to the left.
- Page 24 5302 U RYSTAR SER MANUAL Removing a CF-card To remove a CF-card from the Drystar 5302 slot: Push the unlocking lever underneath the CF-card slot. The CF-card is pushed slightly outward. Remove the CF-card gently from the slot. Introducing the Drystar 5302...
-
Page 25: The Keypad
SER MANUAL Audio signals The Drystar 5302 gives status information via beeps. The length of the beep indicates the response of the system to a key command. A short beep means that Drystar 5302 has accepted the key command and •... - Page 26 5302 U RYSTAR SER MANUAL The Drystar 5302 keypad features the following keys: To access the advanced functions of the key- Key- operator mode. Refer to Chapter 3, ‘Advanced operator key operation (Key-operator mode)’. To quit the current function or exit a menu without Escape key saving modifications.
-
Page 27: The Display
5302 U RYSTAR SER MANUAL The display The Drystar 5302 control panel has a backlit LCD display. We distinguish two panel types depending on the selected language: a backlit LCD display with 4 lines for Western languages (e.g. Dutch, •... - Page 28 In operator mode, appropriate information is displayed in accordance with the status of the printer. The operator basic screen looks as follows, indicating that the Drystar 5302 is ready for operation and that no job is currently being executed. READY...
- Page 29 To accept an entry in a menu, press the Confirm key. • A short beep acknowledges and terminates the entry. • The Drystar 5302 will sound a long beep if you press a key that is not to be • used at that moment. 2831A EN 20041201...
-
Page 30: Switching On The Drystar 5302
‘Safety precautions’ on page 9. Follow the procedure below to ensure proper startup of the Drystar 5302 and to check that everything is working correctly. Check that the power cord is plugged in and then switch on the printer by pressing the Power/Reset button. - Page 31 • is constantly green. READY It takes 13 minutes (starting up of the Drystar 5302 and heating up of the thermal print head) before you can start printing. The display will inform you that the printer is warming up: WARMING UP...
-
Page 32: Switching Off The Drystar 5302
Make sure that pending jobs are correctly finished. If necessary, follow the procedure to stop printing. Press the Power/Reset button to switch off the Drystar 5302. If the printer is ready, it shuts down immediately: • Power off initiated... -
Page 33: Chapter 2: Basic Operation (Operator Mode)
Basic operation (Operator mode) This chapter will inform on how to manage the print queue, how to print films with priority and how to load new films. Overview of operator functions Managing the print queue About Drystar 5302 consumables Loading films... -
Page 34: Overview Of Operator Functions
RYSTAR SER MANUAL Overview of operator functions This section focuses on the basic operating principles of the Drystar 5302. After reading this chapter, the operator should be able to produce diagnostic usable hardcopies. No special technical skills are required. All basic operator functions can be activated directly by pressing a single key on the keypad. -
Page 35: Managing The Print Queue
Drystar 5302. Refer to the User manual of the acquisition modality for more information. - Page 36 5302 U RYSTAR SER MANUAL A description of the possible status of the jobs is listed in the table below: Status Description Printing Printing of this job is in progress. The necessary calculations are already being Calculating made before printing of the job can be started. Waiting Jobs are queued in the printer memory.
-
Page 37: About Drystar 5302 Consumables
SER MANUAL About Drystar 5302 consumables The Drystar 5302 can handle blue-transparent and clear-transparent films. Available film formats are 8x10”, 10x12”, 11x14”, 14x14” and 14x17”. When a new film pack is loaded, the Film Identification tag is read and the printer settings are automatically adjusted. -
Page 38: Loading Films
The Drystar 5302 can be loaded with 8x10”, 10x12”, 11x14”, 14x14” and 14x17” films. The Drystar 5302 can be loaded with new films in full daylight. Loading films is easy and can be done very quickly. Follow the procedures as described in this section. - Page 39 5302 U RYSTAR SER MANUAL When the Drystar 5302 is in the ready state and an input tray is empty: The display shows the following message: Lower input tray empty OK to Open the INPUT TRAY Open the empty input tray.
- Page 40 5302 U RYSTAR SER MANUAL Remove the white (protective) film sheet. Take film pack, and open it. Verify that the film type on the film pack corresponds with the sticker on the tray! If you do use an other film type, you are advised to change the label on the tray. You can put the film pack onto a table to make manipulation easier.
- Page 41 5302 U RYSTAR SER MANUAL Remove the plastic film bag partially. Slide the film pack into the input tray, and remove the plastic film bag completely. 2831A EN 20041201 Basic operation (Operator mode)
- Page 42 Tear the plastic tape from around the film pack. Close the input tray. The Drystar 5302 resumes printing as soon as the tray is closed. Loading instructions are also available on the input tray cover. Never reuse a jammed film. Refer to ‘Clearing of film jams’...
- Page 43 5302 U RYSTAR SER MANUAL Checking the correct position of a film in the input tray You can verify that the film is properly loaded by watching the lower right corner of the films in the input tray. The rounding of this corner should be smaller than the other three corners.
- Page 44 5302 U RYSTAR SER MANUAL Basic operation (Operator mode) 2831A EN 20041201...