Table of Contents
Advertisement
Available languages
Available languages
Advertisement
Chapters
Table of Contents

Related Manuals for Kenwood TK-3230DX


Summary of Contents for Kenwood TK-3230DX
-
Page 1: Instruction Manual
TK-3230DX UHF FM TRANSCEIVER INSTRUCTION MANUAL B5A-1297-00 (K) -
Page 2: Table Of Contents
THANK YOU We are grateful for your purchase of this KENWOOD product and welcome you to the Business Radio Service (BRS). CONTENTS FEATURES ............... 4 OPERATING CONDITIONS..............4 NOTICES TO THE USER ............5 FCC LICENSE INFORMATION ..............6 PRECAUTIONS ..................7 UNPACKING AND CHECKING EQUIPMENT ........12 SUPPLIED ACCESSORIES..............12... - Page 3 SQUELCH LEVEL ..............28 VOICE OPERATED TRANSMISSION (VOX) .........29 VOX OPERATION.................29 VOX Gain Level .................29 VOX Delay Time ................30 Transmit Inhibit While Receiving ............30 VOX Proceed Tone ................31 FleetSync: ALPHANUMERIC 2-WAY PAGING FUNCTION ....32 CALL KEY SETUP ................32 CALL ALERT TONE ................33 Call Alert Side Tone ................33 SELCALL (SELECTIVE CALLING) ............34 Making a Selcall ................36...
-
Page 4: Features
◆ The listed ranges are based on fi eld testing and may vary with your operating conditions. Firmware Copyrights The title to and ownership of copyrights for fi rmware embedded in KENWOOD product memories are reserved for JVC KENWOOD Corporation. -
Page 5: Notices To The User
JVC KENWOOD. The user could lose the authority to operate this equipment if an unauthorized change or modification is made. INFORMATION TO THE DIGITAL DEVICE USER REQUIRED BY THE This equipment has been tested and found to comply with the limits for a Class B digital device, pursuant to Part 15 of the FCC Rules. -
Page 6: Fcc License Information
For information on Li-ion battery recycling in your area, call (toll free) 1-800-8-BATTERY (1-800-822-8837). KENWOOD’s involvement in this program is part of our commitment to preserve our environment and conserve our natural resources. -
Page 7: Precautions
Ensure that there are no metallic items located between the transceiver and the battery pack. • Do not use options not specifi ed by KENWOOD. • If the die-cast chassis or other transceiver part is damaged, do not touch the damaged parts. - Page 8 If an abnormal odor or smoke is detected coming from the transceiver, switch the transceiver power off immediately, remove the battery pack from the transceiver, and contact your KENWOOD dealer. • Use of the transceiver while you are driving may be against traffi c laws.
- Page 9 Information concerning the battery pack: The battery pack includes fl ammable objects such as organic solvent. Mishandling may cause the battery to rupture producing fl ames or extreme heat, deteriorate, or cause other forms of damage to the battery. Please observe the following prohibitive matters.
- Page 10 DANGER • Use only the specifi ed charger and observe charging requirements! If the battery is charged in unspecifi ed conditions (under high temperature over the regulated value, excessive high voltage or current over regulated value, or with a remodeled charger), it may overcharge or an abnormal chemical reaction may occur.
- Page 11 DANGER • Do not touch a ruptured and leaking battery! If the electrolyte liquid from the battery gets into your eyes, wash your eyes with fresh water as soon as possible, without rubbing your eyes. Go to the hospital immediately. If left untreated, it may cause eye-problems.
-
Page 12: Unpacking And Checking Equipment
UNPACKING AND CHECKING EQUIPMENT Carefully unpack the transceiver. If any of the items listed below are missing or damaged, fi le a claim with the carrier immediately. SUPPLIED ACCESSORIES • Battery charger/ AC adapter (KSC-37S) ........ 1 • Li-ion Battery pack (KNB-46L) ..........1 •... -
Page 13: Charging The Battery Pack
CHARGING THE BATTERY PACK The battery pack is not charged at the factory; charge it before use. Average battery pack life: Battery Saver on: 18 hours Battery Saver off: 14 hours • Average times are calculated using 5% transmit time, 5% receive time, and 90% standby time. -
Page 14: Installing The Belt Clip
◆ The ambient temperature should be between 41°F and 104°F (5°C and 40°C) while charging is in progress. Charging outside this range may not fully charge the battery. ◆ The battery pack life is over when its operating time decreases even though it is fully and correctly charged. -
Page 15: Orientation
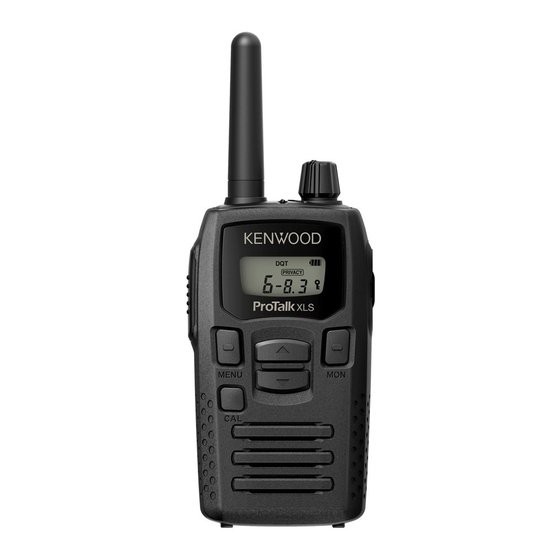
ORIENTATION Antenna Microphone Speaker a Power switch/ Volume control Turn clockwise to switch ON the transceiver. To switch OFF the transceiver, turn counterclockwise until a click sounds. Rotate to adjust the volume level. b LED indicator Indicates the transceiver status. c PTT (Push to Talk) switch Press and hold, then speak into the microphone to transmit. -
Page 16: Display
keys Press to change the operating channel, to select a menu in Setting Mode, and to perform other functions. h SP/MIC jacks Insert the speaker/ microphone or headset plug into this jack. DISPLAY Icon Description Appears when VOX is activated. Appears when using low transmit power. -
Page 17: Basic Operation
BASIC OPERATION Switch the Power ON Switch the transceiver power ON by turning the Power switch/ Volume control clockwise. • A confi rmation tone sounds, the LCD lights up momentarily, then the current channel number is displayed. To switch the transceiver power OFF, turn the Power switch/ Volume control fully counterclockwise, until a click sounds. -
Page 18: Quiet Talk/ Digital Quiet Talk
Make a Call 1 Press the MON key to make sure the channel is not in use {page 22}. 2 Press and release the CAL key to alert the other parties that you are beginning a call. • A call alert tone will sound on the other party’s transceiver. - Page 19 QT Frq. QT Frq. QT Frq. QT Frq. 67.0 Hz 103.5 Hz 156.7 Hz 241.8 Hz 71.9 Hz 107.2 Hz 162.2 Hz 250.3 Hz 74.4 Hz 110.9 Hz 167.9 Hz 69.3 Hz 77.0 Hz 114.8 Hz 173.8 Hz 67.0 Hz 79.7 Hz 118.8 Hz 179.9 Hz...
- Page 20 Code Code Code Code Code 101 (A1) D116I 116 (b6) D226I 131 (d1) D351I 146 (E6) D506I 161 (G1) D712I 102 (A2) D125I 117 (b7) D243I 132 (d2) D364I 147 (E7) D516I 162 (G2) D723I 103 (A3) D131I 118 (b8) D244I 133 (d3) D365I 148 (E8) D532I 163 (G3) D731I 104 (A4) D132I 119 (b9) D245I 134 (d4) D371I 149 (E9) D546I 164 (G4) D732I 105 (A5) D134I 120 (C0) D251I 135 (d5) D411I 150 (F0) D565I 165 (G5) D734I 106 (A6) D143I 121 (C1) D261I 136 (d6) D412I 151 (F1) D606I 166 (G6) D743I...
-
Page 21: Privacy Talk
PRIVACY TALK Whereas the QT and DQT functions allow you to ignore unwanted calls, Privacy Talk allows you to hold a conversation in complete privacy. When this function is activated, any other party that is listening to your channel will be unable to understand your conversation. -
Page 22: Compander
COMPANDER The compander (compressor/expander) allows higher clarity of signals, avoiding excessive noise and interference. When activated, transmitted signals are compressed before being sent and received signals are expanded when they arrive. 1 Press the MENU key 4 times. • The current setting blinks. 2 Press the key to select “... -
Page 23: Lock Function
LOCK FUNCTION KEY LOCK You can lock the MENU, , and keys to prevent accidentally changing the operating mode and channel settings. The Power switch/ Volume control and PTT, CAL*, and MON still function normally. * The CAL key functions normally only if it has been set up as Call Alert {page 32}. -
Page 24: Setting Mode
SETTING MODE Many functions on this transceiver are selected or confi gured through the Menu instead of physical controls. 1 With the transceiver power OFF, press and hold the MENU key while turning the transceiver power ON (for 1 second). 2 Press the key to select your desired Setting menu. - Page 25 Display Name Settings Default Ref. Pg Call Alert Side Tone OFF/ ON OFF/ bo (BOT)/ 01~ PTT ID 32 (List 1 ~ 32) PTT ID Side Tone OFF/ ON Data Transmit 0/ 5 (500)/ 10 Modulation Delay (1000)/ 15 (1500)/ 500 ms Time 20 (2000 ms)
-
Page 26: Channel Frequency Setup
CHANNEL FREQUENCY SETUP You can change the default frequency of each channel. 1 Enter the Setting Mode {page 24}. 2 Press the key to select a channel. • The current frequency table number appears beside the channel number. 3 Press the MENU key then press to select the frequency table number for the channel. -
Page 27: Scan
• The marked CH numbers are the default channel settings. SCAN Scan is useful for monitoring signals on the transceiver channels. When scanning, the transceiver checks for a signal on each channel and only stops if a signal is present. If the QT/DQT matches, the transceiver stops at the channel and opens the squelch so you can listen to the call. -
Page 28: Revert Channel
4 To end the scan at any time, press and hold the key for 1 second. • The transceiver returns to the channel you were using before you started scanning. REVERT CHANNEL The revert channel is the channel from which you start scanning. -
Page 29: Voice Operated Transmission (Vox)
VOICE OPERATED TRANSMISSION (VOX) Using the VOX feature, you can operate the transceiver hands-free. In order to use this feature, however, you must use an optional headset; VOX will not function with the built-in microphone. For best operation conditions, we recommend you use an optional headset with both an ear piece and a microphone on a boom that rests in front of your mouth. -
Page 30: Vox Delay Time
• While adjusting the VOX Gain level, speak into the microphone. When an appropriate level is reached, the LED lights orange. • Setting the VOX gain level to OFF deactivates VOX. In order to transmit with VOX turned off, you must use the PTT switch. VOX Delay Time If the transceiver returns to receive mode too quickly after you stop speaking, the end of your message may not be... -
Page 31: Vox Proceed Tone
3 Press the MENU key then press select “ ” (transmit inhibit while receiving on) or “ ” (transmit inhibit while receiving off). VOX Proceed Tone You can set the transceiver to sound an alert tone when you are able to transmit (transmission is no longer inhibited). 1 Enter the Setting Mode {page 24}. -
Page 32: Fleetsync: Alphanumeric 2-Way Paging Function
FleetSync: ALPHANUMERIC 2-WAY PAGING FUNCTION FleetSync is an Alphanumeric 2-way Paging Function, and is a protocol owned by JVC KENWOOD Corporation. Each transceiver has a unique ID which is used to decode signals from other callers. CALL KEY SETUP You can set up the transceiver CAL key to perform 1 of 2... -
Page 33: Call Alert Tone
CALL ALERT TONE Call alert tones are used to identify yourself to your party members. You can set up a call alert tone to one of 10 types. If each party member uses a different call alert tone, it is easy to know who is making the call. -
Page 34: Selcall (Selective Calling)
SELCALL (SELECTIVE CALLING) A Selcall is a voice call to a particular station or group of stations. Each transceiver is set up with an individual ID number for use with selcalls. There are several types of Selcalls available: Individual, Group, and Broadcast. - Page 35 3 Press the MENU key then press select “ ” (own ID). • The default own ID setting is 01. • When setting up your own ID, make sure that each member within your group sets up a unique ID number for their own ID. If an own ID number is duplicated, that transceiver cannot perform individual calls to other transceivers with the same own ID.
-
Page 36: Making A Selcall
Making a Selcall Following are details on how to make individual, group, and broadcast calls. Refer to the diagram below for the examples provided herein. Broadcast Calls: AL-15 Individual Calls: Id-05 Group Calls: GP-12 Note: ◆ When QT/DQT is set to the receiving side , the call side QT/DQT settings must be set up the same as the receiving side settings. -
Page 37: Receiving A Selcall
Group Calls: For example, transceiver A is calling transceivers D, E, and F. 1 Press the CAL key. 2 Press the key to select a group ID number (GP-12 in this example). • “ ” (group call) represents a group of stations. 3 Press the PTT switch to transmit the selected group ID. -
Page 38: Data Transmit Modulation Delay Time
Data Transmit Modulation Delay Time This function normally operates fi ne using the default setting, so it is not necessary to adjust the value. However, there are certain operating environments that will not allow the use of FleetSync (Selcall) functions, such as Scan mode. When you encounter such an environment, readjust the delay time to a longer time by following the procedures. -
Page 39: Ptt Id Side Tone
PTT ID Side Tone When the PTT switch is pressed and/or released, a tone will sound through your own speaker when the PTT ID is transmitted. To turn the PTT ID Side Tone on or off: 1 Enter the Setting Mode {page 24}. 2 Press the key to select “... -
Page 40: Caller Id Display
Caller ID Display When the transceiver receives a PTT ID signal, the caller ID of that signal appears on the display, along with the icon, so you know who is making the call. 1 Enter the Setting Mode {page 24}. 2 Press the key to select “... -
Page 41: Mic Sense
MIC SENSE You can adjust the sensitivity level of the transceiver microphone. To select the mic sense: 1 Enter the Setting Mode {page 24}. 2 Press the key to select “ ”. 3 Press the MENU key then press ” (normal) or “ ”... -
Page 42: Battery Saver
BATTERY SAVER This transceiver has been designed to give you the most out of your battery power. The battery saver function decreases the amount of power used when a signal is not being received and no operations are being performed. While using the transceiver, battery saver will automatically switch ON after 5 seconds have elapsed with no operations or received calls. -
Page 43: Battery Level Indicator
BATTERY LEVEL INDICATOR When turned ON, the battery level indicator on the display lets you know approximately how much battery life is remaining. When turned OFF, the battery level indicator will not be displayed. When the battery voltage becomes too low while transmitting, the transceiver stops transmitting, a tone sounds, and the LED blinks red until you release the PTT switch. -
Page 44: Incoming Call Notification
INCOMING CALL NOTIFICATION Note: ◆ To use Incoming Call Notifi cation, you must set up a QT tone or a DQT code {page 18}. Incoming Call Notifi cation is used to inform you of when a call is being received. When activated, a tone is emitted when a busy signal is received and the QT/ DQT signaling matches. -
Page 45: Beep Tone
3 Press the MENU key then press select “ ” (BCL on) or “ ” (BCL off). BEEP TONE When you press a key, a beep will emit from the transceiver. To turn the beep tone on or off: 1 Enter the Setting Mode {page 24}. 2 Press the key to select “... -
Page 46: Selectable Power On Tone
SELECTABLE POWER ON TONE You can set up a tone to sound during power on to one of 3 types. To set the power on tone type: 1 Enter the Setting Mode {page 24}. 2 Press the key to select “ ”. -
Page 47: Troubleshooting Guide
TROUBLESHOOTING GUIDE Problem Solution Cannot turn the • The battery pack may be dead. Recharge or transceiver power replace the battery pack. • The battery pack may not be installed correctly. Remove the battery pack and install it again. Battery power •... -
Page 48: Specifications
SPECIFICATIONS High 1.5 W RF output power 500 mW Audio output power 100 mW Frequency stability ±2.5 ppm Operating voltage 3.7 V Dimensions (W x D x H) 52 x 29.6 x 103.5 mm (projections not included) (2.05 x 1.17 x 4.07 in) 155 g (5.5 oz) Weight (with KNB-46L) ©... - Page 49 TK-3230DX TRANSCEPTOR FM UHF MANUAL DE INSTRUCCIONES...
- Page 50 MUCHAS GRACIAS Le agradecemos que haya comprado este producto de KENWOOD y le damos la bienvenida al Servicio Radio para Empresas (Business Radio Service: BRS). CONTENIDO CARACTERÍSTICAS ............4 CONDICIONES DE FUNCIONAMIENTO ..........4 AVISOS AL USUARIO ............5 INFORMACIÓN SOBRE CONCESIÓN DE LICENCIA DE LA FCC .....6 PRECAUCIONES..................7...
- Page 51 NIVEL DE SILENCIAMIENTO ..........28 TRANSMISIÓN ACTIVADA POR VOZ (VOX) ........29 FUNCIONAMIENTO DE VOX ..............29 Nivel de Ganancia VOX ..............29 Tiempo de Retardo VOX ..............30 Inhibición de Transmisión Durante Recepción .........30 Tono para Proceder VOX ..............31 FleetSync: FUNCIÓN DE LOCALIZACIÓN ALFANUMÉRICA DE 2 VÍAS ...32 CONFIGURACIÓN DE LA TECLA DE LLAMADA ........32 TONO DE AVISO DE LLAMADA ............33 Tono Lateral de Aviso de Llamada ............33...
-
Page 52: Características
Derechos de propiedad intelectual del fi rmware La titularidad y propiedad de los derechos de propiedad intelectual del fi rmware integrado en las memorias de los productos KENWOOD están reservados para JVC KENWOOD Corporation. -
Page 53: Avisos Al Usuario
AVISOS AL USUARIO ◆ Solicite el servicio solamente a un técnico cualifi cado. Seguridad: Es importante que el operador conozca y entienda los peligros comunes derivados del uso de cualquier transceptor. -
Page 54: Información Sobre Concesión De Licencia De La Fcc
INFORMACIÓN SOBRE CONCESIÓN DE LICENCIA DE LA FCC Su transceptor KENWOOD funciona en frecuencias de comunicación sujetas a la Normativa y Reglamento de la FCC (Federal Communications Commission). El Reglamento de la FCC exige que todos los operadores que utilizan radiofrecuencias móviles... -
Page 55: Precauciones
Compruebe que no haya ningún objeto metálico interpuesto entre el transceptor y la batería. • No utilice opciones no especifi cadas por KENWOOD. • Si el chasis de fundición u otra pieza del transceptor resulta dañada, no toque ninguna de dichas piezas. - Page 56 Si detecta un olor anormal o humo procedente del transceptor, o si el transceptor muestra un funcionamiento anómalo, apáguelo inmediatamente, retire la batería y póngase en contacto con su proveedor KENWOOD. • El uso del transceptor mientras conduce puede infringir las leyes de tráfi...
- Page 57 Información sobre la batería: La batería contiene objetos infl amables, como disolvente orgánico. Su uso inapropiado puede hacer que la batería se rompa y se incendie o genere calor extremo, que se deteriore o se produzcan otros tipos de daños a la batería. Observe las siguientes prohibiciones. PELIGRO •...
- Page 58 PELIGRO • ¡ Utilice únicamente el cargador especifi cado y observe los requisitos de carga! Si se carga la batería en condiciones distintas a las especifi cadas (a una temperatura superior al valor regulado, tensión o corriente muy superior al valor regulado o con un cargador modifi cado), ésta se podría sobrecargar o sufrir una reacción química anormal.
- Page 59 PELIGRO • ¡ No toque la batería si está rota y tiene fugas! Si el líquido electrolito de la batería llegara a entrarle en los ojos, láveselos con agua fresca lo antes posible, sin frotarlos. Vaya al hospital inmediatamente. Si no se trata, podría causar problemas a la vista.
-
Page 60: Desembalaje Y Comprobación Del Equipo
DESEMBALAJE Y COMPROBACIÓN DEL EQUIPO Desembale el transceptor con cuidado. Si falta algún componente de la lista o está dañado, presente inmediatamente una reclamación a la empresa de transporte. ACCESORIOS SUMINISTRADOS • Cargador de la batería/ Adaptador de CA (KSC-37S) ....1 •... -
Page 61: Carga De La Batería
CARGA DE LA BATERÍA Como la batería no viene cargada de fábrica, deberá cargarla antes de utilizarla. Vida media de la batería: Economizador de batería activado: 18 horas Economizador de batería desactivado: 14 horas • Los promedios de tiempo se calculan utilizando 5% de tiempo de transmisión, 5% de tiempo de recepción y 90% de tiempo de espera. -
Page 62: Instalación Del Gancho Para Cinturón
◆ La vida útil de la batería termina cuando disminuye el tiempo de funcionamiento aunque se haya cargado de forma correcta y completa. Reemplace la batería. INSTALACIÓN DEL GANCHO PARA CINTURÓN Si lo desea, acople el gancho para cinturón a la parte posterior del transceptor utilizando los 2 tornillos de M3 x 8 mm suministrados. -
Page 63: Orientación
ORIENTACIÓN Antena Micrófono Altavoz a Interruptor de encendido/ control de volumen Gírelo hacia la derecha para encender el transceptor. Para apagar el transceptor, gírelo hacia la izquierda hasta que oiga un clic. Gírelo para ajustar el nivel de volumen. b Indicador LED Indica el estado del transceptor. -
Page 64: Indicación
g Teclas Púlselas para cambiar de canal operativo, para seleccionar un menu en el modo de confi guración y para ejecutar otras funciones. h Jacks SP/MIC Inserte la clavija del micrófono/ altavoz o del micrófono- auricular en este jack. INDICACIÓN Icono Descripción Aparece cuando se activa la función VOX. -
Page 65: Operaciones Básicas
OPERACIONES BÁSICAS Encienda el aparato Encienda el transceptor girando el interruptor de encendido/ control de volumen hacia la derecha. • Sonará un tono de confi rmación, se iluminará el LCD momentáneamente y aparecerá el número de canal actual. Para apagar el transceptor, gire el interruptor de encendido/ control de volumen completamente hacia la izquierda hasta que oiga un chasquido. -
Page 66: Quiet Talk/ Digital Quiet Talk
Realice una llamada 1 Pulse la tecla MON para asegurarse de que el canal no está ocupado {página 22}. 2 Pulse y suelte la tecla CAL para avisar a los demás interlocutores que va a iniciar una llamada. • Sonará un tono de aviso de llamada en el transceptor de los otros interlocutores. - Page 67 Frec. QT QT. Frec. QT Frec. QT QT. Frec. QT Nº Nº Nº Nº 67,0 Hz 103,5 Hz 156,7 Hz 241,8 Hz 71,9 Hz 107,2 Hz 162,2 Hz 250,3 Hz 74,4 Hz 110,9 Hz 167,9 Hz 69,3 Hz 77,0 Hz 114,8 Hz 173,8 Hz 67,0 Hz...
- Page 68 Nº Código Nº Código Nº Código Nº Código Nº Código 101 (A1) D116I 116 (b6) D226I 131 (d1) D351I 146 (E6) D506I 161 (G1) D712I 102 (A2) D125I 117 (b7) D243I 132 (d2) D364I 147 (E7) D516I 162 (G2) D723I 103 (A3) D131I 118 (b8) D244I 133 (d3) D365I 148 (E8) D532I 163 (G3) D731I 104 (A4) D132I 119 (b9) D245I 134 (d4) D371I 149 (E9) D546I 164 (G4) D732I 105 (A5) D134I 120 (C0) D251I 135 (d5) D411I 150 (F0) D565I 165 (G5) D734I...
-
Page 69: Conversación Privada
CONVERSACIÓN PRIVADA Si bien las funciones QT y DQT le permiten no atender las llamadas no deseadas, la función de conversación privada le permite mantener una conversación con total privacidad. Cuando se activa esta función, los otros usuarios que escuchen su canal no podrán comprender la conversación. -
Page 70: Compresor-Expansor
COMPRESOR-EXPANSOR El compresor-expansor proporciona mayor claridad en las señales, evitando el exceso de ruidos e interferencias. Cuando está activado, las señales transmitidas se comprimen antes de ser enviadas y las señales recibidas se expanden cuando llegan. 1 Pulse la tecla MENU 4 veces. •... -
Page 71: Función De Bloqueo
FUNCIÓN DE BLOQUEO BLOQUEO DE LAS TECLAS Las teclas MENU, se pueden bloquear para impedir que se pueda cambiar el modo de funcionamiento o la confi guración de los canales de forma accidental. El interruptor de encendido/ control de volumen, el conmutador PTT y las teclas CAL* y MON seguirán funcionando con normalidad. -
Page 72: Modo De Configuración
MODO DE CONFIGURACIÓN Numerosas funciones de este transceptor se seleccionan o confi guran a través del Menú en lugar de hacerlo mediante los mandos físicos. 1 Con el transceptor apagado, pulse prolongadamente la tecla MENU mientras enciende el transceptor (durante 1 segundo). 2 Pulse la tecla para seleccionar el menú... - Page 73 Valor Indicación Nombre Parámetros predeterminado Pág. ref. Tono lateral de aviso de OFF/ ON llamada OFF/ bo (BOT)/ 01 ~ 32 ID de PTT (Lista 1 ~ 32) Tono lateral del ID de PTT OFF/ ON Tiempo de retardo de la 0/ 5 (500)/ 10 (1000)/ 15 modulación de transmisión 500 ms...
-
Page 74: Configuración De La Frecuencia De Los Canales
CONFIGURACIÓN DE LA FRECUENCIA DE LOS CANALES Es posible cambiar la frecuencia predeterminada de cada canal. 1 Introduzca el modo de confi guración {página 24}. 2 Pulse la tecla para seleccionar un canal. • Aparecerá el número de tabla de frecuencias actual junto al número de canal. -
Page 75: Exploración
• Los números de CH marcados corresponden a los ajustes de canal predeterminados. EXPLORACIÓN Los canales del transceptor se pueden explorar para buscar una señal. Cuando el transceptor comprueba una señal en un canal, procede a determinar si su ajuste QT/ DQT coincide con el confi... -
Page 76: Canal Inicial
3 Cuando la señal haya desaparecido, el transceptor esperará 5 segundos antes de reanudar la exploración. • Si aparece una señal nueva antes de que transcurran los 5 segundos, el transceptor permanecerá en el canal hasta que dicha señal desaparezca, y a partir de entonces esperará de nuevo 5 minutos antes de proseguir. -
Page 77: Transmisión Activada Por Voz (Vox)
TRANSMISIÓN ACTIVADA POR VOZ (VOX) La característica VOX le permite utilizar el transceptor en modo manos libres. Para utilizar esta característica, sin embargo, debe usar un micrófono-auricular opcional, ya que VOX no funciona con el micrófono incorporado. Para posibilitar las mejores condiciones de funcionamiento, recomendamos que utilice un micrófono- auricular opcional dotado de auricular y micrófono montado sobre un brazo, que quede justamente delante de la boca. -
Page 78: Tiempo De Retardo Vox
• Mientras ajusta el nivel de ganancia VOX, hable al micrófono. Cuando se alcance un nivel adecuado, el indicador LED parpadeará de color naranja. • Si desactiva el nivel de ganancia VOX, se desactivará la función VOX. Si desea transmitir con la función VOX desactivada, debe utilizar el conmutador PTT. -
Page 79: Tono Para Proceder Vox
3 Pulse la tecla MENU seguida de para seleccionar “ ” (inhibición de transmisión durante recepción activada) o “ ” (inhibición de transmisión durante recepción desactivada). Tono para Proceder VOX El transceptor puede ajustarse para que emita un tono de aviso cuando se pueda transmitir (la transmisión ya no está... -
Page 80: Fleetsync: Función De Localización Alfanumérica De 2 Vías
FleetSync: FUNCIÓN DE LOCALIZACIÓN ALFANUMÉRICA DE 2 VÍAS FleetSync es una función de localización alfanumérica de 2 vías y a su vez es un protocolo patentado por JVC KENWOOD Corporation. Cada transceptor posee un ID único que sirve para descodifi car las señales recibidas de otros interlocutores. -
Page 81: Tono De Aviso De Llamada
TONO DE AVISO DE LLAMADA Los tonos de aviso de llamada sirven para identifi carse ante sus interlocutores. Se pueden confi gurar 10 tipos de tono de aviso de llamada distintos. Si cada interlocutor utiliza un tono de aviso distinto, será más fácil saber quien realiza la llamada. Si pulsa la tecla CAL antes de realizar una llamada, se enviará... -
Page 82: Selcall (Llamada Selectiva)
SELCALL (LLAMADA SELECTIVA) Selcall es una llamada de voz a una emisora concreta o grupo de emisoras. Cada transceptor tiene confi gurado un número de identifi cación que se utiliza con las llamadas selectivas. Hay varios tipos de selcall disponibles: Individual, Grupo y Difusión. - Page 83 2 Pulse la tecla para seleccionar un número de ID de lista. 3 Pulse la tecla MENU, seguida de para seleccionar “ ” (ID personal). • El ID personal predeterminado es 01. • Cuando confi gure su ID personal, asegúrese de que cada miembro de su grupo confi...
-
Page 84: Realización De Una Selcall
Realización de una Selcall A continuación se describe detalladamente cómo realizar llamadas individuales, de grupo o de difusión. Consulte el diagrama siguiente para ver algunos ejemplos al efecto. Difusión 15 Grupo 07 Grupo 12 Llamada de difusión: AL-15 Llamadas individuales: Id-05 Llamadas de grupo: GP-12 Nota: ◆... -
Page 85: Recepción De Una Selcall
Llamadas de grupo: Por ejemplo, el transceptor A llama a los transceptores D, E y F. 1 Pulse la tecla CAL. 2 Pulse la tecla para seleccionar un número de ID de grupo (GP-12 en este ejemplo). • “ ” (llamada de grupo) representa un grupo de emisoras. 3 Presione el conmutador PTT para transmitir el ID de grupo seleccionado. -
Page 86: Tiempo De Retardo De La Modulación De Transmisión De Datos
Tiempo de Retardo de la Modulación de Transmisión de Datos Esta función normalmente funciona bien con la confi guración predeterminada, por lo que no es necesario ajustar el valor. Sin embargo, existen ciertos entornos optativos que no permitirá el uso de las funciones FleetSync, tal como el modo de exploración. Cuando encuentre algún entorno afín, reajuste el tiempo de retardo para que sea mayor siguiendo los procedimientos. -
Page 87: Tono Lateral Del Id De Ptt
Tono Lateral del ID de PTT Cuando se presiona y/o suelta el conmutador PTT, sonará un tono a través del altavoz para indicar que se ha transmitido el ID de PTT. Para activar o desactivar el tono lateral del ID de PTT: 1 Introduzca el modo de confi... -
Page 88: Indicación De Id De Llamador
Indicación de ID de Llamador Cuando el transceptor reciba una señal ID de PTT, el ID de llamador de dicha señal aparecerá en la pantalla junto con el icono para que sepa quién está realizando la llamada. 1 Introduzca el modo de confi guración {página 24}. 2 Pulse la tecla para seleccionar “... -
Page 89: Sensibilidad De Micrófono
SENSIBILIDAD DE MICRÓFONO Es posible ajustar el nivel de sensibilidad del micrófono transceptor. Para seleccionar la sensibilidad del micrófono: 1 Introduzca el modo de confi guración {página 24}. 2 Pulse la tecla para seleccionar “ ”. 3 Pulse la tecla MENU seguida de para seleccionar “... -
Page 90: Economizador De Batería
ECONOMIZADOR DE BATERÍA Este transceptor ha sido diseñado para obtener el mayor rendimiento de la batería. La función Economizador de batería reduce la cantidad de potencia empleada cuando no se está recibiendo ninguna señal y no se está realizando ninguna operación. -
Page 91: Indicador De Nivel De La Batería
INDICADOR DE NIVEL DE LA BATERÍA Cuando está activado, el indicador de nivel de la batería de la pantalla le indica aproximadamente cuanto queda de batería. Cuando está desactivado, el indicador de nivel de la batería no se mostrará. Cuando el nivel de batería está demasiado bajo durante una transmisión, el transceptor deja de transmitir, suena un tono y el indicador LED parpadea de color rojo hasta que suelte el conmutador PTT. -
Page 92: Notificación De Llamada Entrante
NOTIFICACIÓN DE LLAMADA ENTRANTE Nota: ◆ Para utilizar la función de notifi cación de llamada entrante, debe confi gurar un tono QT o un código DQT {página 16}. La notifi cación de llamada entrante se utiliza para indicarle cuando se recibe una llamada. Si está activada, se emite un tono cuando se reciba una señal de ocupado y las señales QT/DQT coincidan. -
Page 93: Tono De Pitido
3 Pulse la tecla MENU seguida de para seleccionar “ ” (BCL activado) o “ ” (BCL desactivado). TONO DE PITIDO Cuando se pulsa una tecla, se emitirá un pitido. Para activar o desactivar el tono de pitido: 1 Introduzca el modo de confi guración {página 24}. 2 Pulse la tecla para seleccionar “... -
Page 94: Tono De Encendido Seleccionable
TONO DE ENCENDIDO SELECCIONABLE. Puede confi gurar un sonido de tono durante el encendido entre uno de los 3 tipos. Para establecer el tipo de tono de encendido: 1 Introduzca el modo de confi guración {página 24}. 2 Pulse la tecla para seleccionar “... -
Page 95: Guía De Resolución De Problemas
GUÍA DE RESOLUCIÓN DE PROBLEMAS Problema Solución No se puede • Posiblemente la batería esté agotada. encender el Recargue o cambie la batería. transceptor. • Es posible que la batería no esté instalada correctamente. Retire la batería y vuelva a instalarla. La batería se agota •... -
Page 96: Especificaciones
ESPECIFICACIONES Alta 1,5 W Potencia de salida Baja 500 mW Potencia de salida de audio 100 mW Estabilidad de la frecuencia ±2,5 ppm Voltaje de servicio 3,7 V Dimensiones (An x Al x Fn) 52 x 29,6 x 103,5 mm (salientes no incluidos) (2,05 x 1,17 x 4,07 pulgadas) 155 g (5,5 oz)