Sony MB-8N User Manual
Network controller
Hide thumbs
Also See for MB-8N:
- Features & specifications (6 pages) ,
- Operating instructions manual (35 pages) ,
- Operation manual (20 pages)
Table of Contents
Advertisement
Quick Links
Download this manual
See also:
Operating Manual
Advertisement
Table of Contents

Related Manuals for Sony MB-8N


Summary of Contents for Sony MB-8N
- Page 1 3-620-203-13(2) MB-8N Network Controller User’s Guide Version 1.0x 2002 Sony Corporation...
- Page 2 Without prior written permission from Sony Corporation, this software and instruction manual may not be reproduced in whole or in part, and may not be used for rental. © 2002 Sony Corporation Sony can accept no responsibility whatsoever for losses suffered by the user of this software, nor of claims from a third party.
-
Page 3: Table Of Contents
Network Settings ..............5 Installation ................8 Starting Up and Closing Down ..........8 Names and Functions of Parts ........13 Changing the MB-8N Settings ........18 Changing the WRU-8N Settings ........19 Monitor Function ............. 20 Assigning WRU-8N Units ............ 20 Editing the Monitor Display ..........21... -
Page 4: Using This Manual
Using This Manual Preparations This manual describes the operation of the MB-8N Network Controller software supplied with the MB-8N Tuner Base Unit. To get the most from this manual, read it in combination with the Operating Instructions for the MB-8N Tuner Base Unit. -
Page 5: Preparations
Connecting directly to the computer: cross-over cable Connecting to the computer through a hub (for example): straight cable For details of connection, refer to the Operating Instructions for the MB-8N Tuner Base Unit. Network Settings This section describes the network connection settings for the MB-8N and computer. - Page 6 For details of the method of making the settings, refer to the Operating Instructions for the MB-8N Tuner Base Unit. Power the MB-8N off, then on again. This completes the settings, and the MB-8N can now be recognized by the network. Computer network settings Select Start >...
- Page 7 Note If you enter a value other than 255.255.255.0, it will take some time for the MB-8N to be recognized on the network. Click OK, to close the TCP/IP Properties dialog box. Click OK, to close the Network dialog box.
-
Page 8: Installation
Starting Up and Closing Down Setting the MB-8N to remote mode To control the MB-8N using this software, it is first necessary to set the MB-8N operating mode to the remote mode. For details of the operating mode, refer to the Operating Instructions for the MB- 8N Tuner Base Unit. - Page 9 For details of the task bar setting, see the Windows Help information. Select the startup method from the following, and click OK. Search all MB-8N: Before starting, search for all MB-8N units on the network. Select this when starting up for the first time.
- Page 10 If the settings file read in and the current network environment do not agree (for example, an MB-8N unit is not powered on, or the network connections have been changed), the following dialog box appears. To clear the WRU-8N assignment information and start up, click Forced continue.
- Page 11 In the dialog box When the computer has a Check the MB-8N power and showing the MB-8N modem or ISDN router LAN cable connection. detection results, installed or connected, when...
- Page 12 Preparations Closing down Carry out any of the following. • Click the ‘×’ (Close) button at the top right corner of the window. • In the menus select FILE > Exit. For details, see “Names and Functions of Parts” (page 13).
-
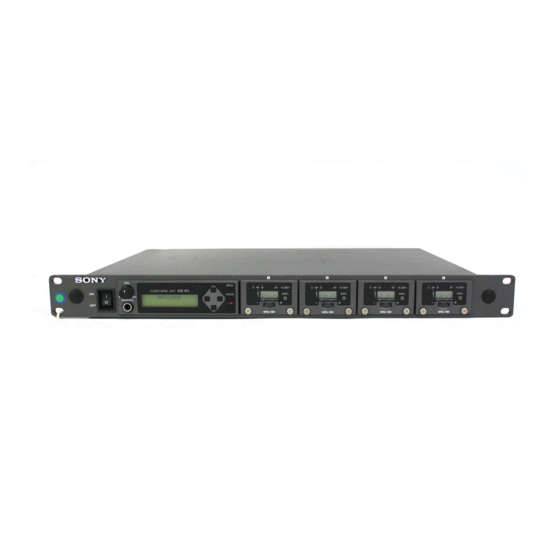
Page 13: Names And Functions Of Parts
: Empty slot The monitoring computer, and the MB-8N and WRU- Indicates an MB-8N slot in which no WRU-8N unit is 8N units appear in a tree structure, providing an installed. In the place where the user name is normally overview of the network and hardware configuration at shown, the legend "No Connect"... - Page 14 For details of the event log display, see "Interpreting the : Fan motor fault Event Log" (page 23). Indicates that the cooling fan at the rear of the MB-8N For details of operations with the event log, see "Using the is failing.
- Page 15 This sets the audio output of each WRU-8N unit to stereo headphones connected to the PHONES When you click on an MB-8N icon or the host name shown to the right of the icon in the tree display, the connector on the front panel of the MB-8N.
- Page 16 For details, see “Using the Menus” (page If you switch to forced remote mode while carrying 24). out a setting operation on the MB-8N, this may cause a malfunction. When switching to forced remote mode, 2 User name box...
- Page 17 Display in local mode The marker indicates which of antennas A and B has When the MB-8N is in local mode, the setting screen the better receiving conditions. for each WRU-8N unit installed in the MB-8N is as follows.
-
Page 18: Changing The Mb-8N Settings
ANT POWER (antenna power feed setting): When there is a check mark in the check box, 9 V DC is supplied from the ANTENNA A, B IN/DC 9V OUT connectors on the rear panel of the MB-8N. (Set this on for an AN-820 or other antenna requiring a power feed.) -
Page 19: Changing The Wru-8N Settings
Changing the WRU-8N Settings In the tree display, click on the icon or user name shown to the right of the icon for the WRU-8N you want to change. When the WRU-8N you want to change is assigned to a monitor cell, select that monitor cell. The WRU-8N settings appear in the detailed settings window. -
Page 20: Monitor Function
Click the WRU-8N icon or user name shown to the right of the icon in the tree display, and drag to the desired monitor cell. Notes • Since the tree display shows the hardware configuration of the MB-8N and WRU-8N units, it is not possible to change the position of icons within the tree display. -
Page 21: Editing The Monitor Display
To assign all WRU-8N units installed in the MB-8N unit in a single operation Click the MB-8N icon or host name shown to the right of the icon in the tree display, and drag to the desired monitor cell. This assigns all of the WRU-8N units installed in the MB-8N, in consecutive monitor cells from the target of the drag-and-drop operation. - Page 22 Monitor Function To add to the monitor cell selection By holding down the Ctrl key and clicking additional monitor cells, you can select the desired multiple monitor cells. A blue frame appears around the selected monitor cells. Note By selecting multiple monitor cells, you can select the functions that apply simultaneously to multiple WRU-8N units (searching for free channels within a group and automatic settings, and so on).
-
Page 23: Interpreting The Event Log
However, this indicates no abnormality unless the same message appears repeatedly. • During communications, if any of the following events should occur, restart the computer and MB-8N unit. If restarting is not possible because of ongoing operation, switch the MB-8N unit to local mode before the operation. -
Page 24: Using The Menus
Using the Menus Click the menu bar to access a menu, and select a command from the menu. FILE menu Use this to read in a settings file, or to save the current settings. The FILE menu provides the following commands. New: Reset to the state where no WRU-8N units are assigned to monitor cells. - Page 25 (This applies the same setting to all MB-8N units.) • Audio output level • Headphone output • Antenna RF attenuation • Antenna power feed The details of the settings are the same as the MB-8N settings. (see page 15)
- Page 26 Select the group, and click OK, to assign channels in cell number order. For details, refer to the Operating Instructions for the MB-8N Tuner Base Unit. Monitor Start: Start monitoring of all WRU-8N units.
- Page 27 When there is a check mark in the check box, a check is carried out at the interval specified in Check Timing. • PassWord: Set a password required when the MB-8N is in local mode, to force the MB-8N to remote mode from this software. When there is a check mark in the PassWord On box, password input is required to change the MB-8N to remote mode from this software.
- Page 28 User’s Guide for MB-8N Network Controller: Opens this manual (PDF file). MB-8N Operating Instructions: Opens the MB-8N Tuner Base Unit operating instructions (PDF file). Frequency Lists: Displays lists of frequencies (HTML file). About MB-8N Network Controller: Show the version of this software. Sony Corporation...