Table of Contents
Advertisement
Quick Links
Advertisement
Table of Contents

Related Manuals for Audiovox D2011


Summary of Contents for Audiovox D2011
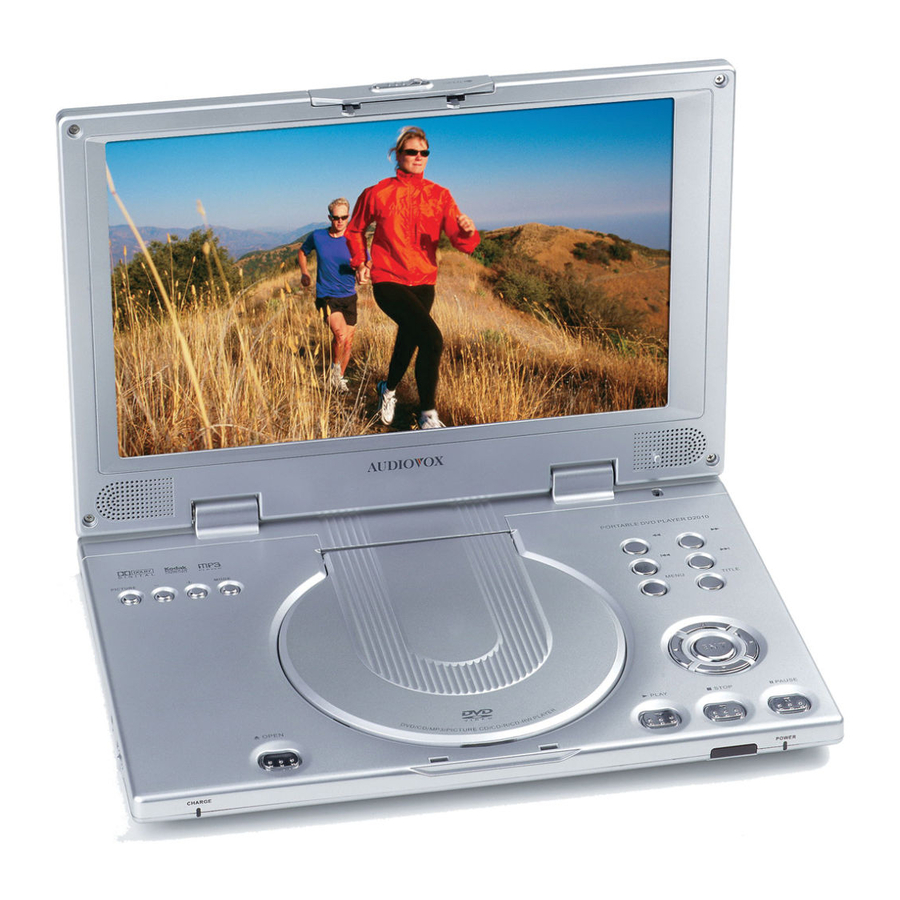
- Page 1 Model D2011 PORTABLE DVD PLAYER WITH 10.2" LCD MONITOR Owner’s Manual...
-
Page 2: Introduction
Thank you for choosing the D2011 portable DVD Player. The unit applies the latest state of the art electronics and is designed for use in hotels, offices, vehicles or your home. The DVD Player is constructed to provide years of reliable, trouble-free service, and is compact so that you can take it with you anywhere and is designed for quick and easy setup. -
Page 3: Cautions And Warnings
Cautions and Warnings The lighting flash with arrowhead symbol, within a triangle, alerts the user to “dangerous voltage” which could cause electric shock. The exclamation point within a triangle is to indicate that the user should read important operating and maintenance instructions in the manual. CAUTION: Laser radiation when open. -
Page 4: Table Of Contents
Introduction---------------------------------------------------------------------------------------------- Cautions and Warnings------------------------------------------------------------------------------ Table of Contents--------------------------------------------------------------------------------------- Main Features-------------------------------------------------------------------------------------------- Screen and System Panel Controls-------------------------------------------------------------- Front Panel Controls------------------------------------------------------------------------------------ System Side Panel Controls------------------------------------------------------------------------ Right Side Panel Controls------------------------------------------------------------------------------ Left Side Panel Controls-------------------------------------------------------------------------------- Remote Control----------------------------------------------------------------------------------------- System Connections---------------------------------------------------------------------------------- Power Supply Connection----------------------------------------------------------------------------- Connecting to a TV-------------------------------------------------------------------------------------- Connecting to an Amplifier---------------------------------------------------------------------------- Connecting to a Digital Ready Amplifier------------------------------------------------------------ System Preparations----------------------------------------------------------------------------------... -
Page 5: Main Features
Main Features High Quality Audio and Video LCD (Liquid Crystal Display) Screen 10.2” Color LCD screen. Special Functions Supports Multi-angle, Multi-language and Parental-lock features. AV Input External Audio/Video signal input can be connected to AV input jacks Digital Out Convenient optical digital audio output jack for connection to an external digital processor. -
Page 6: Screen And System Panel Controls
Screen and System Panel Controls Front Panel Controls OPEN button Press to open the disc tray cover. Disc Tray Cover When the disc is loaded gently press the cover to close it. PLAY button Press to begin playback. Remote Sensor IR receiver for remote control operation. -
Page 7: Front Panel Controls
Screen and System Panel Controls ENT button Press to confirm selection. Direction buttons Press to select menu items or settings. 10. MENU button Press to display the disc menu on the LCD screen in Play mode. 11. TITLE button Press to display titles if present on the DVD disc. Next button Press to skip to the next chapter or track. -
Page 8: System Side Panel Controls
System Side Panel Controls Right Side Panel Controls 1. Volume Control Used to adjust the headphone and speaker volume. 2. Headphone Jack Used to connect wired headphones private listening. headphones are connected to this jack the speaker output will turn off automatically. -
Page 9: Remote Control
Remote Control Remote Control 1. PWR button Press to turn the unit ON or OFF. 2. INFO button Press to display detailed playback information. Keep pressing the button to display additional information or to turn the information display OFF. 3. TITLE button Press to display titles if present on the disc. - Page 10 Remote Control PREV button Press to go to beginning of current Track or Chapter. Press twice to go to beginning of a previous Track or hapter. NEXT button P ress to go to next Track or Chapter. 10. SUBT button When a DVD with subtitles is playing, press to select a subtitle nguage or to turn subtitles OFF.
-
Page 11: System Connections
System Connections Note: Before plugging the power cord into an AC outlet, make sure that all other connections have been made as described below. Power Supply Connection Connect the supplied adapter to the side of the DVD player in the jack marked “DC 12V IN”. -
Page 12: Connecting To An Amplifier
System Connections Connecting to an Amplifier The DVD player can be connected to an amplifier. Plug the supplied A/V cable into the audio jack on the right side of the unit and plug the other end into an audio input on the amplifier (White= left, Red=Right). -
Page 13: System Preparations
System Preparations Using of Remote Control 1. Remove the battery holder. Refer to the figure above. 2. Insert the battery into the battery holder (observe correct polarity) and insert the battery holder into the remote control. 3. For best results, aim the remote directly at the player’s IR receiver window, within 15 feet, and angles not exceeding 60 degrees. -
Page 14: Disc Formats Supported By This Player
System Preparations Disc Formats Supported By This Player Note: The D2011 is capable of playing most recordable DVDs in the DVD-R format. However due to the variety of recordable DVD disc manufacturers and software manufacturers playback cannot be guaranteed. The disc maker specifies the operation of some DVD discs. Please refer to the instruction manual with the disc. -
Page 15: Power Supply
Power Supply Rechargeable Battery Pack Your portable DVD player comes with a lithium ion rechargeable battery that attaches to the rear of the DVD player. Charge the battery fully before initial use. Charging time is typically about 5 hours. A fully charged battery delivers approximately 2-1/2 hours of use, but playing time varies from disc to disc. -
Page 16: Attaching The Battery Pack
Power Supply Attaching the Battery Pack Refer to the following steps for attaching the Battery Pack: 1. Place the DVD Player on a soft and smooth surface with the bottom of the unit facing UP (chassis up see the Fig.1). 2. -
Page 17: Detaching The Battery Pack
Power Supply Detaching the Battery Pack If the DVD Player is not going to be used for a long period of time, the Battery Pack should first be fully charged and then detached from the DVD Player. When the DVD Player is turned OFF, the DVD Player is still consuming some power in STANDBY mode. -
Page 18: Using The Dc Adapter
Power Supply Using the DC Adapter To use the supplied Vehicle DC Adapter, disconnect the Battery Pack and connect the Vehicle Power Plug Adapter into the DVD Player’s Power Jack and the other end into the Vehicle DC outlet (Cigarette Lighter Socket) as shown below. Quick Tips: Do not operate the unit while driving a vehicle. -
Page 19: Installing The System Onto Vehicle Seat Back
Installing The System Onto Vehicle Seat Back Take one of the supplied straps from the carrier bag and connect the latch to one of the upper metal rings on the mounting bag. Connect the “S” hook to the other upper metal ring and place the loop over the headrest. Adjust the strap until the bag is firmly secured. -
Page 20: Installing The System Between Vehicle Seats
Installing The System Between Vehicle Seats Take one strap and connect the latch to the upper metal ring on the left side of the bag. Attach the “S” hook to the same ring after looping the strap around the headrest of the driver’s seat. Repeat this process for the right side (Passenger Seat). -
Page 21: Using Headphones
Using Headphones Using Wired Headphone Connect headphones into the headphone jack on the left or right side of the unit. Quick Tips: • Excessively loud volume could damage your hearing. • Turn down the volume before you connect the headphones, and then raise the volume to comfortable level. - Page 22 DVD Player Operation Preparation Turn on the player’s power by switching the POWER switch on the side of the player to “ON”. Unlatch the LCD panel and lift it up. Press the OPEN button on front panel to open the disc cover. Load disc with the label facing up.
-
Page 23: System Setup
Track. Press the NEXT button on the remote control and playback of the disc will start from the next Chapter or Track. System Setup You can customize the set up menu to your own preference. Press the “SETUP” button on the remote control to display the setup menu. The menu will include “General Setup”, “Speaker Setup”, “Dolby Digital Setup”, “Video Setup”, and “Preference Setup”. -
Page 24: Speaker Setup
System Setup Captions You can choose captions ON or OFF during playback. Screen Saver When activated, the unit will go into screensaver mode if the same image remains on the screen for 3 minutes. Last Memory Select on, and the unit will resume playback from the point where playback was stopped. - Page 25 System Setup Preference Page Audio, Subtitle, Disc Menu This setting allows you to hear or read the subtitles of a DVD in your choice of English, Spanish and French etc. if the disc contains multiple languages. Parental DVD discs equipped with the child lock function are rated according to their contents and settings vary from disc to disc.
-
Page 26: Playback Functions
Playback Functions Forward and Reverse Scan Press the buttons to Forward or Reverse scan a disc during playback (x2, x4, x8, x16 x32). Slow Forward Press the SLOW button to Slow Scan a track on a disc during playback (1/2, 1/4,1/8, 1/16). -
Page 27: Resume Playback
Playback Functions Search by time During DVD disc playback, press the GOTO button on the remote control once, there will be a menu displayed on the screen. You can set or select items for your preference. Use the direction buttons to select the desired item. Press the direction button to return. - Page 28 Playback Functions Playing a JPEG JPEG is a common picture format. Hundreds of pictures can be stored in a disc in this format and viewed on the LCD screen. Normal Playback Load a JPEG disc into the DVD Player. After reading the disc, the DVD Player will display the images on the disc in sequence.
-
Page 29: Troubleshooting
Troubleshooting Symptom The player cannot play. There is no sound. There is no picture. Poor AV performance. Cannot continue to play and play a section repeatedly. The remote control does not work. WARNING: Do not touch any metal objects to the Battery connectors, as it will put the Battery in standby mode. -
Page 30: Specifications
Specifications Screen Resolution TFT Screen Size Laser Wavelength Video System Frequency Response Audio Signal-to-Noise Audio Distortion + Noise Channel Separation Dynamic Range Audio Out Video Out Power Power Consumption Dimension w (o) battery Weight w/o battery DESIGN AND SPECIFICATIONS ARE SUBJECT TO CHANGE WITHOUT NOTICE Manufactured under license from Dolby Laboratories. - Page 31 WARRANTY AUDIOVOX ELECTRONICS CORP. (the Company) warrants to the original retail purchaser of this product that should this product or any part thereof, under normal use and conditions, be proven defective in material or workmanship within ninety (90) days from the date of original purchase, such defect(s) will be repaired or replaced with reconditioned product (at the Company's option) without charge for parts and repair labor.
- Page 32 For Customer Service Visit Our Website At .audiovox.com Product Information, Photos, FAQ’s Owner’s Manuals © 2005 Audiovox Electronics Corp., 150 Marcus Blvd., Hauppauge, N.Y. 11788 128-7498 - 31 -...