
Related Manuals for Audiovox D1708PK - DVD Player - 7


Summary of Contents for Audiovox D1708PK - DVD Player - 7
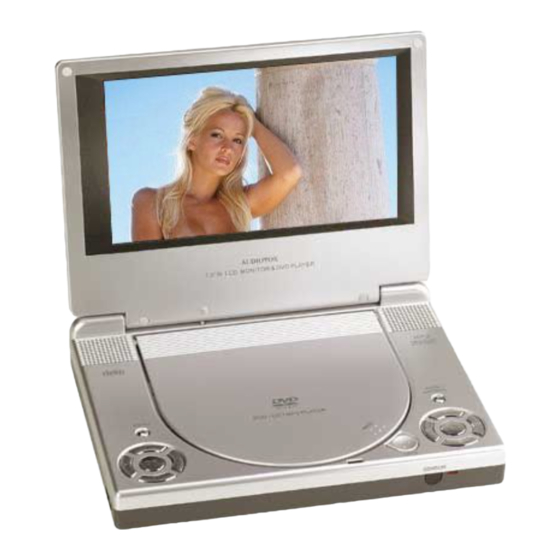
- Page 1 D1708PK D1708PK D1708PK D1708PK D1708PK PORTABLE 7" LCD MONITOR AND DVD PLAYER IN A BAG...
- Page 2 Notice: This Product incorporates copyright protection technology that is pro- tected by method claims of certain U.S. Patents and other intellectual property rights owned by Macrovision Corporation and other rights owners. Use of this copyright protection technology must be autho- rized by Macrovision Corporation, and is intended for home and other limited viewing uses only unless otherwise authorized by Macrovision Corporation.
- Page 3 A. Introduction Thank you for selecting the D1708PK portable DVD player in a bag. The main features include a 7" Screen (16:9 Aspect Ratio) Liquid Crystal Display (LCD) monitor and a DVD player. The unit applies the latest state of the art electronics and is designed for use in ho- tels, offices home or vehicle.
- Page 4 5. Cleaning Unit When cleaning, make sure the system is unplugged from the power source. Do not use liquid cleaners or aerosol cleaners. Use a cloth lightly dampened with water for cleaning the exterior of the system only. 6. Disc Do not use irregularly shaped discs such as heart or star-shaped discs as they may cause the unit to malfunction.
- Page 5 2. Powering the system in a car Plug one end of the cigarette lighter adapter into the DC 9V jack on the unit, then plug the other end into the lighter socket. Figure 1 3. Powering the system with rechargeable Battery Please refer to L.
- Page 6 1.Installing the System onto the seat back in a car (Refer to Figure 2) Seat Standoff Figure 2 1). Take one of the supplied straps from the carrier bag. Connect the latch to one of the upper metal rings on the mounting bag. Connect the “S”...
- Page 7 2. Installing the system between the driver/passenger seat (Refer to Figure 3) Figure 3 1). Take one strap and connect the latch to the upper metal ring on the left side of the bag. Attach the “S” hook to the same ring after looping the strap around the headrest of the driver’s seat.
- Page 8 E. Controls, Indicators, and Connectors 1. Unit View (Refer to Figure 4) Figure 4 13) Screen Mode (WIDE) Button 1) Menu 14) Monitor Off Button 2) UP Button 15) Remote Control Sensor 3) Left Button 16) Power LED 4) Down Button 17) DVD Video Output Jack 5) OK Button 18) DVD Audio L+R Output Jack...
- Page 9 2. Remote Control View (Refer to Figure 5) 1) Display Button 2) Angle Button 3) Subtitle Button 4) Audio Button 5) Zoom Button 6) UP/DOWN/LEFT/RIGHT/ ENTER Buttons 7) Return Button 8) A-B Button 9) Forward Button 10) Reverse Button 11) Slow Button 12) Stop Button 13) Numeric Keypad 14) Setup Button...
- Page 10 G. SETUP Press ‘SETUP’ to display the Main screen of the SETUP Menu on the screen. Press ‘SETUP’ again to exit the SETUP Menu and the unit will resume it’s last playback mode. Figure 6. Main SETUP Menu Screen 1) Press “Setup”, the ‘GENERAL SETUP PAGE’ will display on screen. Figure 7.
- Page 11 * NORMAL/PS: When the player is connected to a normal TV, and a wide picture is shown on the full screen. * NORMAL/LB: When the player is connected to a normal TV, and a wide picture is shown on the screen with a black strip at both the top and bottom of the screen.
- Page 12 c). Select ‘SCREEN SAVER’ using the DOWN button. Figure 10. SCREEN SAVER Display *ON: enables screen saver *OFF: disables screen saver (off) *NOTE: The DVD player will enter the Screen Saver mode after approximately five minutes if the same image remains on the screen.
- Page 13 a).Select “Brightness by using the UP or DOWN buttons ,then press “Enter”you can change the Brightness by pressing the LEFT or RIGHT buttons. To exit “Brightness Setting”, press “Enter”again to return the main Menu. Figure 13. BRIGHTNESS Screen Display b).Select “Contrast” by using the UP or DOWN buttons,then press “Enter”...
- Page 14 d).Select “Saturation “ by using the UP or DOWN buttons, then press “Enter” you can adjust the Saturation by pressing the LEFT or RIGHT buttons. Figure 16. SATURATION (Color)Screen Display To exit “Saturation”Setting,press “Enter”again to return to the main Menu 3).With no disc inside the player ,select “password”...
- Page 15 Figure 19. PASSWORD VERIFY Input Screen isplay NOTE: The Default Password is 3308. This password is always effective even after you have selected your own password and changed it. To avoid the possibility of others using the default password to set the parental level and change the password, you can record this default password in another area and delete it from this manual.
- Page 16 b. Select ‘SUBTITLE’ using the DOWN button, then press RIGHT to enter the submenu. Select the desired subtitle language or SUBTITLE OFF using the UP or DOWN buttons , then press ‘ENTER’ to confirm the setting. Press ‘LEFT’ to return. Figure 21.
- Page 17 d. Select ‘PARENTAL’ using the DOWN button, then press RIGHT to enter the submenu. Figure 23. PARENTAL Preference Screen Display Select the parental level you desire using the UP or DOWN but- tons for discs with lock-out function or multiple rating levels. These are listed from the lowest level (1 Kid Safe) to the highest level (Adult).
- Page 18 1. Basic Operation POWER Turn the unit on/off Remove/load the disc OPEN PLAY Start Play/Execute item or setting SLOW Play at 1/2, 1/4, 1/8 or 1/16 times speed Still Picture PAUSE STOP (1 time) Stop at the present playing point / (2 times) Stop playing NEXT Go to the next chapter, track or scene dur-...
- Page 19 2. MENU A DVD is divided into sections called titles and chapters. When you play a DVD, a root menu of the disc will appear on the screen of your TV or Monitor. The contents of the menu vary from disc to disc. Press MENU during playback to display the menu.
- Page 20 c. Press ‘DISPLAY’ a 3rd time to display the Elapsed Time for the chapter. The heading will disappear automatically in 3 seconds. Figure 27. Chapter Elapsed Time Screen Display d. Press ‘DISPLAY’ a 4th time to display the Remaining Time for the chapter.
- Page 21 Figure 29. Angle Screen Display 3. SUBTITLE During disc playback press ‘SUBTITLE’ to select the subtitle lan- guage you desire*, with the current Subtitle Language Number (1) and the total Number of Subtitle Languages (2) displayed. If there are multiple languages press ‘SUBTITLE’ again to select another subtitle language.
- Page 22 4. AUDIO During playback press ‘AUDIO’ to select the audio language you desire*, with the current Audio Channel Number (1) and the total number of Audio Channels (2) displayed. Press AUDIO again to select another audio language. The audio display will disappear automatically if the ‘AUDIO’...
- Page 23 6. A-B REPEAT a. During playback press first time ‘A-B’ to set the Starting Point A. Figure 33. A-B Repeat Starting Point Screen Display b.Press ‘A-B’second time to set the Ending Point B and the player will repeatedly play the part between Point A and Point Figure 34.
- Page 24 7. REPEAT a. During playback press ‘REPEAT’ once to repeatedly play the cur- rent chapter. Figure 36. Chapter Repeat ON Screen Display b.During playback press ‘REPEAT’ again to repeatedly play the current title. Figure 37. Title Repeat ON Screen Display c.
-
Page 25: Playing Audio Cds
d. Press “REPEAT” a 4th time, to resume normal play. Figure 39. Repeat Off Screen Display 4. PLAYING AUDIO CDS When playing an audio CD press the DISPLAY button on the remote to view time information. The options below show you what information is available using this function. -
Page 26: Using The Repeat Feature
c. Press ‘DISPLAY’ two times and TOTAL ELAPSED appears along with the current track playing and the total time that the CD has been playing. Figure 42. TOTAL ELAPSED Screen Display d. Press ‘DISPLAY’ three times and TOTAL REMAIN appears along with the current track playing and the amount of time remaining on the CD. -
Page 27: Playing Mp3 Discs
5. PLAYING MP3 DISCS MP3 is a format for storing digital audio. An audio CD-quality song is compressed into the MP3 format with very little loss of audio quality while taking up much less disc space. CD-R /RW discs that have been encoded in MP3 format are compatible with this system. - Page 28 Use the ( NEXT ) button to move to the next song. Press the (PREVIOUS) button to move to the beginning of the previous song. USING THE REPEAT FEATURE The default mode for the Repeat feature is OFF. Pressing REPEAT consecutively changes the repeat options: •...
- Page 29 6. Playing JPEG file 1) Load the JPEG Disc into tray. 2) Select JPEG file by pressing “UP/DOWN” button. 3) You can preview the JPEG file by pressing “Play” or “ENTER”. 4) Pressing the “Left Key“ will rotate the picture90 degrees counterclocckwise.
- Page 30 k. Press “display” 11th time, “COMPRESS TO CENTER H” will display on the screen, the picture will refresh from top and bot- tom to center. l. Press “display” 12th time, “COMPRESS TO CENTER V” will display on the screen, the picture will refresh from right and left to center.
- Page 31 7. Connecting to a TV or another monitor ( Refer to Figure 45) You can also connect the DVD player to a TV to enjoy high quality stereo sound and picture on another monitor. 1. Connect one end of the audio/video cable’s black (1/8” stereo plug) plug into the unit’s DVD AUDIO OUT jack, and connect the other end to the AUDIO INPUT jacks on your TV or Monitor (white = left channel, red = right channel).
- Page 32 9. Specifications Supported Media formats: DVD/CD/MP3 Color system: NTSC Screen size: 7’’ DVD video format: Horizontal 720 pixel, vertical 480 pixel (NTSC) Frequency response: DVD (PCM 96 kHz/24 bits ): 20 Hz to 44 Hz DVD (PCM 48 kHz): 20 Hz to 22 kHz CD: 20 Hz to 20 kHz Video output: 1.0 Vp-p/75 Ohm, unbalanced Video S/N: Better than 35 dB...
- Page 33 battery in optimum condition. Under no circumstances short the bat- tery terminals, store the battery in a metal container, or leave the battery in a humid or damp environment. Ideally, store the battery in an airtight container with desiccant or other dehumidifying agent. Each full recharge takes approximately five-hours and one full charge can provide power to the player for approximately 3 hours.
- Page 34 Installing the Battery Pack: 1. First, make sure the player is in “Stop” mode and that the AC power supply has been disconnected. 2. Close the player cover. 3. Align the battery pack with the player module’s front edge. 4. Push the battery towards the rear of the player until it locks into position.
- Page 35 J. Wired Headphones (Refer to Figure 48) 1. WIRED HEADPHONE Wired headphones may be used with the unit. Simply plug in the headset to either HEADPHONE 1 jack or HEADPHONE 2 jack on the right side of the monitor. NOTE: Plugging into Headphone jack 1disables the internal speakers.
-
Page 36: 90-Day Limited Warranty
90 DAY LIMITED WARRANTY Applies to Audiovox Video Products AUDIOVOX ELECTRONICS CORP. (the Company) warrants to the original retail purchaser of this product that should this product or any part thereof, under normal use and conditions, be proven defective in material or workmanship within 90 days from the date of original purchase, such defect(s) will be repaired or replaced with reconditioned product (at the Company's option) without charge for parts and repair labor. - Page 37 © 2004 Audiovox Electronics Corporation 128-7082...