
Related Manuals for Audiovox D7000XP - DVD Player - 7


Summary of Contents for Audiovox D7000XP - DVD Player - 7
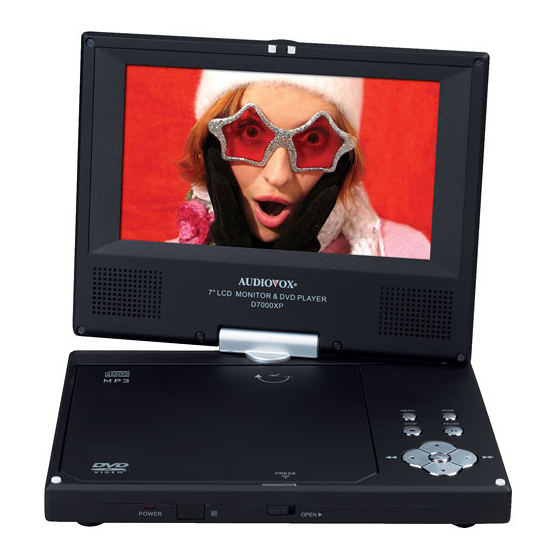
- Page 1 D7000XP PORTABLE 7" LCD MONITOR AND DVD PLAYER PDF created with FinePrint pdfFactory Pro trial version http://www.fineprint.com...
- Page 2 An LCD panel and/or video monitor may be installed in a motor vehicle and visible to the driver if the LCD panel or video monitor is used for vehicle information, system control, rear or side observa- tion or navigation. If the LCD panel or video monitor is used for television reception, video or DVD play, the LCD panel or video monitor must be installed so that these features will only function when the vehicle is in “park”...
-
Page 3: Table Of Contents
Content A. Introduction ..................4 B. Cautions and Warnings ..............4 C. Contents....................6 D. Powering and Installation ..............6 E. Installing in a Vehicle................7 F. Controls, Indicators and Connectors..........8 G. Remote Control.................9 H. Loading and Playing a Disc.............10 Basic Operation................10 J. Menu....................11 K. Display....................11 L. -
Page 4: Introduction
A. Introduction Thank you for choosing the D7000XP portable DVD player. The main features include a 7" Wide Screen (16:9 Aspect Ratio) Liquid Crystal Display (LCD) swivel monitor and a DVD player. The unit also contains a 3 in 1 card reader and a USB port. The unit is de- signed for use with SD/MMC, MS memory cards and USB memory devices. - Page 5 may result in a fire or electric shock). Do not place anything heavy on the unit. To ensure proper ventilation and proper operation, never cover or block and openings with a cloth or other material. It is hazardous to replace the battery incorrectly. Replace the battery only with the same or equivalent type, and in order to protect the enviromnent, please dispose the battery properly.
-
Page 6: Contents
C. Contents 1. 1 x 7’’ LCD Monitor & DVD Player 2. 1 x Remote Control with battery (CR2025) 3. 1 x Audio/Video Cable 4. 1 x USB Adapter Cable 5. 1 x AC to DC Adapter 6. 1 x DC Power Adapter 7. -
Page 7: Installing In A Vehicle
E. Installing in a Vehicle Installing the DVD Player onto the seat back in a car (Refer to Figure 2) Headrest Strap Headrest Headrest Buckle Strap Rear of DVD Player DVD Strap Rear of Vehicle Seat Holders Figure 2 1). Position the headrest strap through the two DVD strap holders located on the back of the DVD player. -
Page 8: Controls, Indicators And Connectors
F. Controls, Indicators and Connectors 1. Unit View (Refer to Figure 3) 10 11 Figure 3 13) SD/MMC/MS Card Slot 1) Menu Button 14) USB Slot 2) Wide Button 15) Power ON/OFF Switch 3) Stop Button 16) Power ON LED Indicator 4) Pause Button 17) Remote Control Sensor 5) Up Button... -
Page 9: Remote Control
G. Remote Control • Pull out the insulating tab to connect the battery. Aim the front of the remote directly at the sensor on the player. If the remote control range gradually decreases the battery probably needs replacing with a new CR2025 or equivalent coin cell type. In- structions to replace the battery are illustrated on the underside of the remote control . -
Page 10: Loading And Playing A Disc
H. Loading and Playing a Disc a. After connecting power to the unit, power on “DVD player” with the power switch. The power indicator will light. b. Open the disc tray by sliding the OPEN switch in the direction of the arrow. -
Page 11: Menu
DISPLAY Display information (title, chapter, track, time, etc.) SUBTITLE Select the subtitle language and turn it on/off AUDIO Select the audio language ZOOM Enlarge an image to 2, 3, 4 ,1/2,1/3 or 1/4 times the original size. SETUP Display the setup menu to select and set items, and exit the setup menu. - Page 12 b. Pressing ‘DISPLAY’ repeatedly will provide the following sequen- tial options below : TITLE ELAPSED: The elapsed time of the title TITLE REMAIN : The remaining time of the title CHAPTER ELAPSED: The elapsed time of the chapter CHAPTER REMAIN: The remaining time of the chapter DISPLAY OFF: The DVD’s time iInformation is removed from view.
- Page 13 3. AUDIO During playback press ‘AUDIO’ to select the audio language you desire*, with the current Audio Channel Number (1) and the total number of Audio Channels (2) displayed. Press AUDIO again to se- lect another audio language. The audio display will disappear auto- matically if the ‘AUDIO’...
- Page 14 5. A-B REPEAT a. During playback press ‘A-B’ to once to set the Starting Point A. A-B Repeat Starting Point b. Press ‘A-B’ a second time to set the Ending Point B and the player will repeatedly play the part between Point A and Point B.
-
Page 15: Playing Audio Cds
6. 1/ALL REPEAT a. During playback press ‘1/ALLREPEAT’ repeatedly to cycle through the repeat modes. CHAPTER: Repeat the current chapter TITLE: Repeat the current title ALL: Repeat all chapters and titles REPEAT OFF: Resume normal playback The ‘Chapter’ repeat display is shown below: Chapter Repeat L. - Page 16 TOTAL ELAPSED: The current track playing and the total time that the CD has been playing. TOTAL REMAIN: The current track playing and the amount of time remaining on the CD. DISPLAY OFF: The CD time Information will not be displayed. 1.
-
Page 17: Playing Mp3 Discs
2. 1/ALL REPEAT a. During playback press ‘1/ALLREPEAT’ repeatedly to cycle through the repeat modes. TRACKCHAPTER: Repeat the current track ALL: Repeat all tracks REPEAT OFF: Resume normal playback The ‘Chapter’ repeat display is shown below: Track Repeat M. Playing MP3 Discs MP3 is a format for storing digital audio. -
Page 18: Playing Sd/Mms/Mc Card
USING THE REPEAT FEATURE The default mode for the Repeat feature is OFF. Pressing REPEAT consecutively changes the repeat options: • Repeat One (repeat playback of a song) • Repeat All (repeat playback of all the songs) • Repeat Off (normal playback) As you toggle through the options, the repeat mode changes. -
Page 19: Using An Usb Memory Device
Audio 6).Using the LEFT button highlight the AUDIO icon in the main menu page. 7).Press OK button to automatically play the first song.And the audio tracks are displayed on the left side of the screen. Artist information is displayed on the right of the screen when available. -
Page 20: Setup
P. SETUP Press ‘MENU’ on the DVD player or to display the Main Menu on the screen. 1. General Setup Page 1) Remove the DVD disc from the player. Use the cursor buttons move the selection box to SETTING and press the ENTER button. 2) Press the ENTER button again to access the sub menu. - Page 21 d). FADE OPTION The fade option controls the transition from one photo to another. Wipe from top Wipe left top diagonal Top/Bottom Horizontal Center Left/Right Vertical Center Vertical bars Horizontal bars Fade box FIFO Morph to another picture e). SLIDE WITH MP3 The ON setting will allow an MP3 file to be played while the slide show is displayed.
- Page 22 3.CLOCK PAGE Use the cursor buttons to move the selection box to CLOCK PAGE ) and press the ENTER button. This page includes: CLOCK SETTING ALARM MODE ALARM SETTING DATE SETTING CLOCK SETTING: Allows the time to be set. Select the hours, min- utes or AM/PM display.
- Page 23 3. PREFERENCE PAGE 1) Use the cursor buttons to move the selection box to the PREFERENCE PAGE and press the ENTER button. Press ENTER to enter the preference page. 2) Press the ENTER button, “Audio” is highlighted. 3) Press the button to select the other sub menus in the preference page.
- Page 24 b) SUBTITLE: Selects the subtitle language you desire*. Use the UP or DOWN buttons to select another subtitle language. To turn subtitles OFF use the UP or DOWN buttonand set to OFF. * Some DVDs only allow access to this function through the DVD menu.
- Page 25 e) DEFAULT Select ‘DEFAULT’ by pressing the button in preference page. Press to enter the sub menu. Press ENTER to make to return to the factory settings. NOTE: The parental setting is not affected by the default reset function. The default password is 3308. This password is always effective even after you have selected your own password and changed it.
-
Page 26: Clock And Calendar Display
Q. CLOCK and CALENDAR Display With no disc inside the player, press “MENU” to display the Main Menu on the screen. Using the cursor buttons move the selection box to “CLOCK” or “CALENDAR”. Press the Enter button .The CLOCK or CALENDAR page will be displayerd on the screen. -
Page 27: Rechargeable Battery Installation And Use
S. Rechargeable Battery Installation and Use The DVD player utilizes a set of long-life Li-Polymer batteries to provide for portability. Li-Polymer batteries feature high storage capacity and low level of degradation. The Li-Polymer batteries do not have “Memory Effect” and thus can be recharged safely regardless of whether the battery is fully or only partially discharged. - Page 28 Powering the player by battery Before first use you must fully charge the battery: please see the preceding section about how to charge it. Installing the Battery Pack: 1. First, make sure the player is in “Power Off” mode and that the AC power supply has been disconnected.
-
Page 29: Specifications
T. Specifications Signal system: NTSC Panel size: 7 inch Audio frequency response: 20 Hz to 20 kHz Video output: 1 Vp-p/75 Ohm, unbalanced Audio output: 1.4V /10kOhm Audio S/N: Better than 60 dB Dynamic range : Better than 85 dB Laser: Semiconductor Laser, Wave Length: 650 nm/795 nm Power source: DC 9V,1A Power consumption: 8 W... -
Page 30: Troubleshooting
U. Troubleshooting PROBLEM SOLUTION • Make sure your DVD is connected properly. No sound or Make sure all cables are securely inserted distorted sound into the appropriate jacks. • You can’t advance through the opening credits and warning information that appears Can’t advance at the beginning of movies because the disc through a movie... - Page 31 Troubleshooting (Cont) PROBLEM SOLUTION • Verify that the batteries in the remote are IR sensor fresh. in operative • Verify that the remote sensor eye is not obstructed. • Verify that the infrared transmitter is affixed over the sensor eye of the com- ponent to be controlled.
-
Page 32: Day Limited Warranty
90 DAY LIMITED WARRANTY Applies to Audiovox Video Products AUDIOVOX ELECTRONICS CORP. (the Company) warrants to the original retail purchaser of this product that should this product or any part thereof, under normal use and conditions, be proven defective in material or workmanship within 90 days from the date of original purchase, such defect(s) will be repaired or replaced with reconditioned product (at the Company's option) without charge for parts and repair labor. - Page 33 © 2007 Audiovox Electronics Corporation 128-8049 PDF created with FinePrint pdfFactory Pro trial version http://www.fineprint.com...