
Related Manuals for Interlogix TVW-1120


Summary of Contents for Interlogix TVW-1120
-
Page 1: Camera Installation Guide
UltraConnect Wi-Fi IP Camera Installation Guide P/N 1073066-EN • REV A • ISS 17SEP15... - Page 2 Copyright © 2015 United Technologies Corporation, Interlogix is part of UTC Building & Industrial Systems, a unit of United Technologies Corporation. All rights reserved. Trademarks and patents Trade names used in this document may be trademarks or registered trademarks of the manufacturers or vendors of the respective products.
- Page 3 compliance could void the user’s authority to operate the equipment. Federal Communication Commission (FCC) Radiation Exposure Statement This equipment complies with FCC radiation exposure set forth for an uncontrolled environment. In order to avoid the possibility of exceeding the FCC radio frequency exposure limits, human proximity to the antenna shall not be less than 20 cm (8 inches) during normal operation.
- Page 4 1. SRD with FHSS modulation Russian Limited Federation implementation 1.1. Maximum 2.5 mW e.i.r.p. 1.2. Maximum 100 mW e.i.r.p. Permitted for use SRD for outdoor applications without restriction on installation height only for purposes of gathering telemetry information for automated monitoring and resources accounting systems.
- Page 5 (Cd), lead (Pb), or mercury (Hg). For proper recycling, return the battery to your supplier or to a designated collection point. For more information see: www.recyclethis.info. For contact information, see www.interlogix.com or Contact www.utcfssecurityproducts.eu. information...
-
Page 6: Table Of Contents
Content Introduction 7 Product overview 7 Installation 7 Installation environment 7 Package contents 9 Cable requirements 11 Camera description 12 Camera dimensions 13 Accessing the SD card 14 Mounting the wedge camera 14 Setting up Ethernet/Wi-Fi transmission 17 Add the camera to UltraConnect 23 View live stream and the latest video clips 24 Program event-triggered camera video clips 25 View event-triggered video clips in History 28... -
Page 7: Introduction
Product overview This is the installation guide for TruVision Intrusion 1120 Series Wi-Fi IP camera models: TVW-1120 (TruVision Intrusion 1.3 MPx, PAL, Wi-Fi, Outdoor IR Wedge Dome, True D/N, H.264, 10 m IR, 2.8 mm @ F1.2, PoE / 12 VDC) TVW-1121 (TruVision Intrusion 3 MPx, PAL, Wi-Fi, ... - Page 8 • Moisture: Do not expose the camera to rain or moisture, or try to operate it in wet areas. Turn the power off immediately if the camera is wet and ask a qualified service person for servicing. Moisture can damage the camera and also create the danger of electric shock.
-
Page 9: Package Contents
Package contents Check the package and contents for visible damage. If any components are damaged or missing, do not attempt to use the unit; contact the supplier immediately. If the unit is returned, it must be shipped back in its original packaging. IP wedge camera Installation manual Converter pan... - Page 10 Hex wrench 12 VDC connector Screws C: M4×8, 2pcs WEEE and battery disposal Power supply with Power supply with UK plug European plug Power supply with SD card Australian plug Installation Guide...
-
Page 11: Cable Requirements
CAUTION: Use direct plug-in UL listed power supplies marked Class 2/CE certified or LPS (limited power source) of the required output rating as listed on the unit. CAUTION: Risk of explosion if the battery is replaced by an incorrect type. Dispose of used batteries according to the instructions. -
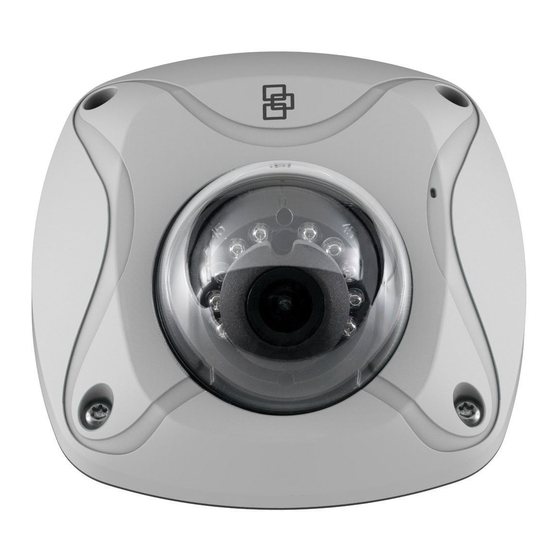
Page 12: Camera Description
Camera description Figure 1: IP wedge camera Camera cover/housing Alarm and Audio port Lens Reset/WPS button SD card Converter pan Ethernet RJ45 PoE port Antenna Power supply Microphone Base Installation Guide... -
Page 13: Camera Dimensions
Camera dimensions Mounting plate dimensions Installation Guide... -
Page 14: Accessing The Sd Card
Accessing the SD card An 8GB Micro SD card is pre-installed with the camera. If desired, the Micro SD Card can be replaced with up to 64GB for local storage as a backup in case, for example, the network fails (see Figure 1 on page 12). Note: Video and log files stored on the Micro SD card can only be accessed via the UltraConnect App when validated with the ZeroWire panel. - Page 15 Loosen the screws with the tamper-resistant hex wrench (supplied) to remove the camera cover. Mount the camera base to the converter pan or mounting surface, depending on the installation. Installation Guide...
- Page 16 Use the supplied lens alignment tool to adjust the pan [±30°], tilt [0 to 80°], and rotation direction [0 to 360°]. Adjusting tool Rotation Tilt Re-attach the dome cover to the camera. Installation Guide...
-
Page 17: Setting Up Ethernet/Wi-Fi Transmission
Setting up Ethernet/Wi-Fi transmission Wi-Fi transmission distance The Wi-Fi transmission distance/range of the camera is approximately 50 m (164 ft.) in open air applications. Note: The transmission distance may vary due to the presence of physical obstacles, such as trees, walls, elevators, fire doors, furniture, etc. - Page 18 To add the camera to the local network via the network cable (Ethernet): Connect the camera to the local router using the CAT5 cable. For outdoor applications, use the included water joint to protect the connection on the camera side. Provide power to the camera using POE (Power over Ethernet), the included transformer, or an external transformer using the included DC plug.
- Page 19 When connected, open TruVision Device Finder or Device Manager and change the IP address of the camera to that of the same subnet of the router. Note: The computer Wi-Fi IP address should also be in the same subnet. Installation Guide...
- Page 20 Log on the camera via web browser and browse to the Wi- Fi page. Select the desired Wi-Fi and enter the key, if required. Installation Guide...
- Page 21 Save Click to save the settings. When the camera is connected to the router, the ad-hoc is disconnected. On the laptop, select the Wi-Fi router and connect it. Open the device finder to check the WLAN IP address of the camera. Log in to the camera to see live view. Installation Guide...
- Page 22 Installation Guide...
-
Page 23: Add The Camera To Ultraconnect
Add the camera to UltraConnect The camera hardware must be correctly installed before proceeding to set up the camera. Ensure that the camera and ZeroWire panel are on the same local area network. Applications where the ZeroWire panel uses cellular only are not compatible with this camera. Note: For detailed information on how to setup the UltraConnect app, add locations, and log in as an installer, please refer to the ZeroWire installation guide. -
Page 24: View Live Stream And The Latest Video Clips
Make sure the MAC ID that is automatically populated in the MAC address field matches the MAC address printed on the back of the camera. If not, change in the MAC address to the one listed on the back of the camera. Click Save. -
Page 25: Program Event-Triggered Camera Video Clips
Live Stream Click to view a live feed from a specific camera. Click Latest Clip to view the last recorded clip from a specific camera. Program event-triggered camera video clips Cameras can be programmed to automatically record when selected events occur. This is achieved by creating a scene. To program event-triggered video clips: More Click... - Page 26 Click Settings. Scenes Select under “Settings Selector”. Select the Scene to Configure and type Scene Name. Select the Scene Trigger. Installation Guide...
- Page 27 Select Alarm System under “Action Device”. Select Trigger Camera Video Clip under “Action Type”. Select the camera(s) that will record when the scene is triggered. Video clips are recorded on the Micro SD card installed in the camera and are linked to events in History. See page 27 to see how to view event-triggered clips.
-
Page 28: View Event-Triggered Video Clips In History
View event-triggered video clips in History Click the More tab on the bottom of the screen. Click History. Find the event you want to view using the Oldest, Prev, Next, and Latest buttons. Play Once you find the video clip you want to view, click Video Clip. -
Page 29: Reset The Camera To Factory Default
Delete the text in Camera Name, IP Address, and MAC Address. Click Save. Reset the camera to factory default If needed, the camera can be reset to factory default. Remove the camera cover, then press and hold the RST/WPS button for 20 seconds. - Page 30 Security 64/128-bit WEP, WPA/WPA2, WPA- PSK/WPA2-PSK, WPS Transmission rate 11b: 11Mbps, 11g: 54Mbps, 11n: up to 150Mbps Transmission range Up to 50 m * It varies depending on the actual working environment. Transmit output power 11b: 17±1.5 dBm @ 11Mbps 11g: 14±1.5 dBm @ 54Mbps 11n: 12.5±1.5 dBm Miscellaneous...