
Related Manuals for Omron BU5002RWLG


Summary of Contents for Omron BU5002RWLG
- Page 1 Uninterruptible Power Supply (UPS/200-240V model) BU2002RWLG/BU3002RWLG/ BU5002RWLG User’s Manual ENGLISH BU2002RWLG/BU3002RWLG/BU5002RWLG...
- Page 3 Uninterruptible Power Supply (UPS/200-240V model) BU2002RWLG/BU3002RWLG/BU5002RWLG User’s Manual BU2002RWLG/BU3002RWLG BU5002RWLG • This manual provides important safety-related information. Thoroughly read and understand this manual before installing and using the product. • Keep this manual in a convenient location so that you can refer to it whenever necessary.
-
Page 5: Introduction
Introduction Features of this product Thank you for purchasing Omron's Uninterruptible Power Supply (UPS). ● The UPS protects computers and other devices from power failures, voltage variations, in- stantaneous voltage drops, and surge voltage such as that caused by lightning (a phenom- enon in which extraordinary high voltage occurs instantaneously). -
Page 6: Important Safety Instruction
IMPORTANT SAFETY INSTRUCTION 1. SAVE THESE INSTRUCTIONS. This manual contains important instructions for BU2002RWLG/ BU3002RWLG/BU5002RWLG that should be followed when using the UPS and batteries. 2. SYMBOL This symbol indicates earth ground. This symbol indicates turning on UPS. This symbol indicates turning off UPS. -
Page 7: Preparation For Operation
Procedure from installation to operation Read “Safety precautions” Start Page v Remove the product from the package and check the contents Page 1 Installation/connection Perform installation and connection Page 5 Are you Read “Using the UPS using UPS monitoring monitoring software and software or contact contact signal”... -
Page 9: Table Of Contents
Table of Contents Introduction ............................i IMPORTANT SAFETY INSTRUCTION ....................ii Safety precautions ..........................vi 1. Preparation ............................1 Unpacking the product ......................... 1 Name of each part ..........................2 Explanation of symbols used on unit ....................4 2. Installation and connection ......................5 Precautions and notes on installation and connection ................. -
Page 10: Safety Precautions
If you drop the unit, stop using it and have it inspected and repaired. ● For repair, contact Omron representatives. Do not hold the side of the front panel when lifting. Injury may result if the panel comes off and falls. - Page 11 RWBU Caution (for installation and connection) For BU5002RWLG, when an abnormality (unusual sound or smell) occurs, disconnect the AC input plug from the wall outlet, or turn OFF the INPUT PROTECTION switch (input overcurrent protection switch) on the back of the unit.
- Page 12 ● If the cable is damaged, stop using the unit and have the cable repaired. ● For repair, contact Omron representatives. ● All of the included accessories are designed to be used exclusively with the unit. Do not use the accessories with other devices.
- Page 13 Using the unit under such conditions may cause a fire. ● If you notice such a condition, stop using the unit and contact Omron representatives. for inspection ● and repairs. Position the unit in such a way that you can immediately disconnect the AC input plug from the ●...
- Page 14 Replacement battery pack for ● BU2002RWLG: BUB2002RWG BU3002RWLG: BUB3002RWG BU5002RWLG: BUB3002RWG (2PCS.) Do not replace the battery in a place where there is flammable gas. Spark may occur when connecting the battery, which may cause an explosion or fire. ●...
- Page 15 RW/BU RW/BU RWBU Notes When moving the unit from a cold place to a warm place, leave it for several hours before using it. If the unit is promptly turned ON after being moved to a warmer place, condensation may form inside the ●...
- Page 16 Safety precautions Notes Check system operation beforehand if the unit is used in combination with a device whose power supply voltage and frequency fluctuate widely, such as a generator. If the generator’s output voltage/frequency falls out of the input voltage/frequency range, the unit will enter ●...
-
Page 17: Preparation
Caution The approximate masses of the units are 28kg (BU2002RWLG), 33kg (BU3002RWLG) and 61kg (BU5002RWLG) . Since the unit is heavy, be careful not to hurt yourself when lifting or transporting it. Hold the handle of the inner packaging when taking out the product from the package box. -
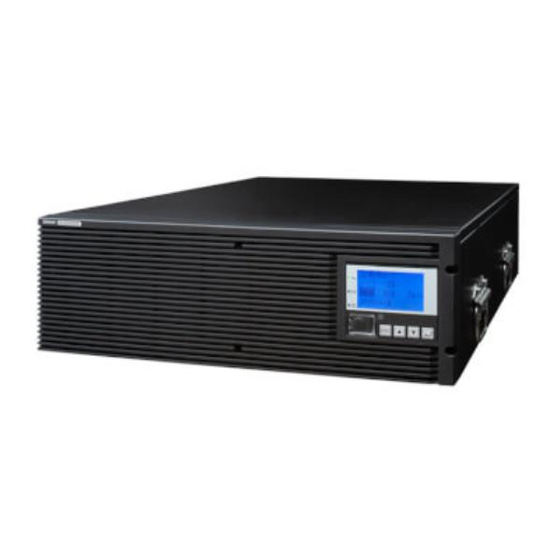
Page 18: Name Of Each Part
"3. Operation" on page 24 that provides the details. Front view < BU2002RWLG/BU3002RWLG > <Air vent> <Operation panel> < BU5002RWLG > <Air vent> <Operation panel> < Enlarged view of the operation panel > A. Power supply output lamp B. Battery mode lamp C. -
Page 19: Rear View
5002 RWLG/BU RWLG/BU RWLG Rear view < BU2002RWLG > < BU3002RWLG > < BU5002RWLG > A. Option slot F. AC output terminal block B. Contact signal port G. AC input overcurrent protection switch C. RS-232C port H. AC input cable D. -
Page 20: Explanation Of Symbols Used On Unit
.Preparation Explanation of symbols used on unit Symbol Description Start the UPS. Stop the UPS. Suspend a beep. UPS output power enabled, supplied by operating on line mode, battery mode. Bypass output “ON”. UPS output power enabled, supplied by operating on battery mode. Batteries at end of useful life, necessary to replace the batteries. -
Page 21: Installation And Connection
The unit may fail. ● For BU5002RWLG, when an abnormality (unusual sound or smell) occurs, disconnect the AC input plug from the wall outlet, or turn OFF the INPUT PROTECTION switch (input overcurrent protection switch) on the back of the unit. - Page 22 If the cable is damaged, stop using the unit and have the cable repaired. ● For repair, contact Omron representatives. The accessories are designed exclusively for use with this unit. Do not use any of the included accessories with other devices.
- Page 23 2002 3002 5002 RWLG/BU RWLG/BU RWLG Caution (for installation and connection) Do not connect devices that cannot be used with commercial power supply. When the unit’s power switch is turned ON and an error occurs with the connected device, by- ●...
-
Page 24: Power Switch
.Installation and connection Notes When moving the unit from a cold place to a warm place, leave it for several hours before using it. If the unit is promptly turned ON after being moved to a warmer place, condensation may form inside the ●... -
Page 25: Installation
2002 3002 5002 RWLG/BU RWLG/BU RWLG Installation The UPS permits the following installing methods. Choose the one best suited for the environment. 2-2-1. Rackmount installation 2-2-2. Stationary installation Horizontal ● Upright intatllation ● Do not use this unit in any position other than the “correct positions” indicated in the illustration below. Note Before installing this device, make a record of the serial number of this device. - Page 26 The mass of each unit: BU2002RWLG: Approx. 28kg BU3002RWLG: Approx. 33kg ● BU5002RWLG: Approx. 61kg In a case where the UPS is to be mounted on a rack, place it on the lower part of the rack. Dropping it may result in injury.
- Page 27 (4) Use the 8 included bracket fixing screws (M4) (2 sets of 4 screws) to securely fasten the ear brackets and unit guide rails to the left and right sides of the UPS. (Installation is possible without removing the handles on the sides of BU5002RWLG; do not remove them.) ...
- Page 28 Use the unit fixing screws to fasten Always use the support angles. Note The batteries for BU5002RWLG are in a separate package. Attach the batteries to the unit before installation. For the attachment procedure, refer to "6-2 Replacing the battery".
- Page 29 Attach the included rubber feet for horizontal installation with the included M3 screws and position the unit horizontally. For stationary horizontal installation, make sure that this product does not slide or fall. (Installation is possible without removing the handles on the sides of BU5002RWLG; do not remove them.) ● Upright installation (1) Upright installation Use the upright stands included with the product.
-
Page 30: Connecting The Equipment
2-3-1. Connecting a device to the power supply output (AC receptacle) (BU5002RWLG only) (1) BU5002RWLG comes equipped with two “NEMA L6-30R” AC receptacles. Only devices with rated voltage of 200 to 240 VAC can be connected to these AC receptacles. Connect devices with rated voltage of 100 VAC to the AC output terminal block. - Page 31 (1) Connect the devices that require backup to the power supply output terminal block of the unit. Check that one terminal block cover and three M3 screws are included in the accessories. BU2002RWLG and BU3002RWLG require two M3 screws, and BU5002RWLG requires one M3 screw. (The remaining M3 screws are spares.) Run the wires to be connected through the hole in the terminal block cover (with cable clamp).
- Page 32 .Installation and connection Figure 1 BU2002RWLG/BU3002RWLG BU5002RWLG Figure 2 Crimp the round terminal to the ground wire. BU2002RWLG/BU3002RWLG : For M4 screw BU5002RWLG : For M5 screw Figure 3 BU2002RWLG/BU3002RWLG BU5002RWLG OUTPUT INPUT OUTPUT1 25 A INPUT 1 φ 100/200/208/ 1 φ...
- Page 33 50-60 Hz 15 A 50-60 Hz 15 A BU5002RWLG Insert the tab on the left side of the terminal block cover into the slit of the input terminal block cov- er, and then run one of the included M3 screws through the hole on the right side of the terminal block cover and tighten it.
-
Page 34: Connecting The Ac Input
● The unit may fail. ● 2-4-1. Connecting the AC input plug (BU5002RWLG) Use the 15A plug included with the product at shipment. ● Provide a wall outlet (commercial power) suitable for the shape of the 15A plug (NEMA 5-15R). - Page 35 To use the BU3002RWLG with up to 3000VA/2100W, a wiring capacity of 16A or required. ● To use the BU5002RWLG with up to 5000VA/3500W, a wiring capacity of 27A or required. ● Make sure to properly match the AC input terminal with the appropriate wire color.
- Page 36 <BU2002RWLG/BU3002RWLG> Power supply 200 VAC External breaker Load Emergency Stop with 250 V/20 A. Switch (double pole) <BU5002RWLG> Power supply 200 VAC External breaker Load Emergency Stop with 250 V/35 A. Switch (double pole) The unit was charged before shipment, but it may have self-discharged during shipment, ●...
-
Page 37: Checking The Operation
2002 3002 5002 RWLG/BU RWLG/BU RWLG Checking the operation When you finish connecting the unit, confirm that the backup operation works properly. Check that the Battery Mode is performed normally according to the following procedure. (In this operation check, the effects of a power failure are reproduced by disconnecting the AC input plug from the wall outlet (commercial power).) (1) Press and hold the unit’s power switch for 3 seconds or longer to turn ON the power. - Page 38 (4) on page 21. • If the problem persists after checking the 2 points above, contact Omron representatives. Beeper ON/OFF can be set with “Settings” - “Local Setting” - “Audible alarm” in the See also menu on the LCD.
-
Page 39: Charging The Battery
2002 3002 5002 RWLG/BU RWLG/BU RWLG Charging the battery The battery automatically starts charging when the unit is connected to a commercial power source. (This occurs regardless of whether the power switch is ON or OFF.) The charging takes 8 hours to complete. The unit was charged before shipment, but it may have self-discharged during shipment, resulting ●... -
Page 41: Operation
Using the unit under such conditions may cause a fire. ● If you notice such a condition, stop using the unit and contact Omron representatives for inspection ● and repairs. Position the unit in such a way that you can immediately disconnect the AC input plug from the ●... - Page 42 .Operation Notes Before stopping the commercial power to the unit, turn OFF the power switch of the unit. The unit enters Battery Mode when commercial power is stopped. If you frequently use the unit in Battery ● Mode, the battery life may be significantly shortened. Take measures for handling unforeseen accidents, such as data backup and system redundancy.
-
Page 43: Start And Stop Procedures And Basic Operation
2002 3002 5002 RWLG/BU RWLG/BU RWLG Start and stop procedures and basic operation The UPS status indicators and UPS setting change menu are displayed on the control display panel on the front of the unit. UPS status indicators (status screen) ●... - Page 44 .Operation When the unit is connected to a commercial power source with the power ● switch OFF and commercial power is supplied to it • The status indicator displays " ". • Power output is stopped. • The battery automatically starts recharging. •...
- Page 45 2002 3002 5002 RWLG/BU RWLG/BU RWLG Operation after a power failure ● • If a power failure or abnormal input power supply occurs, the UPS automatically switches to Battery Mode, continuing power output from the Power Supply Output terminal block supplied from the battery.
-
Page 46: Interpreting Beeps And Displays
BU2002RWLG: Displayed in 10 levels, with 100% indicating 2000 VA/1400 W. BU3002RWLG: Displayed in 10 levels, with 100% indicating 3000 VA/2100 W. BU5002RWLG: Displayed in 10 levels, with 100% indicating 5000 VA/3500 W. The battery level meter displays the remaining battery level as a percentage. -
Page 47: Ups Functions
UPS functions Suspending a beep When the beep is sounding, you can suspend it by pressing and holding the beep ESC switch for 0.5 seconds or longer. Self-diagnosis test This test performs a failure diagnosis on the unit and performs a test to check for battery deterioration. Use the procedure below to check whether a circuit failure has occurred inside the unit and whether battery replacement is required. -
Page 48: Battery Life Counter Function
. UPS functions Battery life counter function This function notifies you with LCD and beep sound when the battery needs to be replaced. The bat- tery life counter operates while commercial power is supplied after shipment. (When the ambient temperature of the battery is higher than 25°C, the value of the counter will be incremented at a faster pace.) When the battery needs to be replaced, the battery replacement lamp will light up and beep will sound. - Page 49 2002 3002 5002 RWLG/BU RWLG/BU RWLG Menu Description Note Settings Local Settings Language Set the language to be displayed on the LCD. LCD Setting Change the contrast of the LCD. LCD Auto off Set the amount of time after which the LCD turns off automatically.
- Page 50 . UPS functions Menu Description Note Identification Type Display the names of the UPS and battery pack. Serial Number Display the serial number of the UPS. Firmware Ver. Display the firmware version of the UPS. Memorandum You can record information of 20 alphanumeric characters.
-
Page 51: Measuring The Backup Time
Measuring the backup time How to measure backup time The backup time you measure for the first time after purchase is the “initial value of the backup time.” You can precisely judge the deterioration condition of the battery if you measure the “initial value of the backup time”... - Page 52 . Measuring the backup time Backup time (25°C, initial value) BU5002RWLG BU3002RWLG BU2002RWLG 1000 1500 2000 2500 3000 3500 Connection capacity (W) Backup time table Time unit: (Minutes) BU2002RWLG Connection 100 200 300 400 600 800 1000 1200 1400 capacity (W)
-
Page 53: Maintenance And Inspection
Maintenance and Inspection Caution (for maintenance) When maintaining the connected equipment, turn OFF the unit’s power switch to stop the output, and stop the supply of commercial power. Even if commercial power to the UPS is stopped while it is in operation, the power output of this ●... -
Page 54: Cleaning
. Maintenance and Inspection 3. Guidelines for how often to check the battery (measure the backup time) Average ambient 6-month check Monthly check temperature 25°C For the first 4 years after starting use When 4 years or more have passed after starting use 35°C For the first 2 years after starting use When 2 years or more have passed after starting use... -
Page 55: Using The Ups Monitoring Software And Contact Signal
PowerAct Pro 5/4 (Slave Agent) (Note1) → See 7-1 Note 1: The most recent version can be downloaded from our homepage (industrial.omron.eu). Note 2: Files cannot be automatically saved. Note 3: The UPS automatically stops once the battery is depleted. - Page 56 . Using the UPS monitoring software and contact signal • UPS monitoring software function list Supported Limited Unsupported Software title General applications Network management applications (Simple functions, standalone) (Advanced functions,network support) Simple Shutdown Software PowerAct Pro Function Required options Auto shutdown (*1) UPS monitoring (operating status) UPS monitoring (data) Pop-up notification...
-
Page 57: When Using The Included Ups Monitoring Software To Perform Auto Shutdown
1. Connect the UPS to a computer. Cable: Included connection cable (RS-232C) <RS-232C> BU2002RWLG/BU3002RWLG Connect to RS-232C port Connect to RS-232C port コネクタ Connector Connector Included connection cable (RS-232C) BU5002RWLG Connect to RS-232C port Connect to RS-232C port Connector Connector Included connection cable (RS-232C) - Page 58 . Using the UPS monitoring software and contact signal * When connecting 2 or more computers to the UPS (Only when using PowerAct Pro) Power cable Power cable LAN connection PC server 3 Power cable Network PC server 2 Power cable Switching hub PC server 1 Remote connection...
-
Page 59: Contact Signal
2002 3002 5002 RWLG/BU RWLG /BU RWLG Contact signal Contact signals are included as standard for the unit. Contact Signal You can develop your unique system based on the following specifications to automate the process at a power failure. You can perform power-failure processing by allowing the system to detect the backup signal and also perform system shutdown processing by allowing the system to detect the Low battery level signal. - Page 60 . Using the UPS monitoring software and contact signal 7-2-3. Contact signal I/O connector (female DSUB9P) Pin assignment Pin number Item Battery LOW signal output (BL) Trouble signal output (TR) Backup stop signal input (BS) 5 4 3 2 1 9 ...
- Page 61 2002 3002 5002 RWLG/BU RWLG /BU RWLG 7-2-6. Example of the use of the Contact Signal circuit ● Example of BU signal output circuit and ● Example of BS signal input circuit and the connected circuit the connected circuit +12V TLP521 1KΩ...
-
Page 63: Troubleshooting
Troubleshooting Perform the checks shown below if the unit is operating abnormally. If the unit continues to operate abnormally, please contact Omron representatives. Problem Check and remedy The LCD does not appear when 1. Make sure the AC input is securely connected to commercial power. -
Page 65: References
References A. Specifications BU2002RWLG BU3002RWLG BU5002RWLG Operation method Full-time inverter supply method (high efficiency) AC input Rated input voltage AC200/208/220/230/240V Startup voltage range 200V mode: 160±2 to 288±2 VAC, 208V mode: 167±2 to 278±2 VAC 220V mode: 176±2 to 278±2 VAC, 230V mode: 184±2 to 278±2 VAC 240V mode: 192±2 to 278±2 VAC, 100V mode: 160±2 to 288±2 VAC... -
Page 66: Dimensions
References B. Dimensions • BU2002RWLG/BU3002RWLG <Unit: mm/ Tolerance: ±2mm for total length, ±1mm for other measurements> (24) • BU5002RWLG <Unit: mm/ Tolerance: ±2mm for total length, ±1mm for other measurements> (9.5) (9.5) (24) - Page 67 2002 3002 5002 RWLG/BU RWLG/BU RWLG • Upright stand <Unit: mm/ Tolerance: ±2mm for total length, ±1mm for other measurements> <BU2002RWLG/BU3002RWLG> <BU5002RWLG> (24)
- Page 68 References • Rubber feet <Unit: mm/ Tolerance: ±2mm for total length, ±1mm for other measurements> <BU2002RWLG/BU3002RWLG> (24) Attach the 6 rubber feet 20.8 <BU5002RWLG> (24) Attach the 6 rubber feet 20.8...
- Page 69 2002 3002 5002 RWLG/BU RWLG/BU RWLG • Support angles <Unit: mm/ Tolerance: ±2mm for total length, ±1mm for other measurements> Rack rail MIN.614 MAX.992 After rackmont installation 600~930 <BU2002RWL/BU3002RWLG> <BU5002RWLG>...
-
Page 70: Circuit Block Diagram
230/240 VAC High frequency compensation circuit Input overcurrent protection Step-up Control Power switch converter circuit Charging circuit Battery Commercial Power Mode Battery Mode Direct Commercial Power Mode D. Related products Description BU2002RWLG BU3002RWLG BU5002RWLG Replacement battery pack BUB3002RWG BUB2002RWG BUB3002RWG (2PCS) - Page 71 Tel: +41 (0) 41 748 13 13 industrial.omron.hu industrial.omron.ch Italy Turkey Tel: +39 02 326 81 Tel: +90 212 467 30 00 industrial.omron.it industrial.omron.com.tr Netherlands United Kingdom Tel: +31 (0) 23 568 11 00 Tel: +44 (0) 1908 258 258 industrial.omron.nl industrial.omron.co.uk More Omron representatives industrial.omron.eu...
- Page 74 Authorized Distributor: Cat. No. U02E-EN-01 Printed in Europe...