Advertisement
Quick Links
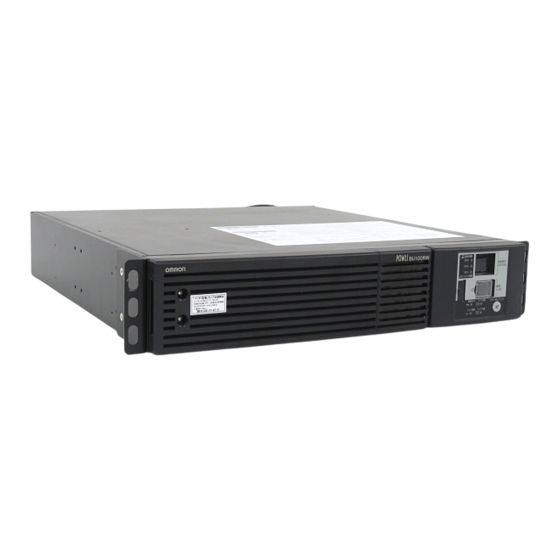
Battery Unit BUM100R/BUM300R Instruction Manual
● This manual contains important information regarding the safe use of the BUM100R/300R. Please read
these instructions before installing and/or using the product.
● Please connect and install the battery unit only after having fully understood the relevant procedures for
the Backup Power Supply, found in the Backup Power Supply Instruction Manual.
Safety precautions
● The safety symbols used in this manual are explained below.
Warning
Caution
: Indicates a prohibited action (something you must not do). For example,
disassembly is prohibited.
: Indicates a necessary action (something you must do). For example,
is necessary.
Note that some items described as cautions may result in more serious damage under certain condi-
tions.The information described here is very important and must be strictly observed.
Do not disassemble, repair, or modify the product.
● Doing so may cause an electric shock or a fi re.
If liquid leaks from the product, do not touch it.
● Doing so may cause blindness or burns.
● If it touches your eyes or skin, wash it out with lots of clean water and consult your doctor.
Do not use this product in applications which require an extremely high degree
of reliability and safety, such as those listed below.
(This product is designed and manufactured for use for OA equipment such as personal computers.)
● Medical equipment or system that may cause death directly
● Applications that directly affect the safety of people. (For example, the operation and control of cars and
elevators.)
● Applications in which failure may signifi cantly damage or impact the society and public. (For example,
important computer systems or communication equipment.)
● Applications with the same level of importance as those described above.
Two or more people should work together to carry, unpack and install.
● Because the unit is heavy, you may injure yourself or drop the unit, or it may fall over.
The weight of the BUM100R is 26kg, and the weight of the BUM300R is 42kg.
Carefully consider the weight when unpacking and transporting this product.
For information about repairs, contact us at __________.
● Injury may result if the unit falls or is dropped.
● If you drop the unit, stop using it and have it inspected and repaired.
Keep plastic bags out of the reach of children.
● Children may suffocate if they put their heads into plastic bags.
This manual contains important information regarding the safe
use of this product.
Please read these instructions before installation and/or use.
Indicates an imminently hazardous situation which, if not handled
properly, may result in death or serious injury.
Indicates a potentially hazardous situation which, if not handled
properly, may result in injury or property damage.
* Property damage means damage to houses/household effects, livestock, and pets.
Warning
Caution
Warning
(product use)
(installation)
1
indicates that
indicates that grounding
Advertisement

Related Manuals for Omron BUM100R


Summary of Contents for Omron BUM100R
- Page 1 Battery Unit BUM100R/BUM300R Instruction Manual ● This manual contains important information regarding the safe use of the BUM100R/300R. Please read these instructions before installing and/or using the product. ● Please connect and install the battery unit only after having fully understood the relevant procedures for the Backup Power Supply, found in the Backup Power Supply Instruction Manual.
- Page 2 Caution (installation) Do not install the unit in any position other than those specifi ed. ● Refer to “2-1 Installation” on page 5 for proper installation positions. ● Injury may result if the unit falls or is dropped. ● If the unit is installed in any position other than those specifi ed, there will be no protection if fl uid leaks from the battery.
- Page 3 Use a specifi ed battery for replacement. ● Using a battery other than that which is specifi ed may cause a fi re. ● Product models: BUB100R: (Replacement battery pack for BUM100R (2 required)) BUB300R: (Replacement battery pack for BUM300R (2 required)) Do not replace the battery in a place where there is fl...
-
Page 4: Consignes De Sécurité
Manuel d’instructions de l’unité de batterie BUM100R/BUM300R ● Ce manuel contient des informations importantes concernant l’utilisation en toute sécurité du BUM100S/150S/300S. Veuillez lire attentivement ces instructions avant d’installer et/ou d’utiliser le produit. ● Ne brancher et installer l’unité de batterie qu’après avoir parfaitement compris les procédures pertinentes pour l’alimentation de secours qui sont indiquées dans le manuel d’instructions sur l’alimentation de secours. - Page 5 2 personnes. ● Comme l’appareil est lourd, vous risquez de vous blesser, de l’échapper, ou il peut tomber. Le BUM100R pèse 26 kg et le BUM300R pèse 42 kg. ● Des blessures peuvent survenir si l’appareil tombe ou est lâché.
- Page 6 Utiliser une batterie spécifi ée lors du remplacement. ● L’utilisation d’une batterie autre que celle spécifi ée peut provoquer un incendie. ● Modèles des produits : BUB100R : (batterie de rechange pour BUM100R (2 requises)) BUB300R : (Batterie de rechange pour le BUM300R (2 requises)) Ne pas remplacer la batterie en présence de gaz infl...
- Page 7 Attention (remplacement de la batterie) Ne pas court-circuiter la batterie avec des objets métalliques. ● Cela peut provoquer un choc électrique, un incendie ou des brûlures. ● Une batterie usagée peut encore contenir de l’énergie électrique. Ne pas jeter la batterie au feu ni la briser. ●...
-
Page 8: Unpacking The Product
● Comme l’appareil est lourd, vous risquez de vous blesser, de l’échapper, ou il peut tomber. Le BUM100R pèse 26 kg et le BUM300R pèse 42 kg. Bien prendre en compte ce poids lors du déballage et du transport du produit. - Page 9 2. Installation and connection 2-1 Installation Install the additional battery unit. Do not use this unit in any position other than the correct positions indicated in the illustration below. For BUM100R ● Correct positions Be careful not to get your fingers caught when arranging the unit.
- Page 10 For BUM300R ● Correct positions BATTERY UNIT BATTERY UNIT Incorrect positions BATTERY UNIT * Do not place the UPS or the additional battery unit on top of each other. The upper unit may fall down by vibration etc.
-
Page 11: Installation
Installation Installation de l’unité de batterie supplémentaire. Ne pas utiliser cet appareil dans toute position autre que les positions correctes indiquées sur l’illustration ci-dessous. Pour le BUM100R ● Positions incorrectes Faire attention à ne pas se coincer les doigts lors de l'installation de l'appareil. - Page 12 Pour le BUM300R ● Positions correctes Faire attention à ne pas se coincer les doigts lors de l'installation de l'appareil. Les supports inférieurs peuvent être retirés en position horizontale. BATTERY UNIT BATTERY UNIT Positions incorrectes BATTERY UNIT * Ne pas placer l'ASC ou l'unité de batterie supplémentaire au dessus l'une de l'autre.
- Page 13 Sans les équerres de soutien, la pince avant ne peut supporter seule le poids de l’ASC. ● Poids de l’ASC : BU100RW : Env. 20 kg BUM100R : Env. 26 kg BU200RW/BU300RW: Env. 33kg BUM300R: Env. 42kg Dans le cas où...
- Page 14 ● BUM100R/BUM300R rack mounting procedure (1) Insert the 4 included rail length fi xing screws and half-tighten them to hold the front and rear rack rails in place.➀ 4 rail length fixing screws (small) (2) Adjust the length of support angles to suit the server rack, and then securely tighten the screws that were half-tightened in step 1.
- Page 15 (4) Use the 8 included ear bracket mounting screws (2 sets of 4 screws) to securely fasten the ear brackets to the left and right sides of the UPS. ➃ Ear bracket mounting screws The support angles cannot be attached to special EIA/JIS racks. (5) Place the UPS on the support angles and push it completely into the rack ➄, and use the 2 included unit fi...
-
Page 16: Stationary Installation
(4 locations) and position the unit horizontally. For stationary horizontal installation, make sure that this product does not slide or fall. Install the UPS (BU100RW/BU200RW/BU300RW) so that it sits on top of the additional battery unit (BUM100R/BUM300R). BU100RW BUM100R... - Page 17 You can add only one additional battery unit. 2-2-1 BUM100R connection procedure / Connectable UPS : BU100RW (1) Connect the additional battery cable to the BU100RW and to the connector on the back of the BUM100R battery unit. Connect the cable to the additional battery signal connector.
- Page 18 2-2-2 BUM300R connection procedure / Connectable UPS : BU200RW/BU300RW (1) Connect the additional battery cable to the UPS and the connector on the back of the battery unit. Connect the signal connection cable to the additional battery signal connector also. (2) Turn ON the overcurrent protection switch on the back of the battery unit and the INPUT PROTECTION switch (input overcurrent protection switch) on the back of the UPS.
- Page 19 ● The unit may fall over if the lower battery pack is removed first. Caution When an additional battery unit (BUM100R/BUM300R) is connected to the UPS, replace the UPS battery when replacing the batteries of the additional battery unit. You cannot perform battery replacement of the additional battery unit only.
- Page 20 For information on UPS battery replacement procedure, refer to the UPS instruction manual. Use a screwdriver to loosen (turn counter-clockwise) the 2 screws at the left side of the BUM100R front panel of the unit, until they turn freely. (The screws cannot be removed from the front panel.) ➀...
- Page 21 Remove the 2 battery connectors from the detached plate cover ➀ and disconnect the connectors. ➁ Disconnect by holding here. Remove the battery pack by pulling on the pullout label at the top and bottom of the battery pack. Caution Do not hold the connector of cable of the battery pack. Attention Ne pas tenir le connecteur du câble de la batterie.
- Page 22 Insert them into the unit. ➂ Attach the plate cover. Insert the tabs on the left side of the plate cover into the two holes in the BUM100R ➀, and push the plate cover toward the BUM100R.Secure the connectors to the plate cover. ➁...
- Page 23 Normal operation resumes after the test for about 10 seconds. <After replacing the battery with operation stopped...> Connect the AC input to a commercial power source, and turn ON the BUM100R/300R power switch. When operation starts, the self-diagnostic test is automatically performed. Normal operation re- sumes after 10-second test.
- Page 24 Additional battery unit (BUM300R) replacement procedure For information on UPS battery replacement procedure, refer to the UPS instruction manual. Use a screwdriver to loosen (turn counter-clockwise) the 4 screws at the top of the front panel of the unit, until they turn freely. (The screws cannot be removed from the front panel.) ➀ Pull the left side of the front panel towards you to remove it.
- Page 25 Remove (turn clockwise) the screws that hold each plate cover in place (2 screws on the left side, 1 screw on the right side). ➀ Pull the plate cover towards you and lift it up to remove it. ➁ Remove the 3 screws Grasp the battery pack handle and pull it out.
- Page 26 Insert 2 new battery packs into the additional battery unit as far as they will go. ➀ ● Replacement battery pack For BUM300R : Model number BUB300R (2 required) Attach the plate cover. Insert the lug at the left of the cover into the hole in the main body and push it towards the main body. ➁ Make sure to fi...
- Page 27 Attach the logo panel. Use a screwdriver to securely tighten (clockwise) the 4 screws at the top of at the logo panel of the unit. ➀ Logo panel Tighten the 4 screws Attach the front panel. Move the front panel in the right and push it towards the main body ➀ Use a screwdriver to securely tighten (clockwise) the 4 screws at the top of the front panel.
- Page 28 <After replacing the battery during operation...> Press the beep stop/test button for 5 to 10 seconds, to perform a self-diagnostic test. Normal operation resumes after the test for about 10 seconds. If the beeping sounds, the beeping stops at the fi rst press of the button and starts test in the second press of the button. If the battery replacement indicator is ON and beep sounds before replacing the battery, the indicator is OFF and beep stops after test completion, and normal operation resumes.
- Page 29 4. Dimensions • BUM100R <Unit: mm/ Tolerance: ±1mm> BATTERY UNIT • Ear brackets...
- Page 30 • BUM300R BATTERY UNIT • Ear brackets • Rack rails Rail length adjusting screw Rail length adjusting screw K1L-D-07120F...