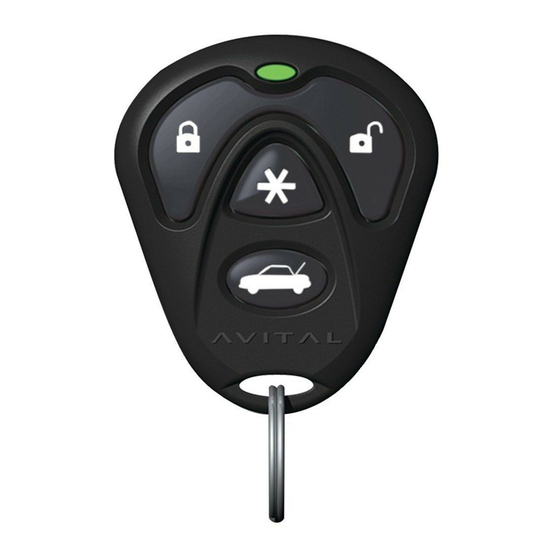
Avital 2101L Installation Manual
1-way vehicle keyless entry system
Hide thumbs
Also See for 2101L:
- Installation manual (24 pages) ,
- Owner's manual (21 pages) ,
- Installation manual (15 pages)
Table of Contents
Advertisement
Quick Links
Model 2101L
Installation Guide
Note: This product is intended for installation by a professional
installer only. Any attempt to install this product by any person
other than a trained professional may result in severe damage to a
vehicle's electrical system and components.
© 2009 Directed Electronics Vista, CA
N2101L 2009-09
Advertisement
Table of Contents

Related Manuals for Avital 2101L


Summary of Contents for Avital 2101L
-
Page 1: Installation Guide
Model 2101L Installation Guide Note: This product is intended for installation by a professional installer only. Any attempt to install this product by any person other than a trained professional may result in severe damage to a vehicle's electrical system and components. -
Page 2: P P E E R R I I P P H H E E R R A A L L P P L L U U G G - - I I N N H H A A R R N N E E S S S S E E S
Code Hopping®, Doubleguard®, ESP®, FailSafe®, Ghost Switch®, Learn Routine™, Nite-Lite®, Nuisance Prevention® Circuitry, NPC®, Revenger®, Silent Mode™, Soft Chirp®, Stinger®, Valet®, Vehicle Recovery System®, VRS®, and Warn Away® are all Trademarks or Registered Trademarks of Directed Electronics, Inc. w w w w w w . . d d i i r r e e c c t t e e c c h h s s . . c c o o m m T T e e c c h h n n i i c c a a l l S S u u p p p p o o r r t t 8 8 0 0 0 0 - - 7 7 5 5 3 3 - - 0 0 8 8 0 0 0 0 These resources are for authorized Directed Dealer use only. -
Page 3: Table Of Contents
Table of contents P P r r i i m m a a r r y y h h a a r r n n e e s s s s ( ( H H 1 1 ) ) , , 1 1 8 8 - - p p i i n n c c o o n n n n e e c c t t o o r r ............4 4 P P e e r r i i p p h h e e r r a a l l P P l l u u g g - - i i n n H H a a r r n n e e s s s s e e s s . -
Page 4: P P R R I I M M A A R R Y Y H H A A R R N N E E S S S S ( ( H H 1 1 ) ) , , 1 1 8 8 - - P P I I N N C C O O N N N N E E C C T T O O R
Primary harness (H1), 18-pin connector (+)12V CONSTANT POWER INPUT H1/1 BLUE (-) 200mA SECOND UNLOCK OUTPUT H1/2 H1/3 BLACK/WHITE DOMELIGHT SUPERVISION RELAY #87 (IN) BLACK/WHITE DOMELIGHT SUPERVISION RELAY#30 (OUT) H1/4 GREEN/BLACK LOCK#30 COMMON OUPUT H1/5 WHITE/BLACK LOCK #87A NORMALLY CLOSED H1/6 VIOLET/BLACK LOCK #87 NORMALLY OPEN (INPUT) - Page 5 H H 1 1 / / 1 1 R R E E D D ( ( + + ) ) 1 1 2 2 V V c c o o n n s s t t a a n n t t p p o o w w e e r r i i n n p p u u t t Before connecting this wire, remove the supplied fuse.
- Page 6 H H 1 1 / / 4 4 B B L L A A C C K K / / W W H H I I T T E E D D o o m m e e l l i i g g h h t t S S u u p p e e r r v v i i s s i i o o n n O O u u t t p p u u t t Connect this wire directly to the domelight circuit in the vehicle.
- Page 7 H H 1 1 / / 8 8 B B L L U U E E / / B B L L A A C C K K U U n n l l o o c c k k # # 3 3 0 0 C C o o m m m m o o n n ( ( O O u u t t p p u u t t ) ) See H1/5.
- Page 8 H H 1 1 / / 1 1 2 2 B B R R O O W W N N ( ( - - ) ) H H o o r r n n H H o o n n k k O O u u t t p p u u t t : : This wire supplies a (-) 200 mA output that can be used to honk the vehicle horn.
-
Page 9: T T R R A A N N S S M M I I T T T T E E R R / / R R E E C C E E I I V V E E R R L L E E A A R R N N R R O O U U T T I I N N E
I I m m p p o o r r t t a a n n t t : Never use this wire to drive anything but a relay or a low-current input. The transistorized output can only provide 200mA of current. Connecting directly to a solenoid motor cause failure. - Page 10 H H 1 1 / / 1 1 6 6 O O r r a a n n g g e e ( ( - - ) ) 5 5 0 0 0 0 m m A A G G r r o o u u n n d d - - W W h h e e n n L L o o c c k k e e d d O O u u t t p p u u t t This wire supplies a (-) 500mA ground as long as the system is locked.
- Page 11 H H 1 1 / / 1 1 8 8 R R e e d d / / w w h h i i t t e e c c h h a a n n n n e e l l 2 2 , , 2 2 0 0 0 0 m m A A ( ( - - ) ) o o u u t t p p u u t t When the system receives the transmitter code control- ling Channel 2 for longer than 1.5 seconds, the red/white wire will supply an output as long as the trans-...
-
Page 12: Super Bright Led, 2-Pin White Plug
Peripheral Plug-in Harnesses Super Bright LED, 2-Pin WHITE Plug The super bright LED operates at (+) 2 volt DC and plugs into the two-pin WHITE port. Make sure the LED wires are not shorted to ground as the LED will be damaged. -
Page 13: Valet/Program Switch, 2-Pin Blue Plug
Valet/Program Switch, 2-Pin Blue Plug The Valet/Program button should be accessible from the driver’s seat. It plugs into the BLUE port on the side of the unit. Consider how the button will be used before choosing a mounting location. Check for rear clearance before drilling a 9/32-inch hole and mounting the button. -
Page 14: System Features Learn Routine
System Features Learn Routine The System Features Learn Routine dictates how the unit operates. It is possible to access and change any of the feature settings using the Valet®/Program switch. To enter the learn routine: 1. K K e e y y . Turn the ignition on and then back off. - Page 15 button will change the setting to the LED OFF setting. The LED will go out indicating the change and the horn will honk twice (if connected). 4.R R e e l l e e a a s s e e . The Valet®/Program switch can now be released.
- Page 16 System Features Menus F F e e a a t t u u r r e e D D e e f f a a u u l l t t L L E E D D O O N N S S e e t t t t i i n n g g L L E E D D O O F F F F s s e e t t t t i i n n g g ( ( P P r r e e s s s s C C h h a a n n n n e e l l 2 2 ) ) N N u u m m b b e e r r...
-
Page 17: Feature Descriptions
Feature Descriptions The features of the system are described below. 1 I I G G N N I I T T I I O O N N C C O O N N T T R R O O L L L L E E D D D D O O O O R R L L O O C C K K O O N N / / O O F F F F : When turned on, the doors will lock three seconds after the ignition is turned on. - Page 18 5 D D O O U U B B L L E E P P U U L L S S E E U U N N L L O O C C K K O O F F F F / / O O N N : : Some vehicles require two pulses on a single wire to unlock the doors.
- Page 19 8 C C O O D D E E - - H H O O P P P P I I N N G G O O N N / / O O F F F F : : The system uses a mathe- matical formula to change codes each time the trans- mitter and receiver communicate.
- Page 20 confirm the selected channel. Do not release the Valet/program switch. T T r r a a n n s s m m i i t t . . While holding Valet/Program button, press the button from the transmitter that you wish to assign to the selected channel.
- Page 21 C C h h a a n n n n e e l l # # 8 8 : : If any button from a known transmitter is programmed to Channel 8, all transmitters will be erased from memory and the system features will revert to the default settings.
-
Page 22: Transmitter Configurations
Transmitter Configurations The transmitters can be programmed with the standard or single button lock/unlock configurations by using the Auto Learn functions in the Transmitter/Receiver Learn Routine. Standard Configuration A transmitter that uses the standard configuration operates similarly to many factory keyless entry transmitters. A stan- dard configuration transmitter allows locking, unlocking, and Panic Mode activation with separate buttons. -
Page 23: Rapid Resume Logic
Rapid Resume Logic Rapid Resume Logic ensures that when the system is pow- ered up it returns to the state it was in before power was disconnected. For a full description of Rapid Resume Logic refer to the Owner's Guide. ©... -
Page 25: Wiring Quick Reference Guide
Wiring Quick Reference Guide © 2009 Directed Electronics, inc. - Page 26 The company behind this system is Directed Electronics Since its inception, Directed Electronics has had one purpose, to provide consumers with the finest vehicle secu- rity and car stereo products and accessories available. The recipient of nearly 100 patents and Innovations Awards in the field of advanced electronic technology.