
Related Manuals for Hoover 7011PH Allergy


Summary of Contents for Hoover 7011PH Allergy
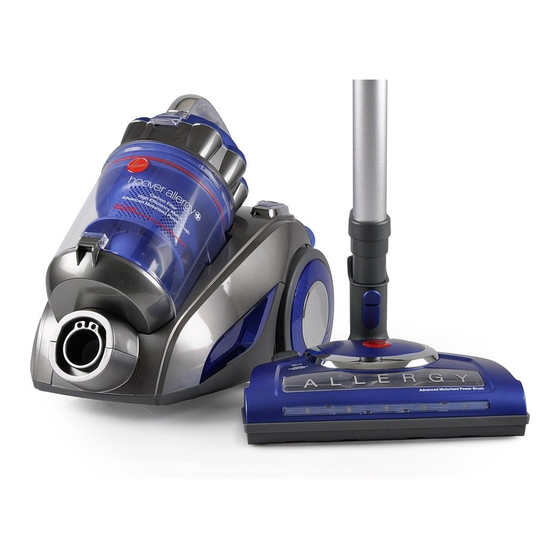
- Page 1 Cyclonic Vacuum Cleaner with Deep Cleaning Powerhead Height Adjustable Powerhead HEPA Carbon Filtration Large 1.75L Dust Capacity...
-
Page 3: Specifications
7011PH Allergy Congratulations on the purchase of your new HOOVER vacuum cleaner. There are many useful features built into your vacuum cleaner and we recommend that you carefully read this instruction manual so that you may take best advantage of them. -
Page 4: Before You Begin
Before you Begin This cleaner must be operated in accordance with these instructions and used only for domestic household cleaning to remove DRY dirt and dust from household carpets, flooring, walls and fabrics. This cleaner is not fit to be used as an industrial cleaner hence will void the manufacturer’s warranty if used inappropriately. -
Page 5: Safety Precautions And Warnings
Safety Precautions & Warnings IMPORTANT! Always switch off the cleaner and remove the plug from the electricity power supply before cleaning your appliance, when not in use or attempting any maintenance task. The cleaner must only be connected to an AC power supply at the voltage shown on the rating label. - Page 6 15. Ensure the appliance is disconnected from the 26. Never attempt to make any modifications mains power supply before connecting the hose electrically to the vacuum cleaner. to the unit. 27. Always store the appliance indoors in a cool 16. Do not operate or use the appliance without the and dry place.
-
Page 7: Removing Accessories
Assembly IMPORTANT! Always remove the plug from the power socket before fitting or removing accessories! Connecting the Dust Container Subassembly Align Align Assembled the two the mark position marks Align the mark on the dust container with the mark on the top cover, and fit the cover into the dust container. - Page 8 Assembly (continued) 1. Fitting or Removing the Flexible Hose Fitting: Insert the flexible hose into the air intake duct of the vacuum. Press until it clicks into position. Removing: Remove the plug from the power socket and then release the flexible hose from the air intake duct by pressing the two buttons.
-
Page 9: Crevice Tool
Accessories Powerhead Compact design with illuminated powerhead for deep carpet cleaning. Not recommended for use on hard floors. Combination Floor Tool Ideal for daily cleaning on carpets and hard floors. Carpet Hard Floors Crevice Tool For radiators, crevices, corners, baseboards and between cushions. -
Page 10: Dusting Brush
Accessories (continued) Dusting Brush For furniture, blinds, bookshelves and lamp shades. Hand Turbo Tool Ideal for pet hair removal with this multi function air driven turbo tool. Note: Never run over the power cable with the floor tool. 2. Never touch the brush roller while the vacuum cleaner is connected to the mains power supply. -
Page 11: Instructions For Use
Instructions for Use Before using the appliance, unwind a sufficient length of cable and insert the plug into the power socket. A yellow mark on the power cable shows the ideal cable length. Don’t expend the cable beyond the red mark. Press the ON/OFF button to turn the vacuum on. -
Page 12: Maintenance
Maintenance IMPORTANT! Ensure the vacuum cleaner is not connected to the power supply when performing any maintenance procedures. Use a damp cloth and mild detergent when cleaning the appliance. Vacuum Cleaner Storage When not in use, ensure the cleaner is not connected to the power supply, and pull the power cable gently out of the power socket. - Page 13 Hand Turbo Brush Warning: Ensure the cleaner is not connected to the mains power supply when performing any maintenance procedures. Unlock the neck on the hand turbo brush by twisting anti-clockwise. Push the release buttons on the side of the Hand Turbo Brush down to unlock the external bristles.
- Page 14 Maintenance (continued) Pre Motor Filter Cleaning Remove the canister by pressing the dust container release button. Pull the clip on the handle of the dust canister to release the lid. Remove the filter, this can be washed with luke warm water. Key Points: Please note: when the dust container release button or the filter cover is not installed correctly, dust can get through the motor and cause damage to the vacuum.
- Page 15 Mesh Filter Cleaning Remove the canister by pressing the dust container release button. Remove the mesh filter and clean with luke warm water. Rear Motor HEPA and Carbon Filter Replacement The rear motor HEPA and carbon filter is installed behind the air outlet grid, this HEPA filter is washable.
- Page 16 Maintenance (continued) Cleaning and Changing the Air Inlet Filter • The air inlet filter should be cleaned at least twice a year or when it becomes visibly dirty. • Always operate the cleaner with filters installed, otherwise, reduced suction or motor damage may result.
- Page 17 Changing the Motorised Powerhead Drive Belt WARNING: To reduce the risk of electric shock, turn all power off from the unit and unplug the unit before performing any cleaning, maintenance or troubleshooting checks. Failure to do so may result in electric shock or personal injury. Depending on how much your vacuum is used, the motorised powerhead drive belt will occasionally require changing.
- Page 18 Holding the rotating brush, insert it into the end cap first and then into the groove on the other side. Replace the bottom plate. Please contact Hoover Customer Care: 1300 360 845 to find your local spare parts provider. Part Part Number...
-
Page 19: Troubleshooting
Troubleshooting Problems and Solutions If you come across a problem, please use the checklist of troubleshooting tips before ringing Hoover Customer Care. Fault Solutions The cleaner will not Check that the power cable is inserted securely; remove from the power supply turn on. - Page 20 Cyclonic Vacuum Cleaner with Deep Cleaning Powerhead Conditions of warranty Your Hoover cleaner, in the case of domestic use, has a two year Hoover Floorcare is unable to accept responsibility under this parts and labour warranty against product defects and failures when...