Table of Contents
Advertisement
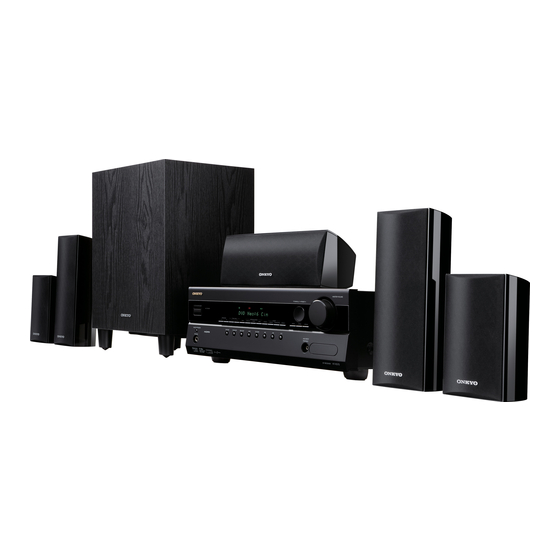
5.1ch Home Theater System
HT-S3200
AV Receiver (HT-R370)
Speaker Package (HTP-370)
Instruction Manual
Thank you for purchasing an Onkyo 5.1ch Home
Theater System. Please read this manual thoroughly
before making connections and plugging in the unit.
Following the instructions in this manual will enable
you to obtain optimum performance and listening
enjoyment from your new 5.1ch Home Theater Sys-
tem.
Please retain this manual for future reference.
Contents
Introduction ...................................2
Connection ..................................15
Turning On & First Time Setup ...35
Basic Operations.........................38
Using the Listening Modes ........47
Advanced Setup ..........................52
Controlling Other Components...60
Others...........................................66
E
n
Advertisement
Table of Contents

Related Manuals for Onkyo HT S3200


Summary of Contents for Onkyo HT S3200
-
Page 1: Instruction Manual
Introduction ...2 Connection ...15 HT-S3200 Turning On & First Time Setup ...35 Basic Operations...38 Using the Listening Modes ...47 Advanced Setup ...52 Controlling Other Components...60 Others...66... -
Page 2: Important Safety Instructions
WARNING AVIS RISK OF ELECTRIC SHOCK RISQUE DE CHOC ELECTRIQUE DO NOT OPEN NE PAS OUVRIR Important Safety Instructions... -
Page 3: Precautions
Precautions... -
Page 4: Speaker Precautions
Speaker Precautions... -
Page 5: Table Of Contents
Contents Introduction Connections Turning on & First Time Setup Basic Operations Using the Listening Modes Advanced Setup Controlling Other Components Others Package Contents AV receiver HT-R370 HT-R370 Remote controller and two batteries (AA/R6) Indoor FM antenna AM loop antenna... -
Page 6: Speaker Package Htp
Package Contents—Continued Speaker Package HTP-370 Front speakers (SKF-370 L/R) Center speaker (SKC-370/SKC-370C) Surround speakers (SKR-370 L/R) Subwoofer (SKW-370) Speaker Package Accessories Speaker cable for front speakers 11 ft. (3.5 m) Speaker cable for center speaker 10 ft. (3 m) Speaker cables for surround speakers 26 ft. (8 m) Speaker cables for subwoofer 13 ft. -
Page 7: Features
Features... -
Page 8: Front & Rear Panels
Front & Rear Panels Front Panel a b c a ON/STANDBY button (35) b STANDBY indicator (35) c SPEAKERS A & B buttons (15, 38) d Remote control sensor (14) e –, +, and TONE buttons (40) f Display g MOVIE/TV button (47) h MUSIC button (47) i GAME button (47) j DIMMER button (39) - Page 9 Front & Rear Panels—Continued t Input selector buttons (38) Display a A and B speaker indicators (15, 38) b MUTING indicator (39) c Listening mode and format indicators (47) d Tuning indicators (43) FM STEREO (43): AUTO (43): TUNED (43): e SLEEP indicator (39) f Message area g Audio input indicators...
-
Page 10: Rear Panel
Front & Rear Panels—Continued Rear Panel m n o a DIGITAL IN COAXIAL b DIGITAL IN OPTICAL 1 and 2 c COMPONENT VIDEO IN 1 and 2 d COMPONENT VIDEO OUT e HDMI IN 1–3 and OUT f AM and FM ANTENNA g MONITOR OUT h FRONT SPEAKERS A, CENTER, and SURR L/R SPEAKERS &... - Page 11 Front & Rear Panels—Continued m CBL/SAT IN n VCR/DVR IN/OUT o DVD/BD IN...
-
Page 12: Speaker Package
Speaker Package Front, Center, Surround, & Subwoofer speakers (SKF-370, SKC-370/SKC-370C, SKR-370, SKW-370) ■ Rear SKF-370 SKC-370/SKC-370C a Speaker terminals b Keyhole slots SKR-370 SKW-370... -
Page 13: Remote Controller
Remote Controller Controlling the AV receiver a ON/STANDBY button (35) b REMOTE MODE/INPUT SELECTOR buttons (38, 62–65) c TONE, +, and – buttons (40) d SP A/B button (15, 38) e Arrow [q]/[w]/[e]/[r] and ENTER buttons f SETUP button g LISTENING MODE buttons (47) h DIMMER button (39) i DISPLAY button (40) j MUTING button (39) -
Page 14: Installing The Batteries
Remote Controller—Continued Installing the Batteries Aiming the Remote Controller To open the battery compartment, press the small lever and remove the cover. 30° 30° Insert the two supplied batteries (AA/R6) in accordance with the polarity diagram inside the battery compartment. Replace the cover and push it shut. -
Page 15: Enjoying Home Theater
Enjoying Home Theater Speaker Sets A and B Remote AV receiver controller Center speaker (SKC-370/SKC-370C) Subwoofer (SKW-370) Tip: Speaker Set B: Sub Room speaker set A speaker set B Speaker set A Speaker set B Indicator Speaker Set A: Main Room Front left and right speakers (SKF-370 L/R) Surround left and right speakers (SKR-370 L/R) -
Page 16: Connecting The Av Receiver
Connecting the AV receiver Connecting Your Speakers Speaker Color 5/8"(15mm) Strip about 5/8" (15 mm) of insulation from the ends of the speaker cables. (Supplied speaker cables are already stripped.) FRONT SPEAKERS A OTHERS Unscrew the terminal. Fully insert the bare wire. Screw the terminal tight. - Page 17 Connecting the AV receiver—Continued 3/8"(10mm) Strip 3/8" (10 mm) of insulation from the ends of the speaker cables. (Supplied speaker cables are already stripped.) While pressing the lever, insert the wire into the hole, and then release the lever. Make sure that the terminals are gripping the bare wires, not the insulation.
-
Page 18: Wall Mounting
Connecting the AV receiver—Continued Wall Mounting Using the Rubber Stoppers for a More Stable Platform Using the Floor Pads for Subwoofer... -
Page 19: Connecting Antenna
Connecting the AV receiver—Continued Connecting Antenna AM ANTENNA push terminals FM ANTENNA jack Attach the FM antenna, as shown. ■ North American Model ■ Asian Models Use thumbtacks or something similar to fix the FM antenna into position. Assemble the AM loop antenna, inserting the tabs into the base, as shown. - Page 20 Connecting the AV receiver—Continued ■ Using a TV/FM Antenna Splitter...
-
Page 21: About Av Connections
Connecting the AV receiver—Continued About AV Connections Video/Audio Cable HDMI Video Cable Component video cable Composite video cable Audio Optical digital audio cable Coaxial digital audio cable Analog audio cable (RCA) Stereo mini plug cable Analog audio Composite video Jack Description HDMI Jack... -
Page 22: Connecting Audio And Video Signals To The Av Receiver
Connecting the AV receiver—Continued Connecting Audio and Video Signals to the AV receiver DVD/BD player, etc. Which Connections Should I Use? Speakers Video Signal Flow Chart DVD player, etc. AV receiver MONITOR OUT TV, projector, etc. Audio Signal Flow Chart DVD player, etc. -
Page 23: Connecting Components With Hdmi
Connecting the AV receiver—Continued Connecting Components with HDMI... -
Page 24: Making Hdmi Connections
Connecting the AV receiver—Continued Making HDMI Connections Step 1: Connect your HDMI-compatible TV to the AV receiver’s HDMI OUT jack. Step 2: Connect your HDMI-compatible player to the AV receiver’s HDMI IN 1, 2, or 3 jack. Step 3: Connect your HDMI-compatible player to an analog and/or digital audio input on the AV receiver. -
Page 25: Connecting A Tv Or Projector
Connecting the AV receiver—Continued Connecting a TV or Projector Step 1: Video Connection Step 2: Audio Connection Connection AV receiver OPTICAL Signal flow Ÿ Ÿ COAXIAL AUDIO VIDEO COMPONENT VIDEO IN TV, projector, etc. - Page 26 Connecting the AV receiver—Continued Connecting a DVD/BD player Step 1: Video Connection Step 2: Audio Connection Connection AV receiver OPTICAL Signal flow COAXIAL VIDEO AUDIO COMPONENT VIDEO OUT DVD/BD player DVD/BD player...
-
Page 27: Connecting A Vcr Or Dvr For Playback
Connecting the AV receiver—Continued Connecting a VCR or DVR for Playback Step 1: Video Connection Step 2: Audio Connection Connection AV receiver OPTICAL Signal flow COAXIAL VIDEO AUDIO COMPONENT VIDEO OUT VCR or DVR VCR or DVR... -
Page 28: Connecting A Vcr Or Dvr For Recording
Connecting the AV receiver—Continued Connecting a VCR or DVR for Recording Step 1: Video Connection Step 2: Audio Connection Connection AV receiver Signal flow VCR or DVD recorder Ÿ Ÿ VIDEO AUDIO VCR or DVR... - Page 29 Connecting the AV receiver—Continued Connecting a Satellite, Cable, Terrestrial Set-top box, or Other Video Source Step 1: Video Connection Step 2: Audio Connection Connection AV receiver OPTICAL Signal flow COAXIAL AUDIO VIDEO COMPONENT VIDEO OUT Satellite, cable, set-top box, etc.
-
Page 30: Connecting A Portable Audio Player
Connecting the AV receiver—Continued Connecting a Portable Audio player Step 1: Make the audio connection Portable Audio Player AUX INPUT AUDIO LINE OUT PORTABLE Connection AV receiver Signal flow Portable Audio Player ... -
Page 31: Connecting A Cd Player Or Turntable
Connecting the AV receiver—Continued Connecting a CD Player or Turntable ■ CD Player or Turntable (MM) with Built-in Phono Preamp Step 1: OPTICAL (CD) COAXIAL (DVD/BD) OPTICAL COAXIAL AUDIO Connection AV receiver ■ Turntable (MM) with no Phono Preamp Built-in AUDIO OUTPUT Phono preamp... - Page 32 Connecting the AV receiver—Continued Connecting a Cassette, CDR, MiniDisc, or DAT Recorder Step 1: OPTICAL (CD) COAXIAL (DVD/BD) OPTICAL Connection AV receiver COAXIAL AUDIO AUDIO Signal flow Cassette, CDR, MD, or DAT recorder Ÿ TV/TAPE TV/TAPE Cassette, CDR, MD, etc.
-
Page 33: Connecting An Ri Dock
Connecting the AV receiver—Continued Connecting an RI Dock ■ If Your iPod Supports Video: CBL/SAT CBL/SAT CBL/SAT ■ If Your iPod Doesn’t Support Video: TV/TAPE VCR/DVR VCR/DVR... -
Page 34: Connecting The Power Cord
Connecting the AV receiver—Continued Connecting Onkyo u Components Step 1: Step 2: Step 3: ■ Auto Power On/Standby ■ Direct Change ■ Remote Control Connecting the Power Cord REMOTE CONTROL e.g., CD player e.g., DVD player ANALOG AUDIO OUT ANALOG... -
Page 35: Turning On The Av Receiver
On the remote controller, press the [RECEIVER] button, followed by the [ON/STANDBY] button. ■ Did you connect a component to component video input or digital audio input? ■ Did you connect an Onkyo MD recorder, CD recorder, or RI Dock? ON/STANDBY RECEIVER... -
Page 36: First Time Setup
First Time Setup Component Video Input Setup Input selector Default assignment Press the [RECEIVER] button, followed by the [SETUP] button. Use the Up and Down [q]/[w] buttons to select “1.Component”, and then press [ENTER]. Use the Up and Down [q]/[w] buttons to select an input selector, and use the Left and Right [e]/[r] buttons to select:... -
Page 37: Changing The Input Display
First Time Setup—Continued Use the Up and Down [q]/[w] buttons to select “2.Digital Audio”, and then press [ENTER]. Use the Up and Down [q]/[w] buttons to select an input selector, and then use the Left and Right [e]/[r] buttons to select: - - - - - Press the [SETUP] button. -
Page 38: Basic Operations
Basic Operations Basic AV receiver Operation SPEAKERS A/B MASTER VOLUME Input selector AV receiver Remote controller AV receiver Remote controller Remote AV receiver controller INPUT SELECTOR SP A/B Use the AV receiver’s input selector buttons to select an input source. To select an input source with the remote controller, Press the [RECEIVER] button, and then press its INPUT SELECTOR buttons. -
Page 39: Muting The Av Receiver
Basic Operations—Continued Press [RECEIVER] first TONE, +, – DIMMER MUSIC OPTIMIZER –, +, TONE DISPLAY PHONES DIMMER Setting the Display Brightness Press the [RECEIVER] button, Remote controller and then press the remote controller’s [DIMMER] button repeatedly to select: dim, dimmer, or normal brightness. AV receiver Muting the AV receiver DISPLAY... -
Page 40: Using Headphones
Basic Operations—Continued Using Headphones Adjusting the Bass & Treble AV receiver Press the [TONE] button repeatedly to select either “Bass” or “Treble”. Use the TONE [–]/[+] buttons to adjust. Remote controller ■ Bass ■ Treble Displaying Source Information Press the [RECEIVER] button, and then press the [DISPLAY] button repeatedly to cycle through the available... -
Page 41: Basic Operations
Basic Operations—Continued Using the Music Optimizer To turn the Music Optimizer “On” or “Off”, use the AV receiver’s [MUSIC OPTIMIZER] button. Specifying the Digital Signal Format Format Display Dolby Digital Press and hold [AUDIO] button for about 8 seconds. While “Auto” is displayed (about 3 seconds), use the Left and Right [e]/[r] buttons to select: PCM, DTS, or Auto. -
Page 42: Listening To The Radio
Listening to the Radio AM/FM Frequency Step Setup ENTER SETUP Press the [RECEIVER] button, followed by the [SETUP] button. Use the Up and Down [q]/[w] buttons to select “8.Hardware”, and then press [ENTER]. Use the Up and Down [q]/[w] buttons to select “FM/AM” (North American/Taiwan models) or “AM Freq”... - Page 43 Listening to the Radio—Continued Listening to AM/FM Stations TUNING TUNING MODE Use the [AM] or [FM] input selector button to select “AM” or “FM”. ■ Auto Tuning Mode Press the [TUNING MODE] button so that the AUTO indicator appears on the display. Press the TUNING Up or Down [q]/[w] button.
- Page 44 Listening to the Radio—Continued ■ Tuning into Stations by Frequency Number buttons D.TUN Press the [AM] or [FM] button to select “AM” or “FM”, followed by the [D.TUN] button. Within 8 seconds, use the number buttons to enter the frequency of the radio station. Band DISPLAY Press the [DISPLAY] button...
- Page 45 Listening to the Radio—Continued Presetting AM/FM Stations ePRESETr MEMORY Tune into the AM or FM station you want to store as a preset. Press the [MEMORY] button. While the preset number is flashing (about 8 seconds), use the PRESET [e]/[r] buttons to select a preset from 1 through 40.
-
Page 46: Recording
Recording Use the input selector buttons to select the source that you want to record. On your recorder, start recording. On the source component, start playback. Camcorder video signal audio signal CD player Prepare the camcorder and CD player for playback. -
Page 47: Using The Listening Modes
Using the Listening Modes Selecting the Listening Modes MUSIC MOVIE/TV GAME ■ [MOVIE/TV] button ■ [MUSIC] button ■ [GAME] button MOVIE/TV MUSIC ■ [MOVIE/TV] button ■ [MUSIC] button ■ [GAME] button ■ [STEREO] button STEREO GAME... -
Page 48: Listening Modes Available For Each Source Format
Using the Listening Modes—Continued Listening Modes Available for Each Source Format Listening Button Mode Direct Stereo Mono Orchestra Unplugged Studio-Mix TV Logic Game-RPG Game-Action Game-Rock Game-Sports AllChStereo FullMono T-D (Theater- dimensional) Speaker layout ✔ ✔ ✔ ✔ ✔ ✔ ✔ ✔... - Page 49 Using the Listening Modes—Continued Listening Button Mode Direct Stereo Mono PLII Movie PLII Music PLII Game Neo:6 Cinema Neo:6 Music Orchestra Unplugged Studio-Mix TV Logic Game-RPG Game-Action Game-Rock Game-Sports AllChStereo FullMono (Theater- dimensional) Speaker layout ✔ ✔ ✔ ✔ ✔ ✔...
-
Page 50: Using The Listening Modes
Using the Listening Modes—Continued Listening Button Mode Direct Stereo Mono Dolby Digital/ DTS/ DTS 96/24 Orchestra Unplugged Studio-Mix TV Logic Game-RPG Game-Action Game-Rock Game-Sports AllChStereo FullMono (Theater- dimensional) Speaker layout ✔ ✔ ✔ ✔ ✔ ✔ ✔ ✔ ✔ ✔ ✔... -
Page 51: About The Listening Modes
Using the Listening Modes—Continued About the Listening Modes Direct Stereo Mono Dolby Pro Logic II • Dolby Pro Logic II Movie • Dolby Pro Logic II Music • Dolby Pro Logic II Game Dolby Digital DTS 96/24 DTS Neo:6 • Neo:6 Cinema •... -
Page 52: Advanced Setup
Advanced Setup Common Procedures in Setup Menu ENTER SETUP Number Buttons Speaker Settings 3. Sp Config (Speaker Configuration) Remote Press the [RECEIVER] button followed by indicator the [SETUP] button. Use the Up and Down [q]/[w] buttons to RECEIVER select the function, and then press the [ENTER] button. - Page 53 Advanced Setup—Continued Small” Speaker cone diameter Crossover frequency 4. Sp Distance (Speaker Distance)
- Page 54 Advanced Setup—Continued 5. Level Cal (Speaker Levels Calibration) 6. Equalizer (Equalizer Settings)
-
Page 55: Advanced Setup
Advanced Setup—Continued Audio Adjust Settings 7. Audio Adjust Multiplex/Mono Settings PLII/Neo:6 Settings... - Page 56 Advanced Setup—Continued Audyssey Settings...
-
Page 57: Hardware Setup
Advanced Setup—Continued T-D (Theater-Dimensional) Setting Hardware Setup 8. Hardware Remote ID While holding down the [RECEIVER] button, press and hold down the [SETUP] button until the Remote indicator lights up (about 3 seconds). Use the number buttons to enter ID 1, 2, or 3. Tuner 20°/40°... -
Page 58: Using The Audio Settings
Advanced Setup—Continued Using the Audio Settings Tone Control Settings Late Night Function CinemaFILTER Press the [RECEIVER] button followed by the [AUDIO] button. Use the Up and Down [q]/[w] buttons to RECEIVER select an item. Use the Left and Right [e]/[r] buttons to qwer change the setting. - Page 59 Advanced Setup—Continued Audyssey Dynamic Volume™ EX.BASS Music Optimizer Speaker Levels A/V Sync...
-
Page 60: Controlling Other Components
Remote indicator REMOTE MODE AUDIO Number buttons See page 61 for the Onkyo component’s remote control code. While holding down the REMOTE MODE button to which you want to enter a code, press and hold down the [DISPLAY] button until the Remote indicator lights up (about 3 seconds). -
Page 61: Resetting The Remote Controller
Controlling Other Components—Continued Make sure the Onkyo component is connected with an u cable and an analog audio cable (RCA). Enter the appropriate remote control code to the REMOTE MODE button. Press the REMOTE MODE button, point the remote controller at the AV receiver, and operate the component. - Page 62 Controlling Other Components—Continued Controlling a DVD Player, or DVD Recorder Press the appropriate REMOTE MODE button first a ON/STANDBY button b TOP MENU button c Arrow [q]/[w]/[e]/[r] and ENTER buttons d SETUP button e Playback buttons f REPEAT button g SEARCH button h Number buttons i DISPLAY button j MUTING button (39)
-
Page 63: Controlling Other Components
Controlling Other Components—Continued Controlling a CD Player, CD Recorder, or MD Player Press the appropriate REMOTE MODE button first a ON/STANDBY button b Arrow [q]/[w]/[e]/[r] and ENTER buttons c SETUP button d Playback buttons e REPEAT button f SEARCH button g Number buttons h DISPLAY button i MUTING button (39) -
Page 64: Controlling An Ri Dock
Controlling Other Components—Continued Controlling an RI Dock Press the appropriate REMOTE MODE button first a ON/STANDBY button b TOP MENU button c Arrow [q]/[w] and ENTER buttons* d Previous [7] button e Fast Reverse [5] button f Pause [3] button g REPEAT button* h DISPLAY button* i MUTING button (39) -
Page 65: Controlling A Cassette Recorder
Controlling Other Components—Continued r PLAY MODE button Controlling a Cassette Recorder Press the appropriate REMOTE MODE button first s RANDOM button* a ON/STANDBY button b Previous and Next [7]/[6] buttons c Rewind and Fast Forward [5]/[4] buttons d Reverse Play [t] button e Play [1] button f MUTING button (39) g VOL [q]/[w] button (38) -
Page 66: Troubleshooting
Troubleshooting To reset the AV receiver to its factory defaults, turn it on and, while holding down the [VCR/DVR] button, press the [ON/STANDBY] button. “Clear” will appear on the display and the AV receiver will enter Standby mode. Power Can’t turn on the AV receiver The AV receiver turns off as soon as it’s turned Audio There’s no sound or it’s very quiet... - Page 67 Troubleshooting—Continued There’s no sound with a certain signal format Can’t get 5.1-channel playback The volume cannot be set to 79 Noise can be heard The Late Night function doesn’t work About DTS signals Video There’s no picture There’s no picture from a source connected to an HDMI IN Tuner Reception is noisy, stereo FM reception suffers...
- Page 68 Troubleshooting—Continued Can’t control other components Recording Can’t record Others The sound changes when I connect my headphones How do I change the language of a multiplex source The u functions don’t work The following settings can be made for the composite video inputs...
-
Page 69: Specifications
Specifications ■ Video Inputs ■ Video Outputs ■ Audio Inputs ■ Audio Outputs... -
Page 70: Ch Home Theater Speaker Package
Specifications—Continued ■ Passive Subwoofer (SKW-370) ■ Front Speaker (SKF-370) ■ Center Speaker (SKC-370) ■ Center Speaker (SKC-370C) ■ Surround Speaker (SKR-370) - Page 71 Memo...
- Page 72 ONKYO U.S.A. CORPORATION ONKYO EUROPE ELECTRONICS GmbH ONKYO EUROPE UK Office http://www.onkyo.com/ ONKYO CHINA LIMITED...
- Page 73 Thank you for purchasing this product. This quick setup sheet shows the typical hookup method for connecting speakers and AV components (OVDIBD player, TV, cablelsateliite receiver). For more detailed hookup Information and operating instructions, please see the Instruction Manual. First of all, turn on speaker set A. Press the SPEAKERS (A] button on the front panel.
- Page 74 AV Component Hookup II you have an HDM1-<:ompatible TV and players, you can connect them to the receiver with HOMI cables. audio and video signal' received Tl1e HDMllnpulS are output by the HOMI OUT To listen through speakers connected to ttle AV receiver, please make audio connections shown below.
- Page 75 (USA and Canada) Product Registration Thank you for purchasing this Onkyo product. In order to protect your investment and to receive information on new products and updates, please register. Please visit our web site for your online registration at: www.us.onkyo.com/prodreg_form.cfm (For USA customers) www.onkyo.ca/prodreg_form.cfm (For Canadian customers)
- Page 76 Onkyo product to an Onkyo Authorized Independent Service Center, all shipping arrangements must be made by you and all shipping charges and insurance must be fully prepaid. Any Onkyo product shipped in its entirety must be shipped in its original carton. Onkyo will pay all return shipping charges for Onkyo products that have been serviced under this warranty.
- Page 77 5. Products that have had their serial numbers altered or removed. 6. Products purchased in "AS IS" condition. 7. Products that have been altered or repaired by anyone other than Onkyo or an Onkyo authorized independent service station in a manner that has affected their performance, stability or reliability.
- Page 78 1. La presente garantie n'est valide qu'au Canada. Pour etre couvert par la presente garantie, Ie produit Onkyo en cause doit etre achete directement aupres de Onkyo ou d'un marchand autorise Onkyo au Canada et la personne qui desire se prevaloir de la garantie doit etre un resident du Canada. La presente garantie ne vise que I'acheteur d'origine et elle ne peut etre cedee a une autre personne.