
Related Manuals for Daikin R22


Summary of Contents for Daikin R22
- Page 1 INSTALLATION MANUAL R22 SPLIT SERIES Installation Manual English R22 Split Series MODELS FDM20JEV1K RD20JEV1K FDM25JEV1K RD25JEV1K FDM30JEV1K RD30JEV1K FDM40JEV1K RD40JEV1K RD40JEY1K FDM50JEV1K RD50JEY1K FDM60JEV1K RD60JEY1K...
-
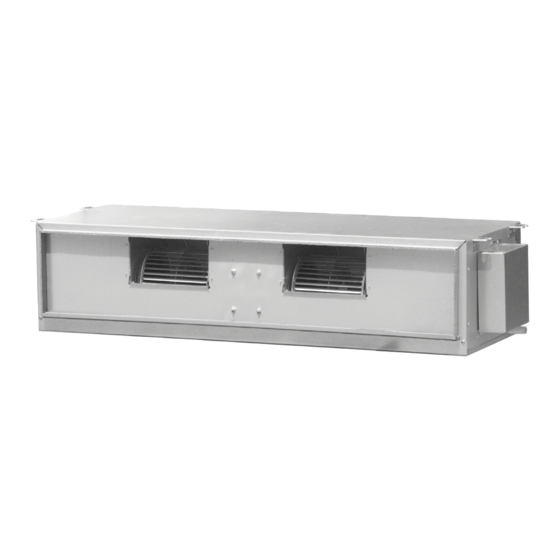
Page 3: Outline And Dimensions
OUTLINE AND DIMENSIONS Indoor Unit All dimensions are in mm Dimension Model FDM20JEV1K 1041 1002 962 1065 FDM25JEV1K 1176 1137 1097 1200 Indoor Unit All dimensions are in mm Dimension Model FDM30JEV1K 292 1295 232 128 1228 1185 284 1262 460 FDM40JEV1K... - Page 4 OUTLINE AND DIMENSIONS Indoor Unit All dimensions are in mm Dimension Model FDM50JEV1K 1369 1326 1287 FDM60JEV1K 1569 1526 1487 Outdoor Unit All dimensions are in mm Dimension Model RD20JEV1K 855 628 328 520 181 44 93 149 101 113 603 126 164 17 34 23 73 75 362 RD25/30JEV1K 855 730 328 520 182 44 93 149 101 113 603 126 164 17 34...
- Page 5 Outdoor Unit All dimensions are in mm Dimension Model RD40JEV1K RD40JEY1K 1030 852 428 410 412 827 72 196 91 488 448 142 141 83 RD50JEY1K RD60JEY1K...
-
Page 6: Safety Precautions
INSTALLATION MANUAL This manual provides the procedures of installation to ensure a safe and good standard of operation for the air conditioner unit. Special adjustment may be necessary to suit local requirements. Before using your air conditioner, please read this instruction manual carefully and keep it for future reference. This appliance is intended to be used by expert or trained users in shops, in light industry and on farms, or for commercial use by lay persons. -
Page 7: Installation Diagram
INSTALLATION DIAGRAM Indoor unit Hanger Return Duct Supply Duct Wrap the insulated pipe with the À nishing tape from bottom to top Drain Piping Thermal Insulation Air Intake Air Intake Air Discharge Outdoor unit... -
Page 8: Installation Of The Indoor Unit
INSTALLATION OF THE INDOOR UNIT The indoor unit must be installed such that there is no short Center distance of axle (see drawing below) circuit of the cool discharge. Respect the installation clearance. Do not put the indoor unit where there is direct sunlight on unit. The location is suitable for piping and drainage and it must have a large distance between a door and unit. - Page 9 Ceiling Concealed Drain Piping Work Unit : mm • The drain pipe must be installed as shown in the diagram (see diagram above) to avoid damage caused by leaks and condensation. • For the best result, keep the piping as short as possible. Slant the piping at an angle to improve the Á ow. •...
-
Page 10: Installation Of The Outdoor Unit
INSTALLATION OF THE OUTDOOR UNIT As condensing temperature rises, evaporating temperature rises and cooling capacity drops. In order to achieve maximum cooling capacity, the location selected for outdoor unit should fulÀ ll the following requirements: • Install the condensing (outdoor) unit in a way such that the hot air distributed by the outdoor condensing unit cannot be drawn in again (as in the case of short circuit of hot discharge air). -
Page 11: Installation Clearance
INSTALLATION CLEARANCE • Outdoor units must be installed such that there is no short circuit of the hot discharge air or obstruction to smooth air Á ow. Select the coolest possible place where intake air should not be hotter than the outside temperature (refer to operating range). Inlet Service Discharge... -
Page 12: Piping Connection To The Units
Piping Works And Flaring Technique Piping Connection To The Units • Do not use contaminated or damaged copper tubing. If any • Align the center of the piping and sufÀ ciently tighten the piping, evaporator or condenser had been exposed or had Á... -
Page 13: Electrical Connection
ELECTRICAL CONNECTION IMPORTANT: These values are for information only, they should be checked and selected to comply with the local and/or national codes and regulations. They are also subjected to the type of installation and size of conductors. ** The appropriate voltage range should be checked with data label on the unit. FDM20JEV1K - RD20JEV1K FDM25JEV1K - RD25JEV1K COMP... - Page 14 FDM40JEV1K - RD40JEV1K Power Supply Cable COMP Indoor unit Outdoor unit Terminal Block Terminal Block COMP There must be an all pole disconnection in the supply mains with a contact Interconnection cable separation of at least 3mm. Model Indoor FDM40JEV1K Outdoor RD40JEV1K Voltage range**...
- Page 15 FDM50JEV1K - RD50JEY1K FDM60JEV1K - RD60JEY1K COMP COMP Outdoor unit Interconnection cable Terminal Block Indoor unit Terminal Block Power Supply Cable There must be an all pole disconnection in the supply mains with a contact separation of at least 3mm. Model Indoor FDM50JEV1K...
- Page 16 • All wires must be À rmly connected. • Make sure all the wire do not touch the refrigerant pipings, compressor or any moving parts. • The connecting wire between the indoor unit and the outdoor unit must be clamped by using provided cord anchorage. •...
-
Page 17: Vacuuming And Charging
VACUUMING AND CHARGING Vacuuming is necessary to eliminate all moisture and air from the system. The series II Outdoor Unit is provided with Á are valve À ttings. Vacuuming The Piping And The Indoor Unit Except for the outdoor unit which is pre-charged with Refrigerant Piping Allen key Flare nut... -
Page 18: Additional Charge
= 302.5[g] SPECIAL PRECAUTIONS WHEN CHARGING UNIT WITH SCROLL COMPRESSORS These precautions are intended for use with Scroll compressors only with R22 and R410A refrigerants but are not applied to others competitive Scroll compressors. Scroll compressors have a very high volumetric efÀ ciency and quickly pump a deep vacuum if there is insufÀ cient refrigerant in the system or if refrigerant is added too slowly. -
Page 19: Indicator Lights
! CAUTION • Manifold Gauge will show cylinder pressure rather than suction pressure if the cylinder valve and Manifold valve “A” are both open. There are many ways of charging liquid in a “controlled manner” into the suction side:- Use valve A on the manifold gauge set Use the valve on the refrigerant cylinder Charge through a Shredder valve Use a hose with a Shredder valve depressor... -
Page 20: Operating Range
OPERATING RANGE COOLING Outdoor DB (°C) Indoor WB (°C) DB = Dry Bulb WB = Wet Bulb OVERALL CHECKING Ensure the following, in particular:- 2) Watch out for the following:- 1) The unit is mounted solidly and rigid in position. a) Is the electric plug À... -
Page 21: Service And Maintenance
SERVICE AND MAINTENANCE Service Parts Maintenance Procedures Period Indoor Air Filter Remove any dust adhered on the À lter by using a vacuum cleaner or At least once every wash in lukewarm water (below 40°C) with neutral cleaning detergent. 2 weeks. Rinse well and dry the À... - Page 22 MEMO...
- Page 24 Lot 60334, Persiaran Bukit Rahman Putra 3, Head offi ce: Taman Perindustrian Bukit Rahman Putra, Umeda Center Bldg., 2-4-12, Nakazaki-Nishi, Kita-ku, 47000 Sungai Buloh, Osaka, 530-8323 Japan Selangor Darul Ehsan, Tokyo offi ce: Malaysia. JR Shinagawa East Bldg., 2-18-1, Konan, Minato-ku, Tokyo, 108-0075 Japan http://www.daikin.com/global_ac/...