Table of Contents
Advertisement
Quick Links
Models:
SERA2B, SERA2W,
SERA2W330033,
SERA2B330033,
SERA2B30,
SERA2W30,
SERA2B33,
SERA2W33,
SERA2B300293,
SERA2W300293
CAUTION: Use this setup
procedure before attempt-
ing to use this brewer.
Failure to follow the instructions can
result in personal injury or void the
warranty.
IMPORTANT: Equipment
to be installed to comply
with applicable govern-
mental plumbing/electrical codes
having jurisdiction.
CAUTION: DO NOT
connect this brewer to hot
water. The inlet valve is
not rated for hot water.
ISO 9001:2008 REGISTERED
WILBUR CURTIS CO., INC.
6913 Acco Street
Montebello, CA 90640-5403
For the latest information go to
www.wilburcurtis.com
Tel: 800-421-6150
Fax: 323-837-2410
Service Manual – Seraphim Coffee Brewer
Important Safeguards/Symbols
This equipment is designed for commercial use. Any servicing other than cleaning and routine maintenance
should be performed by an authorized Wilbur Curtis Co., Inc. service technician.
• DO NOT immerse the unit in water or any other liquid.
• To reduce the risk of fire or electric shock, DO NOT open service panels. There are no user serviceable
parts inside.
• Keep hands and other items away from hot areas of the unit during operation.
• Never clean with scouring powders or harsh chemicals.
Symbols:
WARNING/CAUTION – To advise about conditions that may result in property damage,
personal injury or death
IMPORTANT – Notes about proper operation
Sanitation requirements
The Curtis G4 brewer is preset at the factory for optimal performance.
Following are the factory settings for the G4 Coffee Brewing System:
• Brew Temperature = 200°F
System Requirements:
• Water Source 20 – 90 psi (138 – 620 kPA) with a minimum flow rate of 2 gpm (7.5 lpm).
NOTE: A water filtration system must be used to help maintain trouble-free operation. Air must be
purged from the cartridge prior to connection to equipment. In areas with extremely hard water,
we highly recommend the use of a Curtis approved water filter. For our full line of filters, please visit
www.wilburcurtis.com.
• Electrical: See attached schematic for standard model or visit www.wilburcurtis.com for your model.
NOTE: Electrical source should have a minimum 30 A internal common trip circuit breaker between
the brewer and the main supply, which breaks all poles with a contact separation of at least 3 mm.
NSF International requires the following water connection:
1. A quick disconnect or additional coiled tubing (at least 2x the depth of the unit) is required so
that the unit can be moved for cleaning.
2. This brewer must be installed with adequate back-flow protection to comply with applicable
federal, state and local codes.
3. Water pipe connections and fixtures directly connected to a potable water supply shall be
sized, installed and maintained in accordance with federal, state and local codes.
INSTALLATION INSTRUCTIONS
CAUTION: Avoid Injury. Do not turn on water or electricity until the brew head and water tower
assemblies are properly installed.
Please adhere to these installation instructions to ensure proper set up.
Confirm that the planned location for the coffee brewer has the proper electric and water supply. In
addition, water drain pipes and the floor stability should be considered.
The water tower should be installed and grounded properly by a qualified installer or service
technician. This unit must be electrically grounded in accordance with local codes.
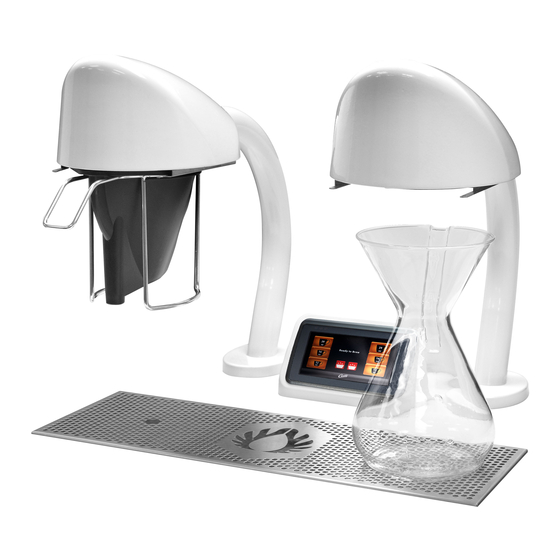
Carefully unpack the Seraphim brewer components from the shipping crates.
W
C
C
ilbur
urtis
o
• Brew Volume = Set to vessel requirement.
continued...
., i
.
nC
1
Advertisement
Table of Contents

Related Manuals for Curtis SERA2B


Summary of Contents for Curtis SERA2B
-
Page 1: Installation Instructions
Important Safeguards/Symbols This equipment is designed for commercial use. Any servicing other than cleaning and routine maintenance should be performed by an authorized Wilbur Curtis Co., Inc. service technician. • DO NOT immerse the unit in water or any other liquid. - Page 2 STEP 1. BEFORE INSTALLATION – PREPARE THE COUNTER TOP Holes must be cut into the counter top prior to installing the brewer. The hole pattern is critical for proper operation of the Seraphim coffee brewer. See Figure 2 below for the basic counter layout.
-
Page 3: Step 2. Install The Drip Tray
STEP 2. INSTALL THE DRIP TRAY 8 3/4" INSET FRAME REMOVE FOR FLUSH INSTALLATION 21 3/4" 3/4" 1 5/8" 1" ø1.125 7 1/4" 20 1/4" Figure 3 - Drip Tray Dimensions After preparing the drip tray location, according to Step 1, apply Teflon plumbing tape to the threads on the supplied pipe nipple and thread into the bottom of the drip tray. - Page 4 STEP 3. INSTALL THE BREW HEAD CAUTION: Do not open the brew head units! The length of the wires and tubing are fixed and set at the factory. Do not splice or extend the tubes that come from beneath the brew head assembly. Ample tube length is provided and the tubes will need to be shortened in most cases for proper installation.
-
Page 5: Spray Head Assembly
Use the screws to attach the plates to the chassis as shown in Figure 6.2 (back view). RIGHT BREW LEFT BREW Connect the brew head cables to the connectors inside HEAD CABLE HEAD CABLE the chassis. The connectors are labeled right and left to indicate the correct cable connection. -
Page 6: Exhaust Lines
Exhaust Lines The water tower is equipped with two outlet fittings that vent steam and condensation from the water tank inside the chassis. Run the provided exhaust line tubing from these fittings to a drain to drain off condensation. IMPORTANT: The exhaust line tubing must be installed so that ends do not become submerged in water to avoid backup. - Page 7 Your Curtis G4/Gold Cup Series Brewer is factory preset for optimal performance. After connection to water and power; turn on the brewer at the rear toggle switch. You will hear a beep and the status lights will come on for a moment. The screen will display . Next is displayed. Water will fill the tank (3-5 minutes depending on water flow rate). When the proper level is reached will appear on the screen. It takes approximately 45 minutes to reach the set point tempera- ture. The screen will display when temperature reaches the set point. The unit is now ready to brew. READY TO BREW COFFEE BREWING INSTRUCTIONS 1. Brewer should be ON. Confirm this at the toggle switch on the back of the water tower, at the lower right side. The touch-screen should...
- Page 8 SCROLL UNDO CURTIS LOGO ENTER To enter programming tap Curtis logo five times to enter programming MAIN MENU. Programming ACCESS CODE screen. Default is 1 2 3 4. MAIN MENU screen contains six control icons: Once the code is entered, press OK. The Recipes, Control Settings, Brew Settings, Model MAIN MENU screen will appear.
- Page 9 Menu Tree This chart explains how to enter programming mode and thee menu selections available from the MAIN MENU. SELECTIONS FOR COFFEE BREWER MODELS Model Select Recipes Control Settings Brew Settings Settings Summary Exit Coffee Gemini Gemini IF One Batch Single Gourmet Std ThermoPro...
-
Page 10: Menu Features
Menu Features... - Page 11 Menu Features Default Recipe Brew Button Settings (Paper Cup) NOTE: Recipe Defaults are for Seraphim Models Only. Custom Recipe feature is “enabled”.
-
Page 12: System Fault Messages
System Fault Messages Brew count "Gallons Since Reset" exceeds Maintenance Required Maintenance Required programmed Preventative Maintenance period. If the Inlet valve remains on longer than XX Seconds (during the brew cycle only) and repeats TWICE during that brew cycle. It shall clear upon Low Water Flow Warning Low Water Flow the next brew and if the same low flow exists... - Page 13 Brew Access Code Chemex Chemex Brew Bakset Brew Bakset Tap “Curtis” logo five times to enter programming mode Enter 1-2-3-4 to access the MAIN MENU Temperature Settings The PASSWORDS screen will display two selections, Programming Password or Brew Password. To set up or...
- Page 14 Illustrated Parts Main View of Water Tower Item № Part № Description WC-61643 COVER, TOP SERA WC-2948 FITTING, TANK OVERFLOW 304SST WC-8559* RELAY, SOLID STATE 230V MAX W/INTEGRATED HEAT SINK WC-847* VALVE, INLET 2GPM 120V (SERA2) WC-883* VALVE, INLET 2 GPM 240V 10W (SERA33) WC-10008 UNIVERSAL HOST ADAPTER (USB-G4) WC-1065...
- Page 15 Illustrated Parts Back View of Water Tower Item № Part № Description WC-589-101* TRANSFORMER, 120VAC-24V 4.8A W/TERMINALS (SERA2) WC-589-102 TRANSFORMER,240VAC- 24V 4.8VA (SERA33) WC-10001* CONTROL MODULE, UPM 120/220V G4 WC-1064* POWER SUPPLY,100-240Vac X12Vdc W/CONNECTORS WC-1066* FAN, CHASSIS W/CONNECTORS SERAPHIM WC-1040* PUMP, WATER CENTRIFUGAL 120V 60Hz WC-5307* TUBE, 3/16 ID x 3/32W SILICONE (SOLD BY THE FOOT)
- Page 16 Description WC-66099-BLK HEAD, BREW ASSY SERAPHIM BLACK WC-66099-WHT HEAD, BREW ASSY SERAPHIM WHITE SERA-BH-BLK120 BREW HEAD ASSY, BLACK 120V COMPLETE (SERA2B) SERA-BH-WHT120 BREW HEAD ASSY, WHITE 120V COMPLETE (SERA2W) SERA-BH-BLK200 BREW HEAD ASSY, BLACK 200V (SERA33B) SERA-BH-WHT200 BREW HEAD ASSY, WHITE 200V (SERA33W)
- Page 17 Illustrated Parts Heating Tank Item № Part № Description WC-53162 TUBE, RETURN ASSEMBLY SERA WC-37008 KIT, TANK LID ROUND WC-43067* O-RING, 4-1/2 I.D. x Ø.285 C.S. SILICONE WC-5527K* KIT, PROBE WATER LEVEL O-RING & NUT WC-62107 TANK COMPLETE, (SERA2) WC-62107-33 TANK COMPLETE, (SERA33) WC-2221 REDUCER, 3/16”...
- Page 18 Illustrated Parts Touch Screen & Drip Tray Item № Part № Description WC-37580* KIT, UCM & BACK PLATE WC-66095-BLK HOLDER, UCM SERAPHIM BLACK WC-66095-WHT HOLDER, UCM SERAPHIM WHITE SERA-UH-BLK UCM HOLDER ASSY, BLACK COMPLETE SERA-UH-WHT UCM HOLDER ASSY, WHITE COMPLETE WC-65034 SCREEN, DRIP TRAY SERAPHIM WC-65035...
- Page 19 Electrical Schematic SERA2...
-
Page 20: Weekly Cleaning
Cleaning the Coffee Brewer Regular cleaning and preventive maintenance is essential in keeping your coffee brewer looking and working like new. CAUTION – Do not use cleaning liquids, compounds or powders containing chlorine (bleach) or corrosives. These products promote corrosion and will pit the stainless steel parts. USE OF THESE PRODUCTS WILL VOID THE WARRANTY. - Page 21 Caring for the LCD Display To remove light smears or grime, wipe the surface with a dry, clean, soft cloth. To remove severe grime, wipe the sur- face with a soft cloth dampened in clean water or diluted mild detergent. Then wipe immediately with a dry cloth. CAUTION: Do not push, rub or hit the surface with your fingernail or a sharp object.
- Page 22 Rough-In Drawing SERA2...
-
Page 24: Product Warranty
All returned equipment must be properly re-packaged in the original carton and received by Curtis within 45 days following the issuance of a RMA. No units will be accepted if they are damaged in transit due to improper packaging.