
Related Manuals for Curtis CAFE Series


Summary of Contents for Curtis CAFE Series
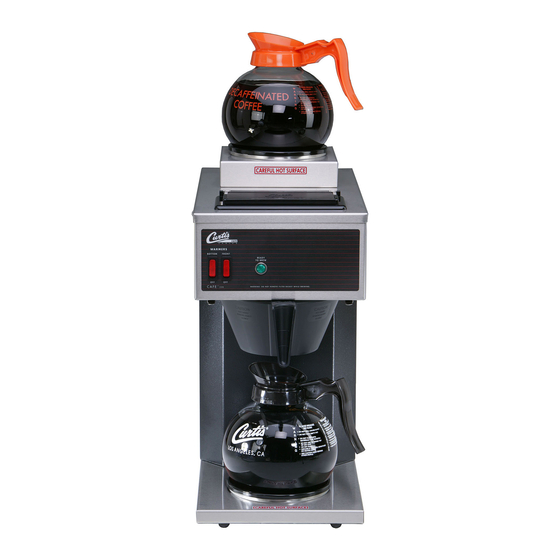
- Page 1 USER GUIDE CAFE Series Glass Decanter Pourover Coffee Brewing System Style Varies READ AND SAVE THESE INSTRUCTIONS NOTICE TO INSTALLER: Please leave this booklet with the machine.
-
Page 2: Table Of Contents
............... IP66 ................. IP192 ..........................ES68 ..........................ES69 ............................................................................. Contact Information Wilbur Curtis Co., Inc. 6913 Acco Street | Montebello, CA 90640 US Phone: 323-837-2300 | Toll Free: 800-421-6150 Email: csrassistance@wilburcurtis.com | Web: www.wilburcurtis.com . - 4:00 . PT Email: techsupport@wilburcurtis.com... -
Page 3: Fs35
KEY FEATURES/SPECIFICATIONS/SYSTEM REQUIREMENTS FS35 Key Features • Pourover operation – No plumbing required. • Powerful heating element provides quick recovery for faster brewing. • Large-volume water tank for greater brewing capacity. • Space-saving design. • Stainless steel construction with textured black powder coating. Speci cations (Selected Models) Electrical Supply Requirements MODEL #... -
Page 4: Is2
INSTRUCTIONS could result in personal injury or void the warranty. • This appliance is designed for commercial use. Any service other than cleaning and preventive maintenance should be performed by an authorized Wilbur Curtis service technician. • serviceable parts inside. - Page 5 IMPORTANT SAFEGUARDS CE Requirements • This appliance must be installed in locations where it can be overseen by trained personnel. • • This appliance is not suitable for outdoor use. • • • This appliance must not be cleaned by water jet. •...
-
Page 6: Ii4
INSTALLATION INSTRUCTIONS WARNING: properly grounded. WARNING: IMPORTANT: Installation Instructions Installation Requirements • A secure surface capable of supporting the weight of the appliance. • For appliances without an attached cord set: Appropriately sized, UL listed, grounding type power cable to long enough •... -
Page 7: Ii5
INSTALLATION INSTRUCTIONS NOTICE - This brewer is shipped with the thermostat turned ON. DO NOT plug in the brewer before pouring 3 pots/192 oz. of water into the opening as instructed below; damage to the heating element and/or thermostat will result. Installation Leveling WARNING: Use the leveling legs to level the... - Page 8 INSTALLATION INSTRUCTIONS Powering Up the Brewer WARNING: Connect the power cords only to the appropriate type and size electrical outlet. If the electrical outlet is not compatible with the power cords, have it upgraded by a licensed electrician. Do not modify the power plug. Do not use an extension cord.
-
Page 9: Oi28
OPERATING INSTRUCTIONS OI28 Brewing Instructions WARNING - TO AVOID SCALDING, AVOID SPLASHING. The brew basket contains hot coffee grounds. Keep body parts clear of the brewer during brewing. Allow the brew basket to drain before removing it. NOTICE - INSTALLATION INSTRUCTIONS section. -
Page 10: Ci1
CLEANING INSTRUCTIONS WARNING: HOT SURFACES - To avoid injury, allow the brewer and dispenser(s) to cool before cleaning. NOTICE - Do not use cleaning liquids, compounds or powders containing chlorine (bleach) or corrosives. USE OF THESE PRODUCTS WILL VOID THE WARRANTY. Cleaning The Brewer - Daily WARNING: DO NOT immerse the brewer in water or any other liquid. -
Page 11: Ci11
CAUTION: Avoid injury or damage when cleaning glass decanters: Do not clean with materials that scratch. Curtis glass decanters are dishwasher safe, or may be hand washed. To clean, prepare a mild solution of detergent and warm water or urn cleaning solution intended for coffee decanters. -
Page 12: Ci12
CLEANING INSTRUCTIONS CI12 De-liming Procedure* NOTICE -... - Page 13 PROGRAMMING GUIDE PG11 Thermostat Adjustment WARNING - The brewer is equipped with either an electronic or mechanical (capillary) type thermostat. The tank temperature (thermostat) adjustment procedure is different for each type. Electronic Thermostat Mechanical Thermostat Electronic Thermostat The electronic thermostat has two settings; 200°F (93°C) and 190°F (88°C). The factory default setting is 200°F. If operating the brewer at altitudes higher than 4000 feet (1200 m), set it to 190°F.
- Page 14 PROGRAMMING GUIDE PG11 Mechanical Thermostat The mechanical thermostat has an adjustment screw used to set the temperature. The factory default setting is 200°F (93°C). When operating the brewer at higher elevations, reduce the operating temperature by 2°F for each 1000 feet of elevation above 4000 feet (1200 m). Unplug the brewer power cord.
- Page 15 ROUGH-IN DRAWINGS RD41 CAFE1DB Series Coffee Brewers 18.50 in* 17.93 in [47.0 cm] [45.5 cm] 9.25 in [23.5 cm] 17.61 in [44.7 cm] 7.08 in [18.0 cm] 1.52 in [3.9 cm] * Units equipped with a toggle switch only CAFE GLASS DECANTER BREWER, ROUGH-IN DRAWING 052119A...
- Page 16 ROUGH-IN DRAWINGS RD41 CAFE2DB Series Coffee Brewers 18.50 in* 17.93 in [47.0 cm] [45.5 cm] 9.25 in [23.5 cm] 19.05 in [48.5 cm] 7.08 in [18.0 cm] 1.52 in [3.9 cm] * Units equipped with a toggle switch only CAFE GLASS DECANTER BREWER, ROUGH-IN DRAWING 052119A...
- Page 17 ROUGH-IN DRAWINGS RD41 CAFE3DB Series Coffee Brewers 17.93 in [45.5 cm] 18.50 in* [47.0 cm] 17.61 in [44.7 cm] 7.08 in [18.0 cm] 1.52 in 15.81 in [3.9 cm] [40.2 cm] * Units equipped with a toggle switch only CAFE GLASS DECANTER BREWER, ROUGH-IN DRAWING 052119A...
- Page 18 ILLUSTRATED PARTS LIST IP64 CAFE1DB, CAFE2DB, CAFE3DB - Main Chassis - Exploded View Water tank assemblies: - Domestic, see section IP66 - Export, see section IP192 CAFE GLASS DECANTER BREWER, ILLUSTRATED PARTS/RECOMMENDED PARTS 052219A...
-
Page 19: Ip64
TOP, WARMER ASSY 120V CAFÉ 2 25A GEM WC-68103 4 TOP, WARMER ASSY 220V CAFÉ 2 WC-39372 1,4 LABEL, SW PANEL CAFÉ 1 CURTIS SWITCH, WARMER (RED) 120V NEON WC-165 1,3,5 WC-39373 2,5 LABEL, SW PANEL CAFÉ 2 CURTIS SPST 20A/250V HI TEMP CAFE/AW WC-39374 3,6 LABEL, SW PANEL CAFÉ... -
Page 20: Ip66
ILLUSTRATED PARTS/RECOMMENDED PARTS IP66 WC-54117 - Tank Assembly WC-54117 - Tank Assembly - Parts List ITEM # PART # DESCRIPTION ITEM # PART # DESCRIPTION WC-54117 TANK, COMPLETE 1450W 120V CAFÉ THERMOSTAT, HI-LIMIT SPST 120V 15A AUTO-RE- WC-521 WC-54125-101 COVER, W/A HEATING TANK CAFE BUSHING, CONICAL .583ID X .945 OD .886LG 12mm WC-2627 WC-43062... -
Page 21: Ip192
ILLUSTRATED PARTS/RECOMMENDED PARTS IP192 WC-53043-30 - Tank Assembly WC-53043-30 - Tank Assembly - Parts List ITEM # PART # DESCRIPTION ITEM # PART # DESCRIPTION WC-53043 TANK, HEATING ASSY CAFÉ 1/2/3 2000W 220V GUARD, SHOCK/HEATING ELEMENT FOR SINGLE WC-4394* HEATING ELEMENT WC-54125-101 COVER, W/A HEATING TANK CAFE THERMOSTAT, HI-LIMIT SPST 120V 15A AUTO-RE-... -
Page 22: Es68
ELECTRICAL SCHEMATICS ES68 CAFE Pourover Brewers - 120 Volt MODEL AND ELECTRICAL TABLE MODEL HEATING ELEMENT CIRCUIT VOLTS WATTS AMPS HERTZ WIRE PHASE CAFE0AP10 WC-917 120VAC 1450W 12.1A 50/60HZ 2W + G 1-PHASE CAFE1DB10 WC- 917 A + B 120VAC 1550W 12.9A 50/60HZ 2W + G 1-PHASE... -
Page 23: Es69
ELECTRICAL SCHEMATICS ES69 CAFE Pourover Brewers - 220-240 Volt CAFE-30, ELECTRICAL SCHEMATIC 072221C... - Page 24 TROUBLESHOOTING GUIDE TG19 WARNING: Electric Shock Hazard - Scald and Burn Hazard - Troubleshooting Guidelines • • Use this troubleshooting guide along with the appropriate ELECTRICAL SCHEMATIC. • No Power, Nothing Works tank according to the INSTALLATION INSTRUCTIONS Water Does Not Heat At All Water Not Hot Enough READY TO BREW indicator lights, but the water does not heat, units with electronic thermostat READY TO BREW indicator lights, but the water does not heat, units with mechanical (capillary) thermostat...
- Page 25 TROUBLESHOOTING GUIDE TG19 Water Does Not Heat At All (cont.) READY TO BREW indicator not lit, all units No Power, Nothing Works ELECTRICAL SCHEMATIC Water Not Hot Enough PROGRAMMING GUIDE sensor Water Too Hot (Boiling or Excessive Steaming) IMPORTANT: PROGRAMMING GUIDE Water Heats More Slowly Than Usual Water Not Hot Enough Slow Flow From the Spray Head...
- Page 26 TROUBLESHOOTING GUIDE TG14 Warmer Does Not Heat NOTE coffee. First, check to make sure that the warmer function is not set to off in brewer program (warmers default). See the PROGRAMMING GUIDE section. Turn on power to the warmer that is not working. See the OPERATING INSTRUCTIONS to determine how the warmer operates for your model.
- Page 27 Return Merchandise Authorization (RMA): All returned equipment must be properly re-packaged in the original carton and received by Curtis within 45 days following the issuance of a RMA. NO UNITS OR PARTS WILL BE ACCEPTED WITHOUT A RETURN MERCHANDISE AUTHORIZATION (RMA).