Oki B 4500 User Manual
Oki fax machine users guide 4500
Hide thumbs
Also See for B 4500:
- Maintenance manual (171 pages) ,
- Specifications (2 pages) ,
- Guide utilisateur (124 pages)
Table of Contents
Advertisement
Quick Links
Advertisement
Table of Contents

Related Manuals for Oki B 4500


Summary of Contents for Oki B 4500
- Page 1 4500 OKIFAX User’s Guide...
-
Page 2: Symbols In This Book
Copyright 1998 by Oki. All rights reserved. Written and produced by Oki Europe Ltd. OKI and OKIFAX are registered trademarks of Oki Electric Industry Company, Ltd. Energy Star is a trademark of the United States Environmental Protection Agency. -
Page 3: Table Of Contents
Programming ... 18 Signal Tones ... 19 INSTALLATION ... 20 Getting Started ... 20 Where to Install Your Fax Machine ... 20 User’s Guide Unpacking ... 20 Setting Up Your Fax Machine ... 21 Installing Paper Trays & Stackers ... 21 Installing Toner Cartridge ... - Page 4 Loading Documents ... 36 Sending Fax to Single Location ... 37 Search Key Dialling ... 38 Real-Time Dialling ... 38 Redialling ... 38 Confirming Results ... 38 Stopping a Transmission ... 39 Receiving Faxes Manually ... 39 Receiving Faxes in Memory ... 39 Memory Reception ...
- Page 5 Clearing Printing Paper Jams ... 79 Replacing Toner Cartridge ... 81 Replacing Image Drum Unit ... 83 Reading Print Counters ... 84 Shipping the Fax Machine ... 85 Problem Checklist ... 85 Display Panel Messages ... 88 Normal Display ... 88 Error Messages ...
-
Page 6: Safety
The electrical power outlet should be located near the fax machine and should be easily accessible. The two TEL ports on the back of the fax machine are only • suitable for 2 wire devices. Not all standard telephones will respond to incoming ringing when connected to an extension socket. -
Page 7: Operation & Maintenance
• The operation of this fax machine on the same line as a telephone or other equipment with audible warning devices or automatic ring detectors will rise to bell tinkle or noise and may cause false tripping of the ring detector. -
Page 8: Emergency First Aid
Emergency First Aid • IF TONER IS SWALLOWED: Induce vomiting and seek medical attention. Never attempt to induce vomiting or give anything by mouth to a person who is unconscious. • IF TONER IS INHALED: Take the person to an open area for fresh air. -
Page 9: Introduction
• A closed network feature to allow you to limit who can send faxes to your fax machine, or to limit both where faxes can be sent to and received from. •... -
Page 10: Product Options
Scan pages from your fax machine into your computer. • Carry out optical character recognition (OCR) on received faxes or scanned pages. • Easily program dial directories on your fax machine. A telephone handset which allows you to use your fax machine as a normal telephone. OKIFAX 4500... -
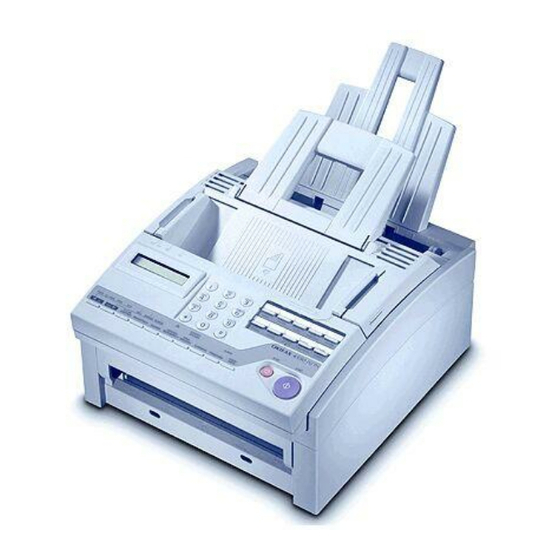
Page 11: Component Identification
COMPONENT IDENTIFICATION What You Should Receive Power Cable Document Tray Paper Tray/ Telephone Cable Copy Stacker Toner Cartridge Document Stacker Facsimile Unit Image Drum Unit (Inside fax machine) User’s Guide... -
Page 12: Components
Components Paper Tray/Copy Stacker Load up to 100 sheets of paper into this tray. Up to 30 sheets of received faxes or finished copies are stacked on top of this tray. Control Panel Document Stacker Supports documents that have been faxed or copied. Document Tray Holds original documents that are to be faxed or copied. -
Page 13: Components
User’s Guide LINE Terminal Terminal for connecting the unit to a telephone line. TEL Terminals Terminals for connecting the fax machine to an external telephone. Power Switch AC Power Inlet Connect the AC power cable, supplied with your fax machine, into this inlet. -
Page 14: Control Panel
Control Panel OKIFAX 4500... -
Page 15: Control Panel Keys & Indicators
HYPHEN Key: When programming One Touch keys and AUTO DIAL telephone numbers, use this key to tell your fax machine to wait for the dial tone of an outside or international line before it continues dialling the rest of the telephone number. - Page 16 When programming a chain dial number into a One Touch key or AUTO DIAL number, press the Plus key at the end of the first part of the number to indicate to the fax machine that this is a chain dial number.
-
Page 17: One Touch Keypad
When programming TSI/CSI and call back numbers into your fax machine, this key is used to enter a “+” symbol. 16 PAUSE Key (One Touch Key 10): Use this key on the One Touch keypad to enter automatic three second pauses in dialling when programming telephone numbers. -
Page 18: Using One Touch Keys For Selecting Functions & Programming
4-digit password. If memory reception mode is set on your fax machine, use this key to print faxes that have been received in memory. Also, use this key to print any bulletin polling messages that have been stored in memory. -
Page 19: Signal Tones
Off-Hook Alarm Tone: If your fax machine is equipped with a handset and if the handset is left off the hook, your fax machine will emit an intermittent warbling sound. To turn off the sound,... -
Page 20: Installation
Unpacking to Setting the Fax Identification. You must complete these steps for your fax machine to operate properly. If you have purchased an option package for your fax machine, refer to the documentation you received with that option. Where to Install Your Fax Machine 1. -
Page 21: Setting Up Your Fax Machine
Installing Paper Trays & Stackers 1. Slot the tabs of the paper tray/copy stacker into the rearmost slots in the top of the fax machine until the tabs lock into place. 2. Insert the document tray into the long horizontal slot on the top of the unit until it locks into place. - Page 22 5. Carefully remove the protective sheet from the image drum unit. 6. Place the image drum unit back into your fax machine. Ensure that the tabs on both sides of the image drum are inserted correctly as shown. Then press down firmly on both ends of the image drum until it snaps into place.
-
Page 23: Connecting Telephone Line
10. Once the toner cartridge is in place, push the coloured lever all the way forward to secure it and release the toner. 11. Close the top cover of the fax machine until it snaps into place. User’s Guide 12. -
Page 24: Connecting Telephone, Handset Or Answering Machine
Your fax machine is now in stand-by mode, ready to send or receive faxes. Loading Paper Your fax machine can hold up to 100 sheets of standard weight (80 gsm) paper. For best results, use paper specially made for laser printers or photocopiers. -
Page 25: Setting The Clock
A4 or letter- size paper. Note: Your fax machine is set at the factory to use A4 paper. If you intend to use a different paper size, change the 1’ST PAPER SIZE user function setting to match... -
Page 26: Answering Mode Options
When the call is a voice call, your fax machine will ring like a telephone. If you do not answer, your fax machine will switch back to fax mode to allow the calling party to manually send a fax. -
Page 27: Changing Answering Mode
Sender ID: This is a descriptive title and is usually the location of your fax machine or the name of your company or office. The Sender ID is printed at the top of every fax you send. You can enter up to 32 characters. -
Page 28: Setting Fax Machine Identification
The call back message is printed on a separate sheet with the message “Please call back” and a telephone number where you can be reached. -
Page 29: Setting Language
PBX. If you are connecting your fax machine to a PBX, follow the instructions below. These setting changes allow your fax machine to identify your PBX’s outside line dial prefix digits in the numbers that you program or dial in your fax machine. -
Page 30: Mfp Function
A PC connector and PC interface board are already included on your fax machine as standard equipment. For details on how to use your fax machine as an MFP, please refer to the documentation that comes with the MFP software. -
Page 31: Dial Directories
DIAL DIRECTORIES Programming One Touch Keys Your fax machine has ten One Touch keys for rapid dialling. You can store up to two fax numbers with 32 digits for each One Touch key, a main number and an alternate number. The alternate number is used if the main number is busy or does not answer. -
Page 32: One Touch Parameters
6. Press the START key. The display shows: NO=<OR LOCATION> 7. Enter the alternate fax number. Refer to the instructions following Step 3. 8. Press the START key to finish programming the One Touch key. The display shows: LOCATION PROGRAMMING ENTER (SRCH, OT, A/D, #) 9. -
Page 33: Chain Dialling
Chain Dialling Each fax number that you enter or program into your fax machine can be up to 32 digits long. If you need to dial a number which is longer than 32 digits, then you can use the chain dial feature. -
Page 34: Programming Groups
You can program up to 5 groups using a maximum of 80 numbers for all 5 groups into your fax machine. 1. Press the SELECT FUNCTION key, then press the LOCATION PROG One Touch key. - Page 35 Continue to add or delete locations from your group. Each group can contain up to a maximum of all of the One Touch and AUTO DIAL locations available on your fax machine. 6. When you are finished programming your group, press the NO õ...
-
Page 36: Basic Operations
216 mm or longer than 356 mm. Note: If you often have documents longer than 356 mm, your dealer may be able to adjust your fax machine to scan and transmit documents up to 1500 mm in length. Please be aware that adjusting the length setting to 1500 mm cancels detection of multiple document misfeeds. -
Page 37: Sending Fax To Single Location
If necessary, readjust the document guides for a snug fit. 3. Your fax machine will grip the documents and pull the bottom page into the machine. 4. If necessary, use the Transmit Resolution or ô YES key to set the resolution of your document. -
Page 38: Search Key Dialling
REQUEST key is not available in some countries. Redialling If the line is busy or if there is no answer, your fax machine waits and then automatically redials the number. Also, if your fax machine is transmitting from memory and a communication error occurs, it automatically redials the number and tries to send the fax again. -
Page 39: Stopping A Transmission
Your fax machine receives faxes automatically unless the fax machine has been set to the manual receive [TEL] mode. If your fax machine is set to the manual receive [TEL] mode, follow the instructions below. 1. When your telephone or fax machine rings, pick up the telephone handset. -
Page 40: No Paper Reception
No Paper Reception When your fax machine has run out of paper, a NO PAPER, REPLACE PAPER message appears on the display. Your fax machine continues to receive faxes into memory when it has run out of paper. -
Page 41: Rejecting Unsolicited Fax Messages
Note: In some countries, this function cannot be set by the user. Please contact your dealer for assistance. You can also set your fax machine not to send faxes to locations whose telephone numbers are not programmed into your One Touch keys or AUTO DIAL numbers. -
Page 42: Making Copies
The manual paper feeder of your fax machine allows you to make copies on a different type of paper than what is normally kept in the paper tray of your fax machine. To make copies using the manual paper feeder, follow the instructions below. -
Page 43: Initiating Voice Request
If you are receiving a fax, you can answer a voice request after reception of each page. You will know if the person on the other fax machine has issued a voice request when you hear a warbling tone. If you do not respond in approximately six seconds, the voice request is automatically cancelled. -
Page 44: Advanced Operations
ADVANCED OPERATIONS Sending Faxes to Multiple Locations and/or Groups If you want to send the same fax to more than one location, carry out the following steps: 1. Load your document. 2. Select your first group or location as follows. The next group or individual location must be selected within three seconds. - Page 45 PRINT ENTRY REPORT? YES (ß ß ß ß ß ) NO (à à à à à ) Press the ô YES key and your fax machine prints a report showing the locations you have selected. After printing the report, the display changes to CHECK LOCATION(S) YES (STR/LOC.) EXIT (à...
-
Page 46: Delayed Sending Of Faxes
This means that you cannot use your fax machine to send other faxes until your delayed fax has been sent. With user function 17:MEM./FEEDER SW. set to MEM, a... -
Page 47: Sending Delayed Faxes To Groups And/Or Multiple Individual Locations
9. Repeat the above procedure if you want to send another delayed fax. Please note that you can only program a maximum of five delayed transmissions into the memory of your fax machine. Sending Delayed Faxes to Groups and/or Multiple Individual Locations 1. - Page 48 4. Press the ô YES key and go to Step 7 if transmission is to occur later today. If the transmission is to occur up to three days later, press the NO õ key. The display shows: DELAYED TX DATE ] PRG.
- Page 49 PRINT ENTRY REPORT? YES (ß ß ß ß ß ) NO (à à à à à ) Press the ô YES key and your fax machine prints a report showing the locations you have selected. After printing the report, the display changes to CHECK LOCATION(S) YES (STR/LOC.) EXIT (à...
-
Page 50: Cancelling Delayed Transmission
Press the NO õ key each time you want to cancel a location entered into your fax machine. Press the START key if the displayed location is OK and to move onto the next location you have entered into your fax machine. -
Page 51: Confidential Faxes
A number dialled on Dial as you would on a normal the numeric keypad telephone. Note: You cannot send a confidential fax to a group or multiple individual locations. 6. Press the START key and your fax machine will begin sending the fax. -
Page 52: Receiving Confidential Faxes
(see below). You then have to tell the person sending the confidential fax your mailbox number. When your fax machine receives a confidential fax, it stores the fax in your personal mailbox. Your fax machine will automatically print a Confidential RX Report to indicate that a confidential fax has been received and is waiting to be printed. -
Page 53: Closing Confidential Mailbox
SELECT FUNCTION key to finish. Changing Mailbox Password Changing the password for a confidential or personal mailbox created on your fax machine is as follows: 1. Press the SELECT FUNCTION key. 2. Press the USER PROG One Touch key. The display shows: 1:FUNC. -
Page 54: Printing Confidential Faxes
8. Press the SELECT FUNCTION key to finish. Printing Confidential Faxes Each time your fax machine receives a confidential fax, it prints a Confidential RX Report telling you which personal box number has received a confidential fax. Printing a confidential fax from a personal box is as follows: 1. -
Page 55: Relay Broadcasting
Before programming your fax machine to initiate a relay broadcast, you need to obtain the following information from the operator of the fax machine you intend to use as a relay key station: Relay Password: This is the 4-digit relay key word which is programmed into the relay key station. -
Page 56: Polling
START key to begin sending the document. However, sometimes it is more useful to be able to simply load your document into your fax machine and set it to wait for the another fax machine to call and collect the document. This is called setting your fax machine to be polled, or polling transmission. - Page 57 6. Using the numeric keypad, enter 0 for the personal mailbox you want to use and press the ô YES key. Your document is then scanned into the memory of your fax machine and the message WAITING TO BE POLLED appears on the display.
-
Page 58: Polling Reception
ITU sub-address on the fax machine you are polling and press the START key. The display changes to: POLLING RX SELECT LOCATION 5. Select the location of the fax machine you are polling as follows: Select Location Using Do This One Touch key Press the One Touch key. -
Page 59: Printing Bulletin Messages
ENTER 0 - 8 User’s Guide 4. Using the numeric keypad, enter the number of the personal box then press the ô YES key. Your fax machine then prints the message stored in the personal mailbox. Note: Standard one-time polling messages cannot be printed. -
Page 60: While Receiving Faxes
• Continue to receive faxes while earlier messages are being printed if your fax machine has been set to memory reception mode. While Making Copies While you are making copies with your fax machine, you can: •... -
Page 61: Programming
User Function Settings User function settings allow you to customize the general operation of your fax machine. Refer to the list below to determine which settings you may need to change, then refer to Changing User Function Settings to make the change. - Page 62 If the incoming call is a voice call, your fax machine will ring to tell you to pick up the handset. If you do not answer, your fax machine automatically switches back to facsimile mode to allow the calling party to manually send a fax.
- Page 63 Setting Distinctive Ring. 13:1’ST PAPER SIZE - This function allows you to tell your fax machine what size of paper you are using in the paper tray and manual paper feed of your fax machine. Available settings are A4, letter, legal 13 and legal 14.
- Page 64 PC. However, if you are experiencing a problem with your PC, you can tell your fax machine to receive and print faxes locally by setting this function to on. Available settings are on and off.
-
Page 65: Changing User Function Settings
Pressing the STOP key turns off the tone. Set this function to off and your fax machine will emit a short beep after receiving a fax message. Available settings are on and off. -
Page 66: Setting Distinctive Ring
SETUP FAX RING CALL FAX NUMBER NOW 7. Using a separate telephone line, immediately dial the number assigned to the fax machine (you must do this within 90 seconds). When your fax machine begins to ring, the display changes to:... -
Page 67: Personal Mailboxes
Personal Mailboxes Personal mailboxes are used to store messages in memory of your fax machine for bulletin polling or receiving confidential faxes. Note: To use a personal mailbox for confidential messages, refer to Confidential Faxes in Advanced Operations. Creating Personal Mailbox (Polling) 1. -
Page 68: Memory Password
9. Continue to close personal mailboxes created on your fax machine or press the SELECT FUNCTION key to finish. Memory Password When your fax machine has been set to Memory Reception Mode, you can protect the printing of stored messages by using a password. Creating Memory Password 1. -
Page 69: Deleting Memory Password
7. Press the SELECT FUNCTION key to finish. Restricted Access Your fax machine can be programmed to restrict the use of your fax machine to designated individuals or departments. Please note that for restricted or department ID to work, user function 26:RESTRICT ACCESS must first be set to ON. -
Page 70: Changing Restricted Id
ENTER 01-24 8. Press the SELECT FUNCTION key to finish or continue to create department ID numbers. The display shows that a password ID is required before the fax machine can be operated: ENTER ID à à à à à [XXXX] Changing Restricted ID 1. -
Page 71: Closing Restricted Id
9. Press the SELECT FUNCTION key to finish or continue to close department IDs. Dial Parameter Settings These functions allow you to control the way your fax machine dials telephone numbers. Refer to Dial Parameter Settings List to determine which settings you may need to change, then refer to Changing Your Dial Parameter Settings to make the change. -
Page 72: Changing Dial Parameter Settings
FLASH/EARTH/NORMAL: If your fax machine is connected to a PBX, this function tells your fax machine about the type of PBX line your fax machine if connected to. Available settings are normal (N), flash (F) and earth (E). - Page 73 3. Using the numeric keypad, press number 2. The display shows: 2:DIAL PARAMETER YES (ß ß ß ß ß ) NO (à à à à à /1-7) 4. Press the ô YES key until the display shows the dial parameter you want to change. 5.
-
Page 74: Reports
Your fax machine provides a variety of useful reports which help you understand the current settings, programming and operations of your fax machine. Refer to the reports listing below to determine which reports you may want to print, then refer to Printing Reports for instructions on printing a report. -
Page 75: Active Memory Files Report
Configuration Report The configuration report provides a list of the current operational settings of your fax machine that can be set by you. The information includes: • The current settings of all your fax machine’s user functions (except for One Touch Parameter settings, which appear in the telephone directory). -
Page 76: Message Confirmation Report
The Personal ID or telephone number of the fax machine you were sending a fax to (DISTANT STATION ID). If the remote fax machine does not have a Personal ID or telephone number programmed, the Location ID or telephone number you entered is printed. -
Page 77: Power Outage Report
Power Outage Report If the electrical power to your fax machine has been interupted and your fax machine had delayed transmissions or messages received into memory, your fax machine automatically prints a power outage report to alert you that fax messages have been lost. -
Page 78: Communication Codes
Communication Codes The following codes indicate the communication mode used for a communication. Code Description B.C. Multiple-location transmission (broadcast) CALLING A communication initiated by your fax machine. CALLED A communication initiated by a remote fax machine POLLING Polling reception POLLED One-time polling transmission POLL=** Bulleting polling transmission (** is the box... -
Page 79: Problem Solving
PROBLEM SOLVING Clearing Document Jams When a document jam occurs, your fax machine beeps and an error message appears in the display. If the jammed document looks like it is positioned straight in your feeder, press the STOP key to try to feed the document the rest of the way through the feeder. - Page 80 4. Carefully pull out any paper you see jammed inside the machine. 5. Place the image drum unit back into your fax machine. Ensure that the tabs on both sides of the image drum are inserted correctly as shown. Then press down firmly on both ends of the image drum until it snaps into place.
-
Page 81: Replacing Toner Cartridge
If your fax machine displays REPLACE TONER CART., replace the toner cartridge with a new one. However, if user function 22:NO TONER MEM.RX is set to off and the print density is high enough, you can continue to use the toner cartridge without replacing it until the print density becomes too low. - Page 82 3. Pull the coloured lever on the old toner cartridge all the way toward you. Carefully pull the old toner cartridge out of the image drum unit. Dispose of it in the plastic bag you received with your new toner cartridge. 4.
-
Page 83: Replacing Image Drum Unit
Contact your dealer to order one. If the faxes you receive are light or have vertical streaks in them and you are not out of toner, or if your fax machine displays a CHANGE DRUM message, your fax machine needs a new image drum unit. -
Page 84: Reading Print Counters
Image Drum Units. Reading Print Counters Your fax machine’s print counters count the number of pages your fax machine has printed or scanned in its lifetime. If you are experiencing a problem, a service person may ask you to check these counters. -
Page 85: Shipping The Fax Machine
This is normal. In the tel/fax answering mode, your fax machine answers the incoming call and detects if the call is a voice call or a fax call. If the call is a voice call, your fax machine will ring, but your telephone will remain silent. It is recommended that you only use tel/fax answering mode if your telephone is located near the fax machine. - Page 86 Contact the person sending you the fax and ask them to change their Transmit Resolution and Type of Original settings. Ask the person to make a copy of the document on their fax machine to ensure that it is working properly. Then ask them to send the fax again.
- Page 87 (see Dial Directories). When you are dialling with an AUTO DIAL code, be sure to press the AUTO DIAL key before you enter the code. If your fax machine has the Auto Start feature turned off, you will have to press the START key before dialling will begin (see Programming).
-
Page 88: Display Panel Messages
Your fax machine does not immediately switch to TEL mode when you make or receive a voice call. Try pressing the STOP key. Your fax machine will return to stand-by mode so that you can converse. This condition may happen infrequently due to telephone line conditions, or the type of external telephone used. - Page 89 CHECK PAPER OR PATH Paper Error: The paper in your fax machine is different than the size set with user function 13:1’ST PAPER SIZE or your fax machine tried to print a sheet of paper with no image drum unit installed. MEMORY OVERFLOW...
-
Page 90: Specifications
(80gsm A4 size) Model number OKIFAX 4500: Model F21002B for approvals organizations Note: Horizontal resolution of 300 dpi is used if the remote fax machine also uses 300 dpi. Also, 300 dpi is used if EX.FINE is selected for copying. OKIFAX 4500... -
Page 91: Index
Index ADF Error (Jam) ... 88 Alarm Indicator ... 16 Answering Mode Changing ... 27 Options ... 26 Auto Dial Key ... 16 Auto Dial Numbers ... 33 Auto Rec Key ... 15 Auto Receive Mode ... 26 Auto Start ... 72 B.C. - Page 92 Flash/Earth/Normal ... 72 Group Key ... 17 Hook/Voice Request Key ... 15 Hyphen Key ... 15 ID= ... 75 ILLEGAL OPERATION ... 52, 53, 54, 57 Image Drum Alarm ... 89 Image in MCF..80 Incoming Ring ... 63 Instant Dialling ...
- Page 93 Remote Receive ... 63 Replace Toner Cart..89 Report Print Key ... 18 Reports Active Memory Files ... 75 Activity ... 74 Broadcast Confirmation ... 74 Broadcast Entry ... 76 Confidential Reception ... 76 Configuration ... 75 Message Confirmation ... 76 Power Outage ...
- Page 94 Statutory User Information (UK only) The OKIFAX 4500 is approved for connection to telecommunications systems specified in the instructions for use subject to the conditions set out in them. The BABT approval number for the OKIFAX 4500 is: BABT 608397 This apparatus has been approved for the use of the following facilities: •...
- Page 95 OKIFAX 4500 to the telephone network, you should send a postcard containing the following information to your local BT Sales Office: The model no. of your fax machine: OKIFAX 4500 The approval no. of your fax machine: BABT 608397 The number of extension sockets you require.
- Page 96 OKI SYSTEMS COMPANIES Oki Systems (UK) Limited 550 Dundee Road Slough Trading Estate Slough Berks SL1 4LE Tel: 44 (0) 1753 819819 Fax: 44 (0) 1753 819899 http://www.oki.co.uk Oki Systems (Ireland) Limited The Square Industrial Complex Tallaght Dublin 24 Tel:...