
Related Manuals for Digisol DG-WA3002NP


Summary of Contents for Digisol DG-WA3002NP
-
Page 1: User Manual
DG-WA3002NP 300Mbps Wireless Access Point with PoE User Manual V1.0 2012-06-28 As our products undergo continuous development the specifications are subject to change without prior notice... - Page 2 Trademarks: DIGISOL™ is a trademark of Smartlink Network Systems Ltd. All other trademarks are the property of the respective manufacturers. Safety This equipment is designed with the utmost care for the safety of those who install and use it.
- Page 3 DG-WA3002NP User Manual Federal Communication Commission Interference Statement FCC Part 15 This equipment has been tested and found to comply with the limits for a class B digital device, pursuant to Part 15 of the FCC Rules. These limitations are designed to provide reasonable protection against harmful interference in a residential installation.
- Page 4 DG-WA3002NP User Manual FCC Caution This equipment must be installed and operated in accordance with provided instructions and a minimum 20 cm spacing must be provided between computer mounted antenna and person’s body (excluding extremities of hands, wrist and feet) during wireless modes of operation.
- Page 5 DG-WA3002NP User Manual R&TTE Compliance Statement This equipment complies with all the requirements of DIRECTIVE 1999/5/EC OF THE EUROPEAN PARLIAMENT AND THE COUNCIL of March 9, 1999 on Radio Equipment And Telecommunication Terminal Equipment and the mutual recognition of their conformity (R&TTE).
-
Page 6: Table Of Contents
DG-WA3002NP User Manual Index 1. Product Information ................8 1-1 Product Introduction..................8 1-2 Safety Information..................9 1-3 System Requirements ..................10 1-4 Package Contents ..................10 1-5 Get familiar with your new wireless PoE Access Point ......11 2. System and Network Setup ..............13 2-1 Hardware and Software Installation ............13 2-2 Connecting to wireless Access Point using web browser......25... - Page 7 DG-WA3002NP User Manual 2-9-1 LED On/Off ....................76 2-9-2 Change Password....................77 2-9-3 IP Address of the Wireless Access Point............79 2-9-4 DHCP Server ....................81 3. Advanced Configuration..............83 3-1 Configuration Backup and Restore .............83 3-2 Firmware Upgrade..................85 3-3 System Reboot.....................87 4. Appendix....................89 4-1 Hardware Specification ................89 4-2 Troubleshooting...................90...
-
Page 8: Product Information
IEEE 802.11n can connect to existing wired Ethernet network, at the speed of up to 300Mbps. DG-WA3002NP also supports power over ethernet which helps in easy installation, by eliminating the need of a dedicated power source for the access point. -
Page 9: Safety Information
DG-WA30002NP User Manual Supports hidden SSID function. Supports WPS (Wi-Fi Protected Setup), simplifies wireless client setup procedures. Even inexperienced users can setup a wireless network without network technician’s help. Easy to use web-based GUI (Graphical User Interface) for network configuration and management purposes. -
Page 10: System Requirements
Before you start using this PoE Access Point, please check if there’s anything missing in the package, and contact your dealer of purchase to claim for missing items: DG-WA3002NP Wireless Access Point with PoE Switching Power Adapter (5V DC, 2A) ... -
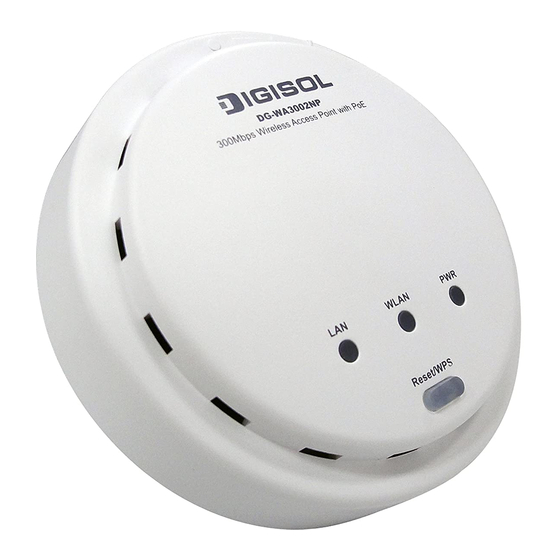
Page 11: Get Familiar With Your New Wireless Poe Access Point
DG-WA30002NP User Manual 1-5 Get familiar with your new wireless PoE Access Point Front Panel Light Status Description Name The Access Point is switched on and correctly powered. Slow System is reset to factory default, at the same time Blinking WLAN LED is on. -
Page 12: Back Panel
DG-WA30002NP User Manual Item Name Description Reset the router to factory default settings (clear all settings) Reset / or start WPS function. Press this button and hold for 10 seconds to restore all settings to factory defaults, and press this button for less than 5 seconds to start WPS function. Back panel Interfaces Description... -
Page 13: System And Network Setup
DG-WA30002NP User Manual 2. System and Network Setup 2-1 Hardware and Software Installation Please follow the below mentioned instructions to build the network connection between your new wireless access point and your computers, network devices: Hardware Installation:- 1. Place the unit in an appropriate place after conducting a site survey. 2. - Page 14 DG-WA30002NP User Manual Software Installation Insert the Setup CD into your CD-ROM drive of notebook/desktop computer. Explore the CD and execute the “APWizard.exe” file. Screen given below will be displayed. Click ‘Next’ to continue.
- Page 15 DG-WA30002NP User Manual Connect one end of the network cable to the LAN port on the Router and the other end to the PoE switch. From the PoE switch connect a cable to the AP. Power ON the router, the AP and the PoE switch. Ensure that all the LED’s on the Access Point are ON.
- Page 16 DG-WA30002NP User Manual Enter the AP’s password to log in to the AP. The default password is “1234”. It is recommended to change the AP’s password to protect it from being accessed by other users. If you do not wish to change the current password, you can leave “New Password”...
- Page 17 DG-WA30002NP User Manual Configure the IP Address of AP for future management. Click ‘Next’ to continue. Select an operation mode for your Access Point and click ‘Next’. The wizard will guide you to finish the following corresponding settings.
-
Page 18: Access Point
DG-WA30002NP User Manual Configure the settings for the operation mode you have selected. Access Point Configure the SSID and Channel Number. Click ‘Next’ to continue. -
Page 19: Universal Repeater
DG-WA30002NP User Manual Universal Repeater To configure Root AP’s SSID Click on ‘Site Survey’, a “Wireless Site Survey” window will appear. Select the wireless router or AP you wish to repeat and click ‘Connect’. Next, configure a network name and channel no in Main SSID and Channel Number for the repeater to be identified. - Page 20 DG-WA30002NP User Manual AP Client Click on ‘Site Survey’, “Wireless Site Survey” window will appear. Select the wireless router or AP you wish to connect and click ‘Connect’, or enter your wireless network’s SSID manually. Click ‘Next’ to continue.
- Page 21 DG-WA30002NP User Manual Point-to-Point / Point-to-MultiPoint / WDS Bridge Note: Same setup procedure applies to Point-to-Point Bridge, Point-to- MultiPoint Bridge and WDS Bridge modes. For bridge mode, you need at least two Access Points. We will use Point-to-Point Bridge as an example. Select a channel number you wish to use and enter the MAC address of the other Access Point for the bridge.
- Page 22 DG-WA30002NP User Manual Configure the wireless security settings. It is recommended to use WPA2- PSK (AES) which is the most secured encryption for general users. Then Click ‘Next’.
- Page 23 DG-WA30002NP User Manual Verify the settings you have configured and click ‘Restart’.
- Page 24 DG-WA30002NP User Manual This will take 60 Seconds. Then Press ‘OK’ Click ‘Finish’ to complete the installation. Congratulations! Your Access Point Installation is now finished.
-
Page 25: Connecting To Wireless Access Point Using Web Browser
DG-WA30002NP User Manual 2-2 Connecting to wireless Access Point using web browser After the network connection is setup, next step is to setup the Access Point with proper network parameters, so it can work properly in your network environment. Please use the web browser to configure the Access Point. A computer with wired Ethernet connection to the Access Point is required for this first-time configuration. -
Page 26: Windows 95/98 Ip Address Setup
DG-WA30002NP User Manual 2-2-1 Windows 95/98 IP address setup 1. Click ‘Start’ button (it should be located at lower-left corner of your computer), then click control panel. Double-click ‘Network’ icon, and Network window will appear. Select ‘TCP/IP’, then click ‘Properties’. - Page 27 DG-WA30002NP User Manual 2. Select ‘Specify an IP address’, then input the following settings in the respective field: IP address: 192.168.2.2 Subnet Mask: 255.255.255.0 Click ‘OK’ when finish.
-
Page 28: Windows 2000 Ip Address Setup
DG-WA30002NP User Manual 2-2-2 Windows 2000 IP address setup 1. Click ‘Start’ button (it should be located at lower-left corner of your computer), then click control panel. Double-click ‘Network and Dial- up Connections’ icon, Right click on ‘Local Area Connection’ and select ‘Properties’, Local Area Connection Properties window will appear. - Page 29 DG-WA30002NP User Manual 2. Select ‘Use the following IP address’, then input the following settings in the respective field: IP address: 192.168.2.2 Subnet Mask: 255.255.255.0 Default gateway: 192.168.2.1 Click ‘OK’ when finish.
-
Page 30: Windows Xp Ip Address Setup
DG-WA30002NP User Manual 2-2-3 Windows XP IP address setup 1. Click ‘Start’ button (it should be located at lower-left corner of your computer), then click control panel. Click on ‘Network Connections’, Right click on ‘Local Area Connection’ and select Properties, Local Area Connection Properties window will appear. - Page 31 DG-WA30002NP User Manual 2. Select ‘Use the following IP address’, then input the following settings in the respective field: IP address: 192.168.2.2 Subnet Mask: 255.255.255.0 Default gateway: 192.168.2.1 Click ‘OK’ when finish.
-
Page 32: Windows Vista Ip Address Setup
DG-WA30002NP User Manual 2-2-4 Windows Vista IP address setup 1. Click ‘Start’ button (it should be located at lower-left corner of your computer), then click control panel. Click on ‘View Network Status and Tasks’, and then click on ‘Manage Network Connections’. Right- click ‘Local Area Connection’, then select ‘Properties’. - Page 33 DG-WA30002NP User Manual 2. Select ‘Use the following IP address’, then input the following settings in the respective field: IP address: 192.168.2.2 Subnet Mask: 255.255.255.0 Default gateway: 192.168.2.1 Click ‘OK’ when finish.
-
Page 34: Connecting To Web Management Interface By Web Browser
DG-WA30002NP User Manual 2-2-5 Connecting to Web Management Interface by web browser All functions and settings of this Access Point must be configured via web management interface. Please start your web browser, and input ‘192.168.2.1’ in the address bar, then press ‘Enter’ key. The following message should be shown:... - Page 35 DG-WA30002NP User Manual Please input user name and password in the field respectively, default user name is ‘admin’, and default password is ‘1234’, then press ‘OK’ button, and you can see the web management interface of this Access Point: NOTE: If you can’t see the web management interface, and you’re being prompted to input user name and password again, it means you didn’t input username and password correctly.
-
Page 36: View System Status And Information
DG-WA30002NP User Manual 2-3 View System Status and Information After you are connected to the Access Point by web browser, the first thing you see is ‘Status and Information’ page. All system and network related information of this Access Point will be displayed here. The information is very helpful when you want to know the detailed information of your Access Point, and when you try to fix the communication problem between this Access Point and other wired / wireless computer / devices. - Page 37 Runtime Code Displays current firmware version. If you want to Version perform firmware upgrade, this number will help you to determine if you need such upgrade. Mode Displays current wireless operating mode ESSID Displays the current wireless SSID. Default is "Digisol"...
-
Page 38: Select An Operating Mode For Wireless Access Point
DG-WA30002NP User Manual Channel Displays current wireless channel number Number Security Displays current wireless security setting BSSID Displays current BSSID ( unique identification name of this Access Point, it can not be modified by user) Associated Clients Displays the number of connected wireless clients IP Address Displays the IP address of this wireless Access Point Subnet Mask... - Page 39 DG-WA30002NP User Manual Below are the descriptions of different modes supported by Access Point. Modes Description Access Point mode, allows wireless clients to connect to Access Point and exchange data with the devices connected to the wired network. Station- Enables the Ethernet devices such us TV and Game Infrastructure player connected to the Access Point to a wireless client.
-
Page 40: Ap Mode
DG-WA30002NP User Manual 2-4-1 AP Mode This is the most common mode. When in AP mode, this Access Point acts as a bridge between 802.11b/g/n wireless devices and wired Ethernet network, and exchange data between them. When you select ‘AP’, the following options will be displayed: Here is the description of every setup item: Parameter... - Page 41 DG-WA30002NP User Manual alphanumerical characters. PLEASE NOTE THAT ESSID IS CASE SENSITIVE. Channel Please select a channel number you wish to use. If you Number know a certain channel number is being used by other wireless Access Points nearby, please refrain from using the same channel number Associated Clients Click ‘Show Active Clients’...
-
Page 42: Station-Infrastructure
DG-WA30002NP User Manual 2-4-2 Station-Infrastructure In this mode, you can connect the Access Point to Ethernet devices such as TV and Game player to enable the Ethernet device to act as a wireless station and connect to a wireless network through an Access Point or AP router. Here is the description of every setup item: Parameter Description... - Page 43 DG-WA30002NP User Manual Site Survey When you use this Access Point as a wireless station for Ethernet network device to have wireless capability, you have to associate it with a working Access Point. Click ‘Select Site Survey’ button, then a “Wireless Site Survey Table”...
-
Page 44: Wireless Site Survey
DG-WA30002NP User Manual 2-4-2-1 Wireless Site Survey The table will list the Access Points nearby, as the Access Point is set to Station mode; you can select one of the Access Points to associate. Here is the description of every setup item: Parameter Description Select... -
Page 45: Ap Bridge-Point To Point Mode
DG-WA30002NP User Manual Setting page. Close Click this button to close this pop up window. 2-4-3 AP Bridge-Point to Point Mode In this mode, this wireless Access Point will connect to another wireless Access Point which uses the same mode, and all wired Ethernet clients of both wireless Access Points will be connected together. - Page 46 DG-WA30002NP User Manual If you select 2.4GHz (B+G), then only wireless clients using 802.11b and 802.11g band will be able to connect to this Access Point. you want to allow 802.11b, 802.11g, and 802.11n clients to connect to this Access Point, select 2.4GHz (B+G+N). Channel Please select a channel number you wish to use.
-
Page 47: Ap Bridge-Point To Multi-Point Mode
DG-WA30002NP User Manual 2-4-4 AP Bridge-Point to Multi-Point Mode In this mode, this wireless Access Point will connect up to four wireless Access Points which use the same mode, and all wired Ethernet clients of every wireless Access Point will be connected together. You can use this mode to connect a network to other networks which are physically isolated. - Page 48 DG-WA30002NP User Manual If you select 2.4GHz (B+G), then only wireless clients using 802.11b and 802.11g band will be able to connect to this Access Point. If you want to allow 802.11b, 802.11g, and 802.11n clients to connect to this Access Point, select 2.4GHz (B+G+N). Channel Please select a channel number you wish to use.
-
Page 49: Ap Bridge-Wds Mode
DG-WA30002NP User Manual 2-4-5 AP Bridge-WDS Mode In this mode, this wireless Access Point will connect to up to four wireless Access Points which use the same mode, and all wired Ethernet clients of every wireless Access Point will be connected together. You can use this mode to connect a network to other networks which are physically isolated. - Page 50 DG-WA30002NP User Manual 802.11b and 802.11g band will be able to connect to this Access Point. If you want to allow 802.11b, 802.11g, and 802.11n clients to connect to this Access Point, select 2.4GHz (B+G+N). MAIN Please input the ESSID (the name used to identify this ESSID wireless Access Point) here.
- Page 51 DG-WA30002NP User Manual After you finish with setting, please click ‘Apply’, and the following message will be displayed: When you see this message, the settings you made are successfully saved. You can click on ‘Continue’ button to go back to previous page and continue with other settings, or click ‘Apply’...
-
Page 52: Universal Repeater
DG-WA30002NP User Manual 2-4-6 Universal Repeater In this mode, the Access Point can act as a wireless repeater; it can be Station and AP at the same time. It can use Station function to connect to a Root AP and use AP function to service all wireless stations within its coverage. NOTE: For Repeater Mode, this Access Point will demodulate the received signal and check if the signal is noise or valid data for the operating network. - Page 53 DG-WA30002NP User Manual If you select 2.4GHz (B+G), then only wireless clients using 802.11b and 802.11g band will be able to connect to this Access Point. If you want to allow 802.11b, 802.11g, and 802.11n clients to connect to this Access Point, select 2.4GHz (B+G+N). MAIN ESSID Please input the ESSID (the name used to identify this wireless Access Point) here.
- Page 54 DG-WA30002NP User Manual After you finish with setting, please click ‘Apply’, and the following message will be displayed: When you see this message, the settings you made are successfully saved. You can click on ‘Continue’ button to go back to previous page and continue with other settings, or click ‘Apply’...
-
Page 55: Wps Setting
DG-WA30002NP User Manual 2-5 WPS Setting Wi-Fi Protected Setup (WPS) is the simplest way to build a connection between wireless network clients and this Access Point. You need not select encryption mode and input a long encryption passphrase every time you need to setup a wireless client. - Page 56 DG-WA30002NP User Manual To use WPS function to set encrypted connection between this Access Point and WPS-enabled wireless client by WPS, click ‘WPS Setting’ on the left of the web management menu, and the following information will be displayed. Here is the description of every setup item: Parameter Description Enable WPS...
- Page 57 DG-WA30002NP User Manual Authentication Mode: The wireless security authentication mode of this Access Point will be displayed here. If you don’t enable security function of the Access Point before WPS is activated, the Access Point will auto set the security to WPA (AES) and generate a set of passphrase key for WPS connection.
-
Page 58: Advanced Wireless Settings
DG-WA30002NP User Manual 2-6 Advanced Wireless Settings This wireless Access Point has many advanced wireless features. Please note that all settings listed here are for experienced users only, if you’re not sure about the meaning and function of these settings, please don’t modify them, or the wireless performance will be reduced. - Page 59 DG-WA30002NP User Manual DTIM Period Set the DTIM period of wireless radio. Do not modify default value if you don’t know what it is, default value is 3 Data Rate Set the wireless data transfer rate to a certain value. Since most of the wireless devices will negotiate with each other and pick a proper data transfer rate automatically, it’s not necessary to change this value unless you know what will...
- Page 60 DG-WA30002NP User Manual After you finish with setting, please click ‘Apply’, and the following message will be displayed: When you see this message, the settings you made are successfully saved. You can click on ‘Continue’ button to go back to previous page and continue with other settings, or click ‘Apply’...
-
Page 61: Wireless Security
DG-WA30002NP User Manual 2-7 Wireless Security This wireless Access Point provides many types of wireless security (wireless data encryption). When you use data encryption, data transferred by radio signals in the air will become unreadable for those people who don’t know correct encryption key (encryption password). - Page 62 DG-WA30002NP User Manual 2. Click ‘Set Security’ button when the wireless operating mode you selected is ‘AP Bridge-Point to Point’, ‘AP Bridge-Point to Multi-Point’, or ‘AP Bridge-WDS’. B. Security: 1. Click ‘Security’ on the left of web management interface.
- Page 63 DG-WA30002NP User Manual There are four types of security levels you can select: Disable (no security - data encryption disabled), WEP, WPA Pre-shared Key, and WPA Radius. Please refer to the following sections for detailed instructions. There are several things you can do to improve wireless security: 1.
-
Page 64: Disable Security
DG-WA30002NP User Manual 2-7-1 Disable Security Select the SSID you wish to configure. When you select ‘Disable’, wireless encryption for the network is disabled. After you finish with the setting, please click ‘Apply’, and the following message will be displayed: When you see this message, the settings you made are successfully saved. -
Page 65: Wep
DG-WA30002NP User Manual 2-7-2 WEP WEP (Wired Equivalent Privacy) is a common encryption mode, it’s safe enough for home and personal use. But if you need higher level of security, please consider using WPA encryption (see next Section). However, some wireless clients don’t support WPA, but only support WEP, so WEP is still a good choice for you if you have such kind of clients in your network environment. - Page 66 DG-WA30002NP User Manual Encryption Key 1 Input WEP key characters here, the number of characters must be the same as the number displayed at ‘Key Format’ field. You can use any alphanumerical characters (0-9, a-z, and A-Z) if you select ‘ASCII’ key format, and if you select ‘Hex’...
-
Page 67: Wpa Pre-Shared Key
DG-WA30002NP User Manual 2-7-3 WPA Pre-shared Key PA Pre-shared key is the safest encryption method currently, and it’s recommended to use this encryption method to ensure the safety of your d ata. When you select ‘WPA pre-shared key’ as encryption type, the following fields will be displayed: e is the descr iption of every setup ite... -
Page 68: Wpa Radius
DG-WA30002NP User Manual fter you finish with setting, please click ‘Apply’, and the following message will be displayed: When you see this message, the settings you made are successfully saved. You can click on ‘Continue’ button to go back to previous page and continue ith other settings, or click ‘Apply’... - Page 69 DG-WA30002NP User Manual Here is the description of every setup item: Parameter Description WPA Unicast You can select WPA encryption type here. AES is safer Cipher Suite than TKIP, but not every wireless client supports it. Please refer to the specification of your wireless client to decide which encryption type you should use.
-
Page 70: 802.1X Authentication
DG-WA30002NP User Manual 2-7-5 802.1x Authentication You can enable 802.1x user identification (based on RADIUS user authentication serv er) by checking ‘Enable 802.1x Authentication’ box when ou select ‘Disable’ or ‘WEP’ as encryption type, and the following message will be displayed: Here is the description of every setup item: Parameter Description... - Page 71 DG-WA30002NP User Manual fter you finish with setting, please click ‘Apply’, and the following message will be displayed: When you see this message, the settings you made are successfully saved. You can click on ‘Continue’ button to go back to previous page and continue with other settings, or click ‘Apply’...
-
Page 72: Mac Filtering
DG-WA30002NP User Manual 2-8 MAC Filtering Another security measure you can use to keep hackers and intruders away is ‘MAC filtering’. You can pre-define a so-called ‘white-list’, which contains s of the wireless clients you trust. All other wireless clients MAC addresse ith MAC addresses which are not in your list will be denied by this wireless Access Point. - Page 73 DG-WA30002NP User Manual The following messages will be displayed: Address filtering table (1) new entry here (2) This page contains two parts of MAC filtering info filtering information. All allowed rmation. All allowed AC addresses will be listed in upper part (1), and you can add new AC addresses will be listed in upper part (1), and you can add new MAC addresses by components in lower par MAC addresses by components in lower par...
- Page 74 DG-WA30002NP User Manual address, like ‘ROOM 2A Computer’ or anything. You can input up to 16 alphanumerical characters here. This is optional and you can leave it blank, however, it’s recommended to use this field to write a comment for every MAC address as a memory aid.
-
Page 75: System Utility
DG-WA30002NP User Manual 2-9 System Utility This Access Point provides some control functions, which include password, IP address management, and DHCP server function. Please click ‘System Utility’ on the left of web management interface to access these functions as shown below. -
Page 76: Led On/Off
DG-WA30002NP User Manual 2-9-1 LED On/Off You can turn on or off the LED of this wireless access point. Please click ‘System Utility’ on the left, and the following message will be displayed: Please select the LED behavior you wish to use. After you finish, please go to the bottom of this page and click ‘Apply’, and the following message will be displayed: When you see this message, the settings you made are successfully saved. -
Page 77: Change Password
DG-WA30002NP User Manual 2-9-2 Change Password You can change the password used to enter the web configuration menu of this wireless Access Point. Please click ‘System Utility’ on the left, and the following message will be displayed: Please input current password in ‘Current Password’ field, then input new password in both ‘New Password’... - Page 78 DG-WA30002NP User Manual Login screen will pop up, enter the newly configured password and press ok button.
-
Page 79: Ip Address Of The Wireless Access Point
DG-WA30002NP User Manual 2-9-3 IP Address of the Wireless Access Point You can change the IP address of this wireless Access Point, so it can become a part of your local network. Please remember this address, or you will not be able to connect to the configuration menu of this wireless Access Point. - Page 80 DG-WA30002NP User Manual After you finish, please go to the bottom of this page and click ‘Apply’, and the following message will be displayed: When you see this message, the settings you made are successfully saved. You can click on ‘Continue’ button to go back to previous page and continue with other settings, or click ‘Apply’...
-
Page 81: Dhcp Server
DG-WA30002NP User Manual 2-9-4 DHCP Server This wireless Access Point is capable to act as a DHCP server for your network, and it’s disabled by default. NOTE: Please remember to select ‘Enabled’ in ‘DHCP Server’ option as described in last Section, or all DHCP-related fields will be grayed out, and you will not be able to input any DHCP parameter. - Page 82 DG-WA30002NP User Manual computer can keep a specific IP address) of every IP address assigned by this Access Point from dropdown menu. After you finish, please click ‘Apply’, and the following message will be displayed: When you see this message, the settings you made are successfully saved. You can click on ‘Continue’...
-
Page 83: Advanced Configuration
DG-WA30002NP User Manual 3. Advanced Configuration 3-1 Configuration Backup and Restore You can backup all configurations of this Access Point to a file, so you can make several copies of the Access Point configuration for security reason. To backup or restore Access Point configuration, please follow the instructions mentioned below: Please click ‘Configuration Tool’... - Page 84 DG-WA30002NP User Manual The following message will be displayed on your web browser. Here is the description of every button: Parameter Description Backup Settings Press ‘Save...’ button, and you’ll be prompted to download the configuration as a file, default filename is ‘config.bin’, you can save it as another filename for different versions, and keep it in a safe place.
-
Page 85: Firmware Upgrade
DG-WA30002NP User Manual 3-2 Firmware Upgrade If there is a new firmware of this wireless Access Point, you can upload it which will change the firmware to the new one, to get extra functions or problem fix. To perform firmware upgrade, please click ‘Upgrade’ on the left of web management interface The following message will be displayed:... - Page 86 DG-WA30002NP User Manual Click ‘Browse…’ button first, you’ll be prompted to provide the filename of firmware upgrade file. Please download the latest firmware file from our website, and use it to upgrade your Access Point. After a firmware upgrade file is selected, click ‘Apply’ button, and the Access Point will start the firmware upgrade procedure automatically.
-
Page 87: System Reboot
DG-WA30002NP User Manual 3-3 System Reboot When you think the Access Point is not working properly, you can use this function to restart the Access Point; this may help and solve the problem. This function is useful when the Access Point is far from you or unreachable. However, if the Access Point is not responding, you may have to switch it off by unplugging it from the power socket and plugging it back again after 10 seconds. - Page 88 DG-WA30002NP User Manual The following message will be displayed: Please click ‘Apply’, and a popup message will appear asking you again, to make sure you really want to reset the Access Point: Click ‘OK’ to reset the Access Point, or click ‘Cancel’ to abort. Once you click on ‘OK’...
-
Page 89: Appendix
DG-WA30002NP User Manual 4. Appendix 4-1 Hardware Specification Flash: 2MB SDRAM: 16MB LAN Port: 10/100M UTP Port x 1 Antenna: PiFa antenna x 2 (2T2R MIMO technology) Power: 5VDC, 2A Switching Power Adapter Frequency Band: 2.4000 ~ 2.4835 GHz Data Rate: IEEE 802.11b (1/2/5.5/11Mbps) IEEE 802.11g (6/9/12/24/36/48/54Mbps) IEEE 802.11n (20 MHz) MCS 0-15, up to 144 Mbps IEEE 802.11n (40 MHz) MCS 0-15, up to 300 Mbps... -
Page 90: Troubleshooting
DG-WA30002NP User Manual 4-2 Troubleshooting If you find that the Access Point is not working properly or stops responding, don’t panic. Before you contact your dealer of purchase for help, please read this troubleshooting section first. Some problems can be solved by you within very short time. - Page 91 DG-WA30002NP User Manual Access Point a. ‘Broadcast ESSID’ set to off? cannot be located b. Is Antenna properly installed and secured? by my wireless c. Are you too far from your Access Point? Try to get client closer. d. Please remember that you have to input ESSID on your wireless client manually, if ESSID broadcast is disabled.
-
Page 92: Glossary
DG-WA30002NP User Manual 4-3 Glossary DEFAULT GATEWAY (ACCESS POINT): Every non-Access Point IP device needs to configure default gateway’s IP address. When the device sends out an IP packet and if the destination is not on the same network, the device has to send the packet to its default gateway, which will then send it to the destination. - Page 93 DG-WA30002NP User Manual bbbbbbbb.bbbbbbbb.bbbbbbbb.bbbbbbbb, where each “b” can either be 0 or 1. A network mask is also a 32-bit binary pattern, and consists of consecutive leading 1’s followed by consecutive trailing 0’s, such as 11111111.11111111.11111111.00000000. Therefore sometimes a network mask can also be described simply as “x” number of leading 1’s.
- Page 94 DG-WA30002NP User Manual PORT: Network Clients (LAN PC) uses port numbers to distinguish one network application/protocol over another. Below is a list of common applications and protocol/port numbers: Application Protocol Port Number Telnet SMTP POP3 H.323 1720 SNMP SNMP Trap HTTP PPTP 1723...
- Page 95 POE: Power-over-Ethernet: It is a means for delivering power to a remote device using the same cable lines used to deliver Ethernet data. This product comes with Life time warranty. For further details about warranty policy and Product Registration, please visit support section of www.digisol.com...