Table of Contents
Advertisement
Quick Links
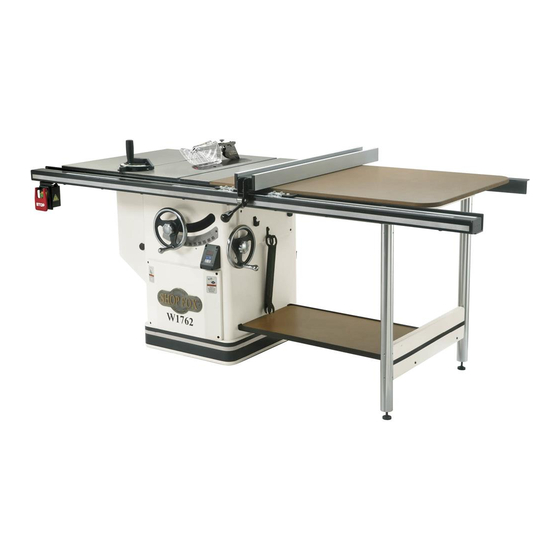
MODEL W1761/W1762
12" TABLE SAW WITH
RIVING KNIFE
OWNER'S MANUAL
Phone: (360) 734-3482 • Online Technical Support: tech-support@shopfox.biz
COPYRIGHT © SEPTEMBER, 2007 BY WOODSTOCK INTERNATIONAL, INC.
WARNING: NO PORTION OF THIS MANUAL MAY BE REPRODUCED IN ANY SHAPE OR FORM WITHOUT
THE WRITTEN APPROVAL OF WOODSTOCK INTERNATIONAL, INC.
Printed in Taiwan
#9077BL
Advertisement
Table of Contents

Related Manuals for Shop fox W1762


Summary of Contents for Shop fox W1762
- Page 1 MODEL W1761/W1762 12" TABLE SAW WITH RIVING KNIFE OWNER'S MANUAL Phone: (360) 734-3482 • Online Technical Support: tech-support@shopfox.biz COPYRIGHT © SEPTEMBER, 2007 BY WOODSTOCK INTERNATIONAL, INC. WARNING: NO PORTION OF THIS MANUAL MAY BE REPRODUCED IN ANY SHAPE OR FORM WITHOUT THE WRITTEN APPROVAL OF WOODSTOCK INTERNATIONAL, INC.
- Page 2 Model W1761/W1762 12" Table Saw Manual Update (For Models Mfg. Before 1/10; Sold After 7/10) Phone #: (360) 734-3482 • Online Tech Support: tech-support@shopfox.biz • Web: www.shopfox.biz We made a few changes to this table saw since the manual was originally written. The saw you received has a different blade guard with a clear shield, removable anti-kickback pawls, and a new mounting block that makes blade guard and riving knife installation/removal and adjustments much easier.
-
Page 3: Blade Requirements
Model W1761/W1762 (M-1/10, S7/10+) Blade Requirements The spreader/riving knife included with this machine is 0.09" (2.3mm) thick and is designed for 12" diameter blades only. When choosing a standard blade, make sure the blade size meets the requirements listed below. (This does not apply to dado blades.) The thickness of the blade body... -
Page 4: Blade Guard
Model W1761/W1762 (M-1/10, S7/10+) Blade Guard This update provides all installation and adjustment infor- mation relevant to the new blade guard. The term "blade guard" refers to the assembly that consists of the clear polycarbonate shield, the spreader, and the anti-kickback pawls on each side of the spreader (see Figure 4). - Page 5 Model W1761/W1762 (M-1/10, S7/10+) In order to work properly, the spreader or riving knife cannot be bent or misaligned with the blade. If either of these gets accidentally bent, DISCONNECT SAW FROM POWER, and straighten or replace it. Using a bent or misaligned spreader will increase the risk of kickback! Refer to Page 8 to check/adjust alignment if necessary.
- Page 6 Model W1761/W1762 (M-1/10, S7/10+) — If the spreader/riving knife is not inside the align- ment zone and not parallel with the blade, then it needs to be adjusted (refer to Page 8). — If the spreader/riving knife is not parallel with the blade, it may be bent.
- Page 7 Model W1761/W1762 (M-1/10, S7/10+) Re-installing Pawls 1. Loosen the knob on top of the spreader, then remove Groove the blade guard. 2. Slide the pin in the pawl block into the second groove from the front of the spreader, as shown in Figure 10.
- Page 8 Model W1761/W1762 (M-1/10, S7/10+) Riving Knife The riving knife works in the same manner as the spreader on the blade guard assembly. It is a metal plate that pre- vents the newly cut workpiece from pinching the backside of the blade and causing kickback.
- Page 9 Model W1761/W1762 (M-1/10, S7/10+) Spreader or Riving Knife Alignment Checking Alignment The blade guard spreader and riving knife must be aligned with the blade when installed. If the spreader/riving knife is not aligned with the blade, then the workpiece will...
- Page 10 Model W1761/W1762 (M-1/10, S7/10+) Adjusting Alignment The spreader/riving knife mounts to a block that can be repositioned to correctly align the spreader/riving knife to the blade. The mounting block adjusts by turning the Mounting Block set screws in each corner of the block. Figure 15 shows the set screws associated with controlling the mounting block position.
- Page 11 Zero-clearance table inserts may be available for the Model W1761/W1762 through your local Woodstock International Inc. Dealer. If you do not have a dealer in your area, a zero-clearance insert can be purchased through an online dealer.
- Page 12 Model W1761/W1762 (M-1/10, S7/10+) New Parts PART # DESCRIPTION PART # DESCRIPTION X1761001V2 BLADE GUARD ASSY UL987 V2.05.10 X1761051 SHAFT SPRING X1761031 LEFT PLATE XPEC07M E-CLIP 7MM XPLN02M LOCK NUT M5-.8 X1761053 LEFT TORSION SPRING XPFH01M FLAT HD SCR M5-.8 X 15...
- Page 14 ����������������������������������������������������������������������� �������������������������������������������������������������� ���������������������������������������������������������������������� �������������������������������������������������������������������� ������������������������ ����������������������������������������������������������������������� ������������������������������������������������������������������������ ������������������������������������������������������������������� ����������������������������������������������������������������� ���������������������������������������������������������������������� ����������������������������������������������� ���������������������������������������������������������������� �������������������������������������������������������������������� ������� �������������������������������������������������������������������� ����������������������������������������������������������������������� ���������������������������������������������������������������������� ������������������������������������� �� ���������������������������� �� ������������������������������������������������������������������ �� ���������������������������������������������������� ������������������������������������������������������������������ ������������������������������������������������������������������ �������������������������������������������������������������������� ��������������������������������������������������������������������� ��������������������������...
-
Page 15: Table Of Contents
Arbor ..........21 W1761 Wiring Diagram ......56 Table Insert ........22 W1762 Electrical Components ....57 Blade Guard & Splitter ......22 W1762 Wiring Diagram 220V, 3-Phase ..58 Riving Knife ........23 W1762 Wiring Diagram 440V, 3-Phase ..59 ON/OFF Switch ........24 PARTS ..........60 Miter Gauge ........24 Fence Components ......24... -
Page 16: Introduction
W1761/W1762 12" Table Saw with Riving Knife INTRODUCTION Woodstock Technical Support This machine has been specially designed to provide many years of trouble-free service. Close attention to detail, ruggedly built parts and a rigid quality control program assure safe and reliable operation. -
Page 17: W1761 Specifications
W1761/W1762 12" Table Saw with Riving Knife �������� �������������� ���������������������������������������������������������������������������������������������� ������������������������� ����� � � ���� � ���������������������������������������������������������������������������������� ������������������������������ � � �������������������������������������������������������������������������������������������������������������������� ���� � � ����������� � ��������������������������������������������������������������������������������������� ������������������� � � ���������������������������������������������������������������������������������������������������������������������� ���� � � ����������������������������������������������������������������������������������������������������������������������� ��� � � ��� � ������������������������������������������������������������������������������������������������������������������� ����... -
Page 18: W1762 Specifications
W1761/W1762 12" Table Saw with Riving Knife �������� �������������� ���������������������������������������������������������������������������������������������� ������������������������� ����� � � ���� � ����������������������������������������������������������������������������������������������������� �������������� � � ����������������������������������������������������������������������������������������������������������������� � � ��� � � � � ����������� � ��������������������������������������������������������������������������������������������� ������������� � � ������������������������������������������������������������������������������������������ ������������������������� � � ������������������������������������������������������������������������������������������������������������������� ������... -
Page 19: Controls And Features
W1761/W1762 12" Table Saw with Riving Knife Controls and Features Figure 1. W1761/W1762 controls and features. A. ON/OFF Switch w/Emergency STOP Paddle B. Front Rail C. Miter Gauge D. Blade Guard and Splitter E. Fence Scale Indicator F. Fence G. Extension Table H. -
Page 20: Safety
W1761/W1762 12" Table Saw with Riving Knife SAFETY READ MANUAL BEFORE OPERATING MACHINE. FAILURE TO FOLLOW INSTRUCTIONS BELOW WILL RESULT IN PERSONAL INJURY. Indicates an imminently hazardous situation which, if not avoided, WILL result in death or serious injury. Indicates a potentially hazardous situation which, if not avoided, COULD result in death or serious injury. - Page 21 W1761/W1762 12" Table Saw with Riving Knife 10. MAKE WORKSHOP CHILD PROOF. Use padlocks, master switches, and secure the anti-start switch safety pin. 11. NEVER LEAVE WHEN MACHINE IS RUNNING. Turn power off and allow all moving parts to come to a complete stop before leaving machine unattended.
-
Page 22: Additional Safety For Table Saws
W1761/W1762 12" Table Saw with Riving Knife Additional Safety for Table Saws READ and understand this USE this and other machinery with caution entire instruction manual and respect. Always consider safety first, before using this machine. as it applies to your individual working Serious personal injury conditions. -
Page 23: Preventing Kickback
W1761/W1762 12" Table Saw with Riving Knife Preventing Kickback Below are tips to avoid the most common causes of kickback: Statistics show that most common • Only cut workpieces with at least one smooth and accidents among table saw users can straight edge. -
Page 24: Protecting Yourself From Kickback
W1761/W1762 12" Table Saw with Riving Knife Protecting Yourself from Kickback Even if you know how to prevent kickback, it may still happen. Here are some tips to protect yourself if kick- back DOES occur: • Stand to the side of the blade during every cut (Figure 4). -
Page 25: Common Terms
W1761/W1762 12" Table Saw with Riving Knife Common Terms In order to increase user safety awareness and understanding, we have provided a list of common terms associated with table saws. We will refer to many of these terms throughout this manual, so the time you spend learning these terms will result in an increased knowledge of table saw applications. -
Page 26: Electrical
W1761/W1762 12" Table Saw with Riving Knife ELECTRICAL The machine must be properly set up before it is safe to operate. DO NOT connect this machine to the power source until instructed to do so in the "Test Run" portion of this manual. -
Page 27: W1762 220V 3-Phase Operation
W1762 440V 3-Phase Operation If rewired to 440V operation, the Model W1762 must be hardwired to a locking shutoff switch by a qualified elec- trician. Hardwiring involves a permanent installation with conduit runs that can only be accomplished safely by a qualified electrician. -
Page 28: Setup
W1761/W1762 12" Table Saw with Riving Knife SETUP Unpacking The SHOP FOX Model W1761/W1762 has been carefully If any parts are missing, examine the pack- ® packaged for safe transporting. If you notice the machine aging for the missing parts. For any missing... -
Page 29: Inventory
W1761/W1762 12" Table Saw with Riving Knife Inventory The following is a description of the main components shipped with the SHOP FOX Model W1761⁄W1762. Lay ® the components out to inventory them. Note: If you can't find an item on this list, check the mounting location on the machine or examine the pack- aging materials carefully. -
Page 30: Fence Rail Inventory
W1761/W1762 12" Table Saw with Riving Knife Fence Rail Inventory Box Inventory: (Figure 11) A. Fence Tube (93" Long) ........1 B. Rear Rail (79" Long) ........1 C. Front Rail (93" Long) ........1 Extension Table Inventory Box Inventory: (Figure 12) A. Extension Table ..........1 B. -
Page 31: Cleaning Machine
W1761/W1762 12" Table Saw with Riving Knife Cleaning Machine The table and other unpainted parts of your table saw are coated with a waxy grease that protects them from corro- sion during shipment. Clean this grease off with a solvent... -
Page 32: Extension Table
W1761/W1762 12" Table Saw with Riving Knife Extension Table To install the front and rear rails, do these steps: 1. Fasten the 93" front rail onto the table saw with five M8-1.25 x 25 flat head screws as shown in Figure 13. - Page 33 W1761/W1762 12" Table Saw with Riving Knife 5. While an assistant holds the extension table, fasten the 93" front rail to the extension table with three M8-1.25 x 25 flat head screws, flat washers and hex nuts (Figure 16). Finger tighten for now.
- Page 34 W1761/W1762 12" Table Saw with Riving Knife 11. Fasten each support leg to the main extension table with four M6-1 x 12 Phillips head screws and flat washers as shown in Figure 20. 12. Rotate both feet until they touch the ground, and tighten the hex nuts to secure the feet.
-
Page 35: Saw Blade
W1761/W1762 12" Table Saw with Riving Knife Saw Blade Review this section, even if your saw blade came pre- installed. To install the blade, do these steps: 1. DISCONNECT THE SAW FROM POWER! 2. Remove the table insert, blade guard, and splitter–if previously installed. -
Page 36: Blade Guard & Splitter
W1761/W1762 12" Table Saw with Riving Knife Table Insert You must install the table insert before operating the table saw. To install and adjust the table insert, do these steps: 1. DISCONNECT THE SAW FROM POWER! Table Insert Screw 2. Place the table insert into the table and tighten the M5-.8 x 20 flat head screw shown in Figure 26. -
Page 37: Riving Knife
W1761/W1762 12" Table Saw with Riving Knife 6. Slide the bracket screws shown in Figure 29 into the Bracket notches on the splitter, push the guard toward the Screws back of the table, and tighten the lock knob (Figure 30). If you have difficulty sliding the blade guard... -
Page 38: On/Off Switch
W1761/W1762 12" Table Saw with Riving Knife ON/OFF Switch To install the switch, do these steps: 1. Fasten the switch to the left end of the front rail with two M8-1.25 x 25 flange bolts, and install the anti-start safety pin as shown in Figure 32. -
Page 39: Dust Collection
W1761/W1762 12" Table Saw with Riving Knife Dust Collection DO NOT operate the Model W1761/W1762 without an adequate dust collection system. This saw cre- ates substantial amounts of wood dust while oper- ating. Failure to use a dust collection system can result in short and long-term respiratory illness. -
Page 40: Test Run
W1761/W1762 12" Table Saw with Riving Knife Test Run Once the assembly is complete, test run the machine to make sure it runs properly for regular operations. The test run consists of verifying the following: 1) The motor powers up and runs correctly, and 2) the safety dis-... -
Page 41: Operations
W1761/W1762 12" Table Saw with Riving Knife OPERATIONS General The Model W1761/W1762 will perform many types of oper- ations that are beyond the scope of this manual. Many of these operations can be dangerous or deadly if performed incorrectly. The instructions in this section are written with the understanding that the operator has the necessary knowl- edge and skills to operate this machine. -
Page 42: Disabling On/Off Switch
W1761/W1762 12" Table Saw with Riving Knife Disabling On/Off Switch To disable the saw and prevent accidental startup, insert the safety pin through the holes in the ON button, and insert the end of the chain into the pin as shown in Figure 38. - Page 43 W1761/W1762 12" Table Saw with Riving Knife Combination blade features (see Figure 41): • Adequate for cutting both with and across the grain. • 40-50 teeth. • Alternate top bevel and flat, or alternate top bevel ��������� and raker tooth profile.
-
Page 44: Workpiece Inspection
W1761/W1762 12" Table Saw with Riving Knife Workpiece Inspection Non-Through & Through Cuts Some workpieces are not safe to cut or may require modification before they can be made Non-Through Cuts safe to cut. A non-through cut is a sawing operation where... -
Page 45: Ripping
W1761/W1762 12" Table Saw with Riving Knife Ripping "Ripping" means cutting with the grain of a natural wood workpiece. In other man-made materials such as MDF or plywood, ripping simply means cutting lengthwise. Serious injury can be caused by kickback. Kickback is a high-speed... -
Page 46: Crosscutting
W1761/W1762 12" Table Saw with Riving Knife Crosscutting "Crosscutting" means cutting across the grain of a natural wood workpiece. In other man-made materials, such as MDF or plywood, crosscuttting means cutting across the width of the workpiece. To make a crosscut using the miter gauge, do these steps: 1. -
Page 47: Miter Cuts
W1761/W1762 12" Table Saw with Riving Knife Miter Cuts A miter is an angled crosscut. Miters are usually cut in the same manner as crosscuts, using the miter gauge and a predetermined mark on the workpiece. To perform a miter cut, do these steps: 1. -
Page 48: Dado Cutting
W1761/W1762 12" Table Saw with Riving Knife Dado Cutting Commonly used in furniture joinery, a dado is a straight channel cut in the face of the workpiece. Dadoes can be cut using either a dedicated dado blade or a standard... - Page 49 W1761/W1762 12" Table Saw with Riving Knife To use a standard saw blade to cut dadoes, do these steps: The danger of kickback increases rela- Note: Reduce motor overloading and blade wear by using tive to the depth and width of a cut.
-
Page 50: Rabbet Cutting
W1761/W1762 12" Table Saw with Riving Knife Rabbet Cutting Commonly used in furniture joinery, a rabbet is an L- shaped groove cut in the edge of the workpiece. Rabbets can be cut with either a dado blade or a standard saw ���������... - Page 51 W1761/W1762 12" Table Saw with Riving Knife To cut rabbets with the standard blade, do these steps: ����� Note: Cutting rabbets with a standard saw blade DOES NOT require the use of a sacrificial fence. ��������� Note: Reduce motor overloading and blade wear by using ���������...
-
Page 52: Resawing
W1761/W1762 12" Table Saw with Riving Knife Resawing Resawing is the process of cutting a thick piece of stock into one or more thinner pieces. Bandsaws are ideal for resawing and the process is fairly easy and safe. A Resawing on a table saw increases the table saw is not intended for resawing and the process chances of kickback. -
Page 53: Auxiliary Fence
W1761/W1762 12" Table Saw with Riving Knife To build the resaw barrier, do these steps: 1. Cut two hardwood or plywood boards to ⁄ " x 7 ⁄ " x 40 ⁄ " and ⁄ " x 3" x 40 ⁄... - Page 54 W1761/W1762 12" Table Saw with Riving Knife Resawing Operations The table saw motor is pushed to its limits when resawing. If the motor starts to bog down, slow down You may experience kickback during your feed rate. Motor overloading and blade wear can this procedure.
-
Page 55: Table Saw Accessories
No drill- ing or bulky clamp arrangements. The Model D3122 Shop Fox Push Stick can help you keep your hands a safe distance from blades and cutters while still maintaining con- trol of the workpiece against machine fences. - Page 56 W1761/W1762 12" Table Saw with Riving Knife The Model D3588 Shop Fox 8" Carbide-Tipped Stacking Dado Blade Set cuts dados from ⁄ " to ⁄ ". Solid body chip cutting blanks pro- vide more mass and better balance. Five-tooth chip cutters provide more cuts per revolution.
- Page 57 D3383: 4" Precision Square D3384: 6" Precision Square D3384 The Model W1727 Shop Fox 1 HP Dust Collector is the perfect companion for the Model W1761/W1762. It packs a 1 HP, 110V/220V, single-phase motor and 800 CFM air suction capacity.
-
Page 58: Maintenance
W1761/W1762 12" Table Saw with Riving Knife MAINTENANCE General Regular periodic maintenance on your SHOP FOX Model ® W1761/W1762 will ensure its optimum performance. Make a habit of inspecting your machine each time you use it. Check for the following conditions and repair or... -
Page 59: Service
W1761/W1762 12" Table Saw with Riving Knife SERVICE Troubleshooting This section covers the most common problems and corrections with this type of machine. WARNING! DO NOT make any adjustments until power is disconnected and moving parts have come to a com-... - Page 60 W1761/W1762 12" Table Saw with Riving Knife PROBLEM POSSIBLE CAUSE CORRECTIVE ACTION Machine stalls or is under- 6. Motor bearings are at fault. 6. Test by rotating shaft; rotational grinding/loose powered (continued). shaft requires bearing replacement. 7. Motor has overheated.
-
Page 61: Replacing Flat Belt
W1761/W1762 12" Table Saw with Riving Knife Replacing Flat Belt To ensure optimum power transmission from the motor to the blade, the flat belt must be in good condition. Replace the belt if it becomes cracked, frayed, or glazed. To remove the flat belt, do these steps: 1. - Page 62 W1761/W1762 12" Table Saw with Riving Knife 10. Lower the arbor down all the way, remove the but- ton head cap screws on the lower part of the belt cover plate, the spacers, and the cover plate. 11. Roll the belt off of the upper and lower pulleys. Be careful not to pinch your fingers.
-
Page 63: Blade Tilt Stops
W1761/W1762 12" Table Saw with Riving Knife Blade Tilt Stops The table saw features stop bolts that stop the blade exactly at 45° and 90° during blade adjustments. The stops have been set at the factory and should require 90° Stop Bolt no adjustments, unless you notice that your cuts are not &... -
Page 64: Digital Readout
W1761/W1762 12" Table Saw with Riving Knife 3. Move the blade angle to 30°, or remove the panel on the right side of the cabinet to access the 45° stop bolt. 4. Using a 12mm wrench, loosen the jam nut (Figure 67) on the 45°... -
Page 65: Miter Slot To Blade Parallelism
W1761/W1762 12" Table Saw with Riving Knife Miter Slot to Blade Parallelism Your table saw will give the best results if the miter slot and the rip fence are adjusted parallel to the blade. If either of these are not exactly parallel, your cuts and your finished work will be lower in quality, but more importantly, this condition increases the risk of kickback. -
Page 66: Blade Alignment
W1761/W1762 12" Table Saw with Riving Knife 8. Tilt the blade to 45° and repeat Steps 2-6. If the blade is still parallel to the miter slot, continue on to the Blade Alignment procedure. Otherwise, con- ������ tinue with the next step. -
Page 67: Adjusting Fence
W1761/W1762 12" Table Saw with Riving Knife Adjusting Fence The rip fence included with your Model W1761/W1762 Table Saw is designed to provide excellent ripping accu- racy when properly adjusted. There are four main adjust- ments to concern yourself with: square, height, paral- lelism, and clamping pressure. -
Page 68: Miter Gauge
W1761/W1762 12" Table Saw with Riving Knife Miter Gauge To adjust the miter gauge so it is perpendicular to the saw blade, do these steps: 1. Slide the miter gauge into the miter gauge slot to the left of the blade. -
Page 69: W1761/W1762 Electrical Components
W1761/W1762 12" Table Saw with Riving Knife W1761/W1762 Electrical Components Figure 78. W1761 motor junction box, 220V Figure 81. Digital readout and angle sensor. single-phase. Figure 79. W1762 motor junction box, 220V 3- phase. Figure 80. Switch. Figure 82. W1761 magnetic switch. -55-... -
Page 70: W1761 Wiring Diagram
W1761/W1762 12" Table Saw with Riving Knife W1761 Wiring Diagram �������� ������ ��������� ������ ��������� ����� �� See Figure 82 ����� � �� � ��� ������� �� ����� �� �� � �� ��� ���������� ��� �� ���������������� ������ �� ��... -
Page 71: W1762 Electrical Components
W1761/W1762 12" Table Saw with Riving Knife W1762 Electrical Components Figure 83. W1762 magnetic switch prewired to Figure 84. W1762 magnetic switch converted 220V, 3-phase. to 440V, 3-phase. Note: The thermal relay in Figure 83 is set for Note: The thermal relay in Figure 84 is 22 amp, 220V, 3-phase operation. -
Page 72: W1762 Wiring Diagram 220V, 3-Phase
W1761/W1762 12" Table Saw with Riving Knife W1762 Wiring Diagram 220V, 3-Phase �������� ������ ������ ������������� ��� �������� ������������������������ ���������������������������� ������� �� ��� ��������������������������� �� ������� See Figure 83 ����������������������������� �� ��� ������������������������ ����������� �� ���������������� �� �� �� ������... -
Page 73: W1762 Wiring Diagram 440V, 3-Phase
W1761/W1762 12" Table Saw with Riving Knife W1762 Wiring Diagram 440V, 3-Phase �������� ������ ������������� ������� �������� ������������������������ ������ ������� ���������������������������� ������� ��� �� ��������������������������� See Figure 84 �� ����������������������������� ���������� ��� ������������������������ �� ������ �� ��������������� � ��� ��... -
Page 74: Parts
W1761/W1762 12" Table Saw with Riving Knife PARTS Blade Guard Assembly � �� �� � �� � � �� � � �� �� �� �� �� � �� �� �� � �� �� �� �� �� � �� �� ��... -
Page 75: Fence Assembly
W1761/W1762 12" Table Saw with Riving Knife Fence Assembly ��� ��� ��� ��� ��� ��� ��� ��� ��� ��� ��� ��� ��� ��� ��� ��� ��� ��� ��� ��� ��� ��� ��� ��� ��� ��� ��� ��� ��� ��� Fence Assembly Parts List PART�#... -
Page 76: Miter Gauge Assembly
W1761/W1762 12" Table Saw with Riving Knife Miter Gauge Assembly ��� ��� ��� ��� ��� ��� ��� ��� ��� ��� ��� ��� ��� ��� ��� ��� ��� ��� ��� Miter Gauge Parts List PART�# DESCRIPTION PART�# DESCRIPTION X1761200 MITER�GAUGE�ASSEMBLY XPSS53M SET�SCREW�M5-.8�X�12... -
Page 77: Main Table, Motor & Cabinet
W1761/W1762 12" Table Saw with Riving Knife Main Table, Motor & Cabinet ���������������� ���������������� ����� ����� ����� ����� ����� ����� ����� ����� ����� ����� ����� ��� ��� ��� ��� ��� ��� ��� ��� ��� ��� ��� ��� ��� ��� ��� ���... - Page 78 W1761/W1762 12" Table Saw with Riving Knife Main Table, Motor & Cabinet Parts List PART�# DESCRIPTION PART�# DESCRIPTION X1761306 SHAFT XPK131M KEY�5�X�5�X�28 X1761307 BUSHING X1761359 SHAFT XPW03M FLAT�WASHER�6MM X1761360 BLADE XPB14M HEX�BOLT�M10-1.5�X�35 X1761361 ARBOR�FLANGE XPN02M HEX�NUT�M10-1.5 X1761362 ARBOR�NUT�1-12 X1761311 MOTOR�MOUNTING�BRACKET XPSB01M CAP�SCREW�M6-1�X�16...
- Page 79 W1761/W1762 12" Table Saw with Riving Knife PART�# DESCRIPTION PART�# DESCRIPTION X1761396 MITER�GAUGE�MOUNTING�BRACKET X1761420 RIGHT�TAPE X1761397 FENCE�RESTING�BRACKET XPSB49M CAP�SCREW�M6-1�X�60 XPRP27M ROLL�PIN�5�X�28 X1761422 ARBOR�1" X1761399 SHAFT X1761423 ARBOR�WRENCH XPHTEK30M TAP�SCREW�M3�X�6 X1761424 HANDWHEEL�HANDLE X1761401 L�PLATE XPWR810 COMBO�WRENCH�8�X�10 X1761402 BLADE�TILT�SHAFT�BRACKET XPWR1113 COMBO�WRENCH�11�X�13 X1761403...
-
Page 80: Extension Table Assembly
W1761/W1762 12" Table Saw with Riving Knife Extension Table Assembly ��� ��� ��� ��� ��� ��� ��� ��� ��� ��� ��� ��� ��� ��� ��� ��� ��� ��� ��� ��� ��� ��� ��� ��� ��� ��� ��� ��� ��� ���... -
Page 81: Label Placement
W1761/W1762 12" Table Saw with Riving Knife Label Placement Safety labels warn about machine hazards and how to prevent machine damage or injury. The owner of this machine MUST maintain the original location and readability of all labels on this machine. - Page 82 Warranty SHOP FOX Woodstock International, Inc. warrants all machinery to be free of defects from work- ® manship and materials for a period of two years from the date of original purchase by the original owner. This warranty does not apply to defects due directly or indirectly to misuse, abuse, negligence or accidents, lack of maintenance, or reimbursement of third party expenses incurred.
-
Page 85: Warranty Registration
2. How long have you been a woodworker/metalworker? _____ 0-2 Years _____ 2-8 Years ____ 8-20 Years _____ 20+ Years 3. How many of your machines or tools are Shop Fox ® _____ 0-2 _____ 3-5 ____ 6-9 _____ 10+ 4. - Page 86 FOLD ALONG DOTTED LINE Place Stamp Here WOODSTOCK INTERNATIONAL INC. P.O. BOX 2309 BELLINGHAM, WA 98227-2309 FOLD ALONG DOTTED LINE TAPE ALONG EDGES--PLEASE DO NOT STAPLE...