Table of Contents
Advertisement
Quick Links
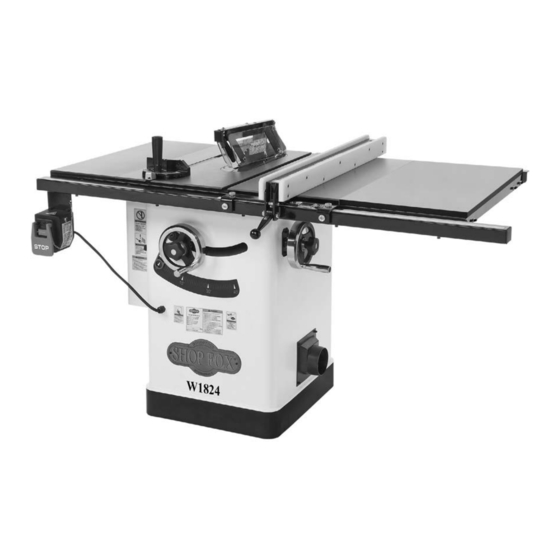
MODEL W1824
10" HYBRID TABLE SAW
w/EXTENSION TABLE
OWNER'S MANUAL
(FOR MODELS MANUFACTURED SINCE 3/11)
Phone: (360) 734-3482 • Online Technical Support: tech-support@shopfox.biz
COPYRIGHT © MAY, 2011 BY WOODSTOCK INTERNATIONAL, INC. REVISED DECEMBER, 2013 (ST)
WARNING: NO PORTION OF THIS MANUAL MAY BE REPRODUCED IN ANY SHAPE OR FORM WITHOUT
#13886JBTS
THE WRITTEN APPROVAL OF WOODSTOCK INTERNATIONAL, INC.
Printed in China
232857
Advertisement
Table of Contents

Related Manuals for Shop fox W1824


Summary of Contents for Shop fox W1824
- Page 1 MODEL W1824 10" HYBRID TABLE SAW w/EXTENSION TABLE OWNER'S MANUAL (FOR MODELS MANUFACTURED SINCE 3/11) Phone: (360) 734-3482 • Online Technical Support: tech-support@shopfox.biz COPYRIGHT © MAY, 2011 BY WOODSTOCK INTERNATIONAL, INC. REVISED DECEMBER, 2013 (ST) WARNING: NO PORTION OF THIS MANUAL MAY BE REPRODUCED IN ANY SHAPE OR FORM WITHOUT #13886JBTS THE WRITTEN APPROVAL OF WOODSTOCK INTERNATIONAL, INC. Printed in China 232857...
- Page 2 This manual provides critical safety instructions on the proper setup, operation, maintenance, and service of this machine/tool. Save this document, refer to it often, and use it to instruct other operators. Failure to read, understand and follow the instructions in this manual may result in fire or serious personal injury—including amputation, electrocution, or death.
-
Page 3: Table Of Contents
Contents INTRODUCTION ........2 Narrow-Rip Auxiliary Fence & Push Block .. 49 Woodstock Technical Support ....2 Outfeed & Support Tables ....51 Controls and Features ......2 Crosscut Sled ........51 Machine Specifications ......3 ACCESSORIES ........52 SAFETY ..........6 Table Saw Accessories ...... -
Page 4: Introduction
Model W1824 10" Hybrid Table Saw INTRODUCTION Woodstock Technical Support This machine has been specially designed to provide many years of trouble-free service. Close attention to detail, ruggedly built parts and a rigid quality control program assure safe and reliable operation. -
Page 5: Machine Specifications
Power Cord Gauge.................... 14 AWG Plug Included....................... Yes Included Plug Type..................6-20 for 220V Recommended Plug Type................5-20 for 110V Switch Type..........ON/OFF Push Button Switch w/Large Shut-Off Paddle Voltage Conversion Kit............... X1824204-1 for 110V Model W1824 Machine Specifications, Page 1 of 3... - Page 6 Fence Rail Width................... 2 in. Fence Rail Height..................1-5/8 in. Miter Gauge Information Miter Gauge Slot Type.................. T-Slot Miter Gauge Slot Size Width................3/4 in. Miter Gauge Slot Size Height................3/8 in. Model W1824 Machine Specifications, Page 2 of 3...
- Page 7 Easy glide fence system Powder coated paint Quick-release riving knife and blade guard assembly Knurled knobs for adjusting fence Includes regular & dado blade table inserts Device on blade guard allows enabling/disabling anti-kickback pawls Model W1824 Machine Specifications, Page 3 of 3...
-
Page 8: Safety
Model W1824 10" Hybrid Table Saw SAFETY SAFETY For Your Own Safety, Read Manual Before Operating Machine The purpose of safety symbols is to attract your attention to possible hazardous conditions. This manual uses a series of symbols and signal words intended to convey the level of importance of the safety messages. - Page 9 Model W1824 10" Hybrid Table Saw APPROVED OPERATION. Untrained operators STABLE MACHINE. Unexpected movement during can be seriously hurt by machinery. Only operations greatly increases the risk of injury allow trained or properly supervised people and loss of control. Verify machines are to use machine.
-
Page 10: Additional Safety For Table Saws
Model W1824 10" Hybrid Table Saw Additional Safety for Table Saws HAND & BODY POSITIONING. Touching a spinning FENCE. Make sure the fence remains properly saw blade will cause serious laceration or amputa- adjusted and parallel with the blade. Always lock tion injuries. -
Page 11: Kickback
Model W1824 10" Hybrid Table Saw Kickback • The splitter or riving knife maintains the kerf in the workpiece, reducing the chance of kickback. Always use the riving knife for all Kickback is a high speed expulsion of the non-through operations, unless a dado blade workpiece from the saw blade, which occurs when is installed. -
Page 12: Electrical
Model W1824 10" Hybrid Table Saw ELECTRICAL Circuit Requirements This machine must be connected to the correct size and The machine must be properly set up type of power supply circuit, or fire or electrical damage before it is safe to operate. DO NOT may occur. -
Page 13: Grounding Requirements
Model W1824 10" Hybrid Table Saw Grounding Requirements This machine MUST be grounded. In the event of certain The machine must be properly set up types of malfunctions or breakdowns, grounding provides before it is safe to operate. DO NOT a path of least resistance for electric current to travel—in... -
Page 14: Voltage Conversion
These replacing the plug on the power cord. Screws The require machine circuit breaker can be purchased from an authorized Shop Fox dealer. The required Ground Ground Center Jumpers plug and receptacle can be purchased from your local hardware store or it may be provided by your electrician. -
Page 15: Setup
Wrench or Socket 17mm .........1 • Wrench or Socket 14mm .........1 • Wrench or Socket 10mm .........1 The Model W1824 is a heavy machine. • Adjustable Wrench ........1 Serious personal injury may occur if safe moving methods are not used. To... -
Page 16: Inventory
Model W1824 10" Hybrid Table Saw Inventory The following is a description of the main components shipped with the Model W1824. Lay the components out to inventory them. Note: If you can't find an item on this list, check the mounting location on the machine or examine the packaging materials carefully. -
Page 17: Machine Placement
Model W1824 10" Hybrid Table Saw Machine Placement Cleaning Machine • Floor Load: This machine distributes a The table and other unpainted parts of your heavy load in a small footprint. Some table saw are coated with a waxy grease that protects them from corrosion during shipment. -
Page 18: Assembly
Model W1824 10" Hybrid Table Saw Assembly Assembly consists of installing minor components, the extension wings and table, fence rails, fence, and blade Shipping Brace guard. To assemble the table saw, do these steps: 1. Remove the shipping brace shown in Figure 11, then re-install the fasteners. - Page 19 Model W1824 10" Hybrid Table Saw 5. Remove the (6) cap screws, flat washers, and lock washers from both sides of the main table. Extension Wings 6. Inspect the extension wings and main table mating surfaces for burrs or foreign materials that may inhibit assembly.
- Page 20 Model W1824 10" Hybrid Table Saw 9. Attach the front rail to the table and extension wings with (4) M8-1.25 x 35 flat head screws, 8mm flat washers, 8mm lock washers, and M8-1.25 hex Equal nuts, as shown in Figure 17.
- Page 21 Model W1824 10" Hybrid Table Saw 14. Attach the fence rail tube to the front rail with (5) M6-1 x 16 cap screws, 6mm flat washers, and 6mm lock washers, as shown in Figure 20. Finger tighten the fasteners for now.
-
Page 22: Dust Collection
Model W1824 10" Hybrid Table Saw 22. Attach the switch to the bottom left-hand side of the front rail using (2) M5-.8 x 12 cap screws, (2) 5mm lock washers, and (2) 5mm flat washers (see Figure 23). Dust Collection Recommended CFM at Dust Port: .... -
Page 23: Test Run
Model W1824 10" Hybrid Table Saw Test Run Once the assembly is complete, test run the machine to make sure it runs properly for regular operations. The test run consists of verifying the following: 1) The motor powers up and runs correctly, and 2) the safety disabling mechanism on the switch works correctly. -
Page 24: Operations
Model W1824 10" Hybrid Table Saw OPERATIONS General This machine will perform many types of operations USE this and other machinery with that are beyond the scope of this manual. Many of these caution and respect. Always consider operations can be dangerous or deadly if performed safety first, as it applies to your incorrectly. -
Page 25: Operation Overview
Model W1824 10" Hybrid Table Saw Operation Overview Workpiece Inspection The purpose of this overview is to provide Some workpieces are not safe to cut on this the novice machine operator with a basic machine or may need to be modified before they understanding of how the machine is used during can be safely cut. -
Page 26: Non-Through & Through Cuts
"how to" books before beginning any projects. Regardless of the content in this section, Shop Fox will not be held liable for accidents caused by lack of training. -24-... -
Page 27: Blade Size Requirements
Model W1824 10" Hybrid Table Saw Blade Size Requirements When choosing a blade, make sure the blade size meets the requirements listed below. The thickness of the blade body and teeth can measured with calipers or any precision measurement device. - Page 28 Model W1824 10" Hybrid Table Saw Laminate Blade Features (Figure 33): • Best for cutting plywood or veneer • 40-80 teeth • Triple chip tooth profile • Very shallow gullet Triple Chip Thin Kerf Blade: A blade with thinner kerf than a Blade standard blade.
-
Page 29: Blade Installation
Model W1824 10" Hybrid Table Saw Blade Installation Properly installing the blade is critical to safe cutting operations that produce good results. Review this section, even if your blade came pre-installed. To install the blade, do these steps: 1. DISCONNECT SAW FROM POWER! 2. -
Page 30: Blade Guard Assembly
Model W1824 10" Hybrid Table Saw Blade Guard Assembly The term "blade guard" refers to the assembly that consists of the clear polycarbonate shield, the spreader, and the anti-kickback pawls on each side of the spreader (see Figure 37). Each of these components have... - Page 31 Model W1824 10" Hybrid Table Saw The blade guard, when properly installed, should be set up, as shown in Figure 39. It should pivot freely up and down, then return to the table in the resting position and completely cover the blade. It should also swing up high enough to accommodate the workpiece.
- Page 32 Model W1824 10" Hybrid Table Saw Disabling Pawls You might disable the pawls if you are concerned about them scratching a delicate workpiece, or if you We do not recommend disabling the believe that they will obstruct a narrow workpiece and pawls during normal operations unless cause feeding difficulty or loss of control.
-
Page 33: Riving Knife
Model W1824 10" Hybrid Table Saw Riving Knife The riving knife works in the same manner as the spreader on the blade guard assembly. It is a metal plate that prevents the newly cut workpiece from pinching the Minimum 1mm backside of the blade and causing kickback. -
Page 34: Ripping
Model W1824 10" Hybrid Table Saw Ripping Ripping means cutting with the grain of a natural wood workpiece. In man-made materials such as MDF or plywood, ripping simply means cutting lengthwise. To make a rip cut, do these steps: Never attempt to rip a workpiece that does not have one perfectly straight 1. -
Page 35: Crosscutting
Model W1824 10" Hybrid Table Saw Crosscutting Crosscutting means cutting across the grain of a natural wood workpiece. In other man-made materials, such as MDF or plywood, crosscutting means cutting across the width of the workpiece. To make a crosscut using the miter gauge, do these steps: 1. -
Page 36: Miter Cuts
Model W1824 10" Hybrid Table Saw Miter Cuts A miter cut is an angled crosscut. Miters are usually cut in the same manner as crosscuts, using the miter gauge and a predetermined mark on the workpiece. To perform a miter cut, do these steps: 1. -
Page 37: Dado Cutting
Model W1824 10" Hybrid Table Saw Dado Cutting Commonly used in furniture joinery, a dado is a straight channel cut in the face of the workpiece. Dadoes are "non-through" cuts that can be made with a dado blade or a standard saw blade. Figure 49 shows a cutaway view of a dado cut being made with a dado blade. - Page 38 Model W1824 10" Hybrid Table Saw To cut a dado with a dado blade, do these steps: 1. DISCONNECT SAW FROM POWER! 2. Adjust the dado blade to the desired depth of cut. 3. Adjust the distance between the fence and the...
- Page 39 Model W1824 10" Hybrid Table Saw Cutting Dados with a Standard Blade A ripping blade (described on Page 25) is typically the best blade to use for cutting dadoes when using Blade Cut 1 a standard blade, because it removes sawdust very efficiently.
-
Page 40: Rabbet Cutting
Model W1824 10" Hybrid Table Saw Rabbet Cutting Commonly used in furniture joinery, a rabbet cut is an L-shaped groove cut in the edge of the workpiece. Rabbets can be cut with either a dado blade or a standard Dado blades have a higher risk of saw blade. - Page 41 Model W1824 10" Hybrid Table Saw Cutting Rabbets with a Standard Blade A ripping blade is typically the best blade to use for cutting rabbets when using a standard blade because it removes sawdust very efficiently. (See Page 25 for blade details.) Also, a sacrificial fence is not required when...
-
Page 42: Resawing
Model W1824 10" Hybrid Table Saw Resawing Resawing is the process of cutting a thick piece of stock into one or more thinner pieces. Although resawing can be done with a table saw, we strongly recommend that Resawing operations require proper you use a bandsaw instead. -
Page 43: Auxiliary Fence
Model W1824 10" Hybrid Table Saw To build the resaw barrier, do these steps: #10 x 2" ⁄ " 1. Cut your wood pieces to the size specified above. Wood Screw If you are using hardwood, cut the pieces oversize, then joint and plane them to the correct size to make sure they are square and flat. - Page 44 Model W1824 10" Hybrid Table Saw Resawing Operation The table saw motor is pushed to its limits when resawing. If the motor starts to bog down, slow down The risk of kickback when resawing is your feed rate. Motor overloading and blade wear can high.
- Page 45 Model W1824 10" Hybrid Table Saw 8. Plug in the table saw, turn it ON, and use a push stick or push block to feed the workpiece through the blade, using a slow and steady feed rate. The danger of kickback increases relative to the depth of a cut.
-
Page 46: Shop-Made Safety Accessories
Model W1824 10" Hybrid Table Saw SHOP-MADE SAFETY ACCESSORIES Featherboards Easily made from scrap stock, featherboards provide an added degree of protection against kickback, especially when used together with push sticks. They also maintain pressure on the workpiece to keep it against the fence... - Page 47 Model W1824 10" Hybrid Table Saw 4. Rout a ⁄ "– ⁄ " wide slot 4"–5" long in the workpiece and 1"–2" from the short end of the featherboard, as "- " Slot illustrated in Figure 64. 1"-2" 5. Cut a miter bar that will fit in the table miter slot approximately 5"...
- Page 48 Model W1824 10" Hybrid Table Saw Mounting Featherboard with Clamps 1. DISCONNECT SAW FROM POWER! 2. Lower the saw blade, then adjust the fence to the desired width and secure it. 3. Place the workpiece against the fence, making sure it is 1"...
-
Page 49: Push Sticks
Model W1824 10" Hybrid Table Saw Push Sticks Push Stick Prohibition Zone When used correctly, push sticks reduce the risk of injury Store Push by keeping hands away from the blade while cutting. In Stick Here Push Stick the event of an accident, a push stick can absorb damage... -
Page 50: Push Blocks
Model W1824 10" Hybrid Table Saw Push Blocks Push Stick Prohibition Zone When used correctly, a push block reduces the risk of injury by keeping hands away from the blade while Push Stick cutting. In the event of an accident, a push block often... -
Page 51: Narrow-Rip Auxiliary Fence & Push Block
Model W1824 10" Hybrid Table Saw Narrow-Rip Auxiliary Fence & Push Block There are hundreds of designs for specialty jigs that can be found in books, trade magazines, and on the internet. These types of jigs can greatly improve the safety and consistency of cuts. - Page 52 Model W1824 10" Hybrid Table Saw Auxilliary Fence Keep the blade guard installed and in the down Blade position. Failure to do this could result in serious personal injury or death. Workpiece Using the Auxiliary Fence and Push Block Cutting Width 1.
-
Page 53: Outfeed & Support Tables
Model W1824 10" Hybrid Table Saw Outfeed & Support Tables One of the best accessories for improving the safety and Support Outfeed ease of using a table saw is simply placing a large table Table Table (outfeed table) behind the saw to catch the workpiece (see Figure 81). -
Page 54: Accessories
Model W1824 10" Hybrid Table Saw ACCESSORIES Table Saw Accessories The following table saw accessories may be available through your local Woodstock International Inc. Dealer. If you do not have a dealer in your area, these products are also available through online dealers. - Page 55 Model W1824 10" Hybrid Table Saw W1104—Yellow Board Buddy Pair ® Feature clockwise turning wheels to maintain constant, even feeding pressure. If a kickback occurs, the wheels lock up and function as anti- kickback devices. W1105—Green Board Buddy Pair ®...
-
Page 56: Maintenance
• Check/tighten the belt tension (Page 56). Cleaning Cleaning the Model W1824 is relatively easy. Vacuum excess wood chips and sawdust, and wipe off the remaining dust with a dry cloth. If any resin has built up, use a resin dissolving cleaner to remove it. After cleaning, treat all unpainted cast iron and steel with a non-staining lubricant. -
Page 57: Lubrication
Model W1824 10" Hybrid Table Saw Lubrication It is essential to clean components before lubricating them because dust and chips build up on these components and make them hard to move. Simply adding more grease to them will not yield smooth moving components. -
Page 58: Service
Model W1824 10" Hybrid Table Saw SERVICE General This section covers the most common service adjustments or procedures that may need to be made during the life of your machine. If you require additional machine service not included in this section, please contact Woodstock International Technical Support at (360) 734-3482 or send e-mail to: tech-support@shopfox.biz. -
Page 59: Replacing Belt
Model W1824 10" Hybrid Table Saw 5. Press the belt in the center to check belt tension. The belt is correctly tensioned when there is approximately ⁄ " deflection as it is pushed with moderate pressure, as shown in Figure 87. -
Page 60: Tilt Stop Collars
Model W1824 10" Hybrid Table Saw Tilt Stop Collars The table saw features stop collars that halt the blade tilt exactly at 45° and 90°. The stop collars have been set at the factory and should require no adjustments, unless you notice that your cuts are not accurate. - Page 61 Model W1824 10" Hybrid Table Saw 6. Place a square against the blade, as illustrated in Figure 88 on the previous page, then adjust the blade until it is perfectly square to the table. 7. Without turning the blade tilt leadscrew, finger- tighten the 90°...
-
Page 62: Miter Slot To Blade Parallelism
Model W1824 10" Hybrid Table Saw Miter Slot to Blade Parallelism Your table saw will give the best results if the miter slot and the rip fence are adjusted parallel to the blade. If either of these are not exactly parallel, your cuts and your finished work will be lower in quality, but more importantly, the risk of kickback will be increased. - Page 63 Model W1824 10" Hybrid Table Saw 6. Remove the six button head cap screws that secure the rear trunnion access panel (see Figure 95), then remove the panel and open the motor access cover to reach the trunnions. The trunnion and motor assembly could fall and crush...
- Page 64 Model W1824 10" Hybrid Table Saw 11. Tilt the blade to 45° and recheck the miter slot-to- blade parallelism. — If the blade is still parallel with the miter slot, no additional adjustments need to be made. Skip ahead to Step 15.
-
Page 65: Spreader Or Riving Knife Alignment
Model W1824 10" Hybrid Table Saw Spreader or Riving Knife Alignment Checking Alignment with Blade The blade guard spreader and riving knife must be aligned with the blade when installed. If the spreader/riving knife is not aligned with the blade, then the workpiece will before forced sideways during the cut, which will increase the risk of kickback. - Page 66 Model W1824 10" Hybrid Table Saw Adjusting Alignment The spreader/riving knife mounting position can be adjusted into alignment with the blade using the cap screws on the spreader/riving knife "L" bracket. Tools Needed Hex Wrench 5mm ..........1 Straightedge .............1 To adjust the spreader/riving knife position, do these steps: 1.
-
Page 67: Fence Adjustments
Model W1824 10" Hybrid Table Saw Fence Adjustments There are four main adjustments for the fence: 1) Height off the table, 2) squareness, 3) parallelism with the miter slot, and 4) clamping pressure. These adjustments are interconnected and some repetition may be needed when adjusting. - Page 68 Model W1824 10" Hybrid Table Saw 8. Place a square on the table and against the face of the fence, as shown in Figure 105, to check if the fence is square to the table. 90° Square — If the fence is square to the table, proceed to Fence Parallelism &...
- Page 69 Model W1824 10" Hybrid Table Saw 5. Slide the fence up against the right-hand edge of the Flush miter slot, as shown in Figure 106, then lock it in Side View Fence place. (Correct) Miter Face 6. Examine how the fence lines up with the miter slot Slots along its length.
-
Page 70: Miter Gauge Adjustments
Model W1824 10" Hybrid Table Saw Miter Gauge Adjustments The miter gauge is equipped with stop screws that allow you to easily adjust the miter gauge 0°– 30° left, 90°, and 0°–45° right. The stop screws contact the shaft, which moves in or out of the way for adjustments. -
Page 71: Electrical Safety Instructions
Model W1824 10" Hybrid Table Saw Electrical Safety Instructions These pages are current at the time of printing. However, in the spirit of improvement, we may make changes to the electrical systems of future machines. Study this diagram carefully. If you notice differences between your machine and these wiring diagrams, call Woodstock International Technical Support at (360) 734-3482. -
Page 72: Wiring Diagram
Model W1824 10" Hybrid Table Saw Wiring Diagram Read Page 69 STOP SWITCH Before Wiring ON/OFF SWITCH 110 VAC 220 VAC 5-20 Plug 6-20 PLUG (As Recommended) Ground Neutral Load Line KEDU HY56 20A 250V 35A 125V Ground Ground Rewired for 110V... -
Page 73: Electrical Components
Model W1824 10" Hybrid Table Saw Electrical Components Capacitors Junction Box Figure 110. Motor capacitor location. Figure 111. Motor junction box location. Circuit Breaker ON/OFF Switch Figure 112. Switch location. -71-... -
Page 74: Troubleshooting
Model W1824 10" Hybrid Table Saw Troubleshooting This section covers the most common problems and corrections with this type of machine. WARNING! DO NOT make any adjustments until power is disconnected and moving parts have come to a complete stop! - Page 75 Model W1824 10" Hybrid Table Saw PROBLEM POSSIBLE CAUSE CORRECTIVE ACTION 1. Replace blade (see Page 27). Blade is not aligned with 1. Blade is warped. miter slot or fence. 2. Make miter slot parallel to blade (see Page 60).
-
Page 76: Parts
Model W1824 10" Hybrid Table Saw PARTS Cabinet & Table PART # DESCRIPTION PART # DESCRIPTION X1824001 EXTENSION WING XPS14M PHLP HD SCR M6-1 X 12 XPCAP64M CAP SCREW M10-1.5 X 25 XPLW03M LOCK WASHER 6MM XPLW06M LOCK WASHER 10MM... -
Page 77: Trunnion & Switch Breakdown
Model W1824 10" Hybrid Table Saw Trunnion & Switch Breakdown 117 119 101 102 106-1 106-6 103 105 126 125 106-5 106-2 106-4 106-3 183 182 204-1 -75-... -
Page 78: Trunnion & Switch Parts List
Model W1824 10" Hybrid Table Saw Trunnion & Switch Parts List REF PART # DESCRIPTION REF PART # DESCRIPTION XPB03M HEX BOLT M8-1.25 X 16 X1824150 LOCKING PLATE XPLW04M LOCK WASHER 8MM X1824151 KEYED LOCK WASHER XPLN07M LOCK NUT M16-2 XPSS26M SET SCREW M5-.8 X 6... -
Page 79: Blade Guard
Model W1824 10" Hybrid Table Saw Blade Guard PART # DESCRIPTION PART # DESCRIPTION XPRP39M ROLL PIN 4 X 20 XPB122M HEX BOLT M4-.7 X 8 X1819419 TORSION SPRING X1819432V2 GUARD SUPPORT XPLN03M LOCK NUT M6-1 XPS62M PHLP HD SCR M6-1 X 30... -
Page 80: Fence/Rails/Miter Gauge Breakdown
Model W1824 10" Hybrid Table Saw Fence/Rails/Miter Gauge Breakdown 501 502 603 604 -78-... -
Page 81: Fence/Rails/Miter Gauge Parts List
Model W1824 10" Hybrid Table Saw Fence/Rails/Miter Gauge Parts List REF PART # DESCRIPTION REF PART # DESCRIPTION 401 X1824401 MITER GAUGE HANDLE CAP 513 XPS22M PHLP HD SCR M5-.8 X 25 402 X1824402 MITER GUAGE HANDLE 514 XPLW01M LOCK WASHER 5MM... -
Page 82: Label Placement
Model W1824 10" Hybrid Table Saw Label Placement PART # DESCRIPTION PART # DESCRIPTION X1824701 BLADE GUARD LABEL X1824707 TABLE SAW WARNING LABEL XLABEL-06A GLASSES/RESPIRATOR LABEL XLABEL-07 DISCONNECT POWER LABEL D3377 SHOP FOX NAMEPLATE XLABEL-05 KEEP DOOR CLOSED LABEL X1824704... - Page 86 Fold along dotted lIne place stamp Here Woodstock international inc. p.o. box 2309 bellingham, Wa 98227-2309 Fold along dotted lIne tape along edges--please do not staple...
-
Page 87: Warranty
Woodstock International, Inc. will repair, replace, or arrange for a dealer refund at its expense and at its option, the Shop Fox machine or machine part, which in proper and intended use has proven to be defective, provided that the original owner returns the product prepaid to an authorized warranty or repair facility as designated by our Bellingham, Washington office with proof of their purchase of the product within two years, and provides Woodstock International, Inc. - Page 88 High Quality Machines and Tools Woodstock International, Inc. carries thousands of products designed to meet the needs of today's woodworkers and metalworkers. Ask your dealer about these fine products:...