Table of Contents
Advertisement
Quick Links
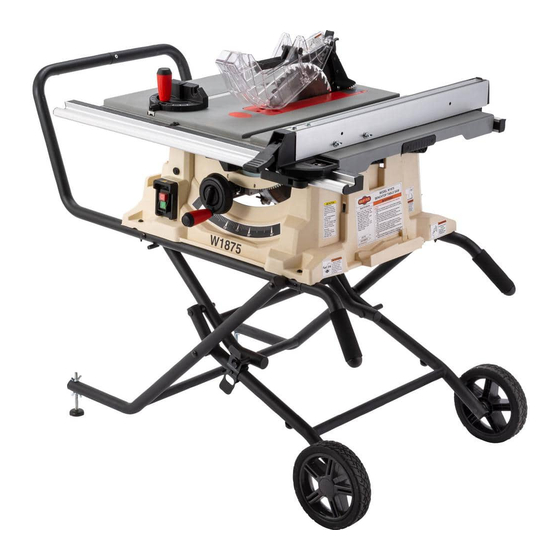
MODEL W1875
BENCHTOP TABLE SAW
OWNER'S MANUAL
(FOR MODELS MANUFACTURED SINCE 1/21)
Phone: (360) 734-3482 • Online Technical Support: techsupport@woodstockint.com
COPYRIGHT © NOVEMBER, 2020 BY WOODSTOCK INTERNATIONAL, INC.
WARNING: NO PORTION OF THIS MANUAL MAY BE REPRODUCED IN ANY SHAPE OR FORM WITHOUT
THE WRITTEN APPROVAL OF WOODSTOCK INTERNATIONAL, INC.
#20601AI Printed in China
Advertisement
Table of Contents

Related Manuals for Shop fox W1875


Summary of Contents for Shop fox W1875
- Page 1 MODEL W1875 BENCHTOP TABLE SAW OWNER'S MANUAL (FOR MODELS MANUFACTURED SINCE 1/21) Phone: (360) 734-3482 • Online Technical Support: techsupport@woodstockint.com COPYRIGHT © NOVEMBER, 2020 BY WOODSTOCK INTERNATIONAL, INC. WARNING: NO PORTION OF THIS MANUAL MAY BE REPRODUCED IN ANY SHAPE OR FORM WITHOUT THE WRITTEN APPROVAL OF WOODSTOCK INTERNATIONAL, INC. #20601AI Printed in China...
- Page 2 This manual provides critical safety instructions on the proper setup, operation, maintenance, and service of this machine/tool. Save this document, refer to it often, and use it to instruct other operators. Failure to read, understand and follow the instructions in this manual may result in fire or serious personal injury—including amputation, electrocution, or death.
-
Page 3: Table Of Contents
Contents INTRODUCTION........2 SHOP-MADE.SAFETY.ACCESSORIES..... 41 Woodstock Technical Support ....2 Featherboards ........41 Machine Specifications ......3 Push Sticks ........44 Identification ........6 Push Blocks ........45 Controls & Components ......7 ACCESSORIES........46 Glossary of Terms ........ 8 Table Saw Accessories ...... -
Page 4: Introduction
Model W1875 (For Machines Mfd. Since 1/20) INTRODUCTION Woodstock.Technical.Support This machine has been specially designed to provide many years of trouble-free service. Close attention to detail, ruggedly built parts and a rigid quality control program assure safe and reliable operation. -
Page 5: Machine Specifications
Included Plug Type....................1‐15 Switch Type..............Magnetic ON/OFF Button Switch Motors Main Horsepower....................2 HP Phase....................Single‐Phase Amps......................15A Speed....................4400 RPM Type....................Universal Power Transfer ..................Direct Bearings..............Sealed & Permanently Lubricated Model W1875 Machine Specifications, Page 1 of 3... - Page 6 Miter Gauge Slot Size Height................3/8 in. Construction Table....................Aluminum Wings....................Aluminum Trunnions....................Cast Iron Body Assembly................... Plastic Fence Assembly..................Aluminum Rails....................Aluminum Miter Gauge Construction................. Aluminum Guard....................Clear Plastic Arbor Bearings............Sealed & Permanently Lubricated Model W1875 Machine Specifications, Page 2 of 3...
- Page 7 Extension Table Expands Up To 42‐1/2" Wide for Ripping Large Workpieces Accessories Aluminum Fence Miter Gauge Blade Guard with Anti‐Kickback Pawls Combo Riving Knife/Spreader Plastic Push Stick Arbor Wrench Included 10 in. Carbide‐Tipped Blade Standard and Dado Table Inserts Model W1875 Machine Specifications, Page 3 of 3...
-
Page 8: Identification
Model W1875 (For Machines Mfd. Since 1/20) Identification Become familiar with the names and locations of the controls and features shown below to better understand the instructions in this manual. Blade Guard w/ Anti-Kickback Pawls Miter Gauge Fence Fence Micro-Adjust... -
Page 9: Controls & Components
Model W1875 (For Machines Mfd. Since 1/20) Controls.&.Components Refer to Figures.1–3.and the following descriptions to become familiar with the basic controls and components of this machine. Understanding these items and how they To.reduce.your.risk.of.serious. work will help you understand the rest of the manual and injury,.read.this.entire.manual. -
Page 10: Glossary Of Terms
Model W1875 (For Machines Mfd. Since 1/20) Glossary.of.Terms The following is a list of common definitions, terms and phrases used throughout this manual as they relate to this table saw and woodworking in general. Become familiar with these terms for assembling, adjusting or operating this machine. -
Page 11: Safety
Model W1875 (For Machines Mfd. Since 1/20) SAFETY SAFETY For.Your.Own.Safety, Read.Manual.Before.Operating.Machine The. purpose. of. safety. symbols. is. to. attract. your. attention. to. possible. hazardous. conditions.. This. manual.uses.a.series.of.symbols.and.signal.words.intended.to.convey.the.level.of.importance.of.the. safety.messages..The.progression.of.symbols.is.described.below..Remember.that.safety.messages.by. themselves. do. not. eliminate. danger. and. are. not. a. substitute. for. proper. accident. prevention. mea- sures—this.responsibility.is.ultimately.up.to.the.operator! - Page 12 Model W1875 (For Machines Mfd. Since 1/20) WEARING.PROPER.APPAREL..Do not wear FORCING.MACHINERY..Do not force machine. It clothing, apparel, or jewelry that can become will do the job safer and better at the rate for entangled in moving parts. Always tie back which it was designed.
-
Page 13: Additional Safety For Table Saws
Model W1875 (For Machines Mfd. Since 1/20) Additional.Safety.for.Table.Saws Serious. cuts,. amputation,. or. death. can. occur. from. contact. with. rotating. saw. blade. during. opera- tion..Workpieces,.broken.blades,.or.flying.particles.thrown.by.blade.can.blind.or.strike.operators.or. bystanders. with. deadly. force.. To. reduce. the. risk. of. these. hazards,. operator. and. bystanders. MUST. completely.heed.the.hazards.and.warnings.below. -
Page 14: Preventing Kickback
Model W1875 (For Machines Mfd. Since 1/20) Preventing.Kickback • Never move the workpiece backwards or try to back it out of a cut while the blade is moving. If you cannot complete a cut for Below are ways to avoid the most common... -
Page 15: Electrical
Model W1875 (For Machines Mfd. Since 1/20) ELECTRICAL Circuit.Requirements This machine must be connected to the correct size and type of power supply circuit, or fire or electrical damage may occur. Read through this section to determine if an The machine must be properly set up adequate power supply circuit is available. -
Page 16: Polarized Plug
Model W1875 (For Machines Mfd. Since 1/20) Polarized.Plug This tool is double-insulated and therefore does not have a grounding wire or plug. The two-pronged, NEMA 1-15 5-15 Receptacle plug has a polarized end; this means that one prong (the neutral connector) is wider than the other (the hot connector). -
Page 17: Setup
Model W1875 (For Machines Mfd. Since 1/20) SETUP Unpacking This machine has been carefully packaged for safe This machine presents transportation. If you notice the machine has been serious injury hazards damaged during shipping, please contact your authorized to untrained users. Read Shop Fox dealer immediately. -
Page 18: Hardware Recognition Chart
Model W1875 (For Machines Mfd. Since 1/20) Hardware.Recognition.Chart USE THIS CHART TO IDENTIFY HARDWARE DURING THE INVENTORY/ASSEMBLY ⁄ " ⁄ " ⁄ " PROCESS. ⁄ " ⁄ " ⁄ " ⁄ " ⁄ " ⁄ " ⁄ " ⁄ "... -
Page 19: Inventory
Model W1875 (For Machines Mfd. Since 1/20) Inventory The following is a list of items shipped with your machine. Before beginning setup, lay these items out and inventory them. Note: If you cannot find an item on this list, carefully check around/inside the machine and packaging materials. -
Page 20: Machine Placement
Model W1875 (For Machines Mfd. Since 1/20) Machine.Placement Workbench.Load Refer to the Machine.Specifications for the weight and footprint specifications of your machine. Some workbenches may require additional reinforcement to support the weight ⁄ " of the machine and workpiece materials. - Page 21 Model W1875 (For Machines Mfd. Since 1/20) 4.. Attach wheel bracket to middle bracket with (2) M8-1.25 x 40 carriage bolts, (2) spacers, and (2) M8-1.25 lock nuts (see Figure.11). Wheel 5.. Attach wheel bracket to foot bracket with (2) M8-1.25 x 40 carriage bolts, (2) spacers, and (2)
-
Page 22: Dust Collection
Model W1875 (For Machines Mfd. Since 1/20) 10. Slide fence up against right hand edge of miter slot, and lock it in place. Examine how fence lines up Fence with miter slot (see Figure.14). Miter Slot Note: It is permissible for back of fence to pivot... -
Page 23: Test Run
Model W1875 (For Machines Mfd. Since 1/20) Test.Run Once assembly is complete, test run the machine to ensure it is properly connected to power and safety components are functioning properly. Serious. injury. or. death. can. result. from. using. this. machine. BEFORE. -
Page 24: Operations
Model W1875 (For Machines Mfd. Since 1/20) OPERATIONS General This machine will perform many types of operations that are beyond the scope of this manual. Many of these operations can be dangerous or deadly if performed incorrectly. The instructions in this section are written with the understanding that the operator has the necessary knowledge and skills to operate this machine. -
Page 25: Workpiece Inspection
Model W1875 (For Machines Mfd. Since 1/20) Workpiece.Inspection •. Large/Loose Knots:.Loose knots can Some workpieces are not safe to cut or may become dislodged during the cutting require modification before they can be made operation. Large knots can cause kickback safe to cut. -
Page 26: Non-Through & Through Cuts
Model W1875 (For Machines Mfd. Since 1/20) Non-Through. &.Through.Cuts Non-Through.Cuts A non-through cut is a sawing operation where the blade Fence does not protrude above the top face of the wood stock, Saw Blade as shown in Figure.16. Workpiece Examples of non-through cuts include dadoes and rabbets. -
Page 27: Blade Size Requirements
Model W1875 (For Machines Mfd. Since 1/20) Blade.Size.Requirements When choosing a main blade, make sure the blade size meets the requirements listed below. The thickness of the blade body and teeth can be measured with calipers or any precision measuring device. - Page 28 Model W1875 (For Machines Mfd. Since 1/20) Laminate.Blade.Features.(Figure.21): • Best for cutting plywood or veneer • 40-80 teeth • Triple chip tooth profile • Very shallow gullet Triple Chip Thin.Kerf.Blade: A blade with thinner kerf than a Blade standard blade. Since the spreader/riving knife included...
-
Page 29: Blade Installation
Model W1875 (For Machines Mfd. Since 1/20) Blade.Installation Review this section, even if your saw blade came pre- installed. To.remove.&.install.blade,.do.these.steps: To.reduce.risk.of.injury,. always. disconnect. 1. DISCONNECT MACHINE FROM POWER! power. to. saw. before. changing. blades.. Since. 2. Raise blade all the way up, then remove blade guard the.blade.is.sharp,.use. -
Page 30: Blade Guard Assembly
Model W1875 (For Machines Mfd. Since 1/20) Blade.Guard.Assembly The term "blade guard" refers to the assembly that Pawls consists of the clear polycarbonate shield, the spreader, and the anti-kickback pawls on each side of the spreader (see Figure.25). Each of these components has important safety functions during the operation of the saw. - Page 31 Model W1875 (For Machines Mfd. Since 1/20) 4. Push spreader/riving knife towards lock lever to disengage positioning pins. 5. Pull spreader/riving knife upwards until positioning pins lock into lowest mounting holes (see Figure.27). 6. Push lock lever down and check spreader/riving Top hole / down position knife alignment (see Page 51).
- Page 32 Model W1875 (For Machines Mfd. Since 1/20) Anti-Kickback.Pawls The anti-kickback pawls allow the workpiece to travel in only one direction. If the workpiece moves backwards, Pawls such as during a kickback, the pawls will dig into the workpiece to slow or stop it.
-
Page 33: Riving Knife
Model W1875 (For Machines Mfd. Since 1/20) Riving.Knife The spreader also functions as a riving knife, which works Minimum 1mm in the same manner as the spreader, but is used for non- Height Difference Maximum 5mm through cuts. It is a metal plate that prevents the newly cut workpiece from pinching the backside of the blade and causing kickback. - Page 34 Model W1875 (For Machines Mfd. Since 1/20) 5. Push spreader/riving knife down until positioning pins lock into top mounting holes (see Figure.34). 6. Push lock lever down and check spreader/riving knife alignment (see Page 51). Top hole / down position 7.
-
Page 35: Ripping
Model W1875 (For Machines Mfd. Since 1/20) Ripping Ripping means cutting with the grain of a natural wood workpiece. In man-made materials such as MDF or plywood, ripping simply means cutting lengthwise. Serious. injury. can. be. caused. by. kickback.. Kickback. is. a. high-speed. -
Page 36: Crosscutting
Model W1875 (For Machines Mfd. Since 1/20) Crosscutting "Crosscutting" means cutting across the grain of a natural wood workpiece, usually with a miter saw. In other man- made materials, such as MDF or plywood, crosscutting means cutting across the width of the workpiece. -
Page 37: Miter Cuts
Model W1875 (For Machines Mfd. Since 1/20) Miter.Cuts A miter cut is an angled crosscut. Miters are usually cut in the same manner as crosscuts, using the miter gauge and a predetermined mark on the workpiece. To.perform.a.miter.cut,.do.these.steps: 1. DISCONNECT MACHINE FROM POWER! 2.. -
Page 38: Dado Cutting
Dado Blade a standard saw blade. Figure.39 shows a cutaway view of a dado cut being made with a dado blade. The Model W1875 can accommodate dado blades up to 10" Fence Workpiece in diameter with a maximum thickness of ". - Page 39 Model W1875 (For Machines Mfd. Since 1/20) Cutting.Dadoes.with.a.Dado.Blade Because dado blades are much wider than standard blades, they place a greater amount of force against the Dado. blades. have. a. higher. risk. of. workpiece when cutting. This additional force increases kickback.
- Page 40 Model W1875 (For Machines Mfd. Since 1/20) Cutting.Dadoes.with.a.Standard.Blade A ripping blade (described on Page.25) is typically the best blade to use when cutting dadoes with a standard Blade Cut 1 blade because it removes sawdust very efficiently. Fence Workpiece To.use.standard.saw.blade.to.cut.dadoes,.do.these.
-
Page 41: Rabbet Cutting
Model W1875 (For Machines Mfd. Since 1/20) Rabbet.Cutting Commonly used in furniture joinery, a rabbet cut is an L-shaped groove cut in the edge of the workpiece. Rabbets can be cut with either a dado blade or a standard Dado. blades. have. a. higher. risk. of. - Page 42 Model W1875 (For Machines Mfd. Since 1/20) Cutting.Rabbets.with.a.Standard.Blade A ripping blade is typically the best blade to use for cutting rabbets when using a standard blade because it removes sawdust very efficiently. (See Page.25 for blade details.) Also, a sacrificial fence is not required when cutting rabbets with a standard blade.
-
Page 43: Shop-Made.safety.accessories
Model W1875 (For Machines Mfd. Since 1/20) SHOP-MADE.SAFETY.ACCESSORIES Featherboards Easily made from scrap stock, featherboards provide an We.recommend.using.a.bandsaw. added degree of protection against kickback, especially for.making.fingers.in.the.next.step. when used together with push sticks. They also maintain because.it.tends.to.be.safer..A.table. pressure on the workpiece to keep it against the fence saw.can.be.used,.but.it.will.over-cut. - Page 44 Model W1875 (For Machines Mfd. Since 1/20) 4. Rout a ⁄ "– ⁄ " wide slot 4"–5" long in workpiece and 1"–2" from short end of featherboard (see Figure. "— " Slot 49). 1"—2" 5. Cut a miter bar approximately 5" long that will fit in table miter slot, as shown in Figure.50.
- Page 45 Model W1875 (For Machines Mfd. Since 1/20) Mounting.Featherboard.w/Clamps 1. Lower saw blade, then adjust fence to desired width The. featherboard. should. be. placed. and secure it. firmly. enough. against. the. workpiece. to. keep. it. against. the. fence. but. not. 2. Place workpiece against fence, making sure it is 1" in so.
-
Page 46: Push Sticks
Model W1875 (For Machines Mfd. Since 1/20) Push.Sticks Supporting: A second push stick can be used to keep the workpiece firmly against the fence while cutting. When using a push stick in this When used correctly, push sticks reduce the risk manner, only apply pressure before the blade;... -
Page 47: Push Blocks
Model W1875 (For Machines Mfd. Since 1/20) Push.Blocks The notched end of the push block is then used to push the workpiece the rest of the way through the cut, keeping the operator's hands at When used correctly, a push block reduces a safe distance from the blade. -
Page 48: Accessories
Model W1875 (For Machines Mfd. Since 1/20) ACCESSORIES Table.Saw.Accessories The following table saw accessories may be available through your local Woodstock International Inc. Dealer. If you do not have a dealer in your area, these products are also available through online dealers. -
Page 49: Maintenance
Lubricate blade height worm and bevel gears (Page. 48). Cleaning.&.Protecting Cleaning the Model W1875 is relatively easy. Vacuum excess wood chips and sawdust, and wipe off the remaining dust with a dry cloth. If any resin has built up, use a resin dissolving cleaner to remove it. -
Page 50: Lubrication
Model W1875 (For Machines Mfd. Since 1/20) Lubrication It is essential to clean components before lubricating them because dust and chips build up on lubricated components and make them hard to move. Simply adding more grease to them will not yield smooth moving components. -
Page 51: Service
Model W1875 (For Machines Mfd. Since 1/20) SERVICE General This section covers the most common service adjustments or procedures that may need to be made during the life of your machine. If you require additional machine service not included in this section, please contact Woodstock International Technical Support at (360) 734-3482 or send e-mail to: techsupport@woodstockint.com. -
Page 52: Miter Slot To Blade Parallelism
Model W1875 (For Machines Mfd. Since 1/20) Miter.Slot.to.Blade. Parallelism Your table saw will give the best results if the miter slot is adjusted parallel to the blade. If the miter slot is not exactly parallel, your cuts and your finished work will be lower in quality, but more importantly, the risk of kickback will be increased. -
Page 53: Spreader Or Riving Knife Alignment
Model W1875 (For Machines Mfd. Since 1/20) 6. Loosen (4) trunnion mounting bolts on table as shown in Figure.66. Trunnion 7. Move the trunnion assembly in the direction needed Mounting by gently pushing the blade height handwheel or the Bolt dust port. - Page 54 Model W1875 (For Machines Mfd. Since 1/20) Adjusting.Alignment The spreader/riving knife mounting position can be adjusted into alignment with the blade using the cap screws on the spreader/riving knife bracket. Tools.Needed. Hex Wrench 4mm ..........1 To adjust spreader/riving knife position, do these steps: 1.
-
Page 55: Fence Scale Calibration
Model W1875 (For Machines Mfd. Since 1/20) Fence.Scale.Calibration The fence scale indicator window, shown in Figure.70, can be calibrated with the fence scale if you notice that Indicator Window your cuts do not accurately match what is shown on the fence scale. - Page 56 Model W1875 (For Machines Mfd. Since 1/20) Table/Dado.Insert. Adjustment The table/dado insert must sit perfectly flush with the table to provide a smooth, continuous surface for the workpiece to slide over. The insert is held in place by a magnet and sits on top of four adjustment screws (see Figure 71).
-
Page 57: Calibrating Fence To Blade
Model W1875 (For Machines Mfd. Since 1/20) Calibrating.Fence.to. Blade Two hex bolts on top of the fence position it parallel with Fence the blade (see Figure.73). Follow the procedures below to check the fence/blade parallelism and adjust the fence if Miter Slot necessary. -
Page 58: Miter Gauge Adjustments
Model W1875 (For Machines Mfd. Since 1/20) Miter.Gauge.Adjustments The miter gauge has quick stops set at -60°, -45°, -30°, 0°, 30°, 45°, and 60° and should require no adjustments unless you notice that your cuts are not accurate. Tools.Needed. Phillips Head Screwdriver #2 ........1 90°... -
Page 59: Brush Replacement
Model W1875 (For Machines Mfd. Since 1/20) Brush.Replacement This table saw is equipped with a universal motor that uses two carbon brushes to transmit electrical current inside the motor. These brushes are considered to be regular "wear items" or "consumables" that will need to be replaced during the life of the motor. -
Page 60: Troubleshooting
Model W1875 (For Machines Mfd. Since 1/20) Troubleshooting The following troubleshooting tables cover common problems that may occur with this machine. If you need replacement parts or additional troubleshooting help, contact our Technical Support. Note: Before contacting Tech Support, find the machine serial number and manufacture date, and if available, your original purchase receipt. - Page 61 Model W1875 (For Machines Mfd. Since 1/20) Operation PROBLEM POSSIBLE.CAUSE CORRECTIVE.ACTION Fence does not 1. Fence not mounted/adjusted correctly. 1. Remount fence and adjust correctly. move smoothly. 2. Rails dirty or sticky. 2. Clean and lubricate/wax rails. Material moves 1. Improper feeding technique.
- Page 62 Model W1875 (For Machines Mfd. Since 1/20) PROBLEM POSSIBLE.CAUSE CORRECTIVE.ACTION Tooth marks on 1. Blade is warped/damaged/dull. 1. Replace blade (Page 27). 2. Adjust fence parallel with blade (Page 55). cut edge. 2. Fence not parallel with blade. 3. Adjust miter slot parallel with blade (Page 50).
-
Page 63: Electrical Safety Instructions
Model W1875 (For Machines Mfd. Since 1/20) Electrical.Safety.Instructions These pages are current at the time of printing. However, in the spirit of improvement, we may make changes to the electrical systems of future machines. Compare the manufacture date of your machine to the one stated in this manual, and study this section carefully. -
Page 64: Electrical Components
Model W1875 (For Machines Mfd. Since 1/20) Electrical.Components Circuit Breaker Motor Brush ON/OFF Button Switch Motor Brush Figure.79. Motor brushes. Figure.78. Switch box wiring. Wiring.Diagram Switch Box 1-15 Plug Read Page 61 (viewed from behind) STOP Before Circuit NEUTRAL Wiring... -
Page 65: Parts
Model W1875 (For Machines Mfd. Since 1/20) PARTS Trunnions.&.Blade REF PART # DESCRIPTION REF PART # DESCRIPTION X18750010 TAP SCREW M4 X 12 X18750036 CAP SCREW M4-.7 X 25 X18750011 FENDER WASHER 5MM X18750037 BLADE TILT LOCK HANDLE X18750012 LOWER BLADE GUARD X18750038 HEX NUT M10-1.5... -
Page 66: Fence
Model W1875 (For Machines Mfd. Since 1/20) Fence REF PART # DESCRIPTION REF PART # DESCRIPTION X18750100 FENCE ASSEMBLY X18750114 FENCE X18750101 PHLP HD SCR M4-.7 X 10 X18750115 FENDER WASHER 6MM X18750102 FLAT WASHER 4MM X18750116 COMPRESSION SPRING X18750103... -
Page 67: Miter Gauge
Model W1875 (For Machines Mfd. Since 1/20) Miter.Gauge REF PART # DESCRIPTION REF PART # DESCRIPTION X18750200 MITER GAUGE ASSEMBLY X18750208 MITER GAUGE INDICATOR X18750201 HANDLE CAP X18750209 MITER HINGE PIN X18750202 FIXED HANDLE 18 X 33, M6-1 X 10... -
Page 68: Anti-Kickback Pawls & Blade Guard
Model W1875 (For Machines Mfd. Since 1/20) Anti-Kickback.Pawls.&.Blade.Guard REF PART # DESCRIPTION REF PART # DESCRIPTION X18750300 ANTI-KICKBACK PAWLS ASSEMBLY X18750402 FENDER WASHER 5MM X18750301 PHLP HD SCR M4-.7 X 10 X18750403 COTTER PIN RETAINING X18750302 X18750404 LOCK NUT M5-.8... -
Page 69: Table
Model W1875 (For Machines Mfd. Since 1/20) Table 650-1 650-2 650-3 650-5 650-4 650-7 650-6 REF PART # DESCRIPTION PART # DESCRIPTION X18750600 TABLE ASSEMBLY X18750623 EXTENSION ROD HOLDER X18750601 FLAT HD SCR M4-.7 X 12 X18750624 FLAT WASHER 6MM... -
Page 70: Motor & Gear Box
Model W1875 (For Machines Mfd. Since 1/20) Motor.&.Gear.Box 752-5 752-6 752-8 752-4 752-2 752-3 752-1 752-7 -68-... - Page 71 Model W1875 (For Machines Mfd. Since 1/20) Motor.&.Gear.Box.Parts.List REF PART # DESCRIPTION PART # DESCRIPTION X18750701 PHLP HD SCR M4-.7 X 12 X18750736 BEVEL GEAR X18750702 DUST COLLECTION COVER X18750737 TAP SCREW M4 X 22 X18750703 TAP SCREW M4 X 12...
-
Page 72: Base
Model W1875 (For Machines Mfd. Since 1/20) Base REF PART # DESCRIPTION REF PART # DESCRIPTION X18750800 TABLE SAW BASE ASSEMBLY X18750808 TAP SCREW 4 X 16 X18750801 ROUND KNOB M8-1.25 X18750809 ANTI-KICKBACK PAWLS STORAGE BRACKET X18750802 ARBOR WRENCH X18750810 CORD STORAGE BRACKET X18750803 KNOB CLAMP M8-1.25... -
Page 73: Mobile Stand
Model W1875 (For Machines Mfd. Since 1/20) Mobile.Stand REF PART # DESCRIPTION REF PART # DESCRIPTION X18750900 MOBILE STAND ASSEMBLY X18750916 SHOULDER SCREW M6-1 X 15, 8 X 43 X18750901 TAP SCREW M5 X 10 X18750917 STAND LOCK PLATE X18750902 FOOT PAD... -
Page 74: Labels & Cosmetics
Model W1875 (For Machines Mfd. Since 1/20) Labels.&.Cosmetics 1001 1002 1003 0° AMPUTATION HAZARD! Always keep fingers and hands away from moving blade. 1005 1004 1016 WARNING! If blade guard Removing is removed for blade guard a special cut, increases risk some other of injury—it... -
Page 75: Warranty
Woodstock International, Inc. will repair, replace, or arrange for a dealer refund, at its expense and option, the Shop Fox machine or machine part proven to be defective for its designed and intended use, provided that the original owner returns the product prepaid to an authorized warranty or repair facility as designated by our Bellingham, Washington office with proof of their purchase of the product within two years, and provides Woodstock International, Inc.