Q-See QT SERIES User Manual
Hybrid dvrs
Hide thumbs
Also See for QT SERIES:
- User manual (89 pages) ,
- Remote monitoring setup manual (78 pages) ,
- Manual (48 pages)

Related Manuals for Q-See QT SERIES


Summary of Contents for Q-See QT SERIES
- Page 1 QT SERIES HYBRID DVRS USER MANUAL...
-
Page 2: An Important Note About Analog And Sdi Cameras
About this Manual This manual is written for the QT series of hybrid DVRs. Not all features and capabilities are shared across all models so you may see features described which are not applicable or available on your machine. In addition you may see screen images that do not exactly match those on your display. -
Page 3: Table Of Contents
9 .2 Calculating the Recording Capacity of a Hard Drive Live Viewing APPENDIX Recording 3.4 Quick Playback A.1 Troubleshooting A.2 Specifications 4. MAIN MENU SETUP Q-SEE PRODUCT WARRANTY 4.1 Basic Configuration Questions or Comments? Contact Us Menu Navigation Setup 4.2 Live Configuration 4.3 Record Configuration 4.4 Schedule Configuration 4.5 Network Configuration... -
Page 4: Introduction
CHAPTER 1 FOR YOUR SAFETY To prevent damage to your Q-See product or injury to yourself or to others, read and understand the following safety precautions in their entirety before installing or using this equipment. Keep these safety instructions where all those who use the product will read them. -
Page 5: Features
FEATURES PTZ CONTROL This DVR uses high-performance video processing chips and an embedded Linux operating system Supports multiple PTZ protocols (PelcoP, PelcoD, LILIN, MINKING, NEON, STAR, for quality image recording and ease of use. It utilizes numerous advanced technologies including the VIDO, DSCP, VISCA, and RANGE) industry-standard H.264 compression to deliver high-quality, smooth videos and dual stream capability Supports 128 PTZ presets and 8 auto cruise tracks... -
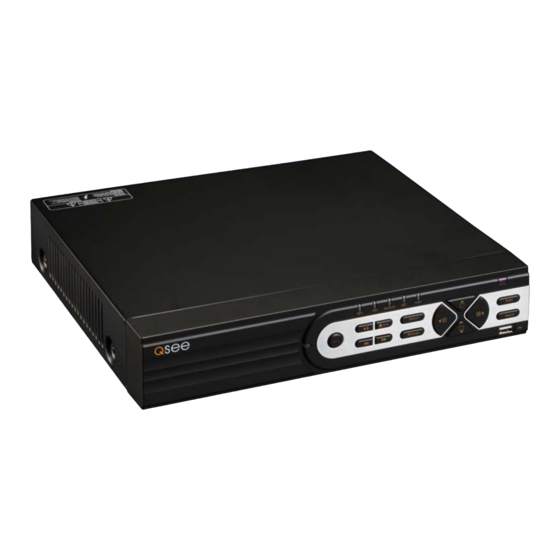
Page 6: Connections And Controls
REAR PANEL CONNECTIONS AND CONTROLS CHAPTER 2 You may view this DVR using an HDMI or standard 19” (or larger) VGA monitor or a television. The HDMI and VGA ports are on the back panel of the DVR along with the CVBS port for the television which uses a BNC connector. -
Page 7: Qt608
FRONT PANEL REAR PANEL QT608 BACKUP PLAY Menu/+ /ESC Enter Backup/- Search 8 Channel QT608 12 13 ITEM NAME FUNCTION ITEM NAME FUNCTION RECORD Manually begins recording PTZ camera connection ports Show status of power, HDD, record, etc. AUDIO IN 2-Channel audio input for microphones or cameras equipped with audio. -
Page 8: Mouse
2.3 REMOTE CONTROL In addition to the buttons on the front of the DVR, your system can be controlled through the USB mouse and the remote control. We have found that the majority of our customers prefer to operate their The remote control allows you to perform most of the day-to-day functions from a convenient distance. -
Page 9: Video Display
2.4 VIDEO DISPLAY Changing Display Resolution BASIC BASIC QT-Series DVRs include an HDMI video out port to take advantage of the HD video from the SDI camera. You can adjust the DVR to optimize its output to System System Date & Time Date &... -
Page 10: Cameras
Because your camera is weatherproof, it requires less protection than weather-resistant cameras and it can be placed in more exposed locations if needed. Keep in mind that most Q-See cameras are designed to operate between 14°F to 122°F (-10°C Depending on your package, you to 50°) with a relative humidity of up to 95%) and... -
Page 11: Additional Considerations
ADDITIONAL CONSIDERATIONS 960H CAMERAS Most users prefer to operate their systems with the DVRs recording only when motion is detected. This A new standard for analog video cameras, 960H increases the width of the image from D1’s 720x480 pixels provides the most efficient use of the hard drive’s capacity, plus making it easier for a recording to be to 960x480 pixels. -
Page 12: Basic Functions
3.2 THE CONTROL BAR BASIC FUNCTIONS CHAPTER 3 When a user is logged in, pressing the ESC button on the DVR or right-clicking on the screen with the mouse will display the CONTROL BAR on the bottom of the screen. 3.1 POWER ON/OFF Before turning on the DVR, ensure that all connections are good. - Page 13 Picture in Picture DISPLAY MODE If you wish to only monitor two channels at a time, you can utilize the Picture-in-Picture mode. The icon By clicking on the display mode buttons on in the Control Bar you can quickly configure how your for this display mode is shown at the far right of Picture 3-4.
-
Page 14: Live Viewing And Recording
3.3 LIVE VIEWING AND RECORDING 3.4 QUICK PLAYBACK SWITCHING VIDEO OUTPUT Pushing the playback button on the DVR or remote will enable you to play back what has been recently As described in Section 2.4 Video Display, the DVR is normally configured to output video signal to recorded by launching Quick Playback. - Page 15 PLAYBACK CONTROL BAR Playback Progress Bar: The slider moves along the Playback Progress Bar as the video plays. Moving this with the mouse will go to another segment of the video. You can move to another point in a single The controls operate in a similar fashion to those of a conventional DVR or other video playback device video by first clicking on that channel and then moving the slider to the desired time.
-
Page 16: Main Menu Setup
BASIC MENU MAIN MENU SETUP CHAPTER 4 There are three tabs covering System, Date & Time and Daylight Savings Time (DST). In the first tab, System you will set the date, time along with other desired settings. 4.1 BASIC CONFIGURATION System Tab This chapter is intended to help you get your DVR up and running before you activate any advanced features which are covered in later chapters. -
Page 17: Live Configuration
4.2 LIVE CONFIGURATION Setting the correct date and time before proceeding is essential to maintaining the integrity of your video records - especially for purposes of evidence. Making these straightforward settings should be your first Live configuration includes four submenus: Live, Main Monitor, Spot and Mask. priority before proceeding further within this manual. -
Page 18: Record Configuration
4.3 RECORD CONFIGURATION Spot Tab This allows select feeds to be viewed on a separate monitor that is connected to the DVR but may be in Hybrid DVRs are set to record in real-time (30 frames per second) in the appropriate format (7200p or 960H/D1 depending on the technology of the channel. - Page 19 Time Tab Snap Tab You can set the length of time the DVRs record an event before and after a motion detection or alarm is In this tab, you can configure how many still images are taken, the quality of the images and the timing triggered as well as how long an individual record is preserved.
-
Page 20: Schedule Configuration
Monitoring Guide which is on the disk that came with your system or which can be downloaded from 1. By highlighting individual hours for specific days our website at www.Q-See.com/Support. The four tabs in this window are Network, Sub-Stream, by using the pencil tool in the upper right of Email and Other Settings. - Page 21 Definitions and descriptions of network configuration: Email Tab This tab allows you to set how your DVR will send out e-mail alerts. You will be able to send e-mail alerts Parameter Definition to three addresses. HTTP Port The network port number for accessing the DVR from a remote location. The default port is 85 NOTE! Depending upon your settings, the system can generate a lot of e-mail Server Port...
-
Page 22: User Management
IP address changes. Q-See offers DDNS for free at MyQ-See.com. Create a domain name, user name and password before proceeding. DynDNS.com also offers a similar free service. This is covered in-depth in the Remote Monitoring Guide. -
Page 23: Time Search
4.7 ADVANCED 4.8 FILE SEARCH, PLAYBACK AND MANAGEMENT In this set of commands, the user can erase all the settings, import or export data files to and from the Access the recordings on the DVR, play them back and backup the recordings to an external storage DVR and control who can remotely access the DVR through three submenus: Reset, Import/Export device. -
Page 24: Event Search
EVENT SEARCH IMAGE Selecting this tab will bring up a list of recorded events. Your DVR is configured by default to record This tab functions much as the Event Search tab by allowing you to search for and view the still images when motion is detected. -
Page 25: Backup
Save File Type: Choose between DVR and AVI. The former will save the video in a proprietary format BACKUP CHAPTER 5 while the latter will create a standard .avi file usable by most media playback software. If you choose the This DVR supports backing up files to USB flash drives, USB hard drives and USB DVD burners through DVR format, you need to select the Desktop Player option (see Picture... -
Page 26: Dvr Management
This record can be searched by type of operation, date and time, and etcetera. It can also be exported DVR MANAGEMENT CHAPTER 6 to external USB storage devices using the backup function. 6.1 INFORMATION This window enables the user to monitor the status of the system, its network connection, online users, history and events through five submenus: System, Event, Log, Network and Online... -
Page 27: Manual Alarm
This window will display firmware updates that are loaded on a USB flash drive in the front USB port. setting up alarms. Firmware upgrades are available from Q-See at www.Q-See.com/Support and may be found by looking up your specific model. Firmware should... -
Page 28: Pan/Tilt/Zoom Cameras
7.2 PAN-TILT-ZOOM (PTZ) CONFIGURATION PAN/TILT/ZOOM CAMERAS CHAPTER 7 If you are connecting optional Pan-Tilt-Zoom cameras, the controls are set from this window in the Serial Port and Advanced tabs. 7.1 CONNECTING A PTZ CAMERA Your DVR can support one or more PTZ camera. You can use both SDI and analog PTZ cameras as P.T.Z P.T.Z long as they are connected to the correct Video In port. - Page 29 Preset Name Symbol What it Does Clicking a Setting button in the Preset column Opens a window to allow the user to set the speed and time of a new PRESET - Channel 1 PRESET - Channel 1 preset point will bring up another window Enable Enable...
-
Page 30: Alarms
Alarm allows you to set whether the internal buzzer will sound, which camera (if any) will display in full ALARMS CHAPTER 8 screen mode, whether an e-mail will be sent and whether still image snapshots will be taken. Your DVR can be configured to perform multiple actions to alert you when it detects a situation through Email notifications are set up in the Email tab of the Network window as covered in SECTION 4.5. -
Page 31: Video Loss
Schedule Tab This is also set to be on all the time by default and it can be adjusted in the same manners as the HARD DISK DRIVE CHAPTER 9 Motion Dection Schedule configuration in SECTION 4.4. Your DVR uses a standard desktop or 3.5” SATA (Serial Advanced Technology Attachment) 1. -
Page 32: Calculating The Recording Capacity Of A Hard Drive
STEP 4. Connect the power and data 9 .2 CALCULATING THE RECORDING CAPACITY OF A HARD DRIVE cables. Press firmly, but do not While the physical data capacity of a hard drive is fixed, how much video you can record upon force them onto the pins or you may it depends on your recording configurations. -
Page 33: Appendix
2. The indicator lights of the DVR are on, but no output. Why? After you download the new firmware from the Q-See website at www.Q-See.com/ a. The power adapter may have been damaged, or is not providing enough power. Please Support and copy it onto a USB flash drive. -
Page 34: Specifications
A.2 SPECIFICATIONS 13. What are the PC configurations for 16-channel real time access with fully open mainstream channel? Model QT604 QT608 PC MODULE PARAMETERS Type Hybrid/SDI Intel Core(TM)2 Duo CPU E4600 Video Format NTSC/PAL MOTHERBOARD G41/P41 chip Live Display Resolution(s) 800x600, 1024x768, 1280x1024, 960x480, 720P, 1080P Video Compression H264... -
Page 35: Q-See Product Warranty
Q-SEE PRODUCT WARRANTY Q-See is proud to back all of our products with a conditional service warranty covering all hardware for 12 months from the date of purchase. Additionally, our products also come with QUESTIONS OR COMMENTS? CONTACT US a free exchange policy that covers all manufacturing defects for one month from the date of purchase. - Page 36 Digital Peripheral Solutions, Inc. 8015 E. Crystal Drive Anaheim, CA 92807...