Fuji Xerox ApeosPort-V C3320 Quick Reference
Hide thumbs
Also See for ApeosPort-V C3320:
- Administrator's manual (633 pages) ,
- User manual (429 pages)
Table of Contents
Advertisement
Advertisement
Table of Contents

Related Manuals for Fuji Xerox ApeosPort-V C3320


Summary of Contents for Fuji Xerox ApeosPort-V C3320
- Page 1 ApeosPort-V C3320 Quick Reference for English-Speaking Users...
- Page 2 Xerox, Xerox and Design, as well as Fuji Xerox and Design are registered trademarks or trademarks of Xerox Corporation in Japan and/or other countries.
-
Page 3: Table Of Contents
Table of Contents Before Using the Machine ........................5 Preface ..................................6 Using This Guide..............................7 Prerequisite Knowledge ..........................7 Organization ..............................7 Conventions ................................8 Safety Notes................................9 Electrical Safety ............................10 Machine Installation..........................11 Operational Safety ............................. 15 Consumable..............................18 Regulation ................................ - Page 4 Stopping the Fax Job ..........................46 Printing Procedure .............................48 Scanning Procedure ............................49 Step 1 Loading Documents ........................49 Step 2 Selecting the Features.........................49 Step 3 Starting the Scan Job........................51 Step 4 Confirming the Scan Job in Job Status.................52 Step 5 Saving the Scanned Data......................53 Stopping the Scan Job..........................53 Other Scan Services............................55 Creating Folders..............................57...
-
Page 5: Before Using The Machine
1 Before Using the Machine This chapter describes how to use this guide, as well as safety notes and legal notice you should read before using the machine. Preface ..............................6 Using This Guide ..........................7 Safety Notes ............................9 ... -
Page 6: Preface
1 Before Using the Machine Preface Thank you for selecting the ApeosPort-V C3320 (hereafter referred to as "the machine"). This guide describes how to operate the machine and the precautions you should follow during operation. To get the most out of the machine and to use it effectively, be sure to read this guide before use. -
Page 7: Using This Guide
Using This Guide This section describes the organization of this guide. This guide was produced for users who operate the ApeosPort-V C3320 on a regular basis. When reading this guide, refer to the chapter most relevant to the operation you are performing. -
Page 8: Conventions
1 Before Using the Machine Conventions The screen shots and illustrations used in this guide vary depending on the machine configuration and optional components installed. Some of the items in the screen shots may not be displayed or available depending on your machine configuration. ... -
Page 9: Safety Notes
Safety Notes Safety Notes Before using this product, read "Safety Notes" carefully for safety use. This product and recommended supplies have been tested and found to comply with strict safety requirements including safety agency approvals and compliance with environmental standards. Follow the following instructions for safety use. WARNING Any unauthorized alteration including an addition of new functions or connection to external devices may not be covered by the product warranty. -
Page 10: Electrical Safety
Plug the power cord directly into a grounded electrical outlet. To prevent overheat and a fire accident, do not use an extension cord, a multi-plug adaptor or a multiple connector. Consult Fuji Xerox Customer Support Center to check if an outlet is grounded. -
Page 11: Machine Installation
To avoid the risk of electric shock and a fire accident, only use the power cord supplied with this product or the ones designated by Fuji Xerox. The power cord is exclusive use for this product. Do not use it for any other product. - Page 12 1 Before Using the Machine This product weighs 38 Kg. When moving it, always carry it by a team of three or more persons to avoid mishandling or injury. When lifting this product, face the front panel and firmly grip the handholds provided on both sides of the product.
- Page 13 Safety Notes Locate this product in a well-ventilated area. Do not obstruct ventilation openings of the product. Poor ventilation may cause overheat and a fire accident. Keep the minimum clearance as follows for ventilation and an access to the power plug. Unplug the product if an abnormal condition is noted. 157 mm 1095 mm 538 mm...
- Page 14 1 Before Using the Machine To bundle wires and cables, always use the cable ties and spiral tubes that Fuji Xerox supplies. Otherwise, it may cause some defects. Others To keep this product in a good performance and condition, always use it in the following environment: Temperature: 10 - 32°C...
-
Page 15: Operational Safety
To avoid the risk of electric shock and a fire accident, switch off and unplug the product promptly in the following conditions, then contact Fuji Xerox Customer Support Center. The product emits smoke or its surface is unusually hot. - Page 16 1 Before Using the Machine Always follow all warning instructions marked on or supplied with this product. To avoid the risk of burn injuries and electric shock, never touch the area with the "High Temperature" or "High Voltage" marks on.
- Page 17 Otherwise, it may cause injuries or burns. Switch off the product immediately and contact Fuji Xerox Customer Support Center. Ventilate well during extended operation or mass copying. It may affect the office air environment due to odor such as ozone in a poorly ventilated room.
-
Page 18: Consumable
It may catch fire by electric sparks inside a vacuum cleaner and cause explosion. Use a broom or a wet cloth to wipe off the spills. If you spill a large volume of toner, contact Fuji Xerox Customer Support Center. -
Page 19: Regulation
Regulation Regulation Radio Frequency Emissions (Class B) This is a Class B product based on the standard of the VCCI Council. If this is used near a radio or television receiver in a domestic environment, it may cause radio interference. Install and use the equipment according to the instruction manual. -
Page 20: Environment
1 Before Using the Machine Environment Fuji Xerox will store the spare parts necessary to maintain the function of this product for 7 years after the production termination of this product. Emissions of dust, ozone, benzene, total volatile organic compounds (TVOC) and ... -
Page 21: Illegal Copies And Printouts
Illegal Copies and Printouts Illegal Copies and Printouts Copying or printing certain documents may be illegal in your country. Penalties of fines or imprisonment may be imposed on those found guilty. The following are examples of items that may be illegal to copy or print in your country. ... - Page 22 1 Before Using the Machine make use of the electronic data thereof (i.e. record the data on PC or other mediums, output the data by printer); and to download copyrighted works, etc. 2) Modification To distort, mutilate or modify copyrighted works which have been fixed in paper or fixed as electronic information, etc.
-
Page 23: Product Overview
2 Product Overview This chapter describes basic operation about the machine, such as the names of each component, switching on and off of the machine, and the operation of the touch screen and power saving settings. Machine Components......................... 24 ... -
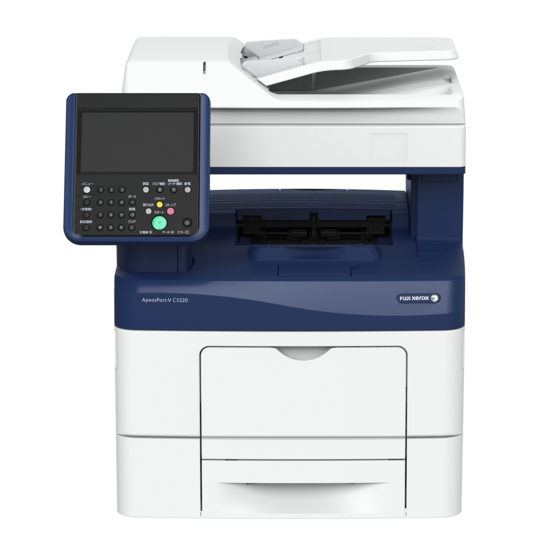
Page 24: Machine Components
2 Product Overview Machine Components The following describes machine components and their functions. Front view of the machine Component Function Push-button power switch Switches the power of the machine on and off. Refer to "Power Source" (P.29). Control panel Consists of operation buttons, LED indicators, and the touch screen. - Page 25 Machine Components Component Function Drum cartridges Contains photoconductors. Waste toner container Collects waste toner. Main power switch Switches the main power on/off of the machine. Always follow the instructions by the system administrator. Important • Always switch the power off before switching the main power off. Refer "Power Source"...
- Page 26 2 Product Overview Component Function USB 2.0 interface connector Connects a USB memory cable for printing. Duplex module Automatically prints or copies on both sides of paper. Second BTR Transfers toner to paper. Fusing unit Fuses toner to paper. Important • Do not touch this unit as it is extremely hot. Power connector Connects to the power code.
-
Page 27: Control Panel
Control Panel Control Panel The following describes the names and functions of components on the control panel. 機械確認 メ ニ ュ ー 認証 ジ ョ ブ確認 (メ ーター確認) 節電 コ ピ ー ポーズ リ セ ッ ト 割り込み ス ト ッ プ (未登録)... - Page 28 2 Product Overview Component Function Push-button power switch Switches the power of the machine on and off. Note • If the main power is not switched on, the machine will not be powered on even when the power is switched on. For more information, refer to "Power Source"...
-
Page 29: Power Source
Power Source Power Source The machine is provided with the push-button power switch and the main power switch. Push-button power switch To use the machine, press the push- Push-button button power switch to switch its power power switch on. You can start operations after the machine warms up. -
Page 30: Switching The Power Off
2 Product Overview You can also use the Power Saver feature to save power consumption while the machine is not in use. For information on the Power Saver feature, refer to "Power Saver Mode" (P.32). Important • If the power is switched off, all the services of the machine will stop. When using the machine throughout the day for jobs such as receiving fax, do not switch the power off. - Page 31 Power Source Press the main power switch to the [ position to switch the main power off. The <Main Power> indicator goes out on the control panel. Disconnect the power code from the machine.
-
Page 32: Power Saver Mode
2 Product Overview Power Saver Mode The machine is equipped with the Power Saver mode that saves electricity by reducing power consumption. The Power Saver feature has two modes: Low Power mode and Sleep mode. Low Power Mode In this mode, the power to the control panel is lowered to save power. ... -
Page 33: Exiting The Power Saver Mode
Power Saver Mode Exiting the Power Saver Mode The machine exits the Power Saver mode by the following instances: Pressing the <Power Saver> button on the control panel Receiving jobs such as print and fax Selecting [Apply] in CentreWare Internet Services Note •... -
Page 34: Screen Brightness
2 Product Overview Screen Brightness You can adjust the screen brightness of the screen on the Services Home screen. Select [Screen Brightness] on the Services Home screen. Press [+] or [-] to adjust the screen brightness. Select [Save]. -
Page 35: Basic Operations
3 Basic Operations This chapter describes the basic operation and features for the Copy service. Copying Procedure ........................36 Fax Procedure..........................43 Printing Procedure ........................48 Scanning Procedure ........................49 Other Scan Services........................55 Creating Folders .......................... -
Page 36: Copying Procedure
3 Basic Operations Copying Procedure This section describes the basic copy procedures. The following shows the reference section for each procedure. Step 1 Loading Documents ................................36 Step 2 Selecting Features ................................38 Step 3 Entering a Quantity................................39 Step 4 Starting the Copy Job ...............................39 Step 5 Confirming the Copy Job in Job Status.........................40 Stopping the Copy Job...................................41 Step 1 Loading Documents... - Page 37 Copying Procedure Adjust the document guides to match the size of the document loaded. Pull out the document stopper. Document Glass The document glass supports a single sheet, a book, or other similar documents with 8.5 x 14" (Legal Size). Important •...
-
Page 38: Step 2 Selecting Features
3 Basic Operations Step 2 Selecting Features The following two services are available to copy documents. Simple Copy Allows you to only select basic features to copy documents. Copy Allows you to make detailed settings to copy documents. The following describes how to select features on the [Copy] screen. -
Page 39: Step 3 Entering A Quantity
Copying Procedure Step 3 Entering a Quantity You can enter up to 999 sets. Enter the number of copies using the numeric メ ニ ュー 認証 ジ ョ ブ確認 keypad. The number of copies entered appears on the upper right of the touch screen. コ... -
Page 40: Step 5 Confirming The Copy Job In Job Status
3 Basic Operations Load the next document. Press the <Start> button. If you have more documents, repeat steps 3 and 4. When all documents have been scanned, select [Last Original]. Step 5 Confirming the Copy Job in Job Status If copies are not output after you start the copy job, the job may be in pending status. Use the following procedure to confirm the job status. -
Page 41: Stopping The Copy Job
Copying Procedure Stopping the Copy Job To cancel a copy job in progress, use the following procedure. Press either the <Stop> button on the control 機械確認 認証 ジ ョ ブ確認 節電 (メーター確認) panel or [Delete] on the touch screen. ポーズ リセッ... - Page 42 3 Basic Operations Select [Delete]. Select [Delete].
-
Page 43: Fax Procedure
Fax Procedure Fax Procedure This section describes the basic fax procedures. The following shows the reference section for each procedure. Step 1 Loading Documents................................43 Step 2 Selecting Features................................43 Step 3 Specifying Destinations ..............................44 Step 4 Starting the Fax Job................................45 Step 5 Confirming the Fax Job in Job Status........................... -
Page 44: Step 3 Specifying Destinations
3 Basic Operations Select [Fax/Internet Fax]. If the previous settings still remain, press the 機械確認 認証 ジ ョ ブ確認 (メーター確認) 節電 <Clear All> button. ポーズ リセッ ト 割り込み ストッ プ 短縮 スタート クリア # エ ラー 主電源 データ <Clear All> button Select each tab, and select a feature as necessary. -
Page 45: Step 4 Starting The Fax Job
Fax Procedure Step 4 Starting the Fax Job The following describes how to start a fax job. Press the <Start> button. 機械確認 認証 ジ ョ ブ確認 節電 (メーター確認) Important • If the document has been loaded in the document feeder, do not hold down the ポーズ... -
Page 46: Step 5 Confirming The Fax Job In Job Status
3 Basic Operations Step 5 Confirming the Fax Job in Job Status The following describes how to confirm the status of a fax job. Press the <Job Status> button. 機械確認 認証 ジ ョ ブ確認 節電 (メーター確認) ポーズ リセッ ト ストッ プ 割り込み... - Page 47 Fax Procedure Select [Delete]. If [Delete] does not appear on the screen: Press the <Job Status> button. 機械確認 認証 ジ ョ ブ確認 (メーター確認) 節電 ポーズ リセッ ト 割り込み ストッ プ 短縮 スタート クリア # エ ラー 主電源 データ <Job Status>...
-
Page 48: Printing Procedure
3 Basic Operations Printing Procedure This section describes the basic printing procedure. Note • In order to print from your computer, a print driver must be installed on the computer. For instractions on how to obtain a print driver, contact our Customer Support Center. Printing procedure vary depending on the application software you are using. -
Page 49: Scanning Procedure
Scanning Procedure Scanning Procedure This section describes the basic scanning procedure. The following shows the reference section for each procedure. Step 1 Loading Documents................................49 Step 2 Selecting the Features..............................49 Step 3 Starting the Scan Job ............................... 51 Step 4 Confirming the Scan Job in Job Status ........................52 Step 5 Saving the Scanned Data.............................. -
Page 50: Store To Usb
3 Basic Operations Store to USB Scans a document and saves the scanned data to a USB memory device. Store & Send Link Scans a document and temporarily saves the scanned data on the machine. The user is notified by e-mail of the URL to the location where the scanned data is stored. -
Page 51: Step 3 Starting The Scan Job
Scanning Procedure Select each tab, and configure features as necessary. Important • This machine cannot detect the original size automatically. Set the original size by using the "Original Size" feature. When you use another Scan service, [Store to Folder] is replaced with [E-mail], [Scan to PC], [Store to USB], [Store &... -
Page 52: Step 4 Confirming The Scan Job In Job Status
3 Basic Operations Load the next document. Press the <Start> button. 機械確認 認証 ジ ョ ブ確認 (メーター確認) 節電 If you have more documents, repeat steps 3 and 4. ポーズ リセッ ト 割り込み ストッ プ 短縮 スタート クリア # 主電源 データ... -
Page 53: Step 5 Saving The Scanned Data
Import using an application Use Network Scanner Driver. Import using Stored File Manager 3 Use Stored File Manager 3 (Fuji Xerox application software). Import using CentreWare Internet Services Use CentreWare Internet Services. Stopping the Scan Job To cancel scanning a document, use the following procedure. - Page 54 3 Basic Operations If [Delete] does not appear on the screen: Press the <Job Status> button. 機械確認 認証 ジ ョ ブ確認 (メーター確認) 節電 ポーズ リセッ ト 割り込み ストッ プ 短縮 スタート クリア # エ ラー 主電源 データ <Job Status> button Select the job to cancel.
-
Page 55: Other Scan Services
Other Scan Services Other Scan Services E-mail This section describes how to scan documents to send them as e-mail attachments. You can specify destination addresses by using the screen keyboard to enter the addresses, or by selecting from the address book. Press the <Services Home>... - Page 56 3 Basic Operations Store to USB This section describes how to save scanned documents in a USB memory device. Insert the USB memory device into the USB memory slot on the control panel. Select [Store to USB] on the touch screen. Note •...
-
Page 57: Creating Folders
Creating Folders Creating Folders Use this feature to create folders for saving confidential incoming fax documents or scanned documents. Fax documents in folders can be printed out at a convenient time and scanned documents in folders can be imported to computers. Select [Setup]. -
Page 58: Changing The Default Settings
3 Basic Operations Changing the Default Settings This section describes the basic system settings procedure. Press the <Log In/Out> button or the login 機械確認 認証 ジ ョ ブ確認 (メーター確認) 節電 information field on the touch screen. ポーズ リセッ ト 割り込み ストッ... -
Page 59: Paper And Other Media
4 Paper and Other Media This chapter describes the paper that can be used with the machine, precautions when handling paper, and how to load paper in trays. Usable Paper ...........................60 Loading Paper ..........................62 Changing the Paper Settings....................66... -
Page 60: Usable Paper
The following sections define the paper types supported for each paper tray. Using inappropriate paper can lead to deterioration in print quality or paper jams, malfunctions, or damage to the machine. Only use media types recommended by Fuji Xerox on the machine to obtain optimal performance. -
Page 61: Unusable Paper
Usable Paper Unusable Paper Paper with one face Color transparency sheets Already printed face already printed (bordered with a white frame) using this printer using another printer Inkjet paper Folded, creased or Label sheets whose face curled paper sheet surface does not Tracing paper cover the entire backing sheet... -
Page 62: Loading Paper
4 Paper and Other Media Loading Paper The following describes how to load paper in Trays 1 and 2, and Tray 5 (Bypass). Loading Paper in Trays 1 and 2 The following describes the procedures to load paper in Trays 1 and 2. When the machine runs out of paper during copying or printing, a message appears on the touch screen. -
Page 63: Loading Paper In Tray 5 (Bypass Tray)
Loading Paper Align the width guides and length guide against the edges of the paper. After confirming that the guides are securely adjusted, insert the tray into the machine. Note • The type of paper in Trays 1 and 2 is normally set to plain paper. - Page 64 4 Paper and Other Media Gently pull open the bypass tray cover. Extend the extension tray as necessary. Slide the width guides to the edge of the tray. The width guides should be fully extended. Insert all media face up and top edge first into the bypass tray.
- Page 65 Loading Paper • If you do not load envelopes in the bypass tray right after they have been removed from the packaging, they may bulge. To avoid jams, press firmly across the whole envelopes to flatten them as shown below before loading the envelopes in the bypass tray. ...
-
Page 66: Changing The Paper Settings
4 Paper and Other Media Changing the Paper Settings This section describes how to change the paper type for Trays and how to set image quality processing by the individual paper type. After loading paper in a tray, specify the type of paper loaded and select image quality for the paper type. - Page 67 Changing the Paper Settings Select [Paper Tray Attributes]. Select a paper tray for changing the paper type setting under [Items]. Select [Change Settings]. Select [Paper Type], [Paper Size], [Paper Color], and [Auto Paper Select] respectively. Note • The paper weight displayed in [Paper Type] varies depending on the settings in [Image Quality].
- Page 68 4 Paper and Other Media...
-
Page 69: Maintenance
5 Maintenance This chapter describes how to replace consumables. Replacing Toner Cartridges .......................71 Replacing Waste Toner Container..................73 Replacing Drum Cartridges (for Customers Having a Spot Maintenance Contract) ..........75... - Page 70 Information contained in this chapter will assist with these tasks. Note • The use of consumables and periodical replacement parts not recommended by Fuji Xerox may impair quality and performance. Use only consumables and periodical replacement parts recommended by Fuji Xerox for the machine.
-
Page 71: Replacing Toner Cartridges
If you have a used toner cartridge no longer needed, contact Fuji Xerox Customer Support Center. for its take- back. Important • Slide out the toner cartridge gently. Otherwise, toner may spill from the cartridge. - Page 72 5 Maintenance Insert the toner cartridge into the associated cartridge slot, and then push until it stops. Close the front cover. Note • If the front cover is not closed completely, a message appears and the machine will remain paused. Move the control panel back in place.
-
Page 73: Replacing Waste Toner Container
• The proper disposal of used waste toner containers is required. Return the old waste toner container to our Customer Support Center. • The use of waste toner containers not recommended by Fuji Xerox may degrade image quality and performance. Use only waste toner containers recommended by Fuji Xerox. - Page 74 5 Maintenance Turn the lock lever 90-degrees counterclockwise to unlock the waste toner container. Grasp the handle on the waste toner container and pull it out making sure to hold it upright so that the waste toner. Important • After removing the waste toner container, do not touch the parts shown in the illustration.
-
Page 75: Replacing Drum Cartridges (For Customers Having A Spot Maintenance Contract)
Important • The use of drum cartridges not recommended by Fuji Xerox may degrade image quality and performance. Use only drum cartridges recommended by Fuji Xerox. - Page 76 5 Maintenance Turn the lock lever 90-degrees counterclockwise to unlock the waste toner container. Grasp the handle on the waste toner container and pull it out making sure to hold it upright so that the waste toner. Note • Take care not to drop the waste toner container while you are removing it.
- Page 77 Replacing Drum Cartridges (for Customers Having a Spot Maintenance Contract) Slightly pressing down the tab on the drum cartridge that you want to replace, pull it out halfway with one hand. Support the drum cartridge with the other hand from underneath, and then pull it out completely.
- Page 78 5 Maintenance Remove the cleaning rod from inside the machine. Remove the cleaning pad by pressing the white tabs between your thumb and index finger. Unpack a new cleaning pad and attach it to the cleaning rod. Insert the cleaning rod fully into the hole under the new drum cartridge until it clicks into the interior of the machine, then pull it out.
- Page 79 Replacing Drum Cartridges (for Customers Having a Spot Maintenance Contract) Reinsert the removed waste toner container. Note • If the waste toner container does not fit into place properly, make sure that the drum cartridges are fully inserted. Turn the lock lever 90-degrees clockwise to lock the waste toner container.
- Page 80 5 Maintenance...
-
Page 81: Troubleshooting
6 Troubleshooting This chapter describes solutions to various problems you may have with the machine. Fault Clearance Procedure ......................82 Image Quality Trouble........................ 90 Paper Jams ............................83 Document Jams..........................89... -
Page 82: Fault Clearance Procedure
6 Troubleshooting Fault Clearance Procedure If a fault or problem occurs, there are several ways in which you can identify the type of fault. Once a fault or problem is identified, establish the probable cause, and then apply the appropriate solution. ... -
Page 83: Paper Jams
Do not attempt to remove a paper deeply jammed inside the product, particularly a paper wrapped around the fusing unit or the heat roller. Otherwise, it may cause injuries or burns. Switch off the product immediately and contact Fuji Xerox Customer Support Center. -
Page 84: Paper Jams In Tray 1 And Tray 5 (Bypass)
6 Troubleshooting Paper Jams in Tray 1 and Tray 5 (Bypass) The following describes how to clear paper jams occurring in the Tray 1 or Tray 5 (bypass). Open the Tray 5 (bypass) and remove the remaining paper on the tray. Grasp both sides of the Tray 5 (bypass), and then pull the tray from the machine. -
Page 85: Paper Jams In Tray 2 (Optional)
Paper Jams Insert the Tray 1 into the machine, and push until it stops. Important • Do not use excessive force on the tray. Doing so could damage the tray or the inside of the machine. Insert the Tray 5 (bypass) into the machine, push until it stops, and close it. -
Page 86: Paper Jams In Fusing Unit
6 Troubleshooting Insert the Tray 2 into the machine, and push until it stops. Important • Do not use excessive force on the tray. Doing so could damage the tray or the inside of the machine. Paper Jams in Fusing Unit The following describes how to clear paper jams occurring in the fusing unit. - Page 87 Paper Jams Hold the Tray 1 with both hands, and remove it from the machine. Open the rear cover. Lift the levers on both sides of the fusing unit. Important • The fusing unit is hot. Do not touch it, doing so may cause burns.
- Page 88 6 Troubleshooting Press down the levers on both sides of the fusing unit. Close the rear cover. Insert the Tray 1 into the machine, and push until it stops. Important • Do not use excessive force on the tray. Doing so could damage the tray or the inside of the machine.
-
Page 89: Document Jams
Document Jams Document Jams When a document jam occurred in the document feeder, the machine stops and a message is displayed on the touch screen. Follow the instructions displayed to clear the document jam and then load the document in the document feeder again. Note •... -
Page 90: Image Quality Trouble
6 Troubleshooting Image Quality Trouble If the image quality of printed documents is poor, identify the symptom in the following table to perform the remedy. If image quality does not improve even after performing the remedy, contact our Customer Support Center. Symptom Cause Remedy... - Page 91 Image Quality Trouble Symptom Cause Remedy Part of the image Is the paper damp? If the paper is damp, the copy image may be is missing on the partially missing or unclear. Replace the copy. paper with new one. Refer to "Loading Paper" (P.62). Is folded or wrinkled paper Remove the unsuitable paper or replace all of included in the tray?
- Page 92 6 Troubleshooting Symptom Cause Remedy Black or colored The drum cartridge has Replace the drum cartridge with a new one. lines are printed. deteriorated or is damaged. Refer to "Replacing Drum Cartridges (for Customers Having a Spot Maintenance Contract)" (P.75). The machine interior (Raster Clean the machine interior.
- Page 93 Image Quality Trouble Symptom Cause Remedy Printed toner The paper is damp. Replace the paper with new one. smudges when Refer to "Loading Paper" (P.62). rubbed with your The paper is unsuitable. Load suitable paper. finger. Toner is not fused. Refer to "Loading Paper"...
- Page 94 6 Troubleshooting Symptom Cause Remedy The entire output When Tray 5 is used, the size Load paper of the correct type and size into is faint. and type of the loaded paper Tray 5. are different from the Refer to "Loading Paper in Tray 5 (Bypass Tray)" (P.63). settings on the print driver.
- Page 95 Image Quality Trouble Symptom Cause Remedy Text or images The paper guides in the paper Adjust the horizontal and vertical paper are printed at an tray are not set in the correct guides to the correct positions. angle. positions. Refer to "Loading Paper" (P.62).
- Page 96 6 Troubleshooting...
-
Page 97: Index
Index Index Numerics 1000BASE-T.................25 ferrite core..................26 10BASE-T/100BASE-TX connector ........25 front cover ..................25 fusing unit ..................26 belt unit ..................24 Gigabit Ethernet Kit..............25 C (clear) button ................28 changing the default settings ..........58 IC card reader ................24 changing the paper settings..........66 illegal copies and printouts ...........21 changing the paper type............66 image quality trouble ..............90 clear all button................27... - Page 98 Index other scan services..............55 unusable paper................61 output tray...................25 usable paper................60 USB 2.0 interface connector.........25 paper jams ...................83 PHONE ...................25 waste toner container .............25 power connector ................26 weights of usable paper ............60 power saver button..............27 WSD ....................50 power saver mode..............32 push-button power switch ........24 rear cover ..................26 saving the scanned data ............53 screen brightness...............34...
- Page 99 Index...
- Page 100 Maintenance, Operation, and Services For details on maintenance, operation, and services (coverage, period, charge, etc), please contact Fuji Xerox Customer Support Center. ApeosPort-V C3320 Quick Reference for English-Speaking Users ME7069E1-2 (Edition 1) February 2015 Fuji Xerox Co., Ltd. Copyright © 2015 by Fuji Xerox Co., Ltd.