Table of Contents
Advertisement
Quick Links
Advertisement
Chapters
Table of Contents

Related Manuals for Fuji Xerox ApeosPort-V C6676


Summary of Contents for Fuji Xerox ApeosPort-V C6676
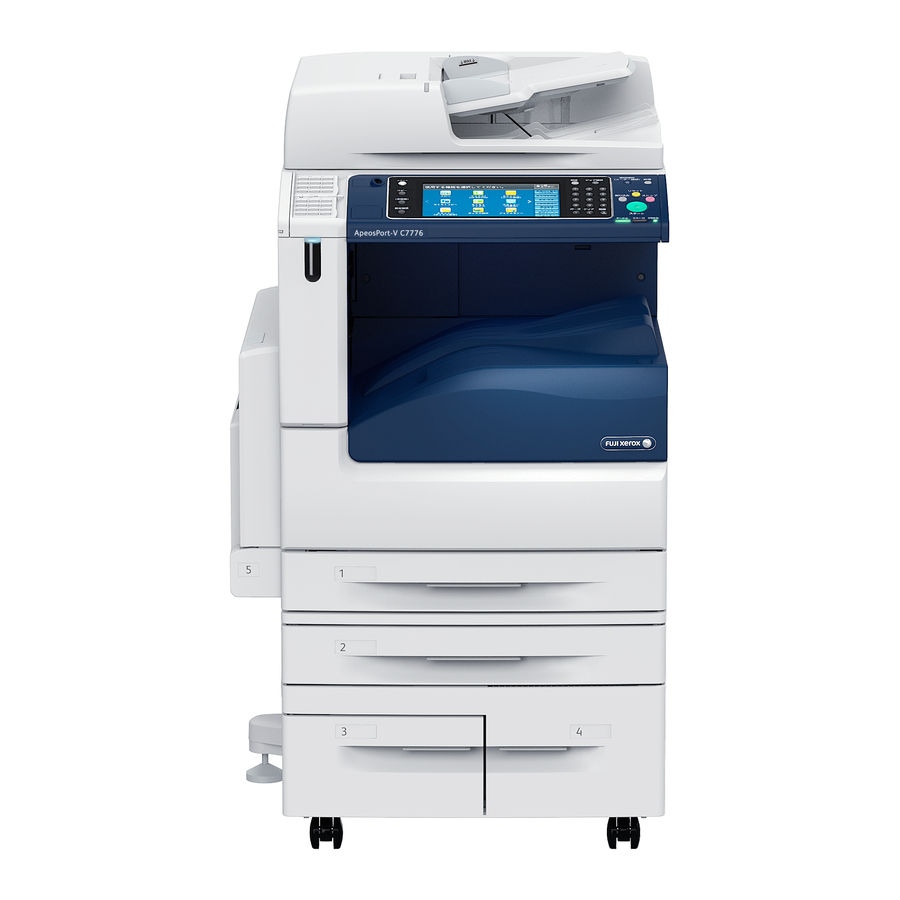
- Page 1 ApeosPort-V C7776 DocuCentre-V C7776 ApeosPort-V C6676 DocuCentre-V C6676 ApeosPort-V C5576 DocuCentre-V C5576 ApeosPort-V C4476 DocuCentre-V C4476 ApeosPort-V C3376 DocuCentre-V C3376 ApeosPort-V C3374 DocuCentre-V C3374 ApeosPort-V C2276 DocuCentre-V C2276 Administrator Guide...
- Page 2 The data saved in the hard disk of the machine may be lost if there is any problem in the hard disk. Fuji Xerox is not responsible for any direct and indirect damages arising from or caused by such data loss. Fuji Xerox is not responsible for any breakdown of machines due to infection of computer virus or computer hacking.
-
Page 3: Table Of Contents
Table of Contents Table of Contents Before Using the Machine ........................15 Preface ................................... 16 Types of Manuals .............................. 17 Using This Guide..............................18 Organization of This Guide ........................18 Conventions..............................19 Interface Cables..............................21 Using the USB Interface .......................... 21 Using the Parallel Interface........................ - Page 4 Replacing Drum Cartridges R1, R2, R3, or R4 (for Customers Having a Spot Maintenance Contract)..............83 Replacing Staple Cartridge (for Finisher-A1)..................87 Replacing Staple Cartridge (for Finisher-B1) ..................89 Replacing Staple Cartridge (for C3 Finisher or C3 Finisher with Booklet Maker) ..............90 Replacing Booklet Staple Cartridge (for Booklet Maker Unit for Finisher-B1)....92 Replacing Booklet Staple Cartridge (for C3 Finisher with Booklet Maker) ......93 Emptying the Hole Punch Waste Container (for Finisher-B1) ...........95 Emptying the Hole Punch Waste Container...
- Page 5 Table of Contents Tools................................137 System Settings Procedure..........................138 Step 1 Entering System Administration Mode................138 Step 2 Entering the System Administrator User ID and Passcode ........138 Step 3 Selecting [Tools] ..........................139 Step 4 Selecting a Setting Item on the [Tools] Screen..............139 Step 5 Setting a Feature ........................141 Step 6 Exiting System Administration Mode.................141 Tools Menu List ..............................142 Common Service Settings ..........................157...
- Page 6 Allocate Memory............................243 Delete Form..............................245 Register Google Cloud Print........................245 Other Settings ............................245 Scan Service Settings............................. 250 Screen Defaults............................250 Scan Defaults ............................. 251 Scan to PC Defaults ..........................254 Original Size Defaults..........................254 Output Size Defaults ..........................255 Reduce/Enlarge Presets ..........................
- Page 7 Table of Contents System Administrator's Meter (Copy Jobs)..................317 Accounting Type............................317 Accounting Login Screen Settings......................318 Fax Billing Data............................319 Accounting/Billing Device Settings ....................319 Authentication/Security Settings......................322 System Administrator Settings......................322 Authentication ............................323 Allow User to Disable Active Settings ....................331 Job Status Default ............................331 Overwrite Hard Disk..........................332 CentreWare Internet Services Settings..................335 Installation of CentreWare Internet Services ..................336 Preparations ..............................336...
- Page 8 CentreWare Internet Services Setting Items................. 363 Scanner Environment Settings......................365 Scan Service Overview........................... 366 Configuration of Store to Folder....................... 368 Step 1 Enabling Port and Setting up TCP/IP ................. 368 Step 2 Registering a Folder........................369 Step 3 Configuring on the Computer ....................369 Configuration of Scan to PC ........................
- Page 9 Table of Contents Step 2 Configuring the SIP User Name....................392 Step 3 Configuring Fax Environment....................392 Step 4 Configuring the SIP Server......................393 Step 5 Registering the VoIP Gateway ....................394 11 Using the Internet Fax Service......................397 Internet Fax Overview ..........................398 Preparations ..............................398 System Requirements for the Machine....................398 E-Mail Environment..........................398 Installation Procedures ..........................400...
- Page 10 14 Authentication and Accounting Features...................429 Overview of Authentication and Accounting Feature..............430 Types of User.............................. 430 User Roles and Authorization Groups....................430 Access Control ............................431 Types of Authentication ........................432 Types of Account Administration....................... 433 Services Controlled by Authentication ....................438 Overview ...............................
- Page 11 Table of Contents Unable to Send E-mail..........................486 The Image is not What was Expected....................486 Network-related Problems ...........................488 When you cannot communicate with other SMB machines ...........488 When using TCP/IP...........................488 CentreWare Internet Services Problems..................489 E-mail Features Problems ........................490 Internet/Intranet Connection Problems..................491 IPv4 and IPv6 Connection Problems....................493 Media Print - Text Trouble ...........................496 Media Print - Photos Trouble ........................497...
- Page 12 Single Fold Position Adjustment......................668 Booklet Position Adjustment........................ 669 C Fold Position Adjustment ........................671 Z Fold Position Adjustment........................672 Z Fold Half Sheet Position Adjustment.................... 673 Adjust Image Transfer..........................675 Adjusting the Transfer Output Value ....................675 ESC/P-K Emulation............................680 Emulation..............................
- Page 13 Table of Contents Notes and Restrictions on the Security Features .................754 Notes and Restrictions on the Authentication and Accounting Features......755 Notes and Restrictions for Using SMB....................755 Notes and Restrictions for Using TCP/IP..................756 Notes and Restriction for Using Secondary Ethernet (Optional)...........757 Notes and Restrictions for Using Bonjour ..................758 Notes and Restrictions for IPv6 Connection ..................758 Notes and Restrictions for Print E-mail.....................760...
-
Page 15: Before Using The Machine
1 Before Using the Machine This chapter describes the organization of this guide and conventions used in this guide. Preface ...............................16 Types of Manuals ..........................17 Using This Guide..........................18 Interface Cables..........................21 Power Saver Mode.........................25 Customizing the Control Panel....................29 ... -
Page 16: Preface
1 Before Using the Machine Preface Thank you for selecting the ApeosPort-V C7776/C6676/C5576/C4476/C3376/C3374/ C2276, DocuCentre-V C7776/C6676/C5576/C4476/C3376/C3374/C2276 (hereafter referred to as "the machine"). This guide is intended for system administrators, and provides maintenance information such as how to replace consumables, how to configure network, and troubleshooting procedures. -
Page 17: Types Of Manuals
Types of Manuals Types of Manuals The following guides are provided with the machine. Accompanying Manuals User Guide The guide describes all the necessary steps for copy, print, scan, and fax. This manual is included in the Media (Software/Product Manual). ... -
Page 18: Using This Guide
1 Before Using the Machine Using This Guide This guide is intended for system administrators, and provides maintenance information such as how to replace consumables, how to configure network, and troubleshooting procedures. Organization of This Guide This guide consists of the following chapters. ... -
Page 19: Conventions
Using This Guide 14 Authentication and Accounting Features The machine has the Authentication feature to restrict the availability of services for each feature and the Accounting feature to manage the use of each feature based on the Login Type selected. ... - Page 20 1 Before Using the Machine > Path to a certain item within a procedure on the control panel. For example: When you see the procedure "select [Tools] > [Setup] > [Create Folder]", this means that you need to select [Tools], select [Setup], and then select [Create Folder].
-
Page 21: Interface Cables
Interface Cables Interface Cables When you connect the machine directly to your computer, use the USB interface or parallel interface (optional). When you connect the machine to a network, use the Ethernet interface. Using the USB Interface This section describes the installation procedures for the USB interface. Note •... -
Page 22: Using The Parallel Interface
1 Before Using the Machine Restart the computer. For more information on setting items, refer to "Printer Environment Settings" (P.343). Using the Parallel Interface This section describes the installation procedures for the Parallel interface. Note • To connect your computer using a parallel port, the Parallel Port Kit (optional) is required. For more information on the optional component, refer to "Optional Components"... -
Page 23: Using The Ethernet Interface
Interface Cables Using the Ethernet Interface This section describes the installation procedures for the Ethernet interface. The Ethernet interface of the machine supports the following three types. 1000BASE-T (optional) 100BASE-TX 10BASE-T Note • 1000BASE-T is not supported for some models. Gigabit Ethernet (optional) or Secondary Ethernet (optional) is required. - Page 24 1 Before Using the Machine Return the rear right cover to its original position. Press the main power switch to the [ | ] position to switch on the main power. Close the front cover. Press the push-button power switch to switch on the power. For more information on setting items, refer to "Printer Environment Settings"...
-
Page 25: Power Saver Mode
Power Saver Mode Power Saver Mode The machine is equipped with the Power Saver mode that reduces the power consumption by saving the electricity to the machine when no copy or print data is received for a specified time. The Power Saver has two modes: the Low Power mode and the Sleep mode. When you do not use the machine for a specified period of time, the machine enters the Low Power mode. - Page 26 1 Before Using the Machine Select [System Settings] > [Common Service Settings] > [Power Saver Settings]. Select [Power Saver Timers], and then select [Change Settings]. Using [ ] and [ ], set the time to elapse until entering the Power Saver mode, in 1 minute increments.
-
Page 27: Deactivating Smart Welcomeyes
Power Saver Mode Deactivating Smart WelcomEyes When you do not use Smart WelcomEyes, follow the procedures below. Press the <Log In/Out> button. <Log In/Out> button Enter the system administrator's user ID with the numeric keypad or the keyboard displayed on the screen, and select [Enter]. Select [Tools] on the Services Home screen. - Page 28 1 Before Using the Machine Important • To deactivate Smart WelcomEyes, select [Deactivated]. To save power by using Smart WelcomEyes, select [Activated]. For details, refer to "Smart WelcomEyes" (P.161). Select [Close] repeatedly until the [Tools] screen is displayed. Note • When you configure settings under [System Settings] or [Setup] and then press the <Services Home> button, the screen directly goes back to the Services Home screen.
-
Page 29: Customizing The Control Panel
Customizing the Control Panel Customizing the Control Panel You can change the services displayed on the touch screen or the features assigned to the buttons to make best use of the machine. This section describes how to change the screen default, the services displayed after Auto Clear, the services displayed on the Services Home screen, and the services assigned to the custom buttons, and how to adjust the screen brightness. -
Page 30: Setting The Screen After Auto Clear
1 Before Using the Machine Select [Screen Default], and then select [Change Settings]. Note • Select [ ] to display the previous screen or ] to display the next screen. Select a service you want to display. Note • Select [ ] to display the previous screen or ] to display the next screen. -
Page 31: Customizing The Button Layout
Customizing the Control Panel Select [System Settings] > [Common Service Settings] > [Screen/Button Settings]. Select [Screen After Auto Clear], and then select [Change Settings]. Note • Select [ ] to display the previous screen or ] to display the next screen. Select [Last Selection Screen] or [Services Home]. - Page 32 1 Before Using the Machine Fax Received - Line 1 (Folder NNN) Fax Received - Line 2 (Folder NNN) Fax Received - Line 3 (Folder NNN) Fax Received - SIP (Folder NNN) Note • The folder number specified in Folder Selector Setup will be displayed instead of "NNN". When the folder number is not specified, "(Folder Not Set)"...
- Page 33 Customizing the Control Panel Press the <Log In/Out> button. <Log In/Out> button Enter the system administrator’s user ID with the numeric keypad or the keyboard displayed on the screen, and select [Enter]. When a passcode is required, select [Next] and enter the system administrator's passcode, and select [Enter].
- Page 34 1 Before Using the Machine Select the service to assign to the selected position. Note • Select [ ] to display the previous screen or ] to display the next screen. • You cannot assign the same feature to more than one button.
-
Page 35: Assigning Services To The Custom Buttons
Customizing the Control Panel Select [Services Home - Additional Features], and then select [Change Settings]. Note • Select [ ] to display the previous screen or ] to display the next screen. Select the position where you want to assign an additional feature. - Page 36 1 Before Using the Machine Press the <Log In/Out> button. <Log In/Out> button Enter the system administrator’s user ID with the numeric keypad or the keyboard displayed on the screen, and select [Enter]. When a passcode is required, select [Next] and enter the system administrator's passcode, and select [Enter].
-
Page 37: Adjusting Screen Brightness
Customizing the Control Panel Adjusting Screen Brightness You can adjust the screen brightness of the screen on the Services Home screen. Select [Screen Brightness] on the Services Home screen. Press [+] or [-] to adjust the screen brightness. Select [Save]. To adjust the screen brightness from the [Tools] screen, refer to "Screen Brightness"... -
Page 38: Touch Screen
1 Before Using the Machine Touch Screen On the touch screen of the machine, you can switch pages and scroll a list by the following operations. Note • The touch screen of the control panel used in the machine is pressure-sensitive. Adjust the power to touch the screen. - Page 39 Touch Screen Note • The operation of pinch in or pinch out (moving two fingers inward or outward) to zoom in or out is not supported. Double-tap a previewed image to enlarge the image.
-
Page 40: Important Security Instructions
1 Before Using the Machine Important Security Instructions The Security Warning screen is displayed before the Services Home screen when any one of the following conditions is fulfilled and you enter the System Administration mode. - The system administrator’s user ID and passcode are default values. - The SNMP protocol’s community name and authentication password are default values. -
Page 41: Entering Text
Entering Text Entering Text During operations, a screen for entering text sometimes appears. The following describes how to enter text. You can enter the following characters: numerals, alphabets, and symbols Item Description Entering alphabets and numerals To enter uppercase letters, select [Shift]. To return to the lowercase letters, select [Shift] again. - Page 42 1 Before Using the Machine...
-
Page 43: Paper And Other Media
2 Paper and Other Media This chapter describes the paper that can be used with the machine, precautions when handling paper, and how to load paper in trays. Paper Types............................44 Loading Paper ..........................60 Changing the Paper Size......................66 ... -
Page 44: Paper Types
To achieve optimum performance of the machine, we recommend that you use only paper recommended by Fuji Xerox. If you desire to use paper other than the paper recommended by Fuji Xerox, contact our Customer Support Center. -
Page 45: Loadable Quantity And Weight
Paper Types Loadable Quantity and Weight Loadable Paper Tray Loadable Paper Loadable Paper Quantity Tray 1 Basis Weight: 52 to 500 sheets Plain (60 - 79 gsm) Tray 2 to 4 (3 Tray 300 gsm Bond (80 - 105 gsm) Module) Ream Weight: 44.7 - Recycled (60 - 79 gsm) - Page 46 2 Paper and Other Media Loadable Paper Tray Loadable Paper Loadable Paper Quantity Tray 5 (bypass tray) Basis Weight: 52 to Up to 10 mm Plain (60 - 79 gsm) 300 gsm 90 sheets Bond (80 - 105 gsm) Ream Weight: 44.7 - Recycled (60 - 79 gsm) 258 kg Plain Reload (60 - 79 gsm)
- Page 47 Paper Types Loadable Paper Tray Loadable Paper Loadable Paper Quantity Tray 6 (HCF B1) Basis Weight: 55 to 2,030 sheets Plain (60 - 79 gsm) (optional) 216 gsm Bond (80 - 105 gsm) Ream Weight: 47 - Recycled (60 - 79 gsm) 186 kg Plain Reload (60 - 79 gsm) Punched (60 - 105 gsm)
-
Page 48: Supported Paper
2 Paper and Other Media • Most ideal image quality with the paper can be obtained by setting the image quality for each type of paper. For more information on the settings, refer to "Image Quality" (P.170). Supported Paper Standard Paper When printing or copying on commonly used paper (plain paper), use paper meeting the standards described below. - Page 49 Paper Types Semi Standard Paper In addition to the standard paper, the following paper also can be used. Paper Image Basis Weight Paper Name Size Notes / Countermeasure (gsm) Type Quality ASTRO EXTRA Plain Plain B ASTRO EXTRA Plain Plain B ASTRO EXTRA Bond Plain A...
-
Page 50: Usable Paper
2 Paper and Other Media Paper Image Basis Weight Paper Name Size Notes / Countermeasure (gsm) Type Quality Professional Plain Plain B Professional Bond Plain A Professional Bond Plain A Xceed Plain Plain B Xceed Plain Plain B Xceed Bond Plain A Xceed Bond... - Page 51 Paper Types Paper Image Basis Weight Paper Name Size Notes / Countermeasure (gsm) Type Quality BUSINESS Bond Plain A CARBON NEUTRAL BUSINESS Bond Plain A CARBON NEUTRAL Colotech + Heavyweight Heavyweight A Colotech + Heavyweight Heavyweight A Colotech + Heavyweight Heavyweight A Colotech + Heavyweight...
- Page 52 2 Paper and Other Media Paper Image Basis Weight Paper Name Size Notes / Countermeasure (gsm) Type Quality Horizon Plain Plain B Horizon Bond Plain A Horizon Bond Plain A Horizon Bond Plain A Horizon Bond Plain A J Paper Bond Plain A J Paper...
- Page 53 Paper Types Paper Image Basis Weight Paper Name Size Notes / Countermeasure (gsm) Type Quality Recycled Supreme Bond Plain A Roxy Paper Bond Plain A Roxy Paper Bond Plain A Roxy Paper Bond Plain A 11" UPM Office Plain Plain B MULTIFUNCTION UPM Office Plain...
-
Page 54: Special Media
2 Paper and Other Media Paper Image Basis Weight Paper Name Size Notes / Countermeasure (gsm) Type Quality Plain Plain B (Black) Plain Plain B (Number One) Plain Plain B (Number One) Plain Plain B (Number One) Plain Plain B (Number One) Plain Plain B... - Page 55 Paper Types Paper Image Basis Weight Paper Name Size Notes / Countermeasure (gsm) Type Quality P801 Unknown Trans- The paper is charged with parency static electricity after a copy or print job. When using Tray 5, insert another type of paper at the bottom of the stack before loading transparencies.
- Page 56 2 Paper and Other Media Paper Image Basis Weight Paper Name Size Notes / Countermeasure (gsm) Type Quality Colotech + X-HW Plus Extra-HW A It is recommended to load paper in portrait orientation. If it is not possible, use Tray 5. ...
- Page 57 Paper Types Paper Image Basis Weight Paper Name Size Notes / Countermeasure (gsm) Type Quality Colotech + Silk X-HW Plus Print one sheet at a time, using Tray 5. Colotech Super Gloss Print one sheet at a time, using ...
- Page 58 2 Paper and Other Media Inhibited Paper You are not allowed to use the following paper: Paper Image Basis Weight Paper Name Size Notes / Countermeasure (gsm) Type Quality Symphony (Pastel Pink etc.) Symphony (Pastel Pink etc.) *1 : Select the paper type setting for the paper loaded on a tray. For more information, refer to "Changing the Paper Settings" (P.72).
- Page 59 Paper Types Unusable Paper Using paper and transparencies not recommended by Fuji Xerox may cause a paper jam or machine malfunction. Use paper and transparencies recommended by Fuji Xerox. Symphony (Pastel Pink etc) Damp or wet paper ...
-
Page 60: Loading Paper
2 Paper and Other Media Loading Paper This section describes how to load paper. Types of paper loaded in trays The machine automatically detects the size and orientation of loaded paper in a tray, but not a paper type. Normally, each tray is set to plain paper. When loading paper other than plain paper, you must change the paper type setting. -
Page 61: Loading Paper In Tray 3 (When Tandem Tray Module Is Installed)
Loading Paper Pull out the tray until it stops. Important • While the machine is processing a job, do not pull out the tray that is being used for the job. • To prevent paper jams or erroneous detection of loaded paper in a tray by the machine, do not add paper on top of any remaining paper in the tray. -
Page 62: Loading Paper In Tray 4 (When Tandem Tray Module Is Installed)
2 Paper and Other Media Pull out the tray until it stops. Important • Make sure to pull out the tray slowly. When the tray is being pulled out with force, the tray may possibly hit your knees or other parts of your body causing injuries. -
Page 63: Loading Paper In Tray 5 (Bypass Tray)
Loading Paper Load and align the edge of the paper against the left edge of the tray, with the side to be copied or printed on facing up. Important • Do not load paper above the maximum fill line ("MAX" in the right figure). It may cause paper jams or machine malfunction. -
Page 64: Loading Paper In Tray 6 (Hcf B1) (Optional)
2 Paper and Other Media Note • When using punched paper, load the punched paper as shown in the illustration on the right. Adjust the paper guides to align the edges of the paper loaded. Note • Entering the paper size is needed to use non- standard size paper for copying using Tray 5. - Page 65 Loading Paper Load and align the edge of the paper against the right edge of the tray with the side to be copied or printed on facing down. Important • Do not load paper above the maximum fill line ("MAX" in the right figure). It may cause paper jams or machine malfunction.
-
Page 66: Changing The Paper Size
2 Paper and Other Media Changing the Paper Size This section describes how to change the paper size in Trays 1 to 4, and 6. Note • The types of paper in Trays 1 to 4, and 6 are preset. Normally, Trays 1 to 4 are set to plain paper. When changing to a different paper type, change the paper quality settings to match the type of paper to be loaded so that you can maintain high quality printing. -
Page 67: Changing The Paper Size For Tray 3 (When Tandem Tray Module Is Installed)
Changing the Paper Size Load and align the edge of the paper against the left side of the tray, with the side to be copied or printed on facing up. Important • Do not load paper above the maximum fill line ("MAX"... -
Page 68: Changing The Paper Size For Tray 4 (When Tandem Tray Module Is Installed)
2 Paper and Other Media Load and align the edge of the paper against the left edge of the tray, with the side to be copied or printed on facing down. Important • Do not load paper above the maximum fill line. -
Page 69: Changing The Paper Size For Tray 6 (Hcf B1) (Optional)
Changing the Paper Size Load and align the edge of the paper against the left edge of the tray, with the side to be copied or printed on facing down. Important • Do not load paper above the maximum fill line. - Page 70 2 Paper and Other Media Unscrew the screw of the front guide and remove the guide from the tray. Insert the small protrusions at the bottom of the guide into the holes corresponding to the paper size (1). Insert the protrusion on the tray into a hole corresponding to the paper size on the top of the guide, and tighten up the screw (2).
- Page 71 Changing the Paper Size Close the end guide securely. Push the tray in gently until it stops.
-
Page 72: Changing The Paper Settings
2 Paper and Other Media Changing the Paper Settings This section describes how to change the paper type for Trays and how to set image quality processing by the individual paper type. After loading paper in a tray, specify the type of paper loaded and select image quality for the paper type. - Page 73 Changing the Paper Settings Select [Paper Tray Attributes]. Select a paper tray for changing the paper type setting under [Items]. Select [Change Settings]. Select [Paper Type], [Paper Size], [Paper Color], and [Auto Paper Select] respectively. Note • The paper weight displayed in [Paper Type] varies depending on the settings in [Image Quality].
- Page 74 2 Paper and Other Media Select the image quality, and then select [Save]. Select [Close] repeatedly until the [Tools] screen is displayed. Select [Close].
-
Page 75: Maintenance
3 Maintenance This chapter describes how to replace consumables, clean the machine, calibrate colors, print a report/list, and delete a print job with an invalid user ID. Replacing Consumables......................76 Cleaning the Machine.......................100 Executing Calibration........................107 Executing 2 Sided Color Scanning Calibration ...............110 ... -
Page 76: Replacing Consumables
It may catch fire by electric sparks inside a vacuum cleaner and cause explosion. Use a broom or a wet cloth to wipe off the spills. If you spill a large volume of toner, contact your local Fuji Xerox representative. - Page 77 When calling our Customer Support Center to order consumables/periodical replacement parts, have the product codes ready. The use of consumables/periodic replacement parts not recommended by Fuji Xerox could impair machine quality and performance. Use only consumables/periodic replacement parts recommended by Fuji Xerox.
-
Page 78: Replacing Toner Cartridges
Important • When replacing a toner cartridge, toner may spill and soil the floor. We recommend laying paper on the floor beforehand. • The use of toner cartridges not recommended by Fuji Xerox may degrade image quality and performance. Use only toner cartridges recommended by Fuji Xerox. - Page 79 Replacing Consumables Make sure that the machine is not operating, and open the front cover. Put your hand under the dent of the toner cartridge indicated in the message, and slightly lift up the cartridge. Note • "Y", "M", "C", or "K" indicates Yellow, Magenta, Cyan, and Black, respectively.
-
Page 80: Replacing Waste Toner Container R5
• The proper disposal of used waste toner containers is required. Return the old waste toner container to our Customer Support Center. • The use of waste toner containers not recommended by Fuji Xerox may degrade image quality and performance. Use only waste toner containers recommended by Fuji Xerox. - Page 81 Replacing Consumables Make sure that the machine is not operating, and open the front cover. Pull out the toner cartridge slowly while holding its left side with one hand. Prepare a new waste toner container out of a box. Waste Toner Container While holding the left side of the waste toner container, push the bottle in until it clicks.
- Page 82 3 Maintenance Carefully place the old waste toner container into the empty box with both hands. WARNING Never throw a waste toner bottle into an open flame. Toner may catch fire and cause burn injuries or explosion. If you have a used waste toner bottle no longer needed, contact your local Fuji Xerox representative for its disposal.
-
Page 83: Replacing Drum Cartridges R1, R2, R3, Or R4
Replacing Consumables Return the cover to the original position. Note • Push the cover until it clicks into place. Rotate the release lever clockwise to lock the cover. Close the front cover. Note • If the front cover is not closed completely, a message appears and the machine will remain paused. Replacing Drum Cartridges R1, R2, R3, or R4 (for Customers Having a Spot Maintenance Contract) The machine displays the following messages when a drum cartridge R1, R2, R3 or R4 needs... - Page 84 Important • The use of drum cartridges not recommended by Fuji Xerox may degrade image quality and performance. Use only drum cartridges recommended by Fuji Xerox.
- Page 85 Replacing Consumables • The remaining page yield is applicable when A4 paper LEF ( ) is used. The value is an estimate and varies depending on the conditions such as the paper size, the paper orientation, the number of pages continuously print, and the machine operating environment. •...
- Page 86 3 Maintenance Take the new drum cartridge out of the box, and insert the used drum cartridge into the supplied plastic bag and place it into the box. Important • Do not place the new drum cartridge in an upright position. •...
-
Page 87: Replacing Staple Cartridge (For Finisher-A1)
When this message appears, load a new staple case into the staple cartridge. Important • The use of staple cartridges not recommended by Fuji Xerox may degrade quality and performance. Use only staple cartridges recommended by Fuji Xerox. - Page 88 3 Maintenance Make sure that the machine is not operating, and open the finisher front cover. Pull the staple cartridge out of the finisher. After you pull out the staple cartridge, check inside of the finisher for any remaining staples. Pinch both sides of the empty staple case with your fingers (1), and remove the staple case from the cartridge (2).
-
Page 89: Replacing Staple Cartridge (For Finisher-B1)
When this message appears, load a new staple case into the staple cartridge. Important • The use of staple cartridges not recommended by Fuji Xerox may degrade quality and performance. Use only staple cartridges recommended by Fuji Xerox. -
Page 90: Replacing Staple Cartridge (For C3 Finisher Or C3 Finisher With Booklet Maker)
The Staple Cartridge [R1] is out of staples or not Replace staples with new ones. fully inserted. Check the Staple Cartridge [R1]. Important • The use of staple cartridges not recommended by Fuji Xerox may degrade quality and performance. Use only staple cartridges recommended by Fuji Xerox. Note •... - Page 91 Replacing Consumables • The 50 sheets staple cartridge can not be set to the C3 Finisher Staple Unit 65 Sheets (optional). If you use the C3 Finisher Staple Unit 65 Sheets (optional), order the staple cartridge for 65 sheets staple. •...
-
Page 92: Replacing Booklet Staple Cartridge (For Booklet Maker Unit For Finisher-B1)
When this message appears, replace the booklet staple cartridges with new ones. Important • The use of booklet staple cartridges not recommended by Fuji Xerox may degrade quality and performance. Use only booklet staple cartridges recommended by Fuji Xerox. -
Page 93: Replacing Booklet Staple Cartridge (For C3 Finisher With Booklet Maker)
* : The messages above are for the Booklet Staple Cartridge [R2]. For the Booklet Staple Cartridge [R3], [R3] is displayed. Important • The use of booklet staple cartridges not recommended by Fuji Xerox may degrade quality and performance. Use only booklet staple cartridges recommended by Fuji Xerox. - Page 94 3 Maintenance Pull out the booklet unit. With grasping the lever of the booklet staple cartridge, push the booklet staple cartridge downward. Then, pull out the booklet staple cartridge upwards. Press the orange buttons on the right and left sides of the booklet staple cartridge (1), and open the cover (2).
-
Page 95: Emptying The Hole Punch Waste Container (For Finisher-B1)
Replacing Consumables Close the cover. Return the booklet staple cartridge to its original position. Slightly push the booklet staple cartridge upwards, and make sure that it clicks into place. Note • Return the booklet staple cartridge until ( of the booklet staple cartridge is fitted in ) of the booklet unit. -
Page 96: Emptying The Hole Punch Waste Container (For C3 Finisher Or C3 Finisher With Booklet Maker)
3 Maintenance Make sure that the machine is not operating, lift the top transport cover, and then open the front transport cover of the finisher. Pull out the hole punch waste container. Empty the container. Insert the emptied hole punch waste container into the finisher until it stops. -
Page 97: Replacing Stamp (For Duplex Automatic Document Feeder B1-C)
Replacing Consumables • Make sure to discard all paper chads when emptying the hole punch waste container. Not doing so will cause the container to fill up before the message telling you to empty the container appears again, and this can cause machine malfunction. •... - Page 98 Important • Do not touch the ink pad of the stamp cartridge. If it comes into contact with your skin, wash immediately. • Problems caused by using consumables not recommended by Fuji Xerox are not covered by the maintenance service contract.
-
Page 99: Replacing Stamp (For Duplex Automatic Document Feeder B1-Pc)
Important • Do not touch the ink pad of the stamp cartridge. If it comes into contact with your skin, wash immediately. • Problems caused by using consumables not recommended by Fuji Xerox are not covered by the maintenance service contract. -
Page 100: Cleaning The Machine
3 Maintenance Cleaning the Machine This section describes how to clean the machine such as the machine exterior, document cover, document feeder, and document glass. WARNING When cleaning this product, use the designated cleaning materials exclusive to it. Other cleaning materials may result in poor performance of the product. Never use aerosol cleaners to avoid catching fire and explosion. - Page 101 Cleaning the Machine Make sure that the machine is not operating, and open the front cover. Rotate the release lever of the drum cartridge cover counterclockwise. Lower the cover. Note • You can now see the drum cartridge. Slowly slide out the cleaning bar housed within the LED printhead until it stops.
-
Page 102: Cleaning The Touch Screen
3 Maintenance Return the cover to the original position. Note • Push the cover until it clicks into place. Rotate the release lever clockwise to lock the cover. Close the front cover. Note • If the front cover is not closed completely, a message appears and the machine will remain paused. Cleaning the Touch Screen This section describes how to clean the touch screen of the machine. -
Page 103: Cleaning Document Cover And Document Glass (For Duplex Automatic Document Feeder B1-Pc)
Cleaning the Machine Wipe the document cover with a soft cloth moistened with water to remove any dirt, and then wipe it with a soft, dry cloth. Important • Do not use cleaning agents other than water or neutral detergent. Note •... -
Page 104: Cleaning The White Chute And The Constant Velocity Transport Glass (For Duplex Automatic Document Feeder B1-C)
3 Maintenance Wipe the document glass with the provided cloth. Note • If you cannot remove dirt easily, gently wipe the document glass with a soft cloth moistened with a small amount of neutral detergent. Important • Do not use cleaning agents other than water or neutral detergent. - Page 105 Cleaning the Machine To ensure clean copies at all times, clean white chute, the Side 1 constant velocity transport glass and the Side 2 constant velocity transport glass about once a month with the cloth provided in the document feeder as shown in the illustration.
-
Page 106: Cleaning The Document Feeder Rollers
3 Maintenance Cleaning the Document Feeder Rollers If the document feeder rollers become soiled, smudges may appear on copies, faxes, or scanned documents and paper jams may occur. To ensure clean copies at all times, clean the document feeder roller about once a month. Important •... -
Page 107: Executing Calibration
Executing Calibration Executing Calibration The machine can automatically calibrate colors using the calibration chart when the reproducibility of density or color in copies and prints deteriorates. The machine can adjust the gradation for each screen type set in the machine in advance. The following four types of screen are available. - Page 108 3 Maintenance Select [Calibration] on the Services Home screen. If [Calibration] is not displayed, follow the procedure below. 1) Press the <Log In/Out> button. <Log In/Out> button 2) Enter the system administrator's user ID with the numeric keypad or the keyboard displayed on the screen, and select [Enter].
- Page 109 Executing Calibration Set [Screen Type], [Paper Supply], and [Target]. Note • The following describes calibration procedures using Copy Job 2, as an example. • For [Paper Supply], select the paper tray in which A4 , A3 , 8.5 x 11" , or 11 x 17" white paper is loaded.
-
Page 110: Executing 2 Sided Color Scanning Calibration
3 Maintenance Executing 2 Sided Color Scanning Calibration This section describes the procedures to adjust scan colors for side 1 and side 2 of the duplex automatic document feeder. Important • For the correct output result, execute the calibration in advance. For the calibration, refer to "Executing Calibration"... - Page 111 Executing 2 Sided Color Scanning Calibration Note • Selecting [Restore Previous Values] and then [Start] restores the previous settings. To restore factory default settings, select [Restore Factory Default Values] and then [Start]. In both cases, a message is displayed on the touch screen when the restoration is completed. •...
-
Page 112: Printing A Report/List
3 Maintenance Printing a Report/List This section describes how to print a report/ list. Note • When the <Data> indicator is not lit, you cannot print the Stored Documents List. For information on the types of report/list, refer to "Print Reports" (P.118). Press the <Machine Status>... -
Page 113: Deleting A Private Charge Print Job With An Invalid User Id
Deleting a Private Charge Print Job with an Invalid User ID Deleting a Private Charge Print Job with an Invalid User ID When the Private Charge Print feature is used, all the print jobs with a user ID, regardless of its validity, are stored with the Private Charge Print feature. -
Page 114: Setting Restore Tool
3 Maintenance Setting Restore Tool Setting Restore Tool backs up the settings data of the machine to a network-connected computer to prevent the loss of data resulting from the malfunction of the machine's hard disk. The feature is designed to restore data to the machine after the hard disk is replaced. For more information on Setting Restore Tool, contact our Customer Support Center. -
Page 115: Machine Status
4 Machine Status This chapter describes the features for checking the machine status. Overview of Machine Status ....................116 Machine Information .......................117 Faults ...............................132 Supplies............................133 Billing Information........................134... -
Page 116: Overview Of Machine Status
4 Machine Status Overview of Machine Status You can check machine status and the number of printed pages on the screen. You can also print various reports/lists to check the job history, settings and registered information. Press the <Machine Status> button. <Machine Status>... -
Page 117: Machine Information
Machine Information Machine Information On the [Machine Information] screen, you can check the machine configuration and paper tray status, print various reports/lists, and change and set print mode settings. The following shows the reference section for each item. General Information ...................................117 Paper Tray Status..................................118 Print Reports....................................118 Automatically Printed Reports/Lists ............................127... -
Page 118: Paper Tray Status
4 Machine Status [Machine Configuration] Screen You can check the machine configuration. Select [Machine Configuration]. Check the machine configuration on the screen displayed. Note • Select [ ] to display the previous screen or ] to display the next screen. •... -
Page 119: Activity Report
Machine Information Note • The items displayed vary depending on the optional features installed. Select [Print Reports]. Select the type of a report or a list to print. Note • The screen as shown on the right appears when the [Tools] button is displayed on the Services Home screen. -
Page 120: Configuration Report
4 Machine Status Note • The use of ApeosWare Log Management (sold separately) allows you to import the contents of an Activity Report to a computer. For information on ApeosWare Log Management or ApeosWare Accounting Service, refer to the manuals provided with the software. For information on the settings, refer to "Reports"... - Page 121 Machine Information Configuration Report You can check the hardware configuration, network information, and print and copy settings of the machine with the report. Note • The contents of [Configuration Report] are identical whether it is printed from [Copy Reports], [Printer Reports], [Scan Reports], or [Fax Reports].
- Page 122 4 Machine Status KS Settings List Prints the settings for the KS5843 emulation mode. KSSM Settings List Prints the settings for the KSSM emulation mode. KS5895 Settings List Prints the settings for the KS5895 emulation mode. Font List Prints the list of fonts available on the machine.
-
Page 123: Fax Reports
Machine Information Job Template List (ApeosPort Series Models Only) You can print the list of settings for the server storing the job templates, which are created using CentreWare Internet Services. For more information on the scan service setting tools, refer to the help of CentreWare Internet Services. Important •... - Page 124 4 Machine Status Folder Selector List You can check the settings for the Folder Sorting feature. Inbound Fax Spam List You can check the settings for the G3 ID (telephone numbers) for which fax reception is restricted. Domain Filter List You can check the settings configured for the domain which filters data transmissions.
- Page 125 Machine Information You can print the list of all billing data. Folder List Prints the list of folder settings and the procedure for saving files to folders. Note • [Folder List] appears when the [Tools] button is displayed on the Services Home screen. For information on how to create a folder, refer to "Create Folder"...
- Page 126 4 Machine Status Note • To display the [Auditron Reports] screen, select the <Machine Status> button, and then select [Machine Information] > [Print Reports] > [Auditron Reports]. Select [Meter Report (Print Jobs)]. Press the <Start> button. Meter Report (Print Jobs) You can check the total number of printed pages and sheets of paper used for each client (job owner).
-
Page 127: Automatically Printed Reports/Lists
Machine Information Important • When [Print Service] is set to [Disable Accounting] in [Auditron Mode] under [Accounting Type], [Meter Report (Print Jobs)] is displayed instead of [Auditron Report (Print Jobs)]. For more information on [Meter Report (Print Jobs)], refer to "Meter Report (Print Jobs)" (P.126). Note •... -
Page 128: Overwrite Hard Disk
4 Machine Status If you set to print this report automatically, it is printed each time a broadcast transmission is completed. For information on setting whether to print the report automatically, refer to "Broadcast/Multi-Poll Report" (P.174). Multi-poll Report You can check the result of a multi-poll communication (polling from multiple recipients). The remote terminal name and transmission result/status are recorded. - Page 129 Machine Information Select [Print Mode]. Select [Off-line] or [On-line]. Off-line The machine does not accept data from a computer. Any data being sent is cancelled and not printed. On-line The printer accepts data from a computer. Select a printer language to set a print mode. Set each item.
- Page 130 4 Machine Status Enter [New Value] with the numeric keypad. Select [Save]. Store/Delete Programming For ESC/P-K and HP-GL/2 emulations, you can register settings in memory. You can register up to 20 print modes for ESC/P-K and HP-GL/2 emulations. Select [Store/Delete Programming]. Select [Store Current Selections] or [Delete].
-
Page 131: Fax Receiving Mode
Machine Information Enter a password of up to 32 single-byte characters with the keyboard displayed, and select [Save]. Fax Receiving Mode You can set a mode for receiving faxes. Note • As for IP fax (SIP), the machine always receives faxes automatically. For information on auto receive and manual receive, refer to "4 Fax"... -
Page 132: Faults
4 Machine Status Faults This section describes how to check the information on errors that occurred on the machine. The error history report shows the list of the latest 50 errors. The items printed include the date and time, error code, and error category. The following describes how to print the error history report. -
Page 133: Supplies
Supplies Supplies You can check the status of consumables on the [Supplies] screen. The status of consumables is shown as "OK", "Replace Soon (Order Now)", or "Replace Now". The following describes the procedure to check the status of consumables. For information on replacing consumables, refer to "Maintenance" (P.75). Press the <Machine Status>... -
Page 134: Billing Information
4 Machine Status Billing Information On the [Billing Information] screen, you can check the number of pages printed per meter or user. The following shows the reference section for each item. Billing Information..................................134 User Account Billing Information............................135 Press the <Machine Status> button. Select the [Billing Information] tab. -
Page 135: User Account Billing Information
Billing Information The table below shows which billing meter is counted depending on the combination of area of paper and the output color. Area of Paper Output Color Meter for Counting Number of Counts Smaller than 279 x 400 mm Black &... - Page 136 4 Machine Status To check the system administrator meter 1) Enter the system administrator's user ID with the numeric keypad or the keyboard displayed on the screen, and select [Enter]. When a passcode is required, select [Next] and enter the system administrator's passcode, and select [Enter].
-
Page 137: Tools
5 Tools Each feature of the machine is set to the factory default (initial) settings, but you can customize these settings in accordance with your environment. To change or customize these settings, enter the System Administration mode and make changes in the [Tools] screen. -
Page 138: System Settings Procedure
5 Tools System Settings Procedure To change or customize the system settings, enter the System Administration mode. This section describes the basic procedures for system settings. The following shows the reference section for each procedure. Step 1 Entering System Administration Mode ........................138 Step 2 Entering the System Administrator User ID and Passcode .................. -
Page 139: Step 3 Selecting [Tools]
System Settings Procedure Step 3 Selecting [Tools] Select [Tools] on the Services Home screen. Note • When the Services Home screen is not displayed on the touch screen, press the <Services Home> button. Step 4 Selecting a Setting Item on the [Tools] Screen On the [Tools] screen, select a setting item to set. - Page 140 5 Tools Fax Service Settings Allows you to configure the fax service settings such as setting defaults, fax control and button settings. For more information, refer to "Fax Service Settings" (P.259). E-mail/Internet Fax Service Settings Allows you to configure the e-mail and Internet fax transmission specifications settings. For more information, refer to "E-mail/Internet Fax Service Settings"...
-
Page 141: Step 5 Setting A Feature
System Settings Procedure Step 5 Setting a Feature Select any feature. Note • Select a submenu from the [Group] list, and then select a feature from the [Features] list. • Select [ ] or [ ] as required. Select an item to set. After setting the feature, select [Save]. -
Page 142: Tools Menu List
5 Tools Tools Menu List The following tables list the items that can be set on the [Tools] screen. Note that the some items may not appear depending on the configuration of the machine. System Settings Common Service Settings Machine Clock/Timers (P.157) Date (P.157) ... - Page 143 Tools Menu List Screen/Button Settings (P.162) Screen Default (P.162) Screen After Auto Clear (P.163) Auto Display of Login Screen (P.163) Custom Buttons 1 to 3 (P.163) One-touch Buttons (P.163) Services Home (P.163) Services Home - Additional Features (P.163) ...
- Page 144 5 Tools Maintenance (P.175) EP Diagnostic Request/Repair Request (P.175) Check EP Connection (P.175) EP Registration (P.176) Initialize Hard Disk (P.176) Delete All Data (P.176) Software Options (P.176) Power on Self Test (P.176) Check Smart Card Details (P.176) Finisher Adjustment (P.176) ...
- Page 145 Tools Menu List Other Settings (P.188) Fax Service (P.188) Offset Stacking (Center Tray - Lower) (P.188) Offset Stacking (Right Middle Tray) (P.188) Extra Center Tray (P.188) Booklet Offset (P.188) Auto Job Promotion (P.189) Default Print Paper Size (P.189) ...
- Page 146 5 Tools Copy Defaults (P.204) Paper Supply (P.204) Reduce/Enlarge (P.204) Output Color (P.205) Output Color (Simple Copy) (P.205) Single Color (P.205) Dual Color - Source Color (P.205) Dual Color - Target Area Color (P.205) ...
- Page 147 Tools Menu List Copy Control (P.210) Memory Full Procedure (P.210) Maximum Stored Pages (P.210) Auto Paper Off (P.210) Mixed Size Originals - 2 Sided Copy (P.210) Fine-tune 100% (P.210) ID Card Copy - Reduce/Enlarge (P.210) Background Suppression (Photo &...
- Page 148 5 Tools Protocol Settings (P.219) Ethernet Settings (P.219) TCP/IP - Common Settings (P.220) TCP/IP - Network Settings/ TCP/IP - Network Settings (Ethernet 1), TCP/IP - Network Settings (Ethernet 2) (P.220) Ping Connection Test (P.223) Machine's E-mail Address/Host Name E-mail Address (P.223) ...
- Page 149 Tools Menu List Security Settings (P.236) SSL/TLS Settings (P.236) S/MIME Settings (ApeosPort Series Models Only) (P.237) PDF/DocuWorks/XPS Signature Settings (ApeosPort Series Models Only) (P.238) IPsec (P.239) IEEE 802.1X Settings / IEEE 802.1X Settings (Ethernet 1), IEEE 802.1X Settings (Ethernet 2) (P.240) Certificate Revocation Retrieval Settings (P.240) ...
- Page 150 5 Tools Scan Defaults (P.251) Color Scanning (P.251) Original Type (P.251) File Format (P.251) Optimize PDF For Quick Web View (P.251) Thumbnail - Outgoing E-mail (P.251) Thumbnail - Scan to PC (P.251) Preview (P.251) ...
- Page 151 Tools Menu List Fax Defaults (P.260) Resolution (P.260) Original Type (P.260) Lighten/Darken (P.260) Mixed Size Originals (P.260) Stamp (P.260) Skip Blank Pages (P.261) Starting Rate (P.261) Delay Start - Specific Time (P.261) Transmission Header Text (P.261) ...
- Page 152 5 Tools Fax Received Options (P.267) Folder Selector by Telephone Number / G3 ID (P.267) Folder Selector Setup (P.268) Output Destination Setup (P.269) Reduce/Enlarge Presets (P.269) Original Size Defaults (P.269) Local Terminal Information (P.269) Local Name (P.270) ...
- Page 153 Tools Menu List Folder Service Settings Folder Service Settings (P.278) Files Retrieved By Client (P.278) File Display Default (P.278) Orientation for Stored Print Jobs (P.278) Print & Delete Confirmation Screen (P.278) Convert Custom Size to Standard Size (P.278) Standard Size Threshold Value (P.278) ...
- Page 154 5 Tools Web Browser Setup Web Browser Setup (P.289) Web Applications Version (P.289) Delete Persistent Cookie Upon Closing (P.289) Clear Cache Upon Closing (P.289) Use Cache (P.289) Accept Cookies (P.289) Use TLS1.0 (P.289) When SSL Certificate Verification Fails (P.289) ...
- Page 155 Tools Menu List Add Address Book Entry (P.302) Address Type (P.304) E-mail Address (P.304) Name (P.305) Index (P.305) Surname (P.305) Given Name (P.305) Custom Item 1 (P.305) Custom Item 2 (P.305) Custom Item 3 (P.305) ...
- Page 156 5 Tools Accounting Type (P.317) Accounting Disabled (P.317) Local Accounting (P.317) Network Accounting (P.317) Xerox Standard Accounting (P.317) Auditron Mode (P.317) Verify User Details (P.317) Customize User Prompts (P.317) Accounting Login Screen Settings (P.318) Alternative Name for User ID (P.318) ...
-
Page 157: Common Service Settings
Common Service Settings Common Service Settings In [Common Service Settings], you can make settings relating to the machine's common features. The following shows the reference section for each item. Machine Clock/Timers.................................157 Power Saver Settings...................................159 Audio Tones....................................161 Screen/Button Settings................................162 Paper Tray Settings..................................167 Image Quality Adjustment ................................171 Reports......................................173 Maintenance ....................................175... - Page 158 5 Tools Select the time format. When you select [12 Hour Clock], set [AM] or [PM]. Specify [Hours] and [Minutes]. Select [Save]. NTP Time Synchronization You can synchronize the machine clock with a time server (NTP: Network Time Protocol), receiving time information from the server. To connect to a time server, select [On] for [NTP Time Synchronization], and set the IP address of the time server in [Time Server Address].
-
Page 159: Power Saver Settings
Common Service Settings To use this feature, the [Lock Out Printer] button needs to be displayed on the right side of the Services Home screen. For information on how to display the [Lock Out Printer] button on the Services Home screen, refer to "Customizing the Button Layout"... - Page 160 5 Tools Power Saver Timers The Power Saver mode has two modes: the Low Power and Sleep modes. When a specified period of time has elapsed, the machine switches to these modes in the following order to reduce power consumption. Last operation on the machine ...
-
Page 161: Audio Tones
Common Service Settings Enabled Set a time for the machine to be automatically turned off. Note • [Disabled] is set by default. • Even when [Enabled] is set, the machine will not be automatically turned off during an error (such as paper jam) or processing (such as copying, printing, and interruption). -
Page 162: Screen/Button Settings
5 Tools Auto Clear Alert Tone Set the volume to be sounded at five seconds before automatically returning to the initial screen when [Auto Clear] is set to [On]. You can select from [Soft], [Normal], and [Loud]. To disable the sound, select [Off]. For more information, refer to "Auto Clear"... -
Page 163: Default Language
Common Service Settings Screen After Auto Clear Set the screen displayed after Auto Clear. For more information on the setting procedure, refer to "Setting the Screen After Auto Clear" (P.30). Auto Display of Login Screen When the Authentication feature is enabled on the machine, set whether or not to automatically display the login screen after turning on the machine or canceling the Power Saver mode. - Page 164 5 Tools Setting in the System Administration mode The language set here is the standard language that is retained even when the machine is powered off and on. Setting in the local user mode The language setting in [Language] in the Services Home screen is lost when the machine is powered off.
-
Page 165: Keyboard Input Restriction
Common Service Settings Screen After Inserting USB Select whether or not to display the screen when the machine detects USB memory device insertion, and also select the screen type at the time. Select from [Off], [Store to USB], [Media Print - Text], [Media Print - Photos], and [Service Selection Screen]. - Page 166 5 Tools Icon Style Button Style Operation/ Screen Enabled Disabled Display Effect Menu Design Icon Style Button Style Scroll Direction Horizontal Vertical Flick to switch pages Drag to switch pages Preview Thumbnail View Tap to display the entire view Flick to switch pages Drag to switch pages Entire View Flick to switch pages...
-
Page 167: Paper Tray Settings
Common Service Settings Double-Tap Interval You can set the interval between two taps to be recognized as a double-tap by the machine. Select from [Shorter], [Default], or [Longer]. Sys. Admin. Settings Security Warning Set whether or not to display the security warning screen when the default values of system administrator's user ID and passcode are used. - Page 168 5 Tools Important • Align the paper guides against the paper to prevent paper jams or errors. If the machine cannot detect a tray, use Tray 5. Paper Type Select the type of paper to load in the trays. For information about paper types available on the machine, refer to "Loadable Quantity and Weight"...
- Page 169 Common Service Settings Paper Tray Attributes During Loading Select whether or not to display the [Paper Tray Attributes] screen after the tray is pulled out or inserted in. This setting applies to Trays 1 to 4, and 6 (optional). You cannot apply this setting to Tray 5. Paper Tray Priority Set the priority of the trays to use when paper of the same size and the same orientation is set in the multiple trays or print data does not include the paper tray information for...
-
Page 170: Auto Tray Switching Control
5 Tools Auto Tray Switching Control Set the alternative tray or paper when running out of paper loaded in the tray selected. Auto Tray Switching You can select from [Always Enable], [Enable during Auto Select], and [Enable for Same Paper Type/Color]. -
Page 171: Image Quality Adjustment
Common Service Settings Setting values Meaning Heavyweight (HW) B (106-169 The image quality is suitable for water-resistant paper. gsm) Heavyweight (HW) C (106-169 The image quality is suitable for white films. gsm) Heavyweight (HW) S (106-169 Normally, do not select this value. gsm) Heavyweight A Reload (106- Default setting for Heavyweight Reload paper. - Page 172 5 Tools Photo & Text Recognition Allows you to change a level with which the machine determines a document as text or photos. This setting is used when you select [Photo & Text] for [Original Type] on the [Image Quality] screen.
-
Page 173: Reports
Common Service Settings Background Suppression (Scan Jobs) Set the method of background suppression to be used for scan operations. Set how the machine detects density and deletes the background color. Select [High Speed] to sample a section of the document and detect the background color. Select [High Quality] to conduct a pre-scan, and sample the whole document to detect the background color. - Page 174 5 Tools Print Reports Button Set the display method of [Print Reports] under the [Machine Information] screen and [Error History Report] under the [Faults] screen displayed by pressing the <Machine Status> button. If you select [Disabled], the [Print Reports] button under [Machine Status] > [Machine Information] and the [Error History Report] button under [Faults] are displayed only in the System Administration mode.
-
Page 175: Maintenance
Common Service Settings On Automatically prints a Transmission Report when data is sent successfully and a Transmission Report - Job Undelivered when data transmission failed. Print when delivery fails Prints a Transmission Report - Job Undelivered when the data transmission failed. Scan File Transfer Report (Fax Server) Set whether or not to print a Transmission Report after scanned data is sent using the Server Fax feature. -
Page 176: Delete All Data
This feature is designed to prevent the leakage of confidential information of a customer when the machine is returned to Fuji Xerox. All data stored on the machine will be deleted. Before executing the operation, make sure that the operation is absolutely necessary. -
Page 177: Software Upgrade
Common Service Settings Adjust Booklet Fold Position Set the booklet fold position for paper smaller or larger than B4. Adjust Fold Position You can adjust the fold position for each paper type and can set up to 10 adjustment type. Also, you can assign the type to each tray. -
Page 178: Watermark
5 Tools Delete All Certificates/Initialize Settings Deletes all certificates stored in the machine and initializes the security settings associated with certificates. This feature is designed to use when you cannot use a certificate data in the machine because of an abnormality of certificate file even when the certificate is set to enabled for [SSL/TLS Settings] under [Tools] >... - Page 179 Common Service Settings Off A text effect is not applied. Embossed When you re-copy a copied document with watermark, the text hidden in the background is printed as embossed text. Outline When you re-copy a copied document with watermark, the text hidden in the background is printed as white cutout.
-
Page 180: Secure Watermark
The feature may not operate properly depending on a document or conditions. For more information, contact our Customer Support Center. • Please note that Fuji Xerox is not liable for any damages caused by the use or without the use of the Secure Watermark feature. -
Page 181: Secure Watermark Control
Common Service Settings • This feature is only available for a Fuji Xerox manufactured machine installed with the Secure Watermark feature. Secure Watermark Control Set whether or not to detect a protection code embedded in a document. Secure Watermark Detection When you set [On] and copy or scan a document with a protection code embedded, the copy or scan job is canceled. - Page 182 5 Tools Media Print Set whether or not to forcibly use the Force Secure Watermark feature when printing for Media Print - Text and Photos. Print Fax Set whether or not to forcibly use the Force Secure Watermark feature when printing a document received by fax.
-
Page 183: Force Annotation
Common Service Settings Print this Sample List Prints hidden text samples of various densities. Select [Watermark/Background Contrast], referring to the printed samples. Force Annotation The string such as a user name and a date (Annotation) is forcibly printed out according to the layout template associated with each job type. -
Page 184: Print Universal Unique Id
5 Tools Media Print Print Fax Print E-mail Report Note • You can associate a layout template with Client Print when a print job is sent from a computer. • You can associate a layout template with Print Stored File when printing a file in a folder. Delete Layout Template Deletes a layout template. -
Page 185: Image Log Control (Apeosport Series Models Only)
• Searching for images and print job logs allows the system administrator to grasp the identification information of the user who instructed the job. Note that Fuji Xerox is not responsible for a privacy issue of the user caused by using the Image Log Control feature. - Page 186 5 Tools - [High]: Replaces the image to an error image (1x1 pixels) and indicates a system error. In this case, turn off the machine and confirm that the control panel is lit off, and then turn on the machine again. - [Low]: Replaces the image to an error image (1x1 pixels) and records the error information after finishing the job.
-
Page 187: Notify Job Completion By E-Mail
Common Service Settings Log Transfer Set whether or not to transfer an image log to a log management server with the Log Transfer feature. Select from [Disabled] and [Enabled]. Assurance Level Allows you to select an assurance level, which affects whether an image log is surely transferred to a log management server, from [High] or [Low]. -
Page 188: Other Settings
5 Tools Embedded Plug-ins Set whether or not to use the embedded plug-ins. Select [Enabled] or [Disabled]. List of Embedded Plug-ins Display the embedded plug-in name and status on the list. Other Settings You can configure other settings related to the machine. Fax Service Switches between the Fax feature and the Server Fax feature. -
Page 189: Auto Job Promotion
Common Service Settings Note • This feature does not appear for some models. An optional component is required. For more information, contact our Customer Support Center. Auto Job Promotion You can select whether or not to allow another job to automatically bypass the current job when the machine is unable to start an operation for any reason, (for example, running out of paper in a tray when starting copying or printing). - Page 190 5 Tools Paper size group AB series (8 × 13") AB series Loading Position Size / Orientation 5.5 × 8.5" 5.5 × 8.5" 7.25 × 10.5" 8 × 10" 8 × 10" 8.5 × 11" 8.5 × 11" 8.5 × 13" 8.5 ×...
- Page 191 Common Service Settings Paper size group AB series (8 × 13") AB series Loading Position Size / Orientation (Taiwan) 16 K (mainland China) 16 K (mainland China) (mainland China) Postcard Envelope (120 x 235 Envelope (90 x 205 Envelope (240 x 332 Envelope (162 x 229 Envelope (229 x 324 Envelope (235x 120...
- Page 192 5 Tools Paper size group AB series (8 × 13") AB series Loading Position Size / Orientation C5 envelopes Postcard (4 × 6") Photograph 2L (5 × 7") Postcard (6 × 9") Available Not available...
- Page 193 Common Service Settings AB series AB series Paper size group (8 K / 16 K) (8 × 13" / 8 × 14") Loading Position Size / Orientation 5.5 × 8.5" 5.5 × 8.5" 7.25 × 10.5" 8 × 10" 8 × 10" 8.5 ×...
- Page 194 5 Tools AB series AB series Paper size group (8 K / 16 K) (8 × 13" / 8 × 14") Loading Position Size / Orientation 16 K (Taiwan) (Taiwan) 16 K (mainland China) 16 K (mainland China) (mainland China) Postcard Envelope (120 x 235 Envelope (90 x 205...
- Page 195 Common Service Settings AB series AB series Paper size group (8 K / 16 K) (8 × 13" / 8 × 14") Loading Position Size / Orientation DL envelopes C4 envelopes C5 envelopes Postcard (4 × 6") Photo 2L (5 × 7") Postcard (6 ×...
- Page 196 5 Tools Paper size group Inch series Loading Position Size / Orientation 5.5 × 8.5" 5.5 × 8.5" 7.25 × 10.5" 8 × 10" 8 × 10" 8.5 × 11" 8.5 × 11" 8.5 × 13" 8.5 × 14" 11 × 17" 12 ×...
- Page 197 Common Service Settings Paper size group Inch series Loading Position Size / Orientation (Taiwan) 16 K (mainland China) 16 K (mainland China) (mainland China) Postcard Envelope (120 x 235 Envelope (90 x 205 Envelope (240 x 332 Envelope (162 x 229 Envelope (229 x 324 Envelope (235 x 120 Envelope (114 x 162...
- Page 198 5 Tools Paper size group Inch series Loading Position Size / Orientation C5 envelopes Postcard (4 × 6") Photo 2L (5 × 7") Postcard (6 × 9") Available Not available Millimeters/Inches Allows you to select unit of measurement displayed on the screen from [Millimeters] or [Inches].
-
Page 199: Encryption Key For Confidential Data
Common Service Settings Data Restoration The encrypted data cannot be restored in the following cases: When a problem occurs with the hard disk. When you have forgotten the encryption key. When you have forgotten the system administrator's user ID and a passcode when [On] is selected in [Service Rep. -
Page 200: Software Download
5 Tools Select [Save] to display a confirmation screen. Select [Yes] on the screen to save the setting. Service Rep. Restricted Operation Allows you to select whether or not to restrict the operation by our service representative to protect the security settings from being altered by someone impersonating our service representative. - Page 201 Common Service Settings Check Document Guides Position Set whether or not to display the confirmation screen when you set the guide position of the document feeder to 8.5" and start loading. Select from [No] or [Yes]. Document Feeder Quiet Mode When you use the duplex automatic document feeder B1-PC, allows you to specify whether or not to reduce the noise of loading a document.
- Page 202 5 Tools Paused Job Handling Allows you to select the way of processing of a job left uncontrolled over the time specified in [Auto Clear]. "Auto Clear" (P.158) For more information on Auto Clear, refer to Resume Job Automatically The job is automatically resumed.
-
Page 203: Copy Service Settings
Copy Service Settings Copy Service Settings In [Copy Service Settings], you can configure settings related to the Copy feature. The following shows the reference section for each procedure. Copy Tab - Features Allocation..............................203 Preset Buttons....................................204 Copy Defaults....................................204 Copy Control....................................210 Original Size Defaults ..................................212 Reduce/Enlarge Presets ................................212 Custom Colors ....................................212 Annotations - Create Comments..............................212... -
Page 204: Preset Buttons
5 Tools Select a feature to display, and select [Save]. Note • Select [ ] to display the previous screen or [ ] to display the next screen. Repeat steps 2 and 3 as required. Select [Save]. Preset Buttons Paper Supply - Button 2 - 5 Select the paper tray displayed in the second to fifth buttons in [Paper Supply] on the [Copy] screen. - Page 205 Copy Service Settings Select the ratio from [100%], [Auto %], and the buttons registered as Reduce/Enlarge Preset buttons. When the default value of [Paper Supply] is set to [Auto Select], [Auto %] cannot be selected for [Reduce/Enlarge]. For information on the Reduce/Enlarge Preset buttons, refer to "Reduce/Enlarge Presets" (P.212). Output Color Set the default value for [Output Color] in the [Copy] screen.
- Page 206 5 Tools Lighten/Darken Set the default value for [Lighten/Darken] of [Image Options] in the [Image Quality] screen. Contrast Set the default value for [Contrast] of [Image Enhancement] in the [Image Quality] screen. Sharpness Set the default value for [Sharpness] of [Image Options] in the [Image Quality] screen. Saturation Set the default value for [Saturation] of [Image Options] in the [Image Quality] screen.
- Page 207 Copy Service Settings Note • You cannot copy the whole area even if you set [0] to [Edge Erase - Top Edge]. For the printable area, refer to "Printable Area" (P.661). Edge Erase - Bottom Edge When you copy a document with the document cover open or when you copy a book, the edges and center margin of the document may be printed as black shadows.
-
Page 208: Image Rotation
5 Tools Image Rotation Set the default value for [Image Rotation] in the [Layout Adjustment] screen. Image Rotation - Rotation Direction Set the default value for [Image Rotation - Rotation Direction] of [Image Rotation] in the [Layout Adjustment] screen. Original Orientation Set the default value for [Original Orientation] in the [Layout Adjustment] screen. - Page 209 Copy Service Settings Annotations - Comment - Font Size Set the default value for [Font Size] under [Format & Style] displayed when [Comment] is selected for [Annotations] in the [Output Format] screen. Annotations - Comment - Font Color Set the default value for [Font Color] under [Format & Style] displayed when [Comment] is selected for [Annotations] in the [Output Format] screen.
-
Page 210: Copy Control
5 Tools Copy Control You can configure settings related to copy operation control. Memory Full Procedure If there is insufficient hard disk memory while scanning a document, a screen appears asking you how you want to handle the partially stored data. Set the process you want the machine to perform for the partially stored data after a certain time has elapsed in the confirmation screen. - Page 211 Copy Service Settings Background Suppression (Photo & Text) Set the background suppression level for color copying. This setting is valid when [Photo & Text] is selected for [Original Type] in the [Image Quality] screen. The larger the value, the stronger the effect of removing background noise. Background Suppression Level (Text) Set the background suppression level for color copying.
-
Page 212: Original Size Defaults
5 Tools Quantity Display You can select how you want to display the counter in the Copy service. Select from [Quantity], [Quantity and Memory], and [Quantity and Original Count]. Maximum Number of Sets Set the maximum number of allowed sets to copy between 1 and 999. Users will not be able to specify a larger number of sets to copy than the value set here. -
Page 213: Connectivity & Network Setup
Connectivity & Network Setup Connectivity & Network Setup In [Connectivity & Network Setup], you can configure settings related to the Connectivity & Network feature. For information on Connectivity and Network Settings, refer to "Printer Environment Settings" (P.343) or "E-mail Environment Settings" (P.357). If you use CentreWare Internet Services, more detailed settings are possible. - Page 214 5 Tools Parallel Port Status Select [Enabled] to use a parallel interface. Print Mode Select the printer language use on the machine. Selecting [Auto] enables the machine to automatically determine and use the most suitable language to print data received from the host device.
- Page 215 Connectivity & Network Setup Adobe Communication Protocol Standard Select this when the output protocol of the print driver is in the ASCII format. Binary Select this when the output protocol of the print driver is in the BCP format. TBCP ...
-
Page 216: Port 9100
5 Tools Important • Do not use a number that is the same as a port number of another port. However, you can use the same port number for a port that uses HTTP (IPP, Internet Services (HTTP), UPnP Discovery, SOAP, WebDAV, and Web Services on Devices (WSD)). -
Page 217: Upnp Discovery
Connectivity & Network Setup Receive E-mail Port Status Select [Enabled] when you receive e-mails or Internet faxes. Send E-mail Port Status Select [Enabled] when you send e-mails or Internet faxes. E-mail Notification Service Port Status Select [Enabled] when you use the E-mail Notification Service. The E-mail Notification Service notifies you of the machine status or the completion of a print job and a direct fax job by e-mail. - Page 218 5 Tools Important • Do not use a number that is the same as a port number of another port. However, you can use the same port number for a port that uses HTTP (IPP, Internet Services (HTTP), UPnP Discovery, SOAP, WebDAV, and Web Services on Devices (WSD)).
-
Page 219: Protocol Settings
Connectivity & Network Setup ThinPrint Port Status You can use the machine for print in the ThinPrint .print environment. The machine decompresses and prints the compressed print data sent from the print server. ® Select [Enabled] when you use ThinPrint ... - Page 220 5 Tools TCP/IP - Common Settings Configure common settings to use TCP/IP. Primary Network When two Ethernet interfaces are used, the name of interface which works as the primary network is displayed. Note • The primary network is "Ethernet 1". You cannot set "Ethernet 2" as the primary network. •...
- Page 221 Connectivity & Network Setup RARP The address, subnet mask, and gateway address will automatically be set via RARP. DHCP/AutoIP The address, subnet mask, and gateway address will automatically be set via DHCP/ AutoIP. If the machine fails to communicate with the DHCP server, the AutoIP function is automatically enabled and an IP address (169.254.xxx.xxx) is assigned to the machine.
- Page 222 5 Tools • To set the IPv4 IP addresses that the machine accepts connection from, use [IP Filtering] in CentreWare Internet Services. For more information, refer to the help of CentreWare Internet Services or refer to "CentreWare Internet Services Settings" (P.335). •...
-
Page 223: Machine's E-Mail Address/Host Name
Connectivity & Network Setup Note • [IPv6 - IP Filter] applies to all features using TCP/IP, such as Print, Store to Folder, Web Applications services (ApeosPort Series Models only), and CentreWare Internet Services. • To set the IPv6 addresses that the machine accepts connection from, use [IP Filtering] in CentreWare Internet Services. -
Page 224: Proxy Server Settings
5 Tools Machine Name Enter the machine name with up to 32 single-byte characters. Host Name Enter the host name with up to 32 single-byte characters. Important • When you use SMB, enter the first 15 letters of the host name. The host name must be up to 15 single-byte characters to identify the machine properly. -
Page 225: Ep Proxy Server Setup
Connectivity & Network Setup HTTPS Proxy Server Port Number Set the HTTPS proxy server port number from 1 to 65535. The default value is 8080. Important • Do not use the numbers assigned to the other ports. HTTPS Proxy Server Authentication Select [Enabled] when authentication is required to connect to the HTTPS proxy server. -
Page 226: Sip Settings
5 Tools HTTP Proxy Server Port Number Set the HTTP proxy server port number from 1 to 65535. The default value is 8080. Important • Do not use the numbers assigned to the other ports. HTTP Proxy Server Authentication Select [Enabled] when authentication is required to connect to the HTTP proxy server. HTTP Proxy Server Login Name Enter a login name of the HTTP proxy server. - Page 227 Connectivity & Network Setup DHCP The SIP proxy server IP address and the SIP registrar server IP address will be automatically retrieved from DHCP. DHCP v6 The IPv6 address for the SIP proxy server and the IPv6 address for the SIP registrar server will be automatically retrieved from the DHCPv6 server.
- Page 228 5 Tools SIP Registrar Server Setup Configure SIP registrar server settings. You can set a primary server and a secondary server. Note • You can use up to two SIP registrar servers. • Select [Cisco] for a server type. Primary Server IP Address Enter the IP address of the primary server.
-
Page 229: T.38 Settings
Connectivity & Network Setup Note • If you specify a specific telephone number, specify the entire telephone number such as "0312345678". Gateway Address Enter the IP address of the VoIP gateway. T.38 Settings Configure the settings for T.38. T.38 Transport Protocol Select T.38 transport protocol from [TCP] or [UDP]. -
Page 230: Smtp Server Settings
5 Tools Server Name/IP Address Enter a server name or IP address with up to 128 characters, and then select [Save]. Port Number Enter a port number from 1 to 65535. The default value is 110. Important • Do not use the numbers assigned to the other ports. ... -
Page 231: Remote Authentication/Directory Service
Connectivity & Network Setup Login Credentials for E-mail Send Select the login user name when sending e-mails from [Remotely Authenticated User] and [System]. When [Remotely Authenticated User] is selected and if the machine tries authenticating the remote server before a job startup, the machine performs verification at the time of transmission with the remotely authenticated user name and password. - Page 232 5 Tools Primary Server - Port Number Set the primary server port number from 1 to 65535. The default value is 88. Important • Do not use the numbers assigned to the other ports. Secondary Server Name/Address Enter the secondary server name or IP address. Note •...
- Page 233 Connectivity & Network Setup Secondary Server - Port Number Set the secondary server port number from 1 to 65535. The default value is 389. Important • Do not use the numbers assigned to the other ports. Authentication Method Select a method to perform LDAP authentication from [Direct Authentication] and [Authentication of User Attributes].
- Page 234 5 Tools Network User ID Attribute (ApeosPort Series Models Only) When a smart card is used for LDAP authentication, set the attribute of the user name to be used for a smart card ID search. The user name is given to the remote service as the authentication information.
- Page 235 Connectivity & Network Setup Search Entries by Surname Set whether or not to use [Attribute Type of Surname] when a name is used as a search key. Search Entries by Given Name Set whether or not to use [Attribute Type of Given Name] when a name is used as a search key.
-
Page 236: Security Settings
5 Tools Maximum Number of Search Results Set a maximum number of address to display from search results from 5 to 100. If the search results exceed the maximum, the search stops at the maximum number set. The default value is 50. ... - Page 237 Connectivity & Network Setup The default value is 443. Important • Do not use the numbers assigned to the other ports. LDAP - SSL/TLS Communication Set whether or not to enable the SSL/TLS communications for authentication and searches. If you enable the LDAP SSL/TLS communications, you must set [Primary Server - Port Number] and [Secondary Server - Port Number] under [LDAP Server/Directory Service Settings].
- Page 238 5 Tools E-mails other than e-mail sent by S/MIME when [S/MIME Communication] is set to [Enabled]. E-mails that fail to attach a signature or verification. E-mails that are attached with an expired certificate. Receive Untrusted Internet Fax If you select [No], the machine does not receive the following Internet fax: ...
- Page 239 Connectivity & Network Setup PDF Signature Select the setting for PDF signature from [Do not add signature], [Always add visible signature], [Always add invisible signature], or [Select during send]. PDF Signature Hash Algorithm Select the setting for PDF Signature Hash Algorithm from [SHA-1] or [SHA-256]. ...
-
Page 240: Certificate Revocation Retrieval Settings
5 Tools Set DH group. Select from [G1] or [G2]. PFS Settings Select whether or not to enable PFS. Destination IPv4 Address Set the IPv4 address of the destination. When entering an IP address, enter the address in the format "xxx.xxx.xxx.xxx", where "xxx"... -
Page 241: Other Settings
Connectivity & Network Setup Selecting [High] verifies the validity of certificates, and determines only certificates that have not been revoked as valid. Retrieval of Certificate Status Select the method to verify the validity of certificates. Select [By Retrieving CRL] if the machine retrieves a CRL (Certificate Revocation List) from the validation authority to verify the revocation status of the certificate. - Page 242 5 Tools Selecting [Change Settings] allows you to enter the domain name using a keyboard displayed with up to 64 characters.
-
Page 243: Print Service Settings
Print Service Settings Print Service Settings In [Print Service Settings], you can configure settings related to the Print feature. Using CentreWare Internet Services, you can make more detailed settings. For more information, refer to "CentreWare Internet Services Settings" (P.335). The following shows the reference section for each setting. Allocate Memory ..................................243 Delete Form ....................................245 Register Google Cloud Print...............................245... - Page 244 5 Tools Job Ticket Memory Specify the amount of memory to use for job tickets from 0.25 to 8.00 MB in 0.25 MB increments. Note • The maximum amount of memory you can allocate varies according to the amount of free space available in memory.
-
Page 245: Delete Form
Print Service Settings Delete Form You can delete registered ESC/P-K forms. Select [Delete Form]. Select the print mode to delete forms. Enter the form number with the numeric keypad, and select [Confirm]. ESC/P Deletes ESC/P-K emulation forms. Form Number When you select an item to delete, you can enter the form number. - Page 246 5 Tools Use Closest Size Switches to the closest size of paper to previously selected and prints. If necessary, the image is automatically reduced in size on the paper. Note • If there is a client specification, the client specification is prioritized. ...
-
Page 247: Banner Sheet
Print Service Settings When Paper Jam Occurs Specify how the machine handles print jobs after a paper jam is cleared. Resume Job after Jam Clearance When a paper jam is cleared, the machine automatically resumes printing from the next page of the page which was output correctly. - Page 248 5 Tools PostScript Default Color Set the default value for Post Script output color. Note • This feature does not appear for some models. An optional component is required. For more information, contact our Customer Support Center. PostScript Paper Supply Select whether the PostScript Deferred Media Selection feature is enabled or disabled when the paper tray is selected.
- Page 249 Print Service Settings Data Processing Order Prints jobs in the order of becoming print-ready status after receiving the jobs. If you instruct the machine to print jobs of multiple documents continuously, the machine may preferentially print a job which was sent later depending on the time for data processing.
-
Page 250: Scan Service Settings
5 Tools Scan Service Settings In [Scan Service Settings], you can configure settings related to the Scan services. Note • This feature does not appear for some models. An optional component is required. For more information, contact our Customer Support Center. •... -
Page 251: Scan Defaults
Scan Service Settings Select a column by choosing from [Feature in 1st Column] to [Feature in 4th Column]. And set the item to be displayed from [Not Selected], [Color Scanning], [2 Sided Scanning], [Original Type], [File Format], [Resolution], [Lighten / Darken], [Reduce / Enlarge], [Mixed Size Originals], and [Original Orientation]. - Page 252 5 Tools Contrast Set the default value for [Contrast] of [Image Enhancement] in the [Advanced Settings] screen. The contrast setting is valid when [Color Scanning] is set to [Color] or [Grayscale]. Sharpness Set the default value for [Sharpness] of [Image Options] in the [Advanced Settings] screen. Background Suppression This feature allows you to suppress the background color of documents.
-
Page 253: Searchable Text
Scan Service Settings [Quality: Higher +2/File Size: Larger +2], [Quality: Higher +3/File Size: Larger +3], and [Quality: Maximum/File Size: Largest]. E-mail Subject Set the default value for the e-mail subject. Up to 128 characters can be entered for the subject. Store &... -
Page 254: Scan To Pc Defaults
5 Tools Scan to PC Defaults Transfer Protocol Set the default value for the transfer protocol used for transfer from [FTP], [SMB], or [SMB (UNC Format)]. Login Credential to Access Destination Set whether or not to use a user authenticated by the remote server when the user logs in to the destination computer for the Scan to PC service. -
Page 255: Output Size Defaults
Scan Service Settings Output Size Defaults Set the sizes to display in [Output Size] when selecting [Enter Output Size] for scanning documents at [Reduce/Enlarge] in the [Layout Adjustment] screen. You can assign any output size to output size buttons. Assigning the output sizes to the buttons will save your time to specify the size each time. -
Page 256: Background Suppression Level
5 Tools Saturation Set the saturation when scanning a full color document. When a document is scanned, saturation is automatically adjusted according to the value set here. Background Suppression Level Set the background suppression level. This is valid when [Background Suppression] is set to [Auto Suppression]. - Page 257 Scan Service Settings Add Date to E-mail Attachment Name Set whether or not to add dates and page number after file names when E-mail is selected. The file name depends on the setting of [Filename Format] and whether or not the file name is automatically generated.
- Page 258 5 Tools Store & Send Link - Maximum File Size Set the maximum data size of files that can be stored for the Store & Send Link feature. You can specify the value from 1 to 200 MB in 1 MB increments. The default value is 200 MB. Print Login Name on PDF Files If scanning a document in PDF format when local machine authentication or remote authentication is enabled, you can set whether or not to add an authentication user name...
-
Page 259: Fax Service Settings
Fax Service Settings Fax Service Settings In [Fax Service Settings], you can configure settings related to the Fax service. Note • This feature does not appear for some models. An optional component is required. The items displayed on the screen vary depending on the optional components installed. For more information, contact our Customer Support Center. -
Page 260: Fax Defaults
5 Tools Transmission Screen Set whether or not to display transmission status during transmission. Display Fax Line Selection Set whether or not to enable you to select a fax line (port) on the [Fax / Internet Fax] screen. Note • This feature does not appear for some models. An optional component is required. For more information, contact our Customer Support Center. -
Page 261: Fax Control
Fax Service Settings Skip Blank Pages Set the default value for [2 Sided Scanning] in the [Fax/Internet Fax] and [Layout Adjustment] screens to [2 Sided (First Page 1 Sided)]. Note • This feature is for service representative use. For more information, contact our Customer Support Center. - Page 262 5 Tools Re-enter Broadcast Recipients This setting is required when you selected [Enter Twice] for [Re-enter Recipients]. Set whether or not to allow the Broadcast Send. Enter Once Only Allows the Broadcast Send. No need to re-enter the recipient. ...
- Page 263 Fax Service Settings Manual Redial List - Dial Mode Specify the destination type saved as a redial destination number. When you deselect all the check boxes, the Redial feature becomes disabled. Transmission Header Text - Polling Set whether or not to attach a transmission header to a polling file. A "polling file"...
- Page 264 5 Tools Select whether or not to enable the Batch Send feature. Note that a batch send is not available for manual transmissions, broadcasts, relay broadcasts, remote folder, and delayed start transmission with a specified time before the specified time. When a redial, resend, delayed start transmission job, or the Authentication feature is used and different users send to the same address, a batch send is not possible.
- Page 265 Fax Service Settings For example, when two A5 pages are received, they are printed on a single A4 sheet. However, if paper of the same paper size as the received document is specified in [Receiving Paper Size], it is printed on the specified size of paper. Depending on the sizes of the received document, two pages of the document may not be printed on one sheet of paper.
-
Page 266: Memory Full Procedure
5 Tools The Folder Selector Setup feature allows you to classify received faxes by line type and store them in folders specified. Filename Format for Store to Folder Set the format for the filename to be generated when fax is stored to folder. When [YYYYMMDDHHMMSS] is selected, the files will be named in the order of year, month, day, hour, minute, and second. -
Page 267: Fax Received Options
Fax Service Settings Direct Fax Set whether or not to receive a fax, which is instructed using a fax driver from a computer. When you select [Disabled], the Direct Fax feature becomes unavailable. Block Inbound Faxes Set a G3 ID (fax number) from which you want to reject a fax reception. You can specify up to 50 G3 IDs. - Page 268 5 Tools Service Specify the priority of classifying method when [Dial-In], [Caller ID], and [G3ID] are informed at the same time. [Dial-In] is set as the factory default value. Telephone Number / G3 ID Enter a telephone number to be classified up to 20 digits with the numeric keypad. When you use * (wild card), the machine checks the telephone number from the first digit.
-
Page 269: Reduce/Enlarge Presets
Fax Service Settings Output Destination Setup In [Output Destination Setup], you can set the output destination for each receiving line. Note • This feature does not appear for some models. An optional component is required. For more information, contact our Customer Support Center. •... - Page 270 5 Tools For information about how to enter characters, refer to "Entering Text" (P.41). Local Name Register the name of the local terminal as the local name. The local name is shown in the recipient's touch screen or Activity Report. Depending on the recipient's device, however, it may not be displayed.
-
Page 271: Internet Fax Control
Fax Service Settings SIP Line - Company Logo Register the sender names for IP fax (SIP). The sender name is printed in the Transmission Header Text or Cover Page. Enter up to 60 characters using the keyboard displayed or the numeric keypad. - Page 272 5 Tools Broadcast Starting Rate Set the default value for the communications mode for the broadcasting for the Internet fax. Delivery Confirmation Method Set the default value for the method of confirming that an Internet fax sent has arrived or not.
- Page 273 Fax Service Settings Transmission Header Text - Fax Transfer When forwarding received e-mail from Internet fax to fax, select whether or not to add a Transmission Header Text (start time, company logo, recipient name, G3 ID, and number of pages). Fax Transfer Maximum Data Size When forwarding a received e-mail from Internet fax to fax, set the maximum data size.
-
Page 274: E-Mail/Internet Fax Service Settings
5 Tools E-mail/Internet Fax Service Settings In [E-mail/Internet Fax Service Settings], you can configure settings related to the e-mail and the Internet Fax service. Note • This feature does not appear for some models. An optional component is required. For more information, contact our Customer Support Center. - Page 275 E-mail/Internet Fax Service Settings Off Does not respond. On Automatically notifies the sender that the e-mail has been processed. Read Receipts When an e-mail is sent from the machine, select whether or not to use the Read Receipts feature.
- Page 276 5 Tools Maximum Split Count Set the split upper limit for splitting mail. Specify not to split mail or a value from 2 to 500. Allow Casual Users to Edit From Field Set whether or not to protect e-mail addresses from being changed by unregistered users under [From] on the [E-mail] tab.
-
Page 277: Address Book Settings
Address Book Settings Address Book Settings In [Address Book Settings], you can configure settings related to the e-mail and the address book. On the [Tools] screen, select [System Settings] > [Address Book Settings]. For the method of displaying the [Tools] screen, refer to "System Settings Procedure" (P.138). Select an item to set or change. -
Page 278: Folder Service Settings
5 Tools Folder Service Settings In [Folder Service Settings], you can configure settings to handle files stored in folders. On the [Tools] screen, select [System Settings] > [Folder Service Settings]. For the method of displaying the [Tools] screen, refer to "System Settings Procedure" (P.138). Select an item to set or change. - Page 279 Folder Service Settings Quality/File Size for Retrieval Select a quality and size for files highly compressed and retrieved from folders. Select from [Quality: Normal, File Size: Small], [Quality: Higher, File Size: Larger], and [Quality: Maximum, File Size: Largest].
-
Page 280: Job Flow Service Settings (Apeosport Series Models Only)
5 Tools Job Flow Service Settings (ApeosPort Series Models Only) In [Job Flow Service Settings], you can configure the settings related to the Job Flow. The Job Flow is a function to perform a series of jobs registered. Also, in [Job Flow Service Settings], you can configure a pool server. As for [Pool Server], [Pool Server Login Method], and [Job Flow Sheet List Default], however, leave the default settings unchanged because a pool server is not available for the machine. -
Page 281: Media Print Service Settings
Media Print Service Settings Media Print Service Settings In [Media Print Service Settings], you can select the paper trays displayed for [Paper Supply] in the [Media Print - Text] and [Media Print - Photos] screens. When the USB Memory Kit (optional) is installed in the machine, you can import and print image data (DCF1.0 (Exif 2.0 - 2.2 compliant JPEG/TIFF files)) from supported storage media and document files (PDF, TIFF, XPS (MSXPS format and OpenXPS format), XDW, XBD, or JPEG (JFIF)). -
Page 282: Stored File Settings
5 Tools Stored File Settings In [Stored File Settings], you can select whether to automatically delete files stored on the folder or the machine. Set the expiration date and the time of deletion. You can also set whether or not to delete the stored file by file type. On the [Tools] screen, select [System Settings] >... - Page 283 Stored File Settings Display Details of Stored Print Job List Set whether or not to display detailed information such as output color and 2 sided in the stored job list of print files (Charge Print, Secure Print, Sample Print, or Delayed Print). When you select [On], detailed information is displayed in the list.
- Page 284 5 Tools File Name: Ascending Prints files in ascending order by file name. File Name: Descending Prints files in descending order by file name.
-
Page 285: Web Applications Service Setup (Apeosport Series Models Only)
It also allows you to directly upload and print a file without going through another computer. Note • To use this feature, the External Access Kit (optional) and any Fuji Xerox manufactured web applications (sold separately) are required. For more information, contact our Customer Support Center. - Page 286 5 Tools 1) Click [SSL/TLS Settings]. 2) Select the [Enabled] check box for [HTTP - SSL/TLS Communication]. 3) Select the [Enabled] check box for [Verify Remote Server Certificate]. 4) Click [Apply]. 5) When the right frame on the web browser will change to the machine reboot display, click [Reboot Machine].
-
Page 287: Server Setup
Web Applications Service Setup (ApeosPort Series Models Only) Server Setup This section describes how to register a server on access web applications. Note • If there are one or more servers to register, it is helpful to assign the servers to the buttons displayed on the Services Home screen. -
Page 288: Other Settings
5 Tools Description Enter the description of the access destination with up to 128 single-byte characters. Use User ID - When [Login Type] is set to [Login to Remote Accounts]: The machine accesses the remote service using the user information authenticated on the machine. -
Page 289: Web Browser Setup
Important • Configure [Web Applications Version] as required when a service which works in ApeosPort is used. Note • To use this feature, a Fuji Xerox manufactured web application (sold separately) is required. For more information, contact our Customer Support Center. - Page 290 5 Tools The File Printing feature allows you to directly print the printable files obtained from the remote Web server. Functional Code Set the functional code as necessary when you use a service which works in ApeosPort. Specify the value between 0 and 65535.
-
Page 291: Setup
Setup Setup In [Setup], you can create or update folders, job flows, and the Address Book. Note • This feature does not appear for some models. An optional component is required. For more information, contact our Customer Support Center. The following shows the reference section for each setting. Create Folder....................................291 Stored Programming...................................293 Create Job Flow Sheet.................................293... - Page 292 5 Tools Select items and set the required settings. When you finish required settings, select [Save]. Folder Name Set the folder name. Enter up to 20 single-byte characters using the keyboard displayed or the numeric keypad. For information about how to enter characters, refer to "Entering Text" (P.41). Check Folder Passcode Set an access restriction to permit operations for specified users only.
-
Page 293: Stored Programming
Setup No Even when the retention period has elapsed, files are not deleted. Yes Deletes expired files at the specified time. If, however, the expiration date has not been specified, files are not deleted even when [Yes] is selected. Note •... -
Page 294: Restrictions On Using Job Flow
5 Tools by selecting a file stored in a folder to select a job flow and execute manually To start a job flow automatically, you must link the job flow to a folder. When a file is stored in the folder, it is automatically processed in accordance with the job flow sheet linked. Note •... - Page 295 Setup Sheet Filtering You can filter the job flow sheets to display. Select the filtering conditions, and then select [Save]. Note • The screen displayed varies depending on the Login Type selected. Owner Filters job flow sheets by owner type. ...
- Page 296 5 Tools Delete Deletes all setting values of the selected item. Edit Confirm or change the settings of the selected item. Close Menu Deselect the selected item. Name Set the name for the job flow sheet with up to 128 single-byte characters. Description Set the description of the job flow sheet with up to 256 single-byte characters.
- Page 297 Setup Send as IP Fax (SIP) Speed Dial Specify an address with a speed dial. Enter the speed dial with the numeric keypad, and select [Save]. The address specified appears in [Name/Fax Number] in the [Send as IP Fax (SIP)] screen.
- Page 298 5 Tools Internet Fax Profile Select an Internet fax profile. A profile is specified to restrict attribute information such as image resolution and paper size for transmissions between Internet Fax-enabled machines. Resend Attempts Set whether or not to try sending again if a transmission fails. If you select [On], set the number of resend attempts and interval.
-
Page 299: Digital Signature
Setup Resend Attempts Set the transmission retry count from 1 to 5. Resend Interval Set the transmission retry interval from 30 to 300 seconds. Encryption Set whether or not to encrypt the e-mail transmission. Note • To encrypt e-mail transmission, the configuration of S/MIME is required. •... - Page 300 5 Tools Transfer via SMB (1), Transfer via SMB (2) Specify where SMB forwarding is to be stored. [Transfer via SMB (2)] will be displayed when [Transfer via SMB (1)] is configured. Address Book When the server address is registered on the Address Book, you can specify the address from the Address Book.
- Page 301 Setup Auto Select A suitable paper tray is automatically selected. Trays 1 to 4 and 6 (optional) Select paper from five trays. Bypass Prints on paper loaded in Tray 5. 2 Sided Printing Set the 2 sided printing option. ...
-
Page 302: Create Job Flow Sheet Keyword
5 Tools Delete Deletes the selected job flow sheet. Copy Creates a duplicate of the selected job flow sheet. You can create a new job flow sheet based on the duplicate. The procedure of creation is the same as creation of a new job flow sheet. For more information, refer to "Create New Job Flow Sheet"... - Page 303 Setup Press a speed dial to register. Note • Select [ ] to display the previous screen or ] to display the next screen. • Entering a speed dial number with the numeric keypad displays the specified number at the top of the column. Select [Address Type].
-
Page 304: Address Type
5 Tools Name User Name Index Password Transfer Protocol Port Number Server Name/IP Address Shared Name (SMB Only) When selecting [Fax] as the address type The following items appear: Address Type Delay Start ... -
Page 305: Given Name
Setup Name Enter a recipient name with up to 18 single-byte characters. For information about how to enter characters, refer to "Entering Text" (P.41). Index You can register a single alphanumeric index character for use as a keyword when listening the registered recipients in alphabetical order. - Page 306 5 Tools Note • If many certificates are registered on the machine, it may take a long time to link a certificate. For more information on the certificate, refer to ""Encryption and Digital Signature Settings" (P.409). Transfer Protocol Set the transfer protocol. You can select either [FTP] or [SMB]. Server Name/IP address Enter a name or an IP address of a forwarding destination server.
-
Page 307: Fax Number
Setup Port Number Set the forwarding destination port number. Specify a number from 1 to 65535. Fax Number Enter a fax number with up to 128 digits. For information about how to enter characters, refer to "Entering Text" (P.41). Index You can register a single alphanumeric index character for use as a keyword to search with the Address Book. -
Page 308: Delay Start
5 Tools Maximum Image Size Select the maximum image size from [A3], [B4], or [A4] to match the recipient's paper size or available profile. Delay Start Set whether or not to use a delayed start transmission. If the machine's system clock is set to the 24-hour display, [AM] and [PM] do not appear. For information on the system clock, refer to "Time"... -
Page 309: Internet Fax Profile
Setup Select [On]. Enter a 2-digit relay station ID with the numeric keypad. Note • The relay station ID is the address number for the base station (the machine) already registered on the relay station. Select [Speed Dial 001<->099]. Enter a speed dial number of broadcast destination (001 to 099) or group number (#01 to #09) registered on the relay station with the numeric keypad, and then select [Add]. -
Page 310: Create Fax Group Recipients
5 Tools When the [Delete Entry] Button is Selected Selecting this button deletes all the information registered for the address selected. To delete all information registered, select [Delete]. Important • Deleted information cannot be restored. Create Fax Group Recipients You can register addresses for broadcast transmission as a group. Each group can include up to 20 address numbers. -
Page 311: Add Fax Comment
Setup Add Fax Comment You can register comments to be printed on cover sheets. A maximum of 50 comments can be registered, each of which can be up to 36 single-byte characters. For information about how to enter characters, refer to "Entering Text" (P.41). Paper Tray Attributes Set a paper size and a paper type load in each tray. -
Page 312: Accounting
5 Tools Accounting In [Accounting], you can register the users that will use the machine, and set the operation settings of the Accounting feature. For more information about this feature, refer to "Authentication and Accounting Features" (P.429). The following shows the reference section for each setting. Create/View User Accounts............................... -
Page 313: User Name
Accounting Select any item, and set it. Select [Close]. User ID Enter a user ID to use the machine. Up to 32 single-byte characters are allowed. User Name Set a user name. Up to 32 single-byte characters are allowed. For information about how to enter characters, refer to "Entering Text" (P.41). Passcode Set a passcode. - Page 314 5 Tools Select a feature to restrict. To set account limits, select [Change Account Limit], and then enter the maximum number of pages with the numeric keypad. Feature Access Set access restrictions on features. Free Access The feature is not restricted. ...
-
Page 315: View Accounts
Accounting - Change the passcode of the system administrator Account Administrator The following authorities are given: - Create, delete, change (except for passcode), and view (unavailable depending on some settings) user information - Create, delete, change, and view accounting - Change an Alternative Name for Account ID or Mask Account ID - Print an Auditron Report for each user ... -
Page 316: Reset User Accounts
5 Tools Reset User Accounts You can delete all registered information for all registered users in a single operation, or reset the auditron data. It is also available to print contents for confirmation before resetting. The settings described here are identical with [Reset User Accounts] under [Authentication] of [Authentication/Security Settings]. -
Page 317: System Administrator's Meter (Copy Jobs)
Accounting System Administrator's Meter (Copy Jobs) You can check or reset the total impression copied using the System Administration mode on the screen. The total impressions are counted up to 9,999,999 pages. Note • This item does not appear when [Network Accounting] is selected in [Accounting Type]. Accounting Type You can select whether or not to use the Accounting feature. -
Page 318: Accounting Login Screen Settings
5 Tools Display User ID & Account ID Prompts Prompts users to enter both their user ID and Account ID. Display User ID Prompt Only Prompts users to enter their user ID only. Display Account ID Prompt Only Prompts users to enter their Account ID only. -
Page 319: Fax Billing Data
• The features described in this section may not appear for some models. Optional components or related products provided by Fuji Xerox are required to use the features. For more information, contact our Customer Support Center. - Page 320 5 Tools Note • While a device for maintenance is connected, you cannot change the setting. Accounting/Billing Device Select the type of the accounting/billing device connected to the machine. Important • If a device connected does not match the device selected in [Accounting/Billing Device], an error occurs.
- Page 321 Accounting This feature is available for Card Activated - Cumulative, and Card Activated - Subtractive. Important • Some of the products listed above may not be available for this feature depending on the types and settings. For information on the products available for this feature and on how to change the settings, contact our Customer Support Center.
-
Page 322: Authentication/Security Settings
5 Tools Authentication/Security Settings In [Authentication/Security Settings], you can configure the registration and authentication of a user and security settings. For more information about the feature, refer to "Authentication and Accounting Features" (P.429). The following shows the reference section for each setting. System Administrator Settings.............................. -
Page 323: Authentication
Authentication/Security Settings Set the passcode after setting the system administrator's user ID. You can set the passcode from 4 to 12 characters. For more information about [Passcode Entry for Control Panel Login], refer to "Passcode Policy" (P.328). Select [System Administrator's Passcode]. Select [New Passcode]. -
Page 324: Access Control
5 Tools Access Control Allows you to restrict access to the machine or each service. Once the access control is enabled, user authentication is required to use the machine or the services. Important • When a user is authenticated by a remote authentication server (except ApeosWare Authentication Management or ApeosWare Authentication Agent), the authenticated user can access the services through the control panel based on the permission information obtained from the remote server. -
Page 325: Create/View User Accounts
Authentication/Security Settings Web Applications (ApeosPort Series Models Only) Restricts access to the Web Applications service on the machine. Custom Services Restricts access to custom services on the machine. Note • This feature is available when any custom service is installed on the machine. For more information on the custom services, contact our Customer Support Center. -
Page 326: User Details Setup
5 Tools Select a [Group Name], and then select [Create/Delete]. Select and set any item. Group Name Enter a group name with up to 32 single-byte characters. Restrict Recipient Selection Method When [Only From Address Book] is selected for [Restrict Recipient Selection Method] under [Tools] >... - Page 327 Authentication/Security Settings Failed Access Log Set the failure count to detect unauthorized access. An error is logged if authentication fails the number of times specified here within a predetermined time (10 minutes). Logout Confirmation Screen Set whether or not to display a logout confirmation screen every time a user session ends. ...
-
Page 328: Maximum Login Attempts By System Administrator
5 Tools Smart Card Certificate Verification Set whether or not to verify the smart cart certificate when a user uses the smart card. When [Enabled] is selected, the owner of the smart card is verified not only by PIN code verification but by certification verification of the smart card and private key match. -
Page 329: Charge/Private Print Settings
Authentication/Security Settings Note • The system administrator's passcode is also required when you change settings from CentreWare Internet Services. Passcode Entry for Smart Card Login You can set whether a passcode is required for smart card authentication when [Login to Local Accounts] is selected. - Page 330 5 Tools Note • When the Authentication and Accounting features are disabled and [Print] under [Service Access] is set to [Unlocked], the settings specified in the print driver are applied. When [According to Print Auditron] is selected, [Job Login Success], [Job Login Failure], and [Job without User ID] are displayed.
-
Page 331: Allow User To Disable Active Settings
Authentication/Security Settings Non-PJL Command Job(s) Set how to handle the job that does not have a PJL command. The job will be distinguished by the existence of the user ID, and will be handled according to the following settings. - Select [Do Not Use At All] to apply the [Job without User ID] setting regardless of whether the job has a user ID. -
Page 332: Overwrite Hard Disk
5 Tools Note • If you set to hide job details, you cannot stop or delete jobs you instructed. Therefore, you cannot cancel jobs in the case of operational error of copies or wrong transmission of faxes. Active Jobs View Select whether or not to hide active jobs from local users. - Page 333 Authentication/Security Settings Change the system administrator's factory default passcode (x-admin). Register a new passcode of 7 characters or more (maximum 12 characters). Be careful not to register a passcode that can be easily assumed and not to store the registered passcode on a location that is easily accessible to other persons.
- Page 334 5 Tools...
-
Page 335: Centreware Internet Services Settings
6 CentreWare Internet Services Settings This chapter describes how to set up CentreWare Internet Services. Installation of CentreWare Internet Services ..............336 Starting CentreWare Internet Services................338 Configuring Machine Settings Using CentreWare Internet Services ....339... -
Page 336: Installation Of Centreware Internet Services
6 CentreWare Internet Services Settings Installation of CentreWare Internet Services CentreWare Internet Services provides services such as displaying the status of the machine and jobs, and altering configurations using a web browser in a TCP/IP environment. Preparations Prepare a computer supporting the TCP/IP protocol and a Web browser such as Internet ®... - Page 337 Installation of CentreWare Internet Services Start CentreWare Internet Services to confirm whether the service is available or not. For information on how to start CentreWare Internet Services, refer to "Starting CentreWare Internet Services" (P.338).
-
Page 338: Starting Centreware Internet Services
6 CentreWare Internet Services Settings Starting CentreWare Internet Services To use CentreWare Internet Services, perform the following procedure on your computer. When Login Type is selected on the machine, authentication is required to access the machine via a web browser. Start a web browser. -
Page 339: Configuring Machine Settings Using Centreware Internet Services
Configuring Machine Settings Using CentreWare Internet Services Configuring Machine Settings Using CentreWare Internet Services CentreWare Internet Services enables you to change various settings on the machine from a computer. Note • Confirm that the port in use is enabled in [Properties] tab > [Connectivity] > [Port Settings] of CentreWare Internet Services when an item that you want to set is not displayed. - Page 340 6 CentreWare Internet Services Settings Item How to Select Overview/Reference Pool Server Settings Select from [Properties] Leave the default settings unchanged tab > [General Setup] because a pool server is not available for the machine. Refer to "Job Flow Service Settings (ApeosPort Series Models Only)"...
- Page 341 Configuring Machine Settings Using CentreWare Internet Services Item How to Select Overview/Reference Select from [Properties] Allows you to enable and disable Store to tab > [Services] USB, Media Print - Text, and Media Print - Photo settings. EP Service Configures the EP system with an active internet connection.
- Page 342 6 CentreWare Internet Services Settings Item How to Select Overview/Reference On Demand Overwrite Select from [Properties] Refer to "Overwrite Hard Disk" (P.332). tab > [Security] Service Representative Allows you to restrict the operation of Restricted Operation service representatives. Prevents the machine from being altered by someone impersonating our service representative.
-
Page 343: Printer Environment Settings
7 Printer Environment Settings This chapter describes the settings to use the Print feature on the machine. Print Overview ..........................344 Installation When Using Parallel Port................346 Installation When Using USB Port ..................349 Installation When Using TCP/IP (LPD/Port 9100) ............351 ... -
Page 344: Print Overview
7 Printer Environment Settings Print Overview This machine can be set up as a local printer by directly connecting the machine to a computer using a USB interface cable or a parallel interface cable. Similarly, it can be set up as a network printer by connecting the machine to a network. -
Page 345: Supported Operating Systems
Print Overview IPP Use IPP to print via the Internet. For more information on how to set up the machine using IPP, refer to "Installation When Using Internet Printing Protocol (IPP)" (P.354). Port 9100 Use Port9100 when the machine uses Port 9100. For more information on how to set up the machine using Port 9100, refer to "Installation When Using TCP/IP (LPD/Port 9100)"... -
Page 346: Installation When Using Parallel Port
7 Printer Environment Settings Installation When Using Parallel Port This section describes how to install the machine using a parallel interface. The following shows the reference section for each procedure. Step 1 Preparations..................................346 Step 2 Configuration on the Machine ............................ 346 Step 3 Configuration on the Computer.......................... -
Page 347: Step 3 Configuration On The Computer
Installation When Using Parallel Port Enable this setting to accept a job with PJL commands. The PJL commands are independent of any printer languages. A printer language used in the data received next can be set independently of the current printer language. ... - Page 348 7 Printer Environment Settings Bi-directional Communication Auto Eject Time Adobe Communication Protocol Note • The Adobe Communication Protocol can be configured when the Adobe PostScript 3 Kit (optional) is installed.
-
Page 349: Installation When Using Usb Port
Installation When Using USB Port Installation When Using USB Port This section describes how to install the machine using a USB interface. The following shows the reference section for each procedure. Step 1 Preparations ..................................349 Step 2 Configuration on the Machine.............................349 Step 3 Configuration on the Computer ..........................350 CentreWare Internet Services Setting Items.........................350 Step 1 Preparations... -
Page 350: Step 3 Configuration On The Computer
7 Printer Environment Settings Note • Rebooting the machine may be required depending on the settings. When a message displayed on the screen, follow the message and reboot the machine. Print a configuration report to confirm that the USB port is enabled. For information on how to print a configuration report, refer to "Printer Reports"... -
Page 351: Installation When Using Tcp/Ip (Lpd/Port 9100)
Installation When Using TCP/IP (LPD/Port 9100) Installation When Using TCP/IP (LPD/Port 9100) This section describes how to install the machine using TCP/IP. The following shows the reference section for each procedure. Step 1 Preparations ..................................351 Step 2 Configuration on the Machine.............................351 Step 3 Configuration on the Computer ..........................352 CentreWare Internet Services Setting Items.........................352 Step 1 Preparations... -
Page 352: Step 3 Configuration On The Computer
7 Printer Environment Settings address. The configuration of an IP address, a subnet mask, and a gateway address is not required. For information on how to set an IP address, refer to "Protocol Settings" (P.219). Enable the Bonjour port, and the Discovery feature that automatically detects printers on the IP network can be enabled. - Page 353 Installation When Using TCP/IP (LPD/Port 9100) IP Mode Host Name IPv4 - IP Address Resolution - Port Settings - IP Address - Subnet Mask - Gateway Address IPv6 - Enable Manual Address - IP Address - Link-Local Address - Gateway Address ...
-
Page 354: Installation When Using Internet Printing Protocol (Ipp)
7 Printer Environment Settings Installation When Using Internet Printing Protocol (IPP) This section describes how to install the machine using Internet Printing Protocol (IPP). The following shows the reference section for each procedure. Step 1 Preparations..................................354 Step 2 Configuration on the Machine ............................ 354 Step 3 Configuration on the Computer.......................... -
Page 355: Step 3 Configuration On The Computer
Installation When Using Internet Printing Protocol (IPP) Set an IP address and the other addresses. Skip this step if an IP address is already set. If DHCP or BOOTP is available in your environment, configure the method for obtaining the address. - Page 356 7 Printer Environment Settings...
-
Page 357: 8 E-Mail Environment Settings
8 E-mail Environment Settings This chapter describes the settings to use various services via e-mail on the machine. Note • This feature does not appear for some models. For such models, an optional component is required. For more information, contact our Customer Support Center. ... -
Page 358: E-Mail Overview
8 E-mail Environment Settings E-mail Overview The machine can send and receive e-mails. The following services and features are available using e-mail: E-mail Store & Send Link Internet Fax Service Print E-mail E-mail Notification (Status notifications such as consumables) ... -
Page 359: Preparations
Preparations Notify the Completion of Jobs by E-mail When a computer submitted a print job or a Direct Fax job to the machine, its completion can be notified by e-mail. For more information, refer to the help of the print driver. ... - Page 360 8 E-mail Environment Settings Print E-mail Store & E-mail Item Description E-mail Send Completion Notification Link Notice SMTP POP3 SMTP AUTH If an SMTP server login name requires authentication, specify an password authentication user Δ Δ Δ Δ Δ Δ name.
-
Page 361: Installation Procedures
Installation Procedures Installation Procedures This section describes how to configure the machine to use the E-mail service. The following shows the reference section for each procedure. Step 1 Enabling Port and Setting up TCP/IP .........................361 Step 2 Configuring E-mail Environment ..........................362 CentreWare Internet Services Setting Items.........................363 Step 1 Enabling Port and Setting up TCP/IP Enable the E-mail port, and set the IP address. -
Page 362: Step 2 Configuring E-Mail Environment
8 E-mail Environment Settings Note • Rebooting the machine may be required depending on the settings. When a message displayed on the screen, follow the message and reboot the machine. Print a configuration report to confirm that the ports are enabled and that TCP/IP is set up correctly. -
Page 363: Centreware Internet Services Setting Items
Installation Procedures For information on how to set the machine's e-mail address when you receive e-mails via SMTP, refer to "Machine's E-mail Address/Host Name" (P.223) When [POP3] is selected for [Protocol to Receive E-mail] Configure the POP3 server. For information on how to configure the POP3 server, refer to "POP3 Server Settings" (P.229). For information on how to set the machine's e-mail address when you receive e-mails via POP3, refer to "Machine's E-mail Address/Host Name"... - Page 364 8 E-mail Environment Settings Receiving Protocol Domain Filtering S/MIME Settings...
-
Page 365: Scanner Environment Settings
9 Scanner Environment Settings This chapter describes the settings to use the Scan services on the machine. Note • This feature does not appear for some models. For such models, an optional component is required. For more information, contact our Customer Support Center. •... -
Page 366: Scan Service Overview
9 Scanner Environment Settings Scan Service Overview The machine is equipped with scanning capabilities. The following scan services are available on the machine: E-mail Store to Folder Scan to PC Network Scanning (Job Template Scanning) (ApeosPort Series Models only) ... - Page 367 Scan Service Overview Scan to My Folder When you select [Login to Remote Accounts] for [Login Type] and select [Enabled] for [Scan to My Folder] using CentreWare Internet Services, you can forward scanned documents to different recipients that corresponds to the login user. For more information on configuration procedures, refer to "Configuration of Scan to My Folder (ApeosPort Series Models Only)"...
-
Page 368: Configuration Of Store To Folder
9 Scanner Environment Settings Configuration of Store to Folder This section describes configuration procedures to use the Store to Folder service on the machine. The following shows the reference section for each procedure. Step 1 Enabling Port and Setting up TCP/IP......................... 368 Step 2 Registering a Folder ............................... -
Page 369: Step 2 Registering A Folder
Configuration of Store to Folder Set an IP address and the other addresses. Skip this step if an IP address is already set. If DHCP or BOOTP is available in your environment, configure the method for obtaining the address. If an IP address cannot be obtained automatically or manual configuration is preferred, confirm the settings of an IP address, a subnet mask, and a gateway address. -
Page 370: Configuration Of Scan To Pc
9 Scanner Environment Settings Configuration of Scan to PC This section describes how to configure the machine to use the Scan to PC service. The following shows the reference section for each procedure. Step 1 Preparations..................................370 Step 2 Enabling Port and Setting up TCP/IP......................... 371 Step 3 Configuration on the Computer.......................... -
Page 371: Step 2 Enabling Port And Setting Up Tcp/Ip
Configuration of Scan to PC Mac OS X 10.7 Lion OS X 10.8 Mountain Lion OS X 10.9 Mavericks Step 2 Enabling Port and Setting up TCP/IP To use Scan to PC service, enable the port (SMB or FTP client) and set the IP address. The following describes the configuration procedures on the machine. -
Page 372: Step 3 Configuration On The Computer
9 Scanner Environment Settings For information on how to set an IP address, refer to "Protocol Settings" (P.219). Select [Close] repeatedly until the [Tools] screen is displayed. Select [Close]. Note • Rebooting the machine may be required depending on the settings. When a message displayed on the screen, follow the message and reboot the machine. -
Page 373: Configuration Of Store To Usb
Configuration of Store to USB Configuration of Store to USB This section describes how to configure the machine to use the Store to USB service. The following shows the reference section for each procedure. Step 1 Available USB Memory Devices ...........................373 Step 2 CentreWare Internet Services Setting Items......................373 Step 1 Available USB Memory Devices The Store to USB service allows you to directly save the scanned data to a USB 2.0 memory... -
Page 374: Configuration Of Network Scanning (Job Template Scanning)
9 Scanner Environment Settings Configuration of Network Scanning (Job Template Scanning) This section describes how to configure the machine to use the Network Scanning service. The following shows the reference section for each procedure. Step 1 Preparations..................................374 Step 2 Enabling Ports and Setting up TCP/IP ........................374 Step 3 Configuring the SNMP Port ............................ -
Page 375: Step 3 Configuring The Snmp Port
Configuration of Network Scanning (Job Template Scanning) 3) Select [SNMP], and then select [Change Settings]. 4) Select [Port Status], and select [Change Settings]. 5) Select [Enabled], and then select [Save]. 6) Select [Close] repeatedly until the [Port Settings] screen is displayed. 7) Enable [Port Status] on the [SMB] or [FTP Client] screen, and enable [Internet Services (HTTP)] on the [Internet Services - Port Status] screen as described above. - Page 376 9 Scanner Environment Settings Important • To display the online help for CentreWare Internet Services, users need to have the environment to connect to the Internet. The communication fee shall be borne by you.
-
Page 377: Configuration Of Scan To My Folder (Apeosport Series Models Only)
Configuration of Scan to My Folder (ApeosPort Series Models Only) Configuration of Scan to My Folder (ApeosPort Series Models Only) This section describes how to configure the machine to use the Scan to My Folder service. The following shows the reference section for each procedure. Step 1 Preparations ..................................377 Step 2 Enabling SMB Port and Setting up TCP/IP........................377 Step 3 Configuring Remote Authentication ..........................378... -
Page 378: Step 3 Configuring Remote Authentication
9 Scanner Environment Settings Note • You can configure the settings using CentreWare Internet Services. For information on how to use CentreWare Internet Services, refer to "Configuring Machine Settings Using CentreWare Internet Services" (P.339). Display the [Tools] screen. 1) Press the <Log In/Out> button. 2) Enter the system administrator's user ID with the numeric keypad or the keyboard displayed on the screen, and select [Enter]. -
Page 379: Step 4 Configuring Scan To My Folder
Configuration of Scan to My Folder (ApeosPort Series Models Only) When a passcode is required, select [Next] and enter the system administrator's passcode, and select [Enter]. Note • The default user ID is "11111". • The default passcode is "x-admin". 3) Select [Tools] on the Services Home screen. - Page 380 9 Scanner Environment Settings For information on how to start CentreWare Internet Services, refer to "Starting CentreWare Internet Services" (P.338). Enable the feature of the Scan to My Folder 1) Click the [Properties] tab. 2) Click [Services]. 3) Click [Scan to My Folder]. 4) Click [General].
-
Page 381: Step 5 Configuration On The Computer
Configuration of Scan to My Folder (ApeosPort Series Models Only) Accessing the destination computer both by the user authentication and by the domain information used when logged in to the machine 1) Select the [Authenticated User and Domain] check box for [Login Credentials to Access the Destination]. -
Page 382: Configuration Of Job Flow Sheets
9 Scanner Environment Settings Configuration of Job Flow Sheets This section describes how to configure the machine to use the Job Flow Sheets service. The following shows the reference section for each procedure. Step 1 Enabling Ports and Setting up TCP/IP ........................382 Step 2 Configuring the SNMP Port ............................ -
Page 383: Step 2 Configuring The Snmp Port
Configuration of Job Flow Sheets For information on how to set an IP address, refer to "Protocol Settings" (P.219). Select [Close] repeatedly until the [Tools] screen is displayed. Select [Close]. Note • Rebooting the machine may be required depending on the settings. When a message displayed on the screen, follow the message and reboot the machine. -
Page 384: Configuration Of Store & Send Link
9 Scanner Environment Settings Configuration of Store & Send Link This section describes how to configure the machine to use the Store & Send Link service. Important • When a user is notified by e-mail of a URL location to retrieve scanned data, the e-mail message is not encrypted, which enables the user to retrieve the data without password authentication. -
Page 385: Device Information
Configuration of Store & Send Link Message Attachment Device Information Signature For details on the setting items, click [Help] at the upper right corner of the CentreWare Internet Services screen to see help. Important • To display the online help for CentreWare Internet Services, users need to have the environment to connect to the Internet. -
Page 386: Configuration Of Store To Wsd
9 Scanner Environment Settings Configuration of Store to WSD This section describes how to configure the machine to use the Store to WSD service. Note • WSD stands for Web Services on Devices. The following shows the reference section for each procedure. Step 1 Preparations.................................. -
Page 387: Step 3 Confirmation On The Computer
Configuration of Store to WSD Note • Rebooting the machine may be required depending on the settings. When a message displayed on the screen, follow the message and reboot the machine. Print a configuration report to confirm that the WSD port is set up correctly. For information on how to print a configuration report, refer to "Print Reports"... - Page 388 9 Scanner Environment Settings...
-
Page 389: Using Ip Fax (Sip)
10 Using IP Fax (SIP) This chapter describes the settings to use the services via IP fax (SIP) on the machine. Note • This feature does not appear for some models. An optional component is required. For more information, contact our Customer Support Center. ... -
Page 390: Ip Fax (Sip) Overview
10 Using IP Fax (SIP) IP Fax (SIP) Overview IP Fax (SIP) is a fax feature that sends and receives document data via the IP network of a corporation (the intranet). The IP Fax (SIP) complies with ITU-T Resolution T.38. Because the IP Fax (SIP) uses the existing IP network for communications, you can reduce the telecommunications costs compared to a conventional G3 fax machine that uses the public telephone line. -
Page 391: Installation Procedures
Installation Procedures Installation Procedures This section describes the configuration procedures to use the IP Fax (SIP) feature on the machine. The following shows the reference section for each procedure. Step 1 Enabling Port and Setting up TCP/IP .........................391 Step 2 Configuring the SIP User Name...........................392 Step 3 Configuring Fax Environment ............................392 Step 4 Configuring the SIP Server............................393 Step 5 Registering the VoIP Gateway .............................394... -
Page 392: Step 2 Configuring The Sip User Name
10 Using IP Fax (SIP) For information on how to print a configuration report, refer to "Print Reports" (P.118). Step 2 Configuring the SIP User Name This section describes the configuration procedures of the SIP user name on the machine. Note •... -
Page 393: Step 4 Configuring The Sip Server
Installation Procedures 3) Select [Tools] on the Services Home screen. Set items displayed on the [Fax/Internet Fax] screen. 1) Select [Fax Service Settings]. 2) Select [Screen Defaults]. 3) Configure the required settings, and then select [Save]. For information on the screen default, refer to "Screen Defaults" (P.259). Set the default settings of the Fax feature. -
Page 394: Step 5 Registering The Voip Gateway
10 Using IP Fax (SIP) 2) Select [SIP settings]. 3) Select [Enable SIP Server], and then select [Change Settings]. 4) Select [Yes], and then select [Save]. 5) Select [SIP Server IP Address Resolution], and then select [Change Settings]. 6) Select a method to obtain SIP server IP address, and then select [Save]. 7) Select [SIP Proxy Server Setup], and then select [Change Settings]. - Page 395 Installation Procedures 5) Select [ID], and then select [Change Settings]. 6) Specify an ID, and then select [Save]. 7) Select [Gateway Address], and then select [Change Settings]. 8) Specify the IP address of the VoIP gateway, and then select [Save]. 9) Select [Save].
- Page 396 10 Using IP Fax (SIP)
-
Page 397: 11 Using The Internet Fax Service
11 Using the Internet Fax Service This chapter describes the settings to use services via the Internet Fax on the machine. Note • This feature does not appear for some models. For such models, an optional component is required to use this feature. For more information, contact our Customer Support Center. ... -
Page 398: Internet Fax Overview
11 Using the Internet Fax Service Internet Fax Overview When the Fax feature is available, the machine can transmit scanned data as an e-mail attachment using a corporate intranet or the Internet, unlike conventional fax machines which use public phone lines. Also, the machine can receive e-mails transmitted from the Internet Fax-enabled machines. - Page 399 Preparations Internet Internet Fax Direct Item Description SMTP POP3 SMTP Configure S/MIME. Δ Δ Δ S/MIME settings Required Δ Set as required Not supported *1 : When you use the Internet Fax Direct feature, set [Tools] > [System Settings] > [Fax Service Settings] > [Internet Fax Control] >...
-
Page 400: Installation Procedures
11 Using the Internet Fax Service Installation Procedures This section describes the configuration procedures to use the Internet Fax feature on the machine. The following shows the reference section for each procedure. Step 1 Enabling Port and Setting up TCP/IP......................... 400 Step 2 Configuring E-mail Environment.......................... -
Page 401: Step 2 Configuring E-Mail Environment
Installation Procedures Note • Rebooting the machine may be required depending on the settings. When a message displayed on the screen, follow the message and reboot the machine. Print a configuration report to confirm that the ports are enabled and that TCP/IP is set up correctly. -
Page 402: Step 3 Testing The Internet Fax
11 Using the Internet Fax Service When [POP3] is selected for [Protocol to Receive E-mail] Configure the POP3 server. For information on how to configure the POP3 server, refer to "POP3 Server Settings" (P.229). For information on how to set the machine's e-mail address when you receive e-mails via POP3, refer to "Machine's E-mail Address/Host Name"... -
Page 403: 12 Using The Server Fax Service
12 Using the Server Fax Service This chapter describes how to use the Server Fax service on the machine. Note • This feature does not appear for some models. For such models, an optional component is required. For more information, contact our Customer Support Center. ... -
Page 404: Server Fax Overview
12 Using the Server Fax Service Server Fax Overview If your machine supports the Scan feature, installing the Server Fax Kit (optional) allows you to use the Fax feature of a Server Fax server. With the Server Fax feature, you can transfer image data received by the machine to the Server Fax server, and can transfer image data received by the Server Fax server to the machine via a network based on the settings you made. -
Page 405: Installation Procedure
Installation Procedure Installation Procedure Installation Overview This section describes the configuration procedure to use the Server Fax feature on the machine. The following shows the reference section for the configuration procedures. Step 1 Fax Settings ..................................405 Step 2 Setting the Server Fax Feature.............................406 Step 1 Fax Settings If your machine does not support the Fax feature and supports the Server Fax feature only, the Server Fax feature will be enabled automatically. -
Page 406: Step 2 Setting The Server Fax Feature
12 Using the Server Fax Service Step 2 Setting the Server Fax Feature Enable the Server Fax feature and set the file destination. The following procedure explains how to set them on CentreWare Internet Services. For more information on how to use CentreWare Internet Services, refer to "Configuring Machine Settings Using CentreWare Internet Services"... - Page 407 Installation Procedure Retype Password When [SMTP] is selected The SMTP server settings are the same as the E-mail settings. For more information on the SMTP server settings, refer to "Step 2 Configuring E-mail Environment" (P.362). The following settings are additionally required for the SMTP server. Domain Name ...
- Page 408 12 Using the Server Fax Service...
-
Page 409: Encryption And Digital Signature Settings
13 Encryption and Digital Signature Settings This chapter describes the settings to use the Encryption feature and the Digital Signature feature on the machine. Encryption and Digital Signature Overview..............410 Configuration of HTTP Communications Encryption ..........415 Configuration of Encryption using IPsec ................418 ... -
Page 410: Encryption And Digital Signature Overview
13 Encryption and Digital Signature Settings Encryption and Digital Signature Overview Types of Certificate To use the Encryption feature and the Signature feature on the machine, a certificate is required. The following two types of device certificate can be used on the machine: ... -
Page 411: Certificate Conditions
Encryption and Digital Signature Overview Certificate conditions that can be set according to the types of encryption Key usage Extended key usage (Only when this item is (Only when this item is included in the V3 included in the V3 extended Mail extended area) area) -
Page 412: Encryption Features For Communication
13 Encryption and Digital Signature Settings Validity Status Cause Remedy Invalid (before validity The valid period of the The validation Check the time when starts) certificate is not started. period of the the valid period of certificate is before the certificate starts. the time of the Also check if the machine. -
Page 413: Encryption And Digital-Signature Features For Scan Files
Encryption and Digital Signature Overview Encrypting HTTP Communications from the Machine to a Remote Server (SSL/TLS Client) The SSL/TLS protocol is used to encrypt the HTTP communications between a remote server and the machine. No certificate is required in general. However; if a remote server is set to require an SSL client certificate, you can use a certificate issued by another CA. - Page 414 13 Encryption and Digital Signature Settings Encryption/Digital Signature of PDF/DocuWorks/XPS Documents (ApeosPort Series Models Only) Digital signatures are available for PDF, DocuWorks, and XPS documents. To use the digital signature, a device certificate is required. For a device certificate, you can use any registered certificates. Note •...
-
Page 415: Configuration Of Http Communications Encryption
Configuration of HTTP Communications Encryption Configuration of HTTP Communications Encryption This section describes the settings to encrypt HTTP communications. The following shows the reference section for each procedure. Installation Overview ..................................415 Step1 Configuration on the Machine............................415 Step2 Configuration on the Computer ...........................417 Installation Overview To encrypt HTTP communications, configure the machine and your computer as follows: ... - Page 416 13 Encryption and Digital Signature Settings For more information on how to start CentreWare Internet Service, refer to "Starting CentreWare Internet Services" (P.338). Create a certificate. 1) Click the [Properties] tab. 2) Click [Security] to display the items in the folder. 3) Click [Machine Digital Certificate Management].
-
Page 417: Step2 Configuration On The Computer
Configuration of HTTP Communications Encryption 1) Click [Security] 2) Click [Certificate Management]. 3) Set [Category] to [Local Device], set [Certificate Purpose] to [SSL Server], and click [Display the list]. 4) Select the check box of the certificate. Note • When the list does not include the desired certificate, refer to "Certificate conditions that can be set according to the types of encryption"... -
Page 418: Configuration Of Encryption Using Ipsec
13 Encryption and Digital Signature Settings Configuration of Encryption using IPsec This section describes how to encrypt communications using IPsec. When the IKE authentication method is set to [Authenticate by Preshared Key], skip step 1 "Import and Configuration of a Certificate" and go to step 2 "Configuration on the Machine (Configuration of IPsec)". -
Page 419: Step2 Configuration On The Machine (Configuration Of Ipsec)
Configuration of Encryption using IPsec Important • You cannot import a certificate that has been already registered in [Local Device] or [Others]. Delete the registered certificate before importing. • If the certificate to be imported contains the V3 extension "keyUsage", "digitalSignature" must be asserted. -
Page 420: Step3 Configuration On The Computer
13 Encryption and Digital Signature Settings For details on the settings, refer to "IPsec Settings" (P.239). Select [Close]. Step3 Configuration on the Computer The following describes the configuration procedures on the computer. Configure the following settings on the computer. Create an IP security policy ... -
Page 421: Configuration Of E-Mail Encryption/Digital Signature
Configuration of E-mail Encryption/Digital Signature Configuration of E-mail Encryption/Digital Signature This section describes how to encrypt e-mails and how to attach a digital signature to e- mails. The following shows the reference section for each procedure. Installation Overview ..................................421 Step1 Configuration on the Machine............................422 Step2 Configuration on Sender and Recipient ........................423 Installation Overview To encrypt e-mails and attach a digital signature, configure the machine and your computer... -
Page 422: Step1 Configuration On The Machine
13 Encryption and Digital Signature Settings Step1 Configuration on the Machine This section describes configuration procedures to set up a certificate with CentreWare Internet Services. Note • You cannot use a self-signed certificate created with CentreWare Internet Services for S/MIME. •... -
Page 423: Step2 Configuration On Sender And Recipient
Configuration of E-mail Encryption/Digital Signature 1) Click [Security] to display the items in the folder. 2) Click [SSL/TLS Settings]. 3) Select the [Enabled] check box for [S/MIME Communication]. 4) Click [Apply]. 5) When the right frame on the web browser changes to the machine reboot display, click [Reboot Machine]. - Page 424 13 Encryption and Digital Signature Settings When source is the machine and destination is a computer The personal certificate of a computer must be registered on the machine. And the device certificate of the machine must be registered on a computer. To register the computer's personal certificate, use CentreWare Internet Services.
- Page 425 Configuration of E-mail Encryption/Digital Signature For information on how to register a certificate to the certificate store of e-mail software, refer to the manual of your e-mail application. The following e-mail applications can transmit e-mails between the machine and a computer: ®...
-
Page 426: Configuration Of Pdf/Docuworks/Xps Signature (Apeosport Series Models Only)
13 Encryption and Digital Signature Settings Configuration of PDF/DocuWorks/XPS Signature (ApeosPort Series Models Only) This section describes the settings to send scanned documents in PDF, DocuWorks, or XPS format with a digital signature (PDF, DocuWorks, or XPS) attached. Note • XPS stands for XML Paper Specification. The following shows the reference section for each procedure. -
Page 427: Note
Configuration of PDF/DocuWorks/XPS Signature (ApeosPort Series Models Only) For details on how to configure the encryption settings for HTTP communication, refer to "Configuration of HTTP Communications Encryption" (P.415). Start CentreWare Internet Services. For more information on how to start CentreWare Internet Services, refer to "Starting CentreWare Internet Services" (P.338). -
Page 428: Step2 Configuration On The Computer
13 Encryption and Digital Signature Settings DocuWorks Signature Select the setting for DocuWorks signature from [Do not add signature], [Always add signature], or [Select during send]. DocuWorks Signature Hash Algorithm Select the setting of the hash algorithm when using DocuWorks signature from [SHA-1] or [SHA-256]. -
Page 429: Authentication And Accounting Features
14 Authentication and Accounting Features The machine provides the Authentication feature to restrict the availability of services for each feature and the Accounting feature to manage the use of each feature based on the Login Type selected. This chapter describes the settings to restrict the availability of services and to manage account usage on the machine. -
Page 430: Overview Of Authentication And Accounting Feature
14 Authentication and Accounting Features Overview of Authentication and Accounting Feature This section overviews the Authentication feature and the Accounting feature. Using authentication feature allows you to restrict the access to the machine, restrict the use of each service, and count the use of services per user. Types of User .................................... -
Page 431: Access Control
Overview of Authentication and Accounting Feature System Administrator The same authority as a system administrator is given except for the following operations: Operate folders Operate job flows sheets Change the passcode of the system administrator Account Administrator The following authorities are given: Create, delete, change (except for passcode), and view (unavailable depending on some ... -
Page 432: Types Of Authentication
14 Authentication and Accounting Features Account Limit for All User When using authentication mode, you can restrict the access to the machine and the use of each service. User authentication is needed to use this feature. For more information, refer to "Access Control" (P.324). ... -
Page 433: Types Of Account Administration
Overview of Authentication and Accounting Feature • When you register user information on a remote authentication server, use up to 32 single-byte characters for a user ID and up to 128 single-byte characters for a password. Note, however, that up to 32 single-byte characters are allowed for an SMB authentication password. -
Page 434: Authentication And Accounting Relationship
14 Authentication and Accounting Features Network Accounting Network Accounting performs account administration using user information managed by a remote service. In Network Accounting, the remote server collects job data stored on the machine and counts up the numbers of pages processed for each user. Note •... -
Page 435: Jobs Manageable By Account Administration
Overview of Authentication and Accounting Feature *1 : When [Login Type] is [Login to Remote Accounts] and [Authentication System] is not set to [Authentication Agent], [Accounting Type] is automatically set to [Accounting Disabled]. Accounting, however, can be performed with ApeosWare Log Management (sold separately) or ApeosWare Accounting Service (sold separately). - Page 436 14 Authentication and Accounting Features Fax The following table shows the fax jobs and the information that can be managed for each fax job. Services (Jobs) Target User Managed Items Send as Fax Automatic Send Login user Transmissions/pages, charging units Manual Send (Call- in, Call-out)
- Page 437 Overview of Authentication and Accounting Feature Restriction on Using the Accounting feature on Fax Jobs: Note the following conditions when you use the Accounting feature on fax jobs. - Sending files from different user accounts to the same destination is not counted as a batch send.
-
Page 438: Services Controlled By Authentication
14 Authentication and Accounting Features Services Controlled by Authentication This section describes the features that are controlled by the Authentication feature. The restricted features vary depending on how the machine is used. For information on the folder and job flow sheet restrictions when the Authentication feature is enabled, refer to "Authentication for Job Flow Sheets and Folders"... - Page 439 Services Controlled by Authentication When [Login Type] is [Login to Local Accounts] and [Accounting Type] is [Network Accounting] Restrictions per user Per-user Usage Services Feature Count Account Limit restrictions Copy Print Scan Fax, Internet Fax Available Not available *1 : The restriction is available with ApeosWare Device Management (sold separately) or ApeosWare Portal Service (sold separately).
- Page 440 14 Authentication and Accounting Features When [Login Type] is [Login to Local Accounts] and [Accounting Type] is [Xerox Standard Accounting] Restrictions per user Per-user Usage Services Feature Count Account Limit restrictions Copy Print Scan Fax, Internet Fax Available Not available * : You can select features available for each user.
-
Page 441: Authentication For Job Flow Sheets And Folders
Authentication for Job Flow Sheets and Folders Authentication for Job Flow Sheets and Folders This section describes the restrictions of job flows, and folders. Creating / Using Job Flow Sheet...............................441 Creating / Using Folder................................442 Creating / Using Job Flow Sheet You can create the job flow sheets for the documents stored in folders. -
Page 442: Creating / Using Folder
14 Authentication and Accounting Features Creating Job Flow Sheet on the [Create Job Flow Sheet] screen The following shows the creator of job flow sheet, manageable user, and available operations Creator of Job Flow Sheet Manageable User Available Operations Login User Edit, Display, Copy, Delete, Creator / System Administrator... -
Page 443: When The Authentication Feature Is Enabled
Authentication for Job Flow Sheets and Folders When the Authentication Feature is Enabled Note • When the Authentication feature is enabled, the following users can use the folders. - A login user and a system administrator when [Login Type] is set to [Login to Local Accounts]. - A login user besides guest user when [Login Type] is set to [Login to Remote Accounts]. -
Page 444: Configuration For Authentication
14 Authentication and Accounting Features Configuration for Authentication This section describes the settings to use the Authentication feature on the machine. The following shows the reference section for each procedure. Installation Overview.................................. 444 Enabling Authentication................................444 Changing the Default Authorization Group Settings......................447 Creating an Authorization Group ............................ - Page 445 Configuration for Authentication Select [Access Control]. Select [Service Access]. Select [Unlocked] for the required services to permit users unlimited access, and then select [Save]. After you finish settings for each feature, select [Close]. To disable button operations on the control panel, select [Device Access] and select [Locked], and then select [Save] and then [Close].
- Page 446 14 Authentication and Accounting Features Select [Login to Remote Accounts], and then select [Save]. For more information on the authentication method, refer to "Login Type" (P.323). Select [Yes]. Select [Access Control]. Select [Service Access]. Select [Unlocked] for the required services to permit users unlimited access, and then select [Save].
-
Page 447: Changing The Default Authorization Group Settings
Configuration for Authentication Changing the Default Authorization Group Settings Perform the following procedures to change the settings of the default authentication group. The settings changed here will be used as the default value of the authorization group for a created user. Press the <Log In/Out>... - Page 448 14 Authentication and Accounting Features For more information on the authorization group settings, refer to "Create Authorization Groups" (P.325). Select [Close] repeatedly until the [Tools] screen is displayed. Select [Close].
-
Page 449: Configuration For Ic Card Reader (Optional)
The machine supports IC Card Reader available for the following smart card type: When using Embedded IC Card Reader ® MIFARE (Type A) - Fuji Xerox IC Card (Type A) - Other MIFARE compatible smart cards eLWISE/ELWISE (Type B) - eLWISE - ELWISE ®... -
Page 450: Step 2 Logout Method Using The Smart Card
14 Authentication and Accounting Features Step 2 Logout Method Using the Smart Card Perform the following steps to set how to logout authentication using the smart card. Press the <Log In/Out> button. Enter the system administrator's user ID with the numeric keypad or the keyboard displayed on the screen, and select [Enter]. -
Page 451: Configuration For Account Administration
Configuration for Account Administration Configuration for Account Administration This section describes the settings to use the Accounting feature on the machine. The following shows the reference section for each procedure. Step 1 Selecting an Accounting Type............................451 Step 2 Registering User Information ............................451 Step 1 Selecting an Accounting Type The following describes the configuration procedures to use the Accounting feature. - Page 452 14 Authentication and Accounting Features Select [<Available>], and then select [Create/Delete]. Enter a user ID and select [Save]. Select [Service Access]. Configure the [Service Access] and [Feature Access] settings for each service, and then select [Save]. For more information on the service access, refer to "Service Access" (P.313). If necessary, select a user role and an authorization group for the user under [User Role], and then select [Save].
-
Page 453: User Authentication Operations
User Authentication Operations User Authentication Operations The machine has the Authentication feature to restrict the services available. This section describes the authentication method to use the restricted services. The following shows the reference section for each procedure. Authenticating Login Users ...............................453 Changing Passcode..................................454 Authenticating Login Users There are two methods to authenticate login users: using the control panel of the machine... -
Page 454: Changing Passcode
14 Authentication and Accounting Features Logging Out of User Authentication The logging out method vary depending on the Smart Card Logout Timing setting. For more information, refer to "Kerberos Server Certificate Verification" (P.328). When you select [Log Out when Card is Removed], the user is authenticated while the ... -
Page 455: 15 Problem Solving
15 Problem Solving This chapter describes solutions to various problems you may have with the machine. Troubleshooting..........................456 Machine Trouble.........................457 Image Quality Trouble ......................462 Trouble during Copying ......................468 Trouble during Printing ......................472 Trouble during Faxing.......................475 ... -
Page 456: Troubleshooting
15 Problem Solving Troubleshooting This section describes troubles that may occur with the machine and their solutions. Follow the troubleshooting procedure below to solve the problems. The machine does not work Action Refer to "Machine Trouble" (P.457) . properly. A message is displayed. Cause Has a paper or document jam occurred? Action For information on paper jams, refer to "Paper Jams"... -
Page 457: Machine Trouble
Machine Trouble Machine Trouble Before you conclude that the machine is defective, check the machine status again. Symptom Cause Remedy The machine is Is the main power and power Switch the main power and power on. not powered on. switched on? Refer to "2 Product Overview"... - Page 458 15 Problem Solving Symptom Cause Remedy Unable to print, or If the machine and a The setting of bi-directional communication unable to copy. computer are connected with is enabled by the factory default. If you a parallel interface cable, the connect the machine to a computer which computer does not support bi- does not support bi-directional...
- Page 459 Machine Trouble Symptom Cause Remedy Unable to insert Did you open a cover or turn Do not forcibly insert or remove the paper or remove a paper the machine off during tray. Switch off the power. In a few seconds, tray.
- Page 460 15 Problem Solving Symptom Cause Remedy Paper is often Is the paper loaded correctly Load the paper correctly. jammed or in the tray? Refer to "Loading Paper" (P.60). wrinkled. Is the paper tray inserted Firmly push in the paper tray until it stops to correctly? insert it correctly.
- Page 461 Machine Trouble Symptom Cause Remedy Documents are Are suitable types of Correctly load documents suitable for the often jammed. documents being used? document feeder. Refer to "3 Copy" > "Copying Procedure" in the User Are you trying to use irregular Guide.
-
Page 462: Image Quality Trouble
15 Problem Solving Image Quality Trouble If the image quality of printed documents is poor, identify the symptom in the following table to perform the remedy. If image quality does not improve even after performing the remedy, contact our Customer Support Center. - Page 463 Image Quality Trouble Symptom Cause Remedy The copy is Is the document loaded Load the document correctly. misaligned or correctly? Refer to "3 Copy" > "Copying Procedure" in the User skewed. Guide. Is the paper loaded correctly Load the paper correctly. in the tray? Refer to "Loading Paper"...
- Page 464 15 Problem Solving Symptom Cause Remedy Printing is faint. The paper is damp. Replace the paper with new one. (smudged, Refer to "Loading Paper" (P.60). unclear) The drum cartridge has Replace the drum cartridge with a new one. deteriorated or is damaged. Refer to "Replacing Drum Cartridges R1, R2, R3, or R4 (for Customers Having a Spot Maintenance Contract)"...
- Page 465 Image Quality Trouble Symptom Cause Remedy White dots The paper is unsuitable. Load suitable paper. appear in black Refer to "Loading Paper" (P.60). filled areas. The drum cartridge has Replace the drum cartridge with a new one. deteriorated or is damaged. Refer to "Replacing Drum Cartridges R1, R2, R3, or R4 (for Customers Having a Spot Maintenance Contract)"...
- Page 466 15 Problem Solving Symptom Cause Remedy White areas or The machine interior (LED Clean the interior. white or colored printheads) may be soiled. Refer to "Cleaning the Interior (LED Printheads)" stripes appear. (P.100). The paper is damp. Replace the paper with new one. Refer to "Loading Paper"...
- Page 467 Image Quality Trouble Symptom Cause Remedy White or color The drum cartridge has Replace the drum cartridge with a new one. patches appear deteriorated or is damaged. Refer to "Replacing Drum Cartridges R1, R2, R3, or R4 vertically. (for Customers Having a Spot Maintenance Contract)" (P.83).
-
Page 468: Trouble During Copying
15 Problem Solving Trouble during Copying This section describes how to resolve copy problems. Unable to Copy If you cannot copy a document, identify the symptom in the following table to perform the remedy. Symptom Cause Remedy The document is The document is too small. -
Page 469: The Copy Result Is Not What Was Expected
Trouble during Copying The Copy Result is Not What was Expected If the copy result is not what was expected, identify the symptom in the following table to perform the remedy. Symptom Cause Remedy The copy is dirty. The document glass or the Clean the document glass or the document document cover is soiled. - Page 470 15 Problem Solving Symptom Cause Remedy Part of the image The paper is damp. If the paper is damp, the copy image may be is missing on the partially missing or unclear. Replace the copy. paper with new one. Refer to "Loading Paper" (P.60). Folded or wrinkled paper is Remove the unsuitable paper or replace all of included in the tray.
- Page 471 Trouble during Copying Symptom Cause Remedy Unable to copy The document glass or the Clean the document glass or the document with the specified document cover is dirty. cover. size. Refer to "Cleaning the Document Cover and Document Glass (for Duplex Automatic Document Feeder B1-C)" (P.102) or "Cleaning Document Cover and Document Glass (for Duplex Automatic Document Feeder B1-PC)"...
-
Page 472: Trouble During Printing
15 Problem Solving Trouble during Printing This section describes how to resolve print problems. Unable to Print If you cannot print a document, identify the symptom in the following table to perform the remedy. Symptom Cause Remedy Data remains in The machine is not powered Switch the main power and power on. -
Page 473: The Print Result Is Not What Was Expected
Trouble during Printing Symptom Cause Remedy The data has The machine is out of paper. Load paper in the machine. been sent to the No paper is loaded for the Load paper of the size specified. machine. specified paper size. Refer to "Loading Paper"... - Page 474 15 Problem Solving Symptom Cause Remedy Printing is slow. [High Resolution] is selected When image data, such as photos, is printed for [Image Quality]. with the high resolution, the print speed becomes slow. Select [Standard] for [Image Quality]. The specified The print driver for another Install the print driver for the model.
-
Page 475: Trouble During Faxing
Trouble during Faxing Trouble during Faxing This section describes how to resolve fax problems. Note • For troubles during Internet faxing, refer to "E-mail Features Problems" (P.490). • The Fax features are not available for some models. An optional component is required. For more information, contact our Customer Support Center. - Page 476 15 Problem Solving Symptom Cause Remedy Unable to When calling from an When calling from an abbreviated telephone communicate abbreviated telephone number to an external line, an external (general fax) number, an external access access number such as "0" may be registered number is appended.
- Page 477 Trouble during Faxing Symptom Cause Remedy Unable to The Authentication/ When the Authentication/Accounting feature communicate (IP Accounting feature is being is used and you send a fax directly from the fax (SIP)) used and the fax is being sent computer, you must set the user ID and directly from the computer.
- Page 478 15 Problem Solving Symptom Cause Remedy IP fax (SIP) A large amount of Use the same communication speed within transmission communication data loss the network. takes long time. occurs because the communication rates (10M/ 100M/1000M) differ on two sides of the network relay device (such as a switch and router).
-
Page 479: Receiving Problems
Trouble during Faxing Receiving Problems If you cannot receive a fax, identify the symptom in the following table to perform the remedy. Symptom Cause Remedy Unable to The phone line is not The machine is equipped with connectors to communicate connected correctly. - Page 480 15 Problem Solving Symptom Cause Remedy Unable to The machine is turned off. The machine cannot receive a fax when communicate (IP turned off. Turn the machine on. fax (SIP)) The machine is in the System The machine cannot receive a fax in the Administration mode.
- Page 481 Trouble during Faxing Symptom Cause Remedy IP fax (SIP) A large amount of Use the same communication speed within transmission communication data loss the network. takes long time. occurs because the communication rates (10M/ 100M/1000M) differ on two sides of the network relay device (such as a switch and router).
- Page 482 15 Problem Solving Symptom Cause Remedy The one-page When scanned on the You can set the machine to process such a document is sender's machine, the document by using the Auto Reduce on Receipt feature and a border limit value for received split into document was enlarged for multiple pages.
-
Page 483: Trouble During Scanning
Trouble during Scanning Trouble during Scanning This section describes how to resolve scan problems. Note • The Scan features are not available for some models. An optional component is required. For more information, contact our Customer Support Center. Unable to Scan with the Machine If you cannot scan with the machine, identify the symptom in the following table to perform the remedy. -
Page 484: Unable To Import Scanned Documents To The Computer
15 Problem Solving Unable to Import Scanned Documents to the Computer If you cannot import scanned documents to the computer, identify the symptom in the following table to perform the remedy. Symptom Cause Remedy Unable to find the The machine is not turned on. Switch the main power and power on. scanner. -
Page 485: Unable To Send A Scanned Document Over The Network (Ftp/Smb)
Trouble during Scanning Unable to Send a Scanned Document over the Network (FTP/SMB) If you cannot send a scanned document over the network, identify the symptom in the following table to perform the remedy. Symptom Cause Remedy A Transmission Unable to transmit because Check the Transmission Results in the Report - Job of the error. -
Page 486: Unable To Send E-Mail
15 Problem Solving Symptom Cause Remedy Unable to send The SMB port number is Check the destination server, the router data over the blocked. between the machine and the server, virus network. scanning software on the destination server, and firewall to confirm whether the SMB port is blocked or not. - Page 487 Trouble during Scanning Symptom Cause Remedy The image is too The scan density is set to Adjust the scan density. dark, or too light. [Darken] or [Lighten]. Refer to "5 Scan" > "Advanced Settings" in the User Guide. The setting for [Original Type] Select the image quality appropriate for the is inappropriate for the document.
-
Page 488: Network-Related Problems
15 Problem Solving Network-related Problems This section describes how to resolve network related problems. When you cannot communicate with other SMB machines Cause Check point Remedy If [Auto Master Mode] of SMB The machine or other SMB Confirm the setting of is set to [On], the number of machines cannot be searched [AutoMaster Mode] of SMB. -
Page 489: Centreware Internet Services Problems
Network-related Problems When print result is not what was expected Cause Check point Remedy Selected printer language on Confirm the selected printer Select the printer language on language on the machine and the machine to match the print the machine does not match the printer language of the the printer language of the data. -
Page 490: E-Mail Features Problems
15 Problem Solving Symptom Remedy Selecting the menu on the left Are you using a specified browser? frame does not update the Old information may be cached on your web browser. right frame contents. Clear all the information cached on the web browser. The screen display is distorted. -
Page 491: Internet/Intranet Connection Problems
Network-related Problems Symptom Remedy Cannot transmit e-mail (E-mail Is the E-mail address for the machine configured? Notification Service, Internet Is [E-mail Notification Service] set to [Enabled]? (For E-mail Fax, and E-mail). Notification Service). Is [Send E-mail] set to [Enabled]? Is the IP address for the SMTP server configured correctly? Are the settings for notification of transmission configured correctly? (for E-mail Notification Service) Confirm the settings on the [Properties] tab of CentreWare... - Page 492 15 Problem Solving Cause Remedy The address of the address Confirm whether only addresses that do not use a proxy server that does not use a proxy are set. Even if addresses not through a proxy server are server is incorrect. specified using the FQDN, if a server is directly accessed using its IP address, the registered server is not excluded.
-
Page 493: Ipv4 And Ipv6 Connection Problems
Network-related Problems Cause Remedy When the proxy server access Set the user name and password on the machine that allow requires authentication, you connection to the proxy server. cannot connect to the server because the user name or password is incorrect. IPv4 and IPv6 Connection Problems The possible causes and remedies for problems when using an IPv4 or IPv6 address are as follows:... - Page 494 15 Problem Solving Unable to print using an IPv6 address Symptom Remedy Register the computer name of the machine on the "hosts" file On an IPv6 network without a DNS server, a computer stored on the computer running Windows OS that supports IPv6. running Windows OS that For example, register in the following file: supports IPv6 cannot be...
- Page 495 Network-related Problems Symptom Remedy When the Web Applications In an IPv6 environment, use a DNS server and specify a remote service such as DocuShare is service's destination URL using the FQDN. used, you cannot correctly specify the destination URL using the IPv6 address. Example: http://[ipv6:2001:db8::1] IPv6 addresses are not...
-
Page 496: Media Print - Text Trouble
15 Problem Solving Media Print - Text Trouble The possible symptoms, causes, and remedies for problems when using Media Print - Text are as follows. Symptom Cause Remedy [Media Print - The optional software, USB Properly set the software option or Text] is not Memory Kit (optional) is not disconnect the USB cable, and then securely... -
Page 497: Media Print - Photos Trouble
Media Print - Photos Trouble Media Print - Photos Trouble The possible symptoms, causes, and remedies for problems when using Media Print - Photos are as follows: Symptom Cause Remedy [Media Print - The USB Memory Kit Properly set the software options or Photos] is not (optional) is not recognized disconnect the USB cable, and then securely... -
Page 498: Error Code
15 Problem Solving Error Code This section describes error codes. An error message and error code (***-***) are displayed on the touch screen if printing terminated abnormally because of an error, or a malfunction occurred in the machine. For faxing, an error code is also displayed on an Activity Report and a Transmission Report - Job Undelivered. - Page 499 Error Code Error Code Cause and Remedy 003-701 [Cause] A digital code is embedded in the document to restrict duplication. [Remedy] Use a document in which no digital code is embedded. 003-702 [Cause] You tried to copy sides 1 and 2 of a document simultaneously specifying different Reduce/Enlarge ratio for each side.
- Page 500 15 Problem Solving Error Code Cause and Remedy 003-795 [Cause] When enlarging/reducing a scanned document to the paper size specified, the reduction/enlargement ratio exceeds the allowed range. [Remedy] Take one of the following measures: Manually enter a reduction/enlargement ratio. ...
- Page 501 Error Code Error Code Cause and Remedy 011-310 [Cause] An error occurred in the machine. [Remedy] Switch off the machine power, make sure that the touch screen is blank, and then switch on the machine power. If the same message is displayed again, contact our Customer Support Center.
- Page 502 15 Problem Solving Error Code Cause and Remedy 012-291 [Cause] The finisher front cover is open. 012-292 [Remedy] Close the finisher front cover. If the error still is not resolved, contact our Customer 012-295 Support Center. 012-296 012-297 012-298 012-299 [Cause] Finisher malfunction [Remedy] The error occurs when the first paper in a setting that comes to a finisher tray is taken...
- Page 503 Error Code Error Code Cause and Remedy 016-210 [Cause] An error occurred in the software. 016-211 [Remedy] Switch off the machine power, make sure that the touch screen is blank, and then switch 016-212 on the machine power. If the error still is not resolved, contact our Customer Support 016-213 Center.
- Page 504 15 Problem Solving Error Code Cause and Remedy 016-310 [Cause] An error occurred. 016-311 [Remedy] Switch off the machine power, make sure that the touch screen is blank, and then switch 016-312 on the machine power. If the same message is displayed again, contact our Customer 016-313 Support Center.
- Page 505 Error Code Error Code Cause and Remedy 016-345 [Cause] An error occurred. 016-347 [Remedy] Switch off the machine power, make sure that the touch screen is blank, and then switch 016-348 on the machine power. If the same message is displayed again, contact our Customer 016-350 Support Center.
- Page 506 15 Problem Solving Error Code Cause and Remedy 016-403 [Cause] The root certificate of Ethernet1 did not match. 016-404 [Remedy] Confirm the authentication server and store the root certificate of the server certificate of the authentication server into the machine. If you cannot acquire the root certificate of the server certificate, set [Server Certificate Verification] of [IEEE 802.1X Settings] for Ethernet1 to [Disabled] on the touch screen.
- Page 507 Error Code Error Code Cause and Remedy 016-454 [Cause] Unable to retrieve the IP address from DNS. [Remedy] Confirm the DNS configuration and IP address retrieve setting. Refer to "Protocol Settings" (P.219). 016-455 [Cause] Connection to the SNTP server timed out. [Remedy] Confirm the network cable connection and the IP address of the SNTP server are correct.
- Page 508 15 Problem Solving Error Code Cause and Remedy 016-508 [Cause] When using the Image Log Control feature, failed to forward the image log to the server. [Remedy] Set the forwarding rule for image logs from the server to the machine. 016-509 [Cause] When using the Image Log Control feature, failed to forward the image log to the server...
- Page 509 Error Code Error Code Cause and Remedy 016-518 [Cause] With the PostScript driver, booklet and Watermark were specified at the same time. [Remedy] With the PostScript driver, specifying a combination of booklet and Watermark/UUID is not possible. Cancel one of them. 016-519 [Cause] The number of pages reached the maximum number of pages specified, and the print...
- Page 510 15 Problem Solving Error Code Cause and Remedy 016-533 [Cause] Kerberos server authentication protocol error [Remedy] The time difference between the machine and the Kerberos server exceeded the clock skew limit value set on the Kerberos server. Check whether the clocks on the machine and Kerberos server are correctly set.
- Page 511 Error Code Error Code Cause and Remedy 016-553 [Cause] ApeosWare Authentication Management or ApeosWare Authentication Agent does not support the interface version of the machine. [Remedy] You must upgrade ApeosWare Authentication Management or ApeosWare Authentication Agent's version. Check whether the machine supports ApeosWare Authentication Management or ApeosWare Authentication Agent to being upgraded.
- Page 512 15 Problem Solving Error Code Cause and Remedy 016-563 [Cause] The job cannot continue because there is insufficient memory for the Image Extension Kit. [Remedy] Select Standard for the image quality. If the error still is not resolved, contact our Customer Support Center.
- Page 513 Error Code Error Code Cause and Remedy 016-582 [Cause] The machine failed to transfer data using FTP of the Scan to PC service because files could not be created on the FTP server after connection. [Remedy] Take one of the following measures: ...
- Page 514 15 Problem Solving Error Code Cause and Remedy 016-592 [Cause] The machine failed to access the NEXTNAME.DAT file using FTP of the Scan to PC service. [Remedy] When [Add to Existing Folder] is set as the process to be executed in case of a file name duplication, check the NEXTNAME.DAT file is correct.
- Page 515 Error Code Error Code Cause and Remedy 016-703 [Cause] The machine received an e-mail specified with an invalid folder number. [Remedy] For errors occurring during fax or Internet fax transmission: Contact our Customer Support Center. For errors occurring during e-mail/fax/Internet fax reception: Take one of the following measures: ...
- Page 516 15 Problem Solving Error Code Cause and Remedy 016-711 [Cause] The upper limit for the e-mail size has been exceeded. [Remedy] Take one of the following measures, and then try sending the mail again. Reduce the number of pages of the document. ...
- Page 517 Error Code Error Code Cause and Remedy 016-721 [Cause] An error occurred during print processing. Probable causes are as follows: 1)Printing was instructed by the Auto Paper selection when [Paper Type Priority] is set to [Auto Paper Off] for all paper in [Paper Tray Settings] of [Common Service Settings].
- Page 518 15 Problem Solving Error Code Cause and Remedy 016-733 [Cause] Probable causes are as follows: 1)Unable to obtain the IP address (the string after "@" in the destination e-mail address) when e-mail is sent. 2)DNS server was unable to resolve the Internet address (the string after "@") by the DNS server when e-mail is sent.
- Page 519 Error Code Error Code Cause and Remedy 016-749 [Cause] Probable causes are as follows: For a print job: 1) The printer language received from the print driver is unsupported by this machine. For printing of a document received by Internet Fax: 2) The printer language of the document received from the remote machine is unsupported by this machine.
- Page 520 15 Problem Solving Error Code Cause and Remedy 016-757 [Cause] The passcode is incorrect. [Remedy] Enter the correct passcode. 016-758 [Cause] The division does not have permission to use the service. [Remedy] Consult your system administrator. 016-759 [Cause] The number of pages reached the maximum number of pages for this service. [Remedy] Consult your system administrator.
- Page 521 Error Code Error Code Cause and Remedy 016-776 [Cause] An error occurred during image conversion processing. [Remedy] For errors occurring when forwarding with Store to Folder or Internet Fax: The image conversion processing for the part of the data may be completed. Retrieve each converted page from the folder using CentreWare Internet Services.
- Page 522 15 Problem Solving Error Code Cause and Remedy 016-786 [Cause] When using the Scan feature, the machine could not write the file to the hard disk. [Remedy] Take one of the following measures: Switch off the machine power, make sure that the touch screen is blank, and then switch on the machine power.
- Page 523 Error Code Error Code Cause and Remedy 017-703 [Cause] The print data sent from ThinPrint.Engine exceeded the maximum size of the machine. [Remedy] Split the job, and try printing again. 017-704 [Cause] An internal error occurred. [Remedy] Switch off the machine power, make sure that the touch screen is blank, and then switch on the machine power.
- Page 524 15 Problem Solving Error Code Cause and Remedy 017-725 [Cause] An error occurred while receiving a print job when the Force Annotation is enabled. [Remedy] Incorrect name is set for the template of the Force Annotation. Confirm the name of the template registered in the machine.
- Page 525 Error Code Error Code Cause and Remedy 017-740 [Cause] Data could not be sent due to a plug-in activation failure. [Remedy] Switch off the machine power, make sure that the touch screen is blank, and then switch on the machine power. If the same message is displayed again, contact our Customer Support Center.
- Page 526 15 Problem Solving Error Code Cause and Remedy 017-756 [Cause] An error occurred in the machine. [Remedy] Switch off the machine power, make sure that the touch screen is blank, and then switch on the machine power. If the error still is not resolved, contact our Customer Support Center.
- Page 527 Error Code Error Code Cause and Remedy 017-769 [Cause] The server addresses of the POP3 server and the server certificate are not same. [Remedy] Use the valid server certificate in which the correct server address is written. 017-770 [Cause] An error occurred in connecting to the POP3 server. [Remedy] Execute the operation again.
- Page 528 15 Problem Solving Error Code Cause and Remedy 018-406 [Cause] The machine detects the identical IPv4 addresses when Ethernet1 and Ethernet2 are connected to different network and the setting of identical addresses is prohibited. 018-407 [Remedy] Set different IP addresses to each Ethernet. When setting the same IP address to each Ethernet, contact our Customer Support Center.
- Page 529 Error Code Error Code Cause and Remedy 018-505 [Cause] Failed to log into the destination computer while transferring data using SMB of the Scan to PC service. [Remedy] Check whether the user name and password of the SMTP server registered in the machine is correct.
- Page 530 15 Problem Solving Error Code Cause and Remedy 018-543 [Cause] Probable causes are as follows: 1)The machine failed to transfer data using SMB of the Scan to PC service because the specified shared name does not exist. 2)The machine failed to transfer data using SMB of the Scan to PC service because Invalid characters are used in the specified shared name.
- Page 531 Error Code Error Code Cause and Remedy 018-560 [Cause] A user authentication error occurred. (Received HTTP Status 401). [Remedy] Check the followings: The destination HTTP server for the scanned document is accessible by PC. Login name Login password ...
- Page 532 15 Problem Solving Error Code Cause and Remedy 018-568 [Cause] An SSL/TLS connection error occurred. [Remedy] Check the followings: The destination HTTP server for the scanned document is accessible by PC. SSL settings for the HTTP server is correct. ...
- Page 533 Error Code Error Code Cause and Remedy 018-579 [Cause] The hard disk on the NetWare server may be full. [Remedy] Check the followings: The NetWare server is accessible by PC The free space of the server to store data Run DSREPAIR at the server console on the NetWare server.
- Page 534 15 Problem Solving Error Code Cause and Remedy 018-585 [Cause] The followings may be the cause: The specified folder or file is in use by another user Made a delete request to the directories or files though some of them are in use by another user ...
- Page 535 Error Code Error Code Cause and Remedy 018-595 [Cause] Multiple entries containing the same smart card information were detected in the database of the LDAP server. [Remedy] Correct the temporary user entries of the LDAP server so that they do not contain the same smart card information.
- Page 536 15 Problem Solving Error Code Cause and Remedy 018-709 [Cause] An error occurred for external access (Web Applications). [Remedy] Take one of the following measures depending on the setting: For IPv4 environment Check the IPv4 address of the machine. ...
- Page 537 Error Code Error Code Cause and Remedy 018-717 [Cause] An LDAP server protocol error occurred as a result of the Address Book operation. The server returned RFC2251 Result Message No "17" (undefined type) for Address Book query. [Remedy] The LDAP server has an attribute problem. Have your network administrator confirm the LDAP server status.
- Page 538 15 Problem Solving Error Code Cause and Remedy 018-728 [Cause] Authentication by the Kerberos server failed. [Remedy] Take one of the following measures: When the root CA certificate of the KDC certificate is not registered, register the root CA certificate. ...
- Page 539 Error Code Error Code Cause and Remedy 018-738 [Cause] The machine cannot connect to Google Cloud Print, because of a network error. [Remedy] Check that the network cable is connected properly. Also check that the environmental settings are adequate. 018-739 [Cause] An internal error occurred.
- Page 540 15 Problem Solving Error Code Cause and Remedy 018-749 [Cause] An LDAP server protocol error occurred as a result of the Address Book operation. The server returned RFC2251 Result Message No "49" (invalid credentials) for Address Book query. The address search was performed with an incorrect authentication user name and password.
- Page 541 Error Code Error Code Cause and Remedy 018-758 [Cause] The save location or file name of a scanned image has a problem while transferring data using SMB of the Scan to PC service. Probable cause is that the specified save location does not exist on the server.
- Page 542 15 Problem Solving Error Code Cause and Remedy 018-765 [Cause] An LDAP server protocol error occurred as a result of the Address Book operation. The server returned RFC2251 Result Message No "65" (object class violation) for Address Book query. [Remedy] The LDAP server has an update problem. Have your network administrator confirm the LDAP server status.
- Page 543 Error Code Error Code Cause and Remedy 018-781 [Cause] An LDAP server protocol error occurred as a result of the Address Book operation. Connection to the server cannot be established for the Address Book query. [Remedy] Take one of the following measures: ...
- Page 544 15 Problem Solving Error Code Cause and Remedy 018-791 [Cause] An LDAP server protocol error occurred as a result of the Address Book operation. The server returned RFC2251 Result Message No "91" (server connection error) for Address Book query. [Remedy] Have your network administrator confirm the LDAP server status. 018-792 [Cause] An LDAP server protocol error occurred as a result of the Address Book operation.
- Page 545 If the network works normally but the error still is not resolved, contact our Customer Support Center. 021-403 [Cause] Failed to resolve the address of the EP center of Fuji Xerox or EP communication aggregate server. [Remedy] Check the followings: ...
- Page 546 15 Problem Solving Error Code Cause and Remedy 021-406 [Cause] The SSL certificate of the external server is not correct. [Remedy] Switch off the machine power, make sure that the touch screen is blank, and then switch on the machine power. If the error still is not resolved, contact our Customer Support Center.
- Page 547 Error Code Error Code Cause and Remedy 021-412 [Cause] An error occurred while connecting to the EP system via the Internet. There is a problem with the address of the EP proxy server name. [Remedy] Check the followings: The LAN cable connection ...
- Page 548 15 Problem Solving Error Code Cause and Remedy 021-417 [Cause] Failed to authorize the proxy server while connecting to the EP system via the Internet. [Remedy] Check the followings: The EP proxy server URL setting The login user of the EP proxy server ...
- Page 549 Error Code Error Code Cause and Remedy 021-423 [Cause] The size of the proxy setting file is too large. Failed to obtain the proxy setting file. [Remedy] Check the EP proxy server setting screen on CentreWare Internet Services. If the error still is not resolved after checking the setting, check the proxy setting file size. When the size exceeds 64 KB, keep the file size down.
- Page 550 15 Problem Solving Error Code Cause and Remedy 021-430 [Cause] The time synchronization with 3Gnet-BOX was failed. [Remedy] Adjust the time on the clock of the machine to the right time. If you still have the problem, switch off the machine power, make sure that the touch screen is blank, and then switch on the machine power.
- Page 551 Error Code Error Code Cause and Remedy 021-440 [Cause] The communication is disabled in 3G communication by way of 3Gnet-BOX with this machine. [Remedy] Switch off the machine power, make sure that the touch screen is blank, and then switch on the machine power.
- Page 552 15 Problem Solving Error Code Cause and Remedy 021-506 [Cause] The SSL Certificate for the EP server is incorrect. [Remedy] Switch off the machine power, make sure that the touch screen is blank, and then switch on the machine power. Execute the operation again. If the error still is not resolved, contact our Customer Support Center.
- Page 553 Error Code Error Code Cause and Remedy 021-520 [Cause] An error occurred while connecting to the EP system via the Internet. 021-521 [Remedy] Check the followings: 021-522 LAN cable connection DNS server address setting The default gateway setting ...
- Page 554 15 Problem Solving Error Code Cause and Remedy 021-540 [Cause] The SW upgrade was canceled since the machine power was turned off while downloading the update file. [Remedy] If necessary, execute the operation again. 021-541 [Cause] The SW upgrade cannot be started since an incorrect setting is done to the machine. [Remedy] If necessary, execute the operation again.
- Page 555 Error Code Error Code Cause and Remedy 021-573 [Cause] An error occurred in 3Gnet-BOX. [Remedy] Switch off the machine power, make sure that the touch screen is blank, and then switch on the machine power. If the error still is not resolved, contact our Customer Support Center.
- Page 556 15 Problem Solving Error Code Cause and Remedy 021-700 [Cause] The USB cable is unplugged or the USB interface may be out of order. [Remedy] Confirm that the USB cable is connected and switch off the machine power, make sure that the touch screen is blank, and then switch on the machine power.
- Page 557 Error Code Error Code Cause and Remedy 024-340 [Cause] An error occurred in the machine. 024-341 [Remedy] Switch off the machine power, make sure that the touch screen is blank, and then switch 024-342 on the machine power. If the same message is displayed again, contact our Customer 024-343 Support Center.
- Page 558 15 Problem Solving Error Code Cause and Remedy 024-705 [Cause] The template of the specified force annotation was not found in the machine. [Remedy] Delete the document in the folder of the machine, and then select [Store to Folder] again from the print driver to store the document. 024-706 [Cause] A print job from Denshi-Pen is sent when [Force Watermark - Client Print] or [Force...
- Page 559 Error Code Error Code Cause and Remedy 026-702 [Cause] The number of accesses from the LDAP server to the machine by Address Book operation exceeded the machine's processing capability. [Remedy] Wait for a while and execute the operation again. If the error still is not resolved, contact our Customer Support Center.
- Page 560 15 Problem Solving Error Code Cause and Remedy 026-718 [Cause] Incompatible print parameters are used. The combination of the specified features such as Document Size, Paper Size, Paper Tray, 2 sided printing, and Output Tray is incompatible. [Remedy] Confirm the print data, and try printing again. 026-719 [Cause] An error occurred while operating the Store to USB service.
- Page 561 Error Code Error Code Cause and Remedy 026-737 [Cause] Unable to send the scanned document to the HTTP server because a network error occurred. [Remedy] Consult your network administrator whether the network or the server have any problem. 026-738 [Cause] The machine failed to send scanned document data to the HTTP server because Web application is closed during it.
- Page 562 15 Problem Solving Error Code Cause and Remedy 027-503 [Cause] A POP server error occurred. [Remedy] Execute the operation again. If the error still is not resolved, contact our Customer Support Center. 027-504 [Cause] An SMTP server error occurred. [Remedy] Execute the operation again. If the error still is not resolved, contact our Customer Support Center.
- Page 563 Error Code Error Code Cause and Remedy 027-518 [Cause] The machine failed to transfer data using SMB of the Scan to PC service because the specified password was incorrect. When the server is Macintosh, the specified user may not have been registered as a user who is permitted to use File Sharing.
- Page 564 15 Problem Solving Error Code Cause and Remedy 027-524 [Cause] The machine failed to transfer data using SMB of the Scan to PC service because a folder could not be created on the SMB server. The specified folder already exists. [Remedy] Check whether the specified name is being used for another file or folder on the SMB server.
- Page 565 Error Code Error Code Cause and Remedy 027-547 [Cause] SMB protocol error. An invalid character was detected in the specified domain name. [Remedy] If the error occurred during SMB authentication: Consult your network administrator for the domain name, and then set it correctly. Also, check whether the domain name set on the machine is correct.
- Page 566 15 Problem Solving Error Code Cause and Remedy 027-569 [Cause] The SMB (TCP/IP) port is not activated. [Remedy] Enter the System Administration mode, and select [Tools] > [Connectivity & Network Setup] > [Port Settings]. On this screen, confirm [SMB Client] is set to [Enabled]. 027-572 [Cause] SMB protocol error...
- Page 567 Error Code Error Code Cause and Remedy 027-706 [Cause] Unable to find the S/MIME certificate associated with the machine's e-mail address when sending e-mail. [Remedy] Import the S/MIME certificate corresponding to the mail address to the machine. 027-707 [Cause] The S/MIME certificate associated with the machine's e-mail address has expired when sending e-mail.
- Page 568 15 Problem Solving Error Code Cause and Remedy 027-723 [Cause] Authentication at the application interface destination (ApeosWare Flow Service) failed. [Remedy] Confirm the user name and password that is used when creating a job flow. 027-724 [Cause] An application interface destination (ApeosWare Flow Service) could not be accessed. [Remedy] Check whether ApeosWare Flow Service is operating correctly.
- Page 569 Error Code Error Code Cause and Remedy 027-737 [Cause] An error occurred while reading data from the pool server for job templates. [Remedy] Check on the directory where the job templates are stored, and confirm whether the settings including the access privilege are correct. 027-739 [Cause] A specified pool server for job templates cannot be found.
- Page 570 15 Problem Solving Error Code Cause and Remedy 027-757 [Cause] Probable causes are as follows: 1)An error occurred while connecting the server. 2)The reliable certificate has not been registered on the machine. 3)The server addresses of the SSL server and the destination server are not same. 4)The machine tries to communicate with the server using the encryption method which is not supported on the machine.
- Page 571 Error Code Error Code Cause and Remedy 027-763 [Cause] The machine failed to verify the user information against the remote accounting server. [Remedy] Take one of the following measures: Check whether the remote accounting server is operating properly. Check whether there is no network failure.
- Page 572 15 Problem Solving Error Code Cause and Remedy 027-796 [Cause] The received e-mail was discarded because no documents were attached to it. (The machine is set to print attached documents only.) [Remedy] To print the mail body or header information also, change settings in the [Properties] screen of CentreWare Internet Services.
- Page 573 Error Code Error Code Cause and Remedy 033-329 [Cause] An error occurred during fax transmission. [Remedy] Switch off the machine power, make sure that the touch screen is blank, and then switch on the machine power. If the same message is displayed again, contact our Customer Support Center.
- Page 574 15 Problem Solving Error Code Cause and Remedy 033-512 [Cause] The other party cannot execute Relay Broadcast. [Remedy] Confirm whether the other party can execute Relay Broadcast. 033-513 [Cause] The other machine does not have the Folder feature. [Remedy] Confirm whether the other machine has the Folder feature. 033-514 [Cause] An error occurred during fax transmission.
- Page 575 Error Code Error Code Cause and Remedy 033-528 [Cause] An error occurred during fax transmission. [Remedy] Ask the sender to send again. 033-529 [Cause] An error occurred during fax transmission. [Remedy] Confirm the other machine has a problem, and then execute the operation again. 033-530 [Cause] Received a procedure disabled signal.
- Page 576 Customer Support Center. 033-560 [Cause] An error occurred during remote maintenance work. 033-561 [Remedy] This is an error occurring during remote maintenance work by Fuji Xerox. No measure is 033-562 required. 033-563 [Cause] Paper that can print faxed documents is not loaded in a tray.
- Page 577 Error Code Error Code Cause and Remedy 033-565 [Cause] Cannot send because too many recipients are specified. [Remedy] Wait until the number of jobs awaiting transmission decreases, or reduce the number of recipients, and then send again. 033-566 [Cause] Cannot send because the recipient (fax number) is not specified. [Remedy] Correctly specify the recipient's fax number.
- Page 578 15 Problem Solving Error Code Cause and Remedy 033-582 [Cause] An error occurred during IP fax (SIP) transmission. [Remedy] Check whether or not the recipient’s machine supports IP fax (SIP). If it is IP fax-enabled device, confirm the settings on the SIP server. 033-583 [Cause] An error occurred during IP fax (SIP) transmission.
- Page 579 Error Code Error Code Cause and Remedy 033-700 [Cause] The connection is time out when a fax is send or the machine receives a fax from a remote machine. [Remedy] In sending a fax, execute the operation again. In receiving a fax, the remote machine may cancel sending.
- Page 580 No measure is required. 033-732 [Cause] An error occurred while connecting to the EP system. [Remedy] This is an error occurring during maintenance work by Fuji Xerox. No measure is required. 033-733 [Cause] An error occurred during fax transmission.
- Page 581 Error Code Error Code Cause and Remedy 033-749 [Cause] The machine will automatically recover and print the document. [Remedy] No measure is required. 033-750 [Cause] An error occurred during fax transmission. [Remedy] Switch off the machine power, make sure that the touch screen is blank, and then switch on the machine power.
- Page 582 15 Problem Solving Error Code Cause and Remedy 042-316 [Cause] An error occurred in the machine. 042-320 [Remedy] Switch off the machine power, make sure that the touch screen is blank, and then switch 042-323 on the machine power. If the error still is not resolved, contact our Customer Support 042-324 Center.
- Page 583 Error Code Error Code Cause and Remedy 042-399 [Cause] An error occurred in the machine. [Remedy] Switch off the machine power, make sure that the touch screen is blank, and then switch on the machine power. If the error still is not resolved, contact our Customer Support Center.
- Page 584 15 Problem Solving Error Code Cause and Remedy 044-327 [Cause] An error occurred in the machine. 044-328 [Remedy] Switch off the machine power, make sure that the touch screen is blank, and then switch 044-329 on the machine power. If the error still is not resolved, contact our Customer Support 044-330 Center.
- Page 585 Error Code Error Code Cause and Remedy 045-310 [Cause] An error occurred. 045-311 [Remedy] Switch off the machine power, make sure that the touch screen is blank, and then switch 045-312 on the machine power. If the same message is displayed again, contact our Customer 045-319 Support Center.
- Page 586 15 Problem Solving Error Code Cause and Remedy 047-320 [Cause] An error occurred. [Remedy] Switch off the machine power, make sure that the touch screen is blank, and then switch on the machine power. If the same message is displayed again, contact our Customer Support Center.
- Page 587 Error Code Error Code Cause and Remedy 062-277 [Cause] A communication error occurred between the document scanning unit and the document feeder. [Remedy] Contact our Customer Support Center. 062-311 [Cause] An error occurred. 062-328 [Remedy] Switch off the machine power, make sure that the touch screen is blank, and then switch 062-329 on the machine power.
- Page 588 15 Problem Solving Error Code Cause and Remedy 072-210 [Cause] Tray 2 malfunction [Remedy] Confirm the paper loading condition for the Tray 2, and then switch off the machine power, make sure that the touch screen is blank, and then switch on the machine power. If the error still is not resolved, contact our Customer Support Center.
- Page 589 Error Code Error Code Cause and Remedy 091-310 [Cause] An error occurred. 091-313 [Remedy] Switch off the machine power, make sure that the touch screen is blank, and then switch on the machine power. If the same message is displayed again, contact our Customer Support Center.
- Page 590 15 Problem Solving Error Code Cause and Remedy 099-373 [Cause] An error occurred in the machine. [Remedy] Switch off the machine power, make sure that the touch screen is blank, and then switch on the machine power. If the error still is not resolved, contact our Customer Support Center.
- Page 591 Error Code Error Code Cause and Remedy 116-325 [Cause] An error occurred. 116-328 [Remedy] Switch off the machine power, make sure that the touch screen is blank, and then switch 116-329 on the machine power. If the same message is displayed again, contact our Customer 116-330 Support Center.
- Page 592 15 Problem Solving Error Code Cause and Remedy 116-343 [Cause] An error occurred. 116-345 [Remedy] Switch off the machine power, make sure that the touch screen is blank, and then switch 116-346 on the machine power. If the same message is displayed again, contact our Customer 116-347 Support Center.
- Page 593 Error Code Error Code Cause and Remedy 116-388 [Cause] The optional hard disk is not installed. [Remedy] Install the hard disk. Contact our Customer Support Center. 116-389 [Cause] The Extension System Memory is not installed. [Remedy] Install the Extension System Memory. Contact our Customer Support Center. 116-390 [Cause] An error occurred in the machine.
- Page 594 15 Problem Solving Error Code Cause and Remedy 116-714 [Cause] An HP-GL/2 command error occurred. [Remedy] Check the print data. 116-716 [Cause] An error occurred when reading the data on the media. 116-717 [Remedy] On a computer, confirm the content recorded on the media. 116-720 [Cause] An error occurred during print processing because of insufficient memory.
- Page 595 Error Code Error Code Cause and Remedy 116-751 [Cause] The process has been canceled because the hard disk is full. [Remedy] Delete stored data in the hard disk. If the error still is not resolved, split the file and send the job again.
- Page 596 15 Problem Solving Error Code Cause and Remedy 117-343 [Cause] Probable causes are follows. 1)When [Image Log Control] on Tools is invalid and [Enabled] is set for [Log Transfer] under [Transfer Image Log], [Transfer Per Job Basis] is set for [Logs to Transfer]. 2)When [Transfer Image Log] is invalid (the hard disk is not installed), [Log Transfer] is set to [Enabled].
- Page 597 Error Code Error Code Cause and Remedy 121-314 [Cause] An error occurred between the machine and the device connected. 121-316 [Remedy] Switch off the machine power, make sure that the touch screen is blank, and then switch 121-317 on the machine power. If the same message is displayed again, contact our Customer 121-318 Support Center.
- Page 598 15 Problem Solving Error Code Cause and Remedy 123-310 [Cause] An error occurred in the machine. 123-311 [Remedy] Switch off the machine power, make sure that the touch screen is blank, and then switch 123-312 on the machine power. If the same message is displayed again, contact our Customer 123-325 Support Center.
- Page 599 Error Code Error Code Cause and Remedy 124-310 [Cause] An error occurred in the machine. 124-311 [Remedy] Switch off the machine power, make sure that the touch screen is blank, and then switch 124-312 on the machine power. If the same message is displayed again, contact our Customer 124-313 Support Center.
- Page 600 15 Problem Solving Error Code Cause and Remedy 124-380 [Cause] An error occurred in the machine. 124-381 [Remedy] Switch off the machine power, make sure that the touch screen is blank, and then switch 124-382 on the machine power. If the same message is displayed again, contact our Customer 124-383 Support Center.
- Page 601 Error Code Error Code Cause and Remedy 127-310 [Cause] An error occurred in the machine. 127-311 [Remedy] Switch off the machine power, make sure that the touch screen is blank, and then switch 127-312 on the machine power. If the same message is displayed again, contact our Customer 127-313 Support Center.
-
Page 602: Other Errors
15 Problem Solving Error Code Cause and Remedy 133-701 [Cause] Unavailable characters are included in Name, Company Logo, Fax Comment, or Local Name and the characters are converted. [Remedy] Enter available characters to Name, Company Logo, Fax Comment, or Local Name. When the available characters are not clear, enter alphanumeric characters only. -
Page 603: Paper Jams
If you were during copying, press the <Start> button to resume the copying from the point when the paper jam occurred. WARNING If you need to pull out a tray to remove paper jam, contact your local Fuji Xerox representative. Do not pull out a tray, otherwise it may cause injuries. CAUTION Do not attempt to remove a paper deeply jammed inside the product, particularly a paper wrapped around the fusing unit or the heat roller. -
Page 604: Paper Jams In Top Left Cover A
15 Problem Solving Paper Jams in Top Left Cover A The following describes how to clear paper jams occurring in the top left cover. Important • Do not touch the black film like Transfer Belt inside the top left cover when you remove the jammed paper because images might be shifted on the Transfer Belt. -
Page 605: Paper Jams In Bottom Left Cover C
Paper Jams If paper is jammed in the fusing unit, move the lever A1 towards you to open the chute of the fusing unit. Remove the jammed paper. Important • The fusing unit is extremely hot. Do not touch the fusing unit as it may result in burn injury. Note •... -
Page 606: Paper Jams In Trays 1 To 4
15 Problem Solving Important • Do not touch the black film like Transfer Belt inside the top left cover when you remove the jammed paper because images might be shifted on the Transfer Belt. If you touch the belt, the image quality might be deteriorated or the belt may be damaged and need replacement. -
Page 607: Paper Jams In Tray 3 (When Tandem Tray Module Is Installed)
Paper Jams Pull out the tray where the paper jam occurred. Important • If you pull out a paper tray without checking the paper jam location, the jammed paper may be torn and the pieces may remain inside the machine. This may cause machine malfunctions;... -
Page 608: Paper Jams In Tray 5 (Bypass Tray)
15 Problem Solving Pull out Tray 4. Important • If you pull out a paper tray without checking the paper jam location, the jammed paper may be torn and the pieces may remain inside the machine. This may cause machine malfunctions;... -
Page 609: Paper Jams In Tray 6 (Hcf B1) (Optional)
Paper Jams Insert the paper into the tray with the printing side facing down until its edge lightly touches against the paper feed entrance. Paper Jams in Tray 6 (HCF B1) (Optional) This section describes how to clear paper jams occurring in Tray 6 (HCF B1) (optional). Paper Jams in Tray 6 Exit ................................609 Paper Jams in Tray 6 Top Cover..............................610 Paper Jams in Tray 6 ...................................610... - Page 610 15 Problem Solving Paper Jams in Tray 6 Top Cover Gently move Tray 6 to the left until it stops by gripping the handle on the top left side of Tray Open the Tray 6 top cover. Remove the jammed paper. Note •...
-
Page 611: Paper Jams In Duplex Module B
Paper Jams Push Tray 6 in gently until it stops. Paper Jams in Duplex Module B The following describes how to clear paper jams occurring in the Duplex Module B if the machine supports the 2 Sided Printing feature. Open Tray 5 (1), lift up the release lever (2), and then gently open the cover of the Duplex Module B (3). -
Page 612: Paper Jams In Finisher-B1
15 Problem Solving Paper Jams under the Finisher Top Cover Open the finisher top cover (1), turn the knob (2), and then remove the jammed paper. Note • If the paper is torn, make sure no piece of paper remains inside the machine. Close the finisher top cover. -
Page 613: Paper Jams In C3 Finisher / C3 Finisher With Booklet Maker
Paper Jams Paper Jams in the Center Unit Lift the top cover and open. Note • The top cover cannot be detached from the machine. Remove the jammed paper. Note • If the paper is torn, make sure no piece of paper remains inside the machine. -
Page 614: Paper Jams In The Finisher Transport
15 Problem Solving Open the top cover of the finisher transport, and then close it. Paper Jams in the Finisher Transport Open the top cover of the finisher transport. Remove the jammed paper if there is. Close the top cover of the finisher transport. Paper Jams at the Handle [3a] Open the finisher front door. -
Page 615: Paper Jams At The Handle [3A] (Using The Knob [3B])
Paper Jams Move the handle [3a] upwards (1), and remove the jammed paper (2). Note • If paper is torn, check for any torn pieces of paper inside the machine. Return the handle [3a] to its original position. Close the finisher front door. Note •... -
Page 616: Paper Jams At The Handle [3C]
15 Problem Solving Gently pull the paper to remove. Note • If paper is torn, check for any torn pieces of paper inside the machine. Return the handle [3a] to its original position. Close the finisher front door. Note • If the finisher front door is not completely closed, a message will appear and the machine remains paused. -
Page 617: Paper Jams At The Handle [3D]
Paper Jams Remove the jammed paper. Note • If paper is torn, check for any torn pieces of paper inside the machine. Return the handle [3c] to its original position. Close the finisher front door. Note • If the finisher front door is not completely closed, a message will appear and the machine remains paused. -
Page 618: Paper Jams At The Handle [3D] (When The Paper Is Ejected At The Output Area)
15 Problem Solving Paper Jams at the Handle [3d] (when the paper is ejected at the output area) Gently pull the jammed paper to the right to remove. Note • If paper is torn, check for any torn pieces of paper inside the machine. -
Page 619: Paper Jams In The Folder Unit Cd1
Paper Jams Paper Jams in the Booklet Tray [4a] (For C3 Finisher with Booklet Maker) Open the finisher front door. Turn the knob [4a] to the right to eject the jammed paper onto the booklet tray. Remove the jammed paper. Note •... - Page 620 15 Problem Solving Paper Jams at the Handle [2a] Make sure that the machine has stopped, and open the folder unit door of the Folder Unit CD1. Move the handle [2a] upwards (1), and remove the jammed paper (2). Note •...
- Page 621 Paper Jams Move the handle [2b] to the left (1), and remove the jammed paper (2). Note • If paper is torn, check for any torn pieces of paper inside the machine. Return the handle [2b] to its original position. Close the folder unit door of the Folder Unit CD1.
- Page 622 15 Problem Solving Return the handle opened ([2f] or [2e]) to its original position (1), and push the Tri-fold output tray [2d] in (2). Close the folder unit door of the Folder Unit CD1. Note • A message will be displayed and the machine will not operate if the folder unit door of the Folder Unit CD1 is even slightly open.
-
Page 623: Document Jams
Document Jams Document Jams When a document jam occurred in the document feeder, the machine stops and a message is displayed on the touch screen. Follow the instructions displayed to clear the document jam and then load the document in the document feeder again. Note •... -
Page 624: Duplex Automatic Document Feeder B1-Pc (Optional)
15 Problem Solving Turn the knob to eject the document upwards Knob to remove. Important • If the document is caught, do not pull it out forcibly. The document could be damaged. Close the inner cover of the document feeder. Close the left cover of the document feeder until it clicks into place, and confirm that there is no space between the near or far side of the cover and the document feeder. - Page 625 Document Jams If the document is not caught in the entry of the document feeder, pull out the document. If the massage on the screen instructs you to Knob turn the knob, turn the knob to eject the document upwards. Important •...
- Page 626 15 Problem Solving Note • After removing the jammed document, reload the entire document including the pages already scanned. The machine will automatically skip the scanned pages and start scanning unscanned pages. • Torn, wrinkled or folded documents may cause document jams and damage. To scan such documents, directly place the document on the document glass to make copies.
-
Page 627: Stapler Faults
Stapler Faults Stapler Faults This section describes how to clear stapler troubles when the optional finisher is installed. Perform the procedures on the following pages when copies are not stapled or staples are bent. Contact our Customer Support Center if the problem persists after you have tried the following solutions. -
Page 628: Staple Jams In Staple Cartridge (For Finisher-A1)
15 Problem Solving Staple Jams in Staple Cartridge (for Finisher-A1) This section describes how to clear staple jam occurred in the staple cartridge of the Finisher- A1 (optional). Make sure that the machine is not operating, and open the finisher front cover. Take the staple cartridge out of the machine. -
Page 629: Staple Jams In Staple Cartridge (For Finisher-B1)
Stapler Faults Push the staple cartridge into the machine until it clicks into place. Close the finisher front cover. Note • If the finisher front cover is not completely closed, a message will appear and the machine remains paused. If you cannot remove jammed staples even after you perform the above procedure, contact our Customer Support Center. - Page 630 15 Problem Solving After you take out the staple cartridge, check inside of the finisher for any remaining staples. Pull up the metal part of the staple cartridge as shown in the illustration. Remove the jammed staples (1), and then return the metal part pulled up in step 5 to the original position (2).
-
Page 631: Staple Jams In Staple Cartridge (For C3 Finisher And C3 Finisher With Booklet Maker)
Stapler Faults Staple Jams in Staple Cartridge (for C3 Finisher and C3 Finisher with Booklet Maker) This section describes how to clear staple jam occurred in the staple cartridge of the C3 Finisher (optional) and the C3 Finisher with Booklet Maker (optional). Make sure that the machine is not operating, and open the finisher front door. -
Page 632: Booklet Staple Jams In Booklet Staple Cartridge (For C3 Finisher With Booklet Maker)
15 Problem Solving Pull up the metal part of the staple cartridge as shown in the illustration. Remove the jammed staples (1), and then return the metal part pulled up in step 5 to the original position (2). CAUTION Be careful in removing jammed staples. With grasping the orange lever of the staple cartridge, push the staple cartridge into its original position until it clicks into place. - Page 633 Stapler Faults Pull out the booklet unit. With grasping the lever of the booklet staple cartridge, push the booklet staple cartridge downward. Then, pull out the booklet staple cartridge upwards. Push down the metal part of the staple cartridge. Remove the jammed staples (1), and return the metal part pushed down in step 4 to its original position (2).
- Page 634 15 Problem Solving Slightly push the booklet staple cartridge upwards, and make sure that it clicks into place. Note • Return the booklet staple cartridge until ( of the booklet staple cartridge is fitted in ) of the booklet unit. Return the booklet unit to its original position.
-
Page 635: Appendix
16 Appendix This chapter describes the machine specifications, notes and restrictions, optional components, and printer emulation languages. Specifications ..........................636 Printable Area ..........................661 Internal Fonts..........................662 Optional Components ......................664 Fold Position Adjustment ......................667 Adjust Image Transfer ......................675 ... -
Page 636: Specifications
52 - 300 gsm Paper Tray 5 (bypass tray) : 52 - 300 gsm Important • Use paper recommended by Fuji Xerox. Copying may not be performed correctly depending on the conditions. • Some types of paper may be jammed or wrinkled. - Page 637 [Single Color]) Monochrome 4.6 seconds Color 4.1 seconds Same magnification/Paper Tray 1/1-sided/Center Tray ApeosPort-V C6676, DocuCentre-V C6676 For A4 /monochrome priority mode (the default for the [Output Color] is [Black & White] or [No Default]) Monochrome 3.3 seconds Color 5.4 seconds...
- Page 638 16 Appendix First Copy Output Time ApeosPort-V C3376, DocuCentre-V C3376, Important ApeosPort-V C3374, DocuCentre-V C3374 The values may vary For A4 /monochrome priority mode depending on the (the default for the [Output Color] is [Black & White] or [No Default]) machine configuration.
- Page 639 [Single Color]) Monochrome 6.4 seconds Color 6.5 seconds Same magnification/Paper Tray 1/1-sided/Center Tray ApeosPort-V C6676, DocuCentre-V C6676 For A4 /monochrome priority mode (the default for the [Output Color] is [Black & White] or [No Default]) Monochrome 5.1 seconds Color 7.2 seconds...
- Page 640 16 Appendix First Copy Output Time ApeosPort-V C3376, DocuCentre-V C3376, Important ApeosPort-V C3374, DocuCentre-V C3374 The values may vary With Duplex Automatic Document Feeder B1-C: depending on the For A4 /monochrome priority mode machine configuration. (the default for the [Output Color] is [Black & White] or [No Default]) Monochrome : 6.9 seconds Color...
- Page 641 Detect], the printing speed for the first page will be slower. It may result in low productivity when using <ApeosPort-V C6676, DocuCentre-V C6676> the center tray - upper Paper Tray 1 - 4, 6 : Continuous 1 sided copy/same magnification for 2-sided copying.
- Page 642 16 Appendix Continuous Copy Speed <ApeosPort-V C5576, DocuCentre-V C5576> Important Paper Tray 1 - 4, 6 : Continuous 1 sided copy/same magnification The speed may be [Monochrome] [Color] reduced due to image B5 , A4 55 sheets/minute 50 sheets/minute quality adjustment.
- Page 643 Specifications Continuous Copy Speed <ApeosPort-V C3376, DocuCentre-V C3376> Important Paper Tray 1 - 4, 6 : Continuous 1 sided copy/same magnification The speed may be [Monochrome] [Color] reduced due to image B5 , A4 35 sheets/minute 35 sheets/minute quality adjustment.
- Page 644 16 Appendix Continuous Copy Speed <ApeosPort-V C2276, DocuCentre-V C2276> Important Paper Tray 1 - 4, 6 : Continuous 1 sided copy/same magnification The speed may be [Monochrome] [Color] reduced due to image B5 , A4 25 sheets/minute 25 sheets/minute quality adjustment.
- Page 645 Specifications Power Supply <ApeosPort-V C7776/C6676, DocuCentre-V C7776/C6676> AC 220 - 240 V ±10%, 10 A, 50/60 Hz / 110 V ±10%, 12.5 A + 7.5 A, 60 Hz (2 power supplies) <ApeosPort-V C5576/C4476/C3376/C3374/C2276, DocuCentre-V C5576/ C4476/C3376/C3374/C2276> AC 220 - 240 V ±10%, 10 A, 50/60 Hz / 110 V ±10%, 15 A, 60 Hz (1 power supply) Power Consumption <ApeosPort-V C7776/C6676, DocuCentre-V C7776/C6676>...
- Page 646 16 Appendix Maximum: Paper Size SRA3 (320 x 450 mm), 12.6 x 17.7" (320 x 450 mm), 12 x 18" (305 x 457 mm), A3 [Bypass Tray: 12 x 19" (305 x 483mm), 320 x 1,200 mm Minimum: [Bypass Tray: Postcard, Envelope (120 x 235 mm)] Image Loss Width: Top edge: 4 mm, Bottom edge: 2 mm, Left and Right edges: 2 mm...
- Page 647 Specifications Operating System Standard : PCL6 Microsoft® Windows Server® 2003, Microsoft® Windows Server® 2008, Microsoft® Windows Vista®, Microsoft® Windows® 7, Microsoft® Windows® 8, Microsoft® Windows® 8.1, Microsoft® Windows Server® 2003 x64, Microsoft® Windows Server® 2008 x64, Microsoft® Windows Vista® x64, Microsoft®...
- Page 648 16 Appendix Connectivity Standard: Ethernet (100BASE-TX/10BASE-T), USB 2.0 Optional: Ethernet (1000BASE-T) Bidirectional parallel (IEEE1284-B) *1 : USB 2.0 is supported by Windows Server® 2003, Windows Server® 2008, Windows ® Vista®, Windows® 7, Windows® 8, Windows 8.1, Windows Server® 2003 x64, Windows Server®...
- Page 649 Microsoft® Windows® 7 x64, Microsoft® Windows Server® 2012 x64, ® ® Microsoft Windows Server 2012 R2 x64, Microsoft® Windows® 8 x64, ® ® Microsoft Windows 8.1 x64 Note • For information about the latest supported OS, refer to the Fuji Xerox Web site.
- Page 650 OS X 10.8 Mountain Lion, OS X 10.9 Mavericks, OS X 10.10 Yosemite* *: Supports FTP protocol only. Note • For information about the latest supported OS, refer to the Fuji Xerox Web site. File Format: Monochrome binary : TIFF (Compression type: MH, MMR),...
- Page 651 Mac OS X 10.5/10.6, Mac OS X 10.7 Lion, OS X 10.8 Mountain Lion, OS X 10.9 Mavericks, OS X 10.10 Yosemite Note • For information about the latest supported OS, refer to the Fuji Xerox Web site. Internet Fax Function...
- Page 652 16 Appendix Output Format Format TIFF-FX Compression method : MH, MMR, JBIG Profile TIFF-S, TIFF-F, TIFF-J Protocol Transmission : SMTP, Reception: SMTP, POP3 Connectivity Standard : Ethernet 100BASE-TX/10BASE-T Optional : Ethernet 1000BASE-T IP Fax (SIP) Function Sending Document Size A3, B4, A4, Long document (Maximum 600 mm) Scanning Resolution Same as the Fax Function...
- Page 653 Specifications Feeding Speed A4 1 sided: <ApeosPort-V C3376, DocuCentre-V C3376> Monochrome 35 sheets/minute Color 35 sheets/minute <ApeosPort-V C3374, DocuCentre-V C3374> Monochrome 30 sheets/minute Color 30 sheets/minute <ApeosPort-V C2276, DocuCentre-V C2276> Monochrome 25 sheets/minute Color 25 sheets/minute A4 2 sided: <ApeosPort-V C3376, DocuCentre-V C3376> Monochrome 23 sheets/minute Color...
- Page 654 16 Appendix Feeding Speed A4 1 sided: <ApeosPort-V C7776, DocuCentre-V C7776> Monochrome 70 sheets/minute Color 70 sheets/minute <ApeosPort-V C6676, DocuCentre-V C6676> Monochrome 65 sheets/minute Color 65 sheets/minute <ApeosPort-V C5576, DocuCentre-V C5576> Monochrome 55 sheets/minute Color 50 sheets/minute <ApeosPort-V C4476, DocuCentre-V C4476>...
- Page 655 Specifications Stacker Capacity Unstapled sheets 500 sheets 250 sheets A3 or larger 200 sheets Mixed size 250 sheets Stapled sheets 30 sets * : With paper of a larger size delivered on paper of a smaller size. Important • When using P paper Staple Capability 50 sheets (90 gsm or less)
- Page 656 16 Appendix Sheets per subset 2-15 sheets (Crease + Staple), 1-5 sheets (Crease) Booklet Finishing Paper size Maximum: A3, 11 x 17", Minimum : A4, Letter Paper weight 64 - 80 gsm (Crease + Staple) 64 - 105 gsm (Crease) Important •...
- Page 657 Specifications Staple Capability 50 sheets (90 gsm or less) Note • When the C3 Finisher Staple Unit 65 Sheets (optional) is installed, at the maximum of 65 sheets can be stapled. Depending on the paper type, copies may not be aligned or stapled properly. •...
- Page 658 16 Appendix C3 Finisher with Booklet Maker (optional) Type Output tray x 1 Sorting/Stacking Finisher tray x 1 Sorting (Offset available) Stacking (Offset available) Booklet tray x 1 Sorting/Stacking Paper Size Output tray Maximum 12 x 19" (305 x 483 mm) Minimum Postcard Finisher tray...
- Page 659 Specifications *1, *2 Number of holes : 2-hole/4-hole punch or 2-hole/3-hole punch (US Punch Specifications) Paper size : A3, 11 x 17", B4, A4 , A4 , 8.5 x 11", 8.5 x 11" , B5 , 7.25 x 10.5", 8 x 10", 16K, Cover A4, 9 x 11", 215 x 315 mm, 8.5 x 13", Legal (8.5 x 14"), 11 x 15", 8K * : The 3 holes (optional) are not available.
- Page 660 16 Appendix Paper Capacity Tri-fold: 40 sheets Important • When using 64 gsm paper Power / Maximum power AC220V ± 10%, 1.0A, 50/60Hz common, 100W or less consumption Important • When using Folder Unit CD1, power supply separate from the main unit is required.
-
Page 661: Printable Area
Printable Area Printable Area This section describes the area on paper that can be printed. Standard Printable Area The standard printable area is the area of a sheet of paper excluding the 4.0 mm margins on all four edges of paper. For SRA3 paper (width of 320 mm), the printable area of the paper is the area excluding the 11.5 mm left and right margins. -
Page 662: Internal Fonts
16 Appendix Internal Fonts This section lists the fonts pre-installed on the machine. For more information on the optional HP-GL/2 and PCL fonts, refer to "PCL Emulation" (P.699) and "HP-GL/2 Emulation" (P.707). Stroke fonts European Stroke fonts (for PCL5 and HP-GL/2) Outline Euro- ESC/P-K... - Page 663 Internal Fonts Times New Bold Outline Euro- CG Times fonts pean CG Times Italic Times New Bold Italic Symbol CG Times Bold CG Times Bold Italic Wingdings Univers Medium Line Printer Univers Medium Italic Times Roman Univers Bold Times Italic Times Bold Univers Bold Italic Univers Medium Condensed...
-
Page 664: Optional Components
16 Appendix Optional Components The following table shows the optional components available. To purchase these options, contact our Customer Support Center. Product Name Description Duplex Automatic Document Scans multi-page duplex documents internally capturing both Feeder B1-PC sides at once. Large Size UI Kit A control panel with 10.4 inch SVGA color touch screen. - Page 665 Optional Components Product Name Description IC Card Gate Installation Kit A kit of a table to load IC Card Reader. This is installed on the right front of the machine. Full Stack Sensor Detects and tells you whether the stack is full. English Kit Allows the machine to support English.
- Page 666 16 Appendix Product Name Description Stamp Kit SP Stamps on a document scanned with Duplex Automatic Document Feeder B1-PC to send as a fax. IP FAX[SIP] Kit Adds the IP Fax (SIP) feature to the machine. Server Fax Kit Adds the Server Fax feature to the machine. Copy Management Prints dates or serial numbers on all the pages of confidential Expansion Kit...
-
Page 667: Fold Position Adjustment
Fold Position Adjustment Fold Position Adjustment This section describes how to adjust the fold position. You can adjust the fold position for each paper type, and save 10 types of adjusted values. You can assign a set type to each tray. You can adjust the fold position for single fold, booklet, C fold, Z fold, Z fold half sheet. -
Page 668: Single Fold Position Adjustment
16 Appendix Select [Name], and select [Change Settings]. Enter the type name, and then select [Save]. Note • We recommend you to use a name such as "Single Fold Plain" that allows you to know what the content is. Select the fold type, and then select [Change Settings]. For details on making each fold adjustment, refer to the following sections. -
Page 669: Booklet Position Adjustment
Fold Position Adjustment Select [Long at Left] or [Long at Right], and enter the value you measured in the step 5 in [Value A Before Adjustment]. Select [Adjust]. Select [Sample Printout] again. Select the tray in which you loaded paper and press the <Start> button. The sample is printed. - Page 670 16 Appendix Select the tray in which you loaded paper, select [16-Sheet Stack], and press the <Start> button. The sample is printed. Select [Close]. Check the sample printout, measuring the position misaligned amount for 2-sheet stack and 16-sheet stack. Select [Booklet Fold State (2 Sheets)]. Select the state of the fold and staple position of the printout, and enter the 2-sheet stack misalignment amount you measured in step 6...
-
Page 671: C Fold Position Adjustment
Fold Position Adjustment Note • When you configure settings under [System Settings] or [Setup] and then press the <Services Home> button, the screen directly goes back to the Services Home screen. C Fold Position Adjustment Adjust the C fold position. Select [C Fold - A4 ] or [C Fold - 8.5x11"... -
Page 672: Z Fold Position Adjustment
16 Appendix Confirm the result of sample printout. Adjust the alignment again if necessary. (Steps 5 to 11) Select [Save]. Select [Close] until the Services Home screen is displayed. Note • When you configure settings under [System Settings] or [Setup] and then press the <Services Home> button, the screen directly goes back to the Services Home screen. -
Page 673: Z Fold Half Sheet Position Adjustment
Fold Position Adjustment Select [Sample Printout] again. Select the tray in which you loaded paper, and press the <Start> button. The sample is printed. Select [Close]. Confirm the result of sample printout. Adjust the alignment again if necessary. (Step 5 to 11) Select [Save]. - Page 674 16 Appendix Enter the value you measured in step 5 in [Values A & B Before Adjustment], and the value to which to adjust in [Desired Values A & Important • Set value B so that an edge of the paper does not extend beyond a fold position of the paper.
-
Page 675: Adjust Image Transfer
Adjust Image Transfer Adjust Image Transfer This section describes how to adjust the transfer output value. You can specify the transfer output value manually or by scanning the sample printout. This is useful when the toner image does not transfer to the paper properly. Adjusting the Transfer Output Value You can specify the image transfer output value for each paper type. - Page 676 16 Appendix Select the paper type, and then select [Close]. Select [Print Sample]. Select the paper size, load paper of that size in Tray 5 (Bypass), and then select [1 Sided] or [2 Sided]. Press the <Start> button. Side1 The print sample will be printed. Note •...
- Page 677 Adjust Image Transfer Enter the [Side 1] and the [Side 2] values you selected in step 10. Select [Adjust]. The specified transfer output values will be applied when the paper type of the job is the same as the paper type selected in step 7. Select [Close].
- Page 678 16 Appendix Select the paper type, and then select [Close]. Select [Print Sample]. Select the paper size, load paper of that size in Tray 5 (Bypass), and then select [1 Sided] or [2 Sided]. Press the <Start> button. Side1 The print sample will be printed. Note •...
- Page 679 Adjust Image Transfer Place five or more blank sheets of the same size as the print sample over the print sample. Then close the document cover and select [Start]. After the print sample is completely scanned, remove the print sample and the blank sheets. When the sample is printed on both sides of the sheet, perform steps 11 and 12 for each side of the sample printout.
-
Page 680: Esc/P-K Emulation
16 Appendix ESC/P-K Emulation This section describes how to use ESC/P-K emulation. Emulation This section describes the printer language emulations available on the machine. Print data conforms to certain rules (grammars). These rules (grammars) are called printer languages. The machine supports two types of printer languages: a page description language, which is used to create images on a page-by-page basis, and an emulation, which is used to achieve the print results similar to those of other printers. -
Page 681: Fonts
ESC/P-K Emulation Interface-dependent You can set a printer language for each host interface by using CentreWare Internet Services. The machine switches to a printer language corresponding to the host interface that received data. Fonts This section explains the fonts used for emulation. Available fonts The following fonts can be used for ESC/P-K emulation: ... -
Page 682: Esc/P-K Emulation Settings
16 Appendix The Pages per Side feature can be used in the ESC/P-K emulation mode. In the ESC/P-K mode, 2 Up can be used. Form Overlay In the ESC/P-K mode, you can register an original form on the machine, and overprint the form on a printout. - Page 683 ESC/P-K Emulation Item Setting Item Value Number Paper tray Sets the paper tray to be used for printing. : Auto [1] (Default) : Tray 1 : Tray 2 : Tray 3 : Tray 4 : Tray 5 : Tray 6 (HCF B1) If printing from Tray 5, instruct printing and then operate the machine to start printing.
- Page 684 16 Appendix Item Setting Item Value Number Paper size Sets the size of paper to be printed. This setting can be made only when [Paper Tray] is set to [Auto] or [Tray 5]. This setting can be configured only for cut sheets.
- Page 685 ESC/P-K Emulation Setting Item Item Number Value Reduce/Enlarge Sets the print magnification. (Reduce/ [0] (Default) : Preset % Enlarge mode) : Variable % : Fit to Cut Sheet [Preset %] is a magnification automatically calculated based on [Original Size] and [Paper Size], and reduces/enlarges the printable area of the document to fit in the printable area of the output paper.
- Page 686 16 Appendix Setting Item Item Number Value 2 Sided printing Sets the 2 sided printing. [0] (Default) : Off : Head to Head : Head to Toe Important • When [Postcard] is selected for [Paper Size], [Head to Head] and [Head to Toe] cannot be selected.
- Page 687 ESC/P-K Emulation Setting Item Item Number Value ESCP switch Sets the position to start printing at 8.5 mm or 22 mm below the top edge of (Paper feed paper. position) [0] (Default) : 8.5 mm : 22 mm Sets the action to be executed when a CR command is received. (CR feature) [0] (Default) : Carriage return : Carriage return and linefeed...
-
Page 688: Magnification Table
16 Appendix Setting Item Item Number Value Form Type Sets the form type. [0] (Default) : ESC/P-K Punching Select the position for punching holes. [0] (Default) : Off : Top : Bottom : Left : Right Number of holes Select the number of punch holes. [0] (Default) : 2 holes : 3 holes : 4 holes... - Page 689 ESC/P-K Emulation 8.5 x 13" Long edge Short edge 8.5 x 11" Long edge Short edge Postcard Long edge Short edge 15 x 11" Long edge Short edge 15 x 12" Long edge Short edge 10 x 11" Long edge Short edge 10 x 12"...
- Page 690 16 Appendix Preset % (2-Up Printing) Document Paper Size A3/2 A4/2 A5/2 B4/2 B5/2 11 x 17" 8.5 x 14" 8.5 x 13" 8.5 x 11" Postcard Size Long edge Short edge Long edge Short edge Long edge Short edge Long edge Short edge Long edge...
- Page 691 ESC/P-K Emulation Fit to Cut Sheet Document Paper Size 11 x 17" 8.5 x 14" 8.5 x 13" 8.5 x 11" Postcard Size Long edge Short edge Long edge Short edge Long edge Short edge Long edge Short edge Long edge Short edge 11 x 17"...
- Page 692 16 Appendix Fit to Cut Sheet (When 2 Up is specified) Document Paper Size A3/2 A4/2 A5/2 B4/2 B5/2 11 x 17" 8.5 x 14" 8.5 x 13" 8.5 x 11" Postcard/ Size Long edge Short edge Long edge Short edge Long edge Short edge Long edge...
-
Page 693: Paper Size And Number Of Printable Characters
ESC/P-K Emulation Paper Size and Number of Printable Characters When the paper feed position is 22 mm Portrait Landscape Paper Size Characters Lines Characters Lines Postcard 11 x 17" 8.5 x 14" 8.5 x 13" 8.5 x 11" When the paper feed position is 8.5 mm Portrait Landscape Paper Size... - Page 694 16 Appendix Fit to Cut Sheet Portrait Landscape Paper Size Characters Lines Characters Lines Postcard 11 x 17" 8.5 x 14" 8.5 x 13" 8.5 x 11" Note • The values are based on 10-cpi character pitch and 6-lpi line pitch. •...
-
Page 695: Pdf Direct Print
This section describes the available settings with the PDF Direct Print feature. The settings configured here are valid when printing PDF files without using "ContentsBridge" provided by Fuji Xerox. Note • For information on printing PDF files using ContentsBridge Utility, refer to the manual provided on the Media (Software/Product Manual). - Page 696 [0] (Default) : PDF Bridge : PS [PDF Bridge] processes PDF files using the PDF Direct Print feature provided by Fuji Xerox. [PS] processes PDF files using the PostScript feature provided by Adobe. Note • This item is displayed when the Adobe PostScript 3 Kit (optional) is installed.
-
Page 697: Docuworks Direct Print
This section describes the available settings with the DocuWorks Direct Print feature. The settings configured here are valid when printing DocuWorks files without using "ContentsBridge" provided by Fuji Xerox. Note • For information on printing DocuWorks files using ContentsBridge Utility, refer to the manual provided on the Media (Software/Product Manual). - Page 698 16 Appendix Item Setting Item Value Number Layout Sets the layout for printing. [0] (Default) : Auto % : 2-up : 4-up : 100% (size-by-size) The [Auto %] setting automatically calculates the largest magnification possible to fit to the output paper size. The [2-up] setting prints two pages onto one sheet of paper.
-
Page 699: Pcl Emulation
PCL Emulation PCL Emulation Emulation This section describes the printer language emulations available on the machine. Print data conforms to certain rules (grammars). These rules (grammars) are called printer languages. The machine supports two types of printer languages: a page description language, which is used to create images on a page-by-page basis, and an emulation, which is used to achieve the print results similar to those of other printers. -
Page 700: Fonts
16 Appendix Fonts Available fonts The following fonts can be used for PCL emulation: Alphanumeric fonts CG Times Univers Bold Condensed CG Times Italic Univers Bold Condensed Italic CG Times Bold Antique Olive CG Times Bold Italic Antique Olive Italic ... -
Page 701: Output Feature
PCL Emulation Line Printer ITC Avant Garde Book Oblique Times Roman ITC Avant Garde Demi Times Italic ITC Avant Garde Demi Oblique Times Bold ITC Zapf Chancery Medium Italic Times Bold Italic ITC Zapf Dingbats ... -
Page 702: Pcl Settings List
16 Appendix PCL Settings List The following table describes the parameters that can be set with the mode menu. Parameter Item No. Value Paper tray Sets the paper tray to be used for printing. [0] (Default) : Auto : Tray 1 : Tray 2 : Tray 3 : Tray 4... - Page 703 PCL Emulation Parameter Item No. Value Orientation Set the orientation of paper. [0] (Default) : Portrait : Landscape 2 Sided printing Sets the 2 sided printing. [0] (Default) : Off : On...
- Page 704 16 Appendix Parameter Item No. Value Default font : CG Times [43] : Symbol : CG Times Italic [44] : Wingdings [45] : Line Printer : CG Times Bold : CG Times Bold Italic [46] : Times Roman [47] : Times Italic : Univers Medium : Univers Medium Italic [48]...
- Page 705 PCL Emulation Parameter Item No. Value Symbol set [0] (Default) : Roman 8 [18] : Microsoft : ISO 8859-1 Latin 1 Publishing [19] : Math 8 : ISO 8859-2 Latin 2 : ISO 8859-9 Latin 5 [20] : PS Math : ISO 8859-10 Latin 6 [21] : Pi Font...
- Page 706 16 Appendix Parameter Item No. Value Binding Sets binding when printing 2 sided. You can select [LEF] or [SEF] for 2 sided printing. Select according to the edge to be bound. Unifies the leading direction of the image on the front and rear sides of the paper at the long edge of the paper for LEF and at the short edge of the paper for SEF.
-
Page 707: Hp-Gl/2 Emulation
HP-GL/2 Emulation HP-GL/2 Emulation Emulation This section describes the printer language emulations available on the machine. Print data conforms to certain rules (grammars). These rules (grammars) are called printer languages. The machine supports two types of printer languages: a page description language, which is used to create images on a page-by-page basis, and an emulation, which is used to achieve the print results similar to those of other printers. -
Page 708: Output Feature
16 Appendix Font Caching To ensure hi-speed printing, outline fonts of up to a certain size are cached. Outline fonts are converted into bitmap data temporarily and then printed. To minimize this processing time, the processed bitmap data is saved in the memory. This process is called font caching. The saved bitmap data is deleted when you turn the machine off or reset it. -
Page 709: Hp-Gl/2 Emulation Settings
HP-GL/2 Emulation Paper Margin The paper size is set to A series paper by factory default. If the print data is larger than the active coordinates area, the machine prints the data on the next larger A series paper (for example, the next larger size of A4 is A3). - Page 710 16 Appendix Parameter Item No. Value Paper size Sets the default paper size. Only available when [Paper tray] is set to [Auto] or [Tray 5]. Only cut sheet can be set. : A3 [4] (Default) : A4 : A5 [14] : B4 [15] : B5...
- Page 711 HP-GL/2 Emulation Parameter Item No. Value No. of prints Sets the number of copy to be printed. [1] - [250] (Default: 1) : 1 - 250 Output Sets the output tray for the printouts. destination [0] (Default) : Center Tray - Lower : Side Tray : Center Tray - Upper (optional) [80]...
- Page 712 16 Appendix Parameter Item No. Value Print control Selects a graphics language. This setting affects to IW, OW, and UC of HP-GL/ (HP-GL mode) 2 commands. [0] (Default) : HP-GL : HP-GL/2 Note • To print HP-GL/2 command that does not include BP command, select [HP- GL/2].
- Page 713 HP-GL/2 Emulation Parameter Item No. Value Print control 159 (Scaling) Sets whether the original size is enlarged or reduced so that the document size fits the paper size. : OFF [1] (Default) : ON Selects the document size for auto scaling: A series paper (A0, A1, A2, A3, A4, (Scaling mode) and A6) or the active coordinate area which is determined accordance with the setting selected in [Area Determination Mode].
- Page 714 16 Appendix Parameter Item No. Value Folding/180 Specify the Z fold half sheet and whether to rotate landscape documents in degree rotation 180 degrees. [0] (Default) : None : Z fold half sheet (Right bind/Top bind) : Z fold half sheet (Left bind/Bottom bind) : None (180 degrees rotation) : Z fold half sheet (Right bind/Top bind, 180 degrees rotation) : Z fold half sheet (Left bind/Bottom bind, 180 degrees rotation)
-
Page 715: Hard Clip Area
HP-GL/2 Emulation Parameter Item No. Value Pen attributes 900-915 Set the process for when pens' lines intersect for 16 pens (No. 00 to 15). No. (Pen 00 denotes Item No. 900. intersects) [0] (Default) : None (No. 0-No.15) : Intersect : Round : Cut [None]... -
Page 716: Printable Area
16 Appendix Paper Defines a size same as the paper size as the hard clip area. However, the area that allows actual printing is within the printable area. The hard clip area can be set either with HP-GL emulation mode settings or by the specified hard clip command "&I". - Page 717 HP-GL/2 Emulation Width Top-right X, Top-right Y Short-side Height Long-side Physical paper size Printable Area Bottom-left X, Bottom-left Y (0, 0) Paper Paper Length Coordinate Value (1/7200 inch) size (1/7200 inch) X Axis Y Axis Margin Printable Area Top-right Edge Margin Width Height...
-
Page 718: Auto Layout
16 Appendix Auto Layout This section explains Auto Layout. What is Auto Layout? Auto Layout is a function that evaluates document size using the HP-GL data entered from a host system and enlarges or reduces the document size corresponding to the paper size so that data plotted is placed in the center of the paper. - Page 719 HP-GL/2 Emulation The area specified by the last IW command in the data becomes the active coordinates area. If there are no IW commands in the data, the active coordinates area is determined by Adapted. The coordinates encompassing all areas specified by IP commands in the data becomes the active coordinates area.
- Page 720 16 Appendix If it is a Paper Size Set the document size from the obtained active coordinates area and the origin point setting. The document size can be selected from six sizes of A series paper (A0, A1, A2, A3, A4, or A5).
- Page 721 HP-GL/2 Emulation 2) Because there are no font size specification commands and all pen widths are 0.1 mm in the above example, add the height/2 of the default font size for A3 size paper (75 plotter units) to the active coordinates area obtained in step 1. The active coordinates area obtained in step 2 is -8474,-6013,8474,6013.
- Page 722 16 Appendix How to Determine the Scaling Ratio When auto scaling is being used, although the scaling ratio is determined by document size and paper size, it differs according to the scale mode setting. Note • To activate scaling, set the scaling to ON on the [HP-GL/2 - Programming] screen. If it is set to OFF, it is plotted at the same scale (100%).
- Page 723 HP-GL/2 Emulation Examples of Combinations of Each Function The following are examples showing the print results that can be achieved by combining various functions. Document: Auto, Coordinate Origin: 0 Degrees, Scaling Mode: Paper Size, Scaling: ON Print Area Document Size Paper Size ...
- Page 724 16 Appendix Document: Auto, Coordinate Origin: 0 Degrees, Scaling Mode: Active Coordinate Area, Scaling: OFF Print Area Active Coordinate Area determined by Paper Size entered data...
-
Page 725: Notes And Restrictions
Notes and Restrictions Notes and Restrictions This section describes the notes and restrictions to observe when using the machine. Notes and Restrictions on the Use of the Machine Notes on Switching Off the Main Power and Power Power off processing is performed internally on the machine for a while after the power is switched off. - Page 726 16 Appendix Output Destination When you change the finisher to install, reconfigure the output destination under [Tools] > [System Settings] > [Copy Service Settings] > [Copy Defaults] > [Output Destination]. You can also change the output destination for Print E-mail, Private Folder Printed Files, and Fax Received as required.
- Page 727 Notes and Restrictions To connect a USB memory device via a USB cable, use the USB Hub (optional). When the machine is equipped with the USB Hub (optional), up to two USB devices can be connected to the machine at the same time, although the total of USB connectors are three, one USB memory slot on the control panel and two USB ports with the USB Hub (optional) on the back of the machine.
- Page 728 16 Appendix - A custom button to which the Network Scanning or Job Flow feature is assigned (ApeosPort Series Models only) - Address Book for the Fax/Internet Fax, E-mail, and Scan to PC services - Buttons that cannot be selected - The [Language] button on the Services Home screen - The [Screen Brightness] button on the Services Home screen - The [Browse] button of the Scan to PC service...
- Page 729 Notes and Restrictions The <Power Saver> button still lights up when you perform the operations which do not light up the touch screen such as printing command from a computer. A message does not appear on the touch screen if you open and close the top cover of the document feeder when the document feeder is deactivated (such as when the service to use a scanner is not selected).
-
Page 730: Notes And Restrictions On The Use Of The Copy Feature
16 Appendix When [Tools] > [System Settings] > [Connectivity & Network Setup] > [Port Settings] > [USB] > [USB - Print Mode] is set to any option other than [Auto], exiting the Power Saver mode activates the entire machine. ... -
Page 731: Notes And Restrictions On The Use Of The Print Feature
Notes and Restrictions When the reduced size is specified to copy an ID card, the machine may copy the ID card in a different orientation from the original orientation depending on the magnification ratio specified. Notes and Restrictions on the Use of the Print Feature ... - Page 732 - This feature supports the features of PDF 1.6 created by Adobe Acrobat 7 or later. However, it does not support the features of PDF 1.7 (Adobe Acrobat 8 and 9). - PDF Bridge, that is provided by Fuji Xerox, of the machine supports the features of PDF 1.6 such as transparent object.
-
Page 733: Notes And Restrictions On The Use Of The Scan Features
Notes and Restrictions ThinPrint To install "ThinPrint .print" to Windows Server 2003 or Windows Server 2008, a ".print Application Server Engine" license is required. ThinPrint can operate in an IPv4 environment, but not in an IPv6 environment. ... - Page 734 16 Appendix Retrieving Files from Folder When [Delete Files After Retrieval] is set to [No], the same file can be accessed by multiple clients. When [Delete Files After Retrieval] is set to [Yes], only one client can access any given file. The file that is being imported by a client cannot be seen by other clients.
- Page 735 Notes and Restrictions Neither the Media Print - Text nor Media Print - Photos feature can be used while the Store to USB service is in progress. The Store to USB service cannot be used as well while the Media Print - Text or Media Print - Photos feature is in progress.
- Page 736 16 Appendix PKI Encryption and PKI Signature of Scan Files Signature using the electronic stamp of DocuWorks is not supported. Acrobat Approval is not supported. PKI Encryption and PKI Signature of PDF and DocuWorks Documents PKI (Public Key Infrastructure) encryption of PDF is not available. A certificate is not used ...
- Page 737 Notes and Restrictions If you cancel the scanning of a document by pressing the <Stop> button on the control panel or the [Delete] button in the touch screen, selecting [Preview] may not display all the scanned files. Scanning Documents with a Small Number of Colors (the Specific Color Feature) ...
- Page 738 16 Appendix Thumbnail View Files in a folder may not be displayed in thumbnail view in the following cases. In those cases, display them in list view. - Some file is not displayed in thumbnail view even though it is stored in the folder. - Characters and images are not correctly displayed because they are scaled down from the actual sizes.
-
Page 739: Notes And Restrictions On The Use Of The Fax Feature
Notes and Restrictions machine. While the standby screen is displayed, the machine does not execute Auto Clear or enter the Power Saver mode. After being scanned, remove the originals and then select [OK] on the [Remove Your Originals] screen. You cannot execute any operation without selecting [OK]. ... - Page 740 16 Appendix Features Supported by F Code Communication F Code communication supports the following features: the Send Fax - Remote Folder, Secure Polling, Store File - Local Folder, Relay Broadcast, and Remote Relay Broadcast features. Fax Immediate Reception If the machine's memory capacity becomes insufficient to receive fax data, the machine automatically switches into immediate reception mode.
-
Page 741: Notes And Restrictions On The Use Of The E-Mail/Internet Fax Feature
Notes and Restrictions screen. Specify a recipient using an address number (Speed Dial) or the Address Book under this setting. You cannot specify multiple recipients when [On] is set for [Restrict Multi-Address Fax Transmission:] to prevent faxes from being sent to undesired destinations. ... - Page 742 16 Appendix - ApeosPort-V C7776/C6676/C5576/C4476/C3376/C3374/C2276 - DocuCentre-V C7776/C6676/C5576/C4476/C3376/C3374/C2276 - ApeosPort-V C7775/C6675/C5575/C4475/C3375/C3373/C2275 - DocuCentre-V C7775/C6675/C5575/C4475/C3375/C3373/C2275 - ApeosPort-IV C5575/C4475/C3375/C3373/C2275 - DocuCentre-IV C5575/C4475/C3375/C3373 - ApeosPort-IV C7780/C6680/C5580 - DocuCentre-IV C7780/C6680/C5580 - ApeosPort-IV C4430 - DocuCentre-IV C4430 - DocuCentre-IV C2260 - ApeosPort-IV C5570 - DocuCentre-IV C5570 - ApeosPort-IV C4470 - DocuCentre-IV C4470 - ApeosPort-IV C3370...
- Page 743 Notes and Restrictions When [Resend Attempts] is set to [On] and the status of the Internet Fax Direct feature enters Resend Required, the subsequent jobs will not be executed until the jobs in Standby status finish. Transmission results of Internet faxes cannot be listed on Transmission Report - Job Undelivered or Transmission Report by recipients.
- Page 744 16 Appendix Administration mode, you cannot receive the confirmation result even if [Read Receipts] is set to [On]. Fax Gateway Feature This feature can only be used when the e-mail receiving protocol is SMTP on the Internet Fax-enabled machine that faxes are sent to. If an e-mail was sent by converting it into fax, and if it was not delivered successfully to the recipient, the e-mail that was received originally will be deleted.
- Page 745 Notes and Restrictions By specifying the domains from which e-mail can be received, you automatically can reject e-mail sent from other addresses. For information on restricting domains from which e-mail can be received, refer to "Domain Filtering" (P.241). Notes on E-mail Receptions A large volume of e-mail may not be printed if the memory capacity is insufficient.
-
Page 746: Notes And Restrictions For Ip Fax (Sip)
16 Appendix Notes and Restrictions for IP Fax (SIP) This section describes notes and restrictions to observe when using IP Fax (SIP). IP Fax (SIP) Feature In IP Fax (SIP) transmissions, protocols used for call connection are SIP and for data communication is T.38. -
Page 747: Notes And Restrictions When Connecting With Internet Service Provider
VoIP gateways do not work in an IPv6 environment. If settings other than specified by Fuji Xerox are configured for a dial peer or a voice port on a VoIP gateway, the VoIP gateway does not work. ... - Page 748 16 Appendix Be sure to assign an exclusive e-mail account to the machine for POP reception. Sharing an e-mail account with other users may cause troubles. Be sure to set size limitation for sending e-mail. Although the applicable e-mail size may vary depending on the ISP used, we recommend that you set a small value.
-
Page 749: Notes And Restrictions On The Interrupt Mode
Notes and Restrictions Setting is not required. Depending on settings of the router and the DHCP server, registration may be required. Confirm operation rules for the router and DHCP server you are using. When access is restricted by MAC address, registration on the DHCP server may be required. - Page 750 16 Appendix Jobs can/cannot be executed during interruption are as follows: Job Instruction from Execution the Control Panel Copy Required Print Printing of a document instructed from a Required client computer Required Printing of a document instructed from the <Job Status> button > [Secure Print Jobs & More] Fax transmission, Broadcast Send Required...
-
Page 751: Notes And Restrictions On Folders
If the user name exceeds 39 characters, it may exceed 107 characters. - Windows 7 <system drive>\Users\<user name>\Documents\Fuji Xerox\Network Scan3 You can change the directory of the temporary file by: [File] > [Details] > [Other settings] > [Temporary Save in]... -
Page 752: Notes And Restrictions When Operating From Computers
16 Appendix Supporting Windows Server 2003, Windows Server 2008, Windows Server 2008 R2, Windows Server 2012, Windows Server 2012 R2, Windows Vista, Windows 7, Windows 8, or Windows 8.1 Comply with the following conditions: - RFC2616: Hypertext Transfer Protocol HTTP/1.1 (Standard connection/SSL connection/Proxy authentication) - RFC2617: HTTP Authentication: Basic and Digest Access Authentication (only Basic authentication is supported, the other authentications are not supported) -
Page 753: Notes And Restrictions On Job Flows
Notes and Restrictions When sending a document of different orientations using this feature, the machine may divide the document into multiple jobs in each size. (It depends on the application you use.) This feature does not support documents with covers. ... -
Page 754: Notes And Restrictions On The Security Features
16 Appendix - Resolution: [200 dpi] or [300 dpi] - Internet fax profile for sending Internet faxes: [TIFF-F] or [TIFF-J] Web Application feature (ApeosPort Series Models Only) The following conditions and restrictions are applied when you print files stored in a remote server. -
Page 755: Notes And Restrictions On The Authentication And Accounting Features
Notes and Restrictions - Color Scanning: [Black & White] - Resolution: [200 dpi] - 2 Sided Scanning: [2 Sided (Head to Head)] or [2 Sided (Head to Toe)] Allow User to Disable Active Settings (for Forcible Printing Features) This feature cannot apply to the ordinary print jobs. This feature is applicable to the jobs stored in the machine and then printed by the instruction from the touch screen, such as Copy, Secure Print, Private Charge Print, Print Stored File, Media Print - Text, and Media Print - Photos. -
Page 756: Notes And Restrictions For Using Tcp/Ip
16 Appendix When setting the network such as IP addresses with a host used under the Network Information Service (NIS), consult your NIS administrator. SMB Authentication When an IP address or a host name is used to designate the authentication server for SMB authentication, even if the domain name is incorrect, the authentication succeeds if the correct user name and passcode are entered. -
Page 757: Notes And Restriction For Using Secondary Ethernet (Optional)
Ethernet 1 and Ethernet 2. When you use the software which is not supplied by Fuji Xerox to check the machine usage status, please do not set IP address to avoid the duplication of machine information. Instead of IP address, set the machine-specific information such as UUID depending on the software you use. -
Page 758: Notes And Restrictions For Using Bonjour
16 Appendix Notes and Restrictions for Using Bonjour This section describes notes and restrictions to observe when using Bonjour. Supported Environment for Bonjour Bonjour is available on Printer Setup Tool (Print Center, Printer Setup Utility) of Mac OS X 10.5/10.6, Mac OS X 10.7 Lion, OS X 10.8 Mountain Lion, OS X 10.9 Mavericks, OS X 10.10 Yosemite, or Macintosh computers that use Safari. - Page 759 Notes and Restrictions The machine may be assigned an unavailable address, such as site local addresses (fec0::) or the documentation prefix (2001:db8::/32), as an autoconfigured IPv6 address or as an IPv6 DNS server address. The machine may use the DNS information for IPv4 rather than that for IPv6 if: the machine is in Dual Stack mode, the DNS information for both IPv4 and IPv6 is configured, the machine is to be communicate with a device that is specified using the FQDN, and the machine has just been turned on.
-
Page 760: Notes And Restrictions For Print E-Mail
16 Appendix Notes and Restrictions for Print E-mail Print E-mail The machine cancels receiving e-mails but does not display error codes when disk space is insufficient. -
Page 761: Passcode Setting For Extended Function
Passcode Setting for Extended Function Passcode Setting for Extended Function A passcode is required to use the extended function on the machine. Available Extended Function and Passcode Extended Function Passcode Fonts to Prevent Garbled Characters on Touch OMLTCNPLGXCG@ Screen Extensible Customization Function CXWDJAISBRRB@ Important •... - Page 762 16 Appendix Select [Software Options]. Enter the passcode for the extended function with the keyboard. Select [Reboot]. The setting of "Fonts to Prevent Garbled Characters on Touch Screen" is completed after rebooting the machine. If you are setting "Embedded Plug-ins", continue the steps below. After rebooting the machine, start CentreWare Internet Services.
- Page 763 Passcode Setting for Extended Function Click [Reboot Machine]. After rebooting the machine, the setting will be enabled.
-
Page 764: Using The Telephone
16 Appendix Using the Telephone This section describes how to use an external telephone connected to the machine with the Fax feature. Placing a Call The following describes how to place a call using the external telephone. To place a call, the following two methods can be used: ... - Page 765 Using the Telephone On the Services Home screen, select [Fax/ Internet Fax]. Select the [More Options] tab, and then select [On-hook (Manual Send/Receive)]. Specify the call destination. The call destination can be specified using the numeric keypad, address numbers, or one- touch buttons.
-
Page 766: Activity Report
16 Appendix Activity Report You can print activity reports to check whether a transmission is successfully completed or not. In the report, a remote terminal name and a result or a status of each operation are recorded by outgoing and incoming transmission. Note •... - Page 767 Activity Report Item Description Remote Station Information on recipient to which transmission is made is recorded in the following order of priority. Transmitting (speed dialing) 1. Recipient 2. Remote terminal name 3. G3 ID (including spaces) 4. Tel. No. 5.
- Page 768 16 Appendix Item Description Pages "-" is shown when the number of pages is 0. Transmitting The number printed on the left side of the slash "/" indicates the number of pages that were successfully transmitted. The number printed on the right side of the slash "/" indicates the number of total pages.
- Page 769 Activity Report Item Description Status The result of the operation is indicated. Completed : The operation ended normally. Busy : The recipient is busy or did not answer. Auto Send : The document is being re-sent and the set re- send times has not been exceeded.
-
Page 770: Ep System
EP System Electronic Partnership (EP) is a system to automatically control or maintain the machine by connecting the machine and the EP center of Fuji Xerox. You can use the EP system via the Internet. The following describes how to use the EP system on the machine. -
Page 771: Glossary
Glossary Glossary Term Description Border Limit One more sheet is used when the length of the transmitted (Page split threshold value) document exceeds the length of paper installed on the receiving terminal. A margin at the bottom of a received document can be eliminated so that the data can be printed on one page. - Page 772 16 Appendix Term Description Header A record of the sender. It is printed on the top edge of a received document. Image Color Matching. A color management software used with Windows 2000 and Windows Server 2003. It corrects device-dependent color differences to match the colors printed on your output with the colors displayed on your screen.
-
Page 773: Index
Index Index Numerics auditron reports ............125 authentication......... 138 2 pages up on receipt ............264 authentication feature is disabled ........442 2 sided color scanning calibration......110 authentication system setup..........231 2 sided copying (default value)........206 authentication/security settings ........322 2 sided printing ...............265 authorization groups............. - Page 774 border limit................264 connectivity ................648 bottom left cover..............605 connectivity & network setup..........213 broadcast and multi-poll report........174 constant velocity transport glass........104 broadcast checkbox on 1st tab......... 262 consumables..............76 broadcast report ..............127 consumables status notice (by e-mail)......358 broadcast starting rate ............
- Page 775 Index date stamp................209 dual color - non-target area color ........205 daylight savings ..............159 dual color - source color ............205 decoding passcode ..............181 dual color - target area color ..........205 default language..............163 duplex module................. 611 default print paper size............
- Page 776 FTP Client .................. 375 FTP port..................371 F code..................308 failed access log..............327 fault tone................... 161 G3 ....................269 fax billing data ................ 319 G3 line 1 to 3 - dial type ............270 fax comments list..............124 G3 line 1 to 3 - fax ID ............270 fax control .................
- Page 777 Index index ....................307 JPEG logical printers list ............121 inhibited paper ................58 JPEG settings list..............121 initialize hard disk..............176 internal fonts................662 internet fax control..............271 Kerberos server settings ............231 internet fax output destination........272 keyboard input restriction........... 165 internet fax path..............
- Page 778 machine status................ 116 machine timers................ 157 machine trouble..............457 odd page 2 sided..............189 machine’s e-mail address ......223 off-hook dialing............... 764 manual receive ................ 131 one touch button..............163 manual redial list - dial mode..........263 on-hook dialing ............... 764 manual redial list - saved entries ........
- Page 779 Index parallel ..................214 print reports ..............118 parallel interface............. 22 print service settings ............. 243 parallel port................346 print stored file ................ 181 passcode ..................138 print this sample list (secure watermark) ..... 183 passcode entry for control panel login ......328 print universal unique ID.............
- Page 780 reconfirm fax and internet fax recipient ...... 164 screen and button settings..........162 recording paper size .............. 651 screen brightness............37 reduce 8.5 x 11" original to A4.......... 265 screen default ................162 reduce and enlarge..............204 screen defaults ................ 250 reduce/enlarge presets..........
- Page 781 Index SOAP port .................. 382 tandem tray module ............. 607 software download..............200 TCP and IP - IP mode............220 software options..............176 TCP/IP ................351 software upgrade ..............177 text - paper supply - button 2 to 5........281 software version..............118 ThinPrint..................
- Page 782 unit (millimeters or inches)..........198 view accounts ................315 unregistered forms..............246 VoIP gateway .............390 unregistered user..............430 VoIP gateway setup.............. 228 unusable paper................59 UPnP discovery................ 217 URL file expiration ..............257 warm-up time ................636 usable paper................50 waste toner container .............76 USB..................
- Page 783 ApeosPort-V C7776/C6676/C5576/C4476/C3376/C3374/C2276 DocuCentre-V C7776/C6676/C5576/C4476/C3376/C3374/C2276 Administrator Guide ME7547E2-1 (Edition 1) June 2015 Fuji Xerox Co., Ltd. Copyright © 2015 by Fuji Xerox Co., Ltd.