Table of Contents
Advertisement
Available languages
Available languages
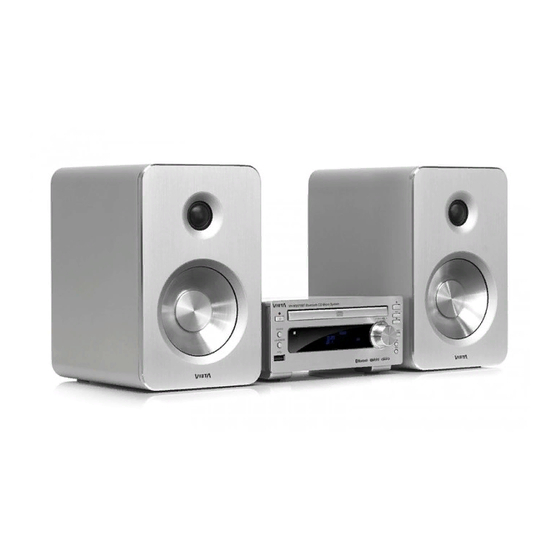
VH-MS570BT
Manual de usuario
Micro Sistema CD
User Manual
CD Microsystem
Le rogamos que lea el manual de usuario antes de utilizar el producto y que lo guarde para futuras consultas.
La operación de este equipo está sujeta a las siguientes dos condiciones:
(1) es posible que este equipo odispositivo no cause interferencia perjudicial y (2) este equipo o dispositivo
debe aceptar cualquier interferencia, incluyendo la que pueda causar su operación no deseada.
Please read the user manual first before using the product, keep well for future referring.
Advertisement
Chapters
Table of Contents

Related Manuals for VIETA VH-MS570BT


Summary of Contents for VIETA VH-MS570BT
- Page 1 VH-MS570BT Manual de usuario Micro Sistema CD User Manual CD Microsystem Le rogamos que lea el manual de usuario antes de utilizar el producto y que lo guarde para futuras consultas. La operación de este equipo está sujeta a las siguientes dos condiciones: (1) es posible que este equipo odispositivo no cause interferencia perjudicial y (2) este equipo o dispositivo debe aceptar cualquier interferencia, incluyendo la que pueda causar su operación no deseada.
- Page 2 Esta garantía tendrá validez solamente cuando se presente la factura de compra en la cual aparece el nombre del cliente, el centro distribuidor y la fecha en la que se realiza la compra del producto. VIETA AUDIO S.A. acepta repara durante el periodo de garantía, todos aquellos productos que presenten anomalías durante su utilización normal tal y como se detalla...
-
Page 3: Table Of Contents
Índice Advertencias de seguridad ......................4 Seguridad de la batería ........................6 Contenido del paquete ........................7 Introducción al producto ......................... 8 Introducción al mando de control remoto ..................9 Instalación de la batería ....................... 10 Alcance de la operación del control remoto ................. 10 Conexiones........................... -
Page 4: Advertencias De Seguridad
Advertencias de seguridad - Lea con atención todas las instrucciones antes de - Si derrama líquido sobre la unidad, puede provocar utilizar la unidad y guárdelas para consultas en el futuro. daños graves. Desconéctelo inmediatamente de la red eléctrica. Desconecte el enchufe de la red y consulte a - Conserve el manual. - Page 5 - Por favor, recicle las baterías adecuadamente Mantenimiento siguiendo las instrucciones contenidas en este - Compruebe que la unidad está desconectada de la manual. alimentación eléctrica antes de proceder a su limpieza. - No debe exponer las baterías (el paquete de pilas o - No utilice ningún tipo de trapo abrasivo o limpiador las baterías instaladas) a calor excesivo tal como luz abrasivo ya que podría dañar la superficie de la...
-
Page 6: Seguridad De La Batería
Seguridad de las baterías Utilizadas correctamente, las baterías domésticas No intente recargar baterías normales, ya son una fuente segura y fiable de energía portátil. Se sea con un cargador pueden producir problemas si se utilizan mal o con o aplicándolas calor. descuido, provocándose fugas o, en casos extremos, Pueden provocarse un incendio o una explosión. -
Page 7: Contenido Del Paquete
Contenido del paquete Verifique que todos estos elementos se encuentran dentro del embalaje. La unidad. Altavoces x 2. Mando a distancia. Cable del altavoz x 2. Pila incluida. Cable de audio. Antena FM. Adaptador AC. Manual de instrucciones. ESPAÑOL... -
Page 8: Introducción Al Producto
Introducción al producto 1. Botón fuente (SOURCE) 2. Botón Standby 3. Bandeja del disco 4. Botón reproducir/pausa Botón sintonización hacia delante 5. Botón abrir/cerrar 6. Botón Parar Botón sintonizar hacia atrás 7. Botón Volumen (LOUDNESS) 8. Conector USB 9. Sensor del mando remoto 10. -
Page 9: Introducción Al Mando De Control Remoto
Introducción al mando de control remoto 1. Botón Standby 2. Botón función CD (CD) 3. Botón función sintonizador (FM) 4. Botón modo MODO Botón selección Stereo/mono MODE 5. Botón Intro (INTRO) 6. Botón Volumen (LOUDNESS) 7. Botón Preajuste del Ecualizador (P-EQ) 8. -
Page 10: Instalación De La Batería
Instalación de la batería 1. Retire la tira de mylar aislante de la batería. Se • No coloque el control remoto sobre un objeto mojado. encuentra en la parte trasera inferior del mando de • No coloque el control remoto bajo la luz directa del control remoto. -
Page 11: Conexiones
Conexiones Precaución: Compruebe todas las conexiones antes de conectar la unidad a la toma de corriente alterna. Conexión de los altavoces Conecte el cable con cabeza roja a los terminales (+) y el cable con cabeza de otro color a los terminales (-). Precaución: * Para evitar el ruido, mantenga las antenas lejos del equipo, del cable de conexión y del cable de... -
Page 12: Funciones Eco-Energía/Standby
Funciones ECO-Energía/Standby ENCENDIDO / APAGADO Ajuste automático del reloj Cuando conecte la unidad por primera vez a la toma de Sintonice una emisora RDS, pulse y mantenga CC, la unidad entrará en el modo de espera. pulsado el botón DISPLAY . El reloj se actualizará automáticamente. -
Page 13: Cómo Escuchar Emisoras De Radio
Cómo escuchar emisoras de radio Podrá escuchar emisoras FM. Podrá sintonizar las 3. Pulse el botón para asignar un número a emisoras de forma manual, automática o eligiendo las esta emisora de radio. emisoras almacenadas en memoria. Nota: Si seleccione más de 20, el número de emisora a preajustar cambiará... -
Page 14: Funcionamiento Del Cd
Funcionamiento del CD Reproducción de CD 4. Pulse el botón PROG del mando a distancia para confirmar el número de pista a almacenar. 1. Gire el botón SOURCE de la unidad o pulse el 5. Repita los pasos 3 a 4 para seleccionar y almacenar botón CD del mando a distancia. -
Page 15: Reproducción Del Disco Mp3/Wma
Reproducción del disco MP3/WMA Nota: Repetir reproducción (disco MP3) • Podrá configurar la función Repetir reproducción UNA • La reproducción de música MP3/WMA desde el CD vez y TODAS sin más que pulsar el Botón MODO. se puede ver afectada debido al tipo y formato del disco o del tipo de grabación. -
Page 16: Reproducción Desde El Dispositivo Bluetooth
2. Active su dispositivo Bluetooth y seleccione el modo de búsqueda. 3. “VH-MS570BT” aparecerá en su dispositivo Bluetooth. 4. Seleccione“VH-MS570BT” y escriba “0000” como contraseña, en caso de que sea necesario. 5. Para desconectar la función Bluetooth pulse y mantenga pulsado el botón PAIRING del mando a distancia o desactive la función de su dispositivo... -
Page 17: Ajuste Del Temporizador Diario
Ajuste del Temporizador diario Mantenimiento Puede utilizar el temporizador de ajuste para hacer que Limpieza de la unidad la unidad se encienda automáticamente a una hora Nota: Compruebe que la unidad está totalmente determinada todos los días desde el modo standby. desconectada del enchufe eléctrico antes de proceder Cuando el temporizador de ajuste esté... -
Page 18: Resolución De Problemas
Resolución de problemas Si está teniendo problemas con su unidad, revise esta - Espere hasta que la condensación de humedad en la lista para localizar una posible solución antes de llamar lente haya desaparecido. al servicio técnico. - Sustituya o limpie el disco. Si no puede resolver el problema con los consejos que se dan aquí, o la unidad ha sufrido un daño físico, llame - Utilice un CD finalizado o un disco con el formato... -
Page 19: Especificaciones
Especificación Adaptador principal Entrada.....................AC 100-240V 50-60Hz 1,2A Salida....................DC 15V, 3A Unidad principal Banda de sintonización FM.............87,5~108 MHz Salida de potencia................25W x 2 THD....................≤ 1% Dimensiones..................16(An) x 7,8(Al) x 27,5(L) cm Altavoz Impedancia..................4Ω Potencia de entrada................25W Dimensiones..................13(An) x 21(Al) x 17,5(L) cm Nota: La información acerca de este producto puede modificarse sin aviso previo. - Page 20 TERMS OF GUARANTEE VIETA AUDIO S.A. guarantees its products for a period of 24 months. The guarantee period starts on the date of purchase of brand new products that have never been used by the first end user. This guarantee covers any possible manufacturing flaws for any Vieta products sold on Spanish territory by authorised distributors.
- Page 21 Contents Safety Warnings ........................... 22 Battery Safety Guidelines ......................24 Pack Contents ..........................25 Product Overview ......................... 26 Remote Control Overview ......................27 Installation of Battery ........................28 Connections..........................28 ECO-Power/Standby Features ..................... 30 Setting the Clock .......................... 30 Sound Quality ..........................30 Listening to Radio Broadcasts ......................
-
Page 22: Safety Warnings
Safety Warnings - Read all the instructions carefully before using the unit - If you spill any liquid into the unit, it can cause serious and keep them for future reference. damages. Switch it off at the mains immediately. Withdraw the mains plug and consult your dealer. - Retain the manual. - Page 23 - Please dispose of batteries correctly by following the - Do not use any type of abrasive pad or abrasive guidance in this manual. cleaning solutions as these may damage the unit’s surface. - Batteries (battery pack or batteries installed) shall not be exposed to excessive heat such as sunshine, fire or - Do not use liquids to clean the unit.
-
Page 24: Battery Safety Guidelines
Battery Safety Guidelines Used correctly, domestic batteries are a safe and Never attempt to recharge ordinary dependable source of portable power. Problems can batteries, either in a occur if they are misused or abused — resulting in charger or by applying leakage or, in extreme cases, fire or explosion. -
Page 25: Pack Contents
Pack Contents Make sure all of the following contents are included. The Unit Speakers x 2 Remote Control Speaker leads x 2 (battery included) FM Antenna Audio Cable User Manual AC Adaptor Instruction Manual ENGLISH... -
Page 26: Product Overview
Product Overview 1. Source Button (SOURCE) 2. Standby Button 3. Disc Tray 4. Play/Pause Button Tuning Forward Button 5. Open/Close Button 6. Stop Button Tuning Backward Button 7. Loudness Button (LOUDNESS) 8. USB Jack 9. Remote Sensor 10. LCD Display Lens 11. -
Page 27: Remote Control Overview
Remote Control Overview 1. Standby Button 2. CD Function Button (CD) 3. Tuner Function Button (FM) 4. Mode Button (MODE) Stereo/mono Select Button (MODE) 5. Intro Button (INTRO) 6. Loudness Button (LOUDNESS) 7. Preset Equalizer Button (P-EQ) 8. Clock Button (CLOCK) 9. -
Page 28: Installation Of Battery
Installation of Battery 1. Remove the insulating mylar strip from the battery. • Do not place the remote control under the direct sunlight or near sources of excessive heat. It is located at the bottom back side of the remote control. -
Page 29: Connections
Connections Caution: Make all connections before plugging the unit into the AC Power outlet. Connecting the Speakers Connect the cable with a red head to the (+) terminals and cable with a other colour head to the (-) terminals. Caution: * To avoid noise, keep antennas away from the system, the connecting cord and the AC power cord. -
Page 30: Eco-Power/Standby Features
ECO-Power/Standby Features Switching ON / OFF Setting the Clock Automatically When you first connect the unit to the DC Jack, the unit Tune into a RDS station, press and hold the DISPLAY will be in standby mode. button. The clock will automatically update. •... -
Page 31: Listening To Radio Broadcasts
Listening to Radio Broadcasts Caution: 3. Press the button to allocate a number to this radio station. Before listening to the radio, please check that the FM Antenna is correctly connected and adjusted for length Note: If you select more than 20, the preset number will and direction. -
Page 32: Cd Operation
CD Operation CD Playing 3. Press the 0-9, +10 buttons on the remote control to select the desired track number. 1. Repeatedly press the SOURCE button on the unit or 4. Press the PROG button on the remote control to directly press the CD button on the remote control to confirm the track number to be stored. -
Page 33: Mp3/Wma Disc Playing
MP3/WMA Disc Playing Note: Playing Repeatedly (MP3 disc) • MP3/WMA music playback from CD maybe be • ONE and ALL Repeat Play can be set by pressing the affected due to the type and format of disc or condition MODE button. of the recording. -
Page 34: Setting The Sleep Timer
2. Activate your Bluetooth device and select the search mode. 3. “VH-MS570BT” will appear on your Bluetooth device. 4. Select “VH-MS570BT” and enter “0000” for the password if necessary. 5. To disconnect the Bluetooth function, press and hold the PAIRING button on the remote control or disable the function from your Bluetooth device. -
Page 35: Set The Alarm Timer
Setting the Daily on Timer Maintenance You can use the setting timer to make the unit Cleaning the Unit automatically turn on at a certain time everyday from standby. When the setting timer is on, the timer indicator Note: Ensure the unit is fully unplugged from the mains “... -
Page 36: Troubleshooting
Troubleshooting If you are having a problem with your unit, check this list - Replace or clean the disc. for a possible solution before calling for service. - Use a finalized CD or correct format disc. If you cannot solve the problem from the hints given here, or the unit has been physically damaged, call a Cannot display some files in USB device qualified person, such as your dealer, for service. -
Page 37: Specifications
Specifications Main adaptor Input....................AC 100-240V 50-60Hz 1.2A Output....................DC 15V, 3A Main Unit FM Tuning Range................87.5~108 MHz Output Power...................25W x 2 THD....................≤ 1% Dimensions..................16(W) x 7,8(H) x 27,5(D) cm Speaker Impedance..................4Ω Input Power..................25W Dimensions..................13(W) x 21(H) x 17,5(D) cm Note: Product information is subject to change without prior notice. - Page 40 www.vieta.es...