Table of Contents

Related Manuals for Jensen JiLS-525iB


Summary of Contents for Jensen JiLS-525iB
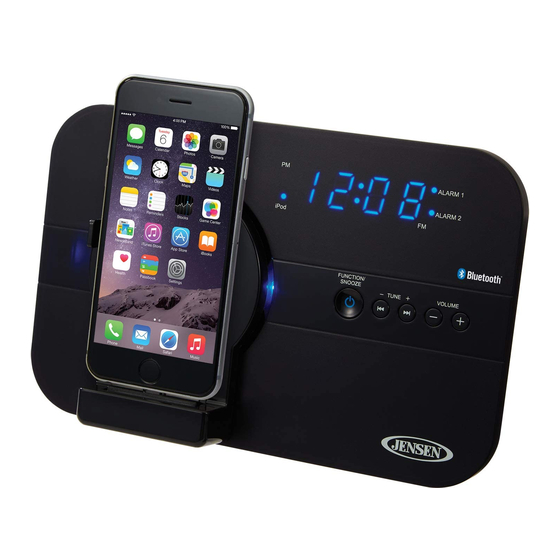
- Page 1 Bluetooth Docking Music System with Rotating Lightning™ Dock for iPhone and iPod JiLS-525iB USER MANUAL (iPod/iPhone Not Included) PLEASE READ THIS USER MANUAL COMPLETELY BEFORE OPERATING THIS UNIT AND RETAIN THIS BOOKLET FOR FUTURE REFERENCE.
-
Page 3: Dear Jensen® Customer
The serial number of this product is found on its bottom. You should note the serial number of this unit in the space provided as a permanent record of your purchase to aid in identification in the event of theft of loss. Model Number: JiLS-525iB Serial Number: ____________________... -
Page 4: Important Safety Instructions
IMPORTANT SAFETY INSTRUCTIONS When used in the directed manner, this unit has been designed and manufactured to ensure your personal safety. However, improper use can result in potential electrical shock or fire hazards. Please read all safety and operating instructions carefully before installation and use, and keep these instructions handy for future reference. -
Page 5: Compliance With Fcc Regulations
COMPLIANCE WITH FCC REGULATIONS This device complies with Part 15 of the FCC Rules. Operation is subject to the following two conditions: (1) this device may not cause harmful interference, and (2) this device must accept any interference received, including interference that may cause undesired operation. - Page 6 PRECAUTIONS AND IMPORTANT NOTES PRECAUTIONS Do not connect the AC Adaptor to the unit and mains before checking the mains voltage. Do not cover any vents and make sure that there is a space of several inches around the unit for ventilation. This unit is not magnetically shielded and may cause color distortion on the screen of some TVs or video monitors.
-
Page 7: Location Of Controls
LOCATION OF CONTROLS Main Unit Front View Back View CONTROL FUNCTION DESCRIPTION Lightning Connector Docking Platform Power Indicator LED indicator lights when the power is ON. / FUNCTION / - Tap to turn unit on. SNOOZE Button - Press and hold to return unit to standby mode. - While unit is on, tap to select Radio, iPod, Bluetooth and AUX-IN mode. - Page 8 LOCATION OF CONTROLS ALARM 1 LED Indicator LED indicator lights when Alarm 1 is ON. ALARM 2 LED Indicator LED indicator lights when Alarm 2 is ON. FM Radio Mode LED LED indicator lights when in FM Radio mode. Indicator MODE / FM ST/MO - Set clock and 12/24 hour format.
- Page 9 LOCATION OF CONTROLS Remote Control CONTROL FUNCTION DESCRIPTION Infrared Transmitter Sends control signals to the main unit; do not block. MUTE Button Mute the volume. STANDBY Button Turn the unit on and off. MODE / FM ST/MO Set clock and 12/24 hour format; select FM radio stereo/ Button mono receiving mode.
-
Page 10: Getting Started
GETTING STARTED POWER SUPPLY SOURCES This Bluetooth Docking Music System operates using the included AC Adaptor with 5V 3500 mA (center-positive) output and is compatible with standard 120V~ 60Hz AC household power. This unit also requires 1 x CR2032 Lithium battery (included) for clock backup during power outage. - Page 11 BATTERY NOTE AND CARE Danger of explosion if the battery is replaced incorrectly. Replace only with the same type battery. Only use a good quality known brand battery to ensure the longest life and best performance. If the unit is not used for an extended period of time, remove the battery. An old or leaking battery can cause damage to the remote and may void the warranty.
- Page 12 DOCKING YOUR iPhone / iPod touch / iPod nano DOCKING iPod nano (7 Gen.) Support tab for iPhone 5 and iPod touch ( 5 Gen.) PORTRAIT MODE Remove the Support Tab Dock your iPod nano onto the Lightning connector in Portrait mode as shown above. Note: It is not recommended to use the landscape mode with the iPod nano.
- Page 13 PLAYING AND CHARGING YOUR iPhone / iPod touch / iPod nano CHARGING YOUR APPLE DEVICE Even when the JiLS-525iB is in standby mode, once your iPod nano (7 Gen.), iPhone 5/5S, iPod touch (5 Gen.) iPhone 6 or iPhone 6+ is docked onto the Lightning Connector, the charging will start automatically.
-
Page 14: Radio Operation
RADIO OPERATION FM ANTENNA Fully unwrap and extend the FM antenna wire for the best FM radio reception. RADIO TUNING Tap the button to turn on the unit. Tap the FUNCTION button to select FM radio mode. The FM radio mode indicator LED turns on. -
Page 15: Bluetooth Operation
ENABLED DEVICE to the JiLS-525iB. With the power on, tap the FUNCTION button repeatedly to select Bluetooth mode. The LED display will show “bt” and blink for about 10 minutes The JiLS-525iB is ready to pair (link) with your Bluetooth device. - Page 16 BLUETOOTH OPERATION Re-linking to the cell phone If your cell phone or Bluetooth device is already paired with the JiLS-525iB, but became unlinked at some point, even with both Bluetooth devices turned on. You can re-link them by: Press and hold the PAIR button on remote control or /PAIR button on main unit to re-link your cell phone.
-
Page 17: Setting The Clock
PRESET EQ AND TREBLE / BASS SETTINGS The unit is designed for you to select the preset EQ and Treble / Bass settings. When the unit is powered on (in iPod, Aux-In or Radio mode), you can select 4 preset EQ or setting Treble / Bass as following steps. -
Page 18: Alarm Operation
ALARM OPERATION The unit incorporated dual alarm timer, ALARM 1 and ALARM 2. You may set the two alarm time individually. It wakes you up from Beep Alarm, FM Radio or iPhone/iPod. When the unit is OFF (Standby mode): Select wake up alarm source 1. - Page 19 ALARM OPERATION Wake to Beep Alarm - When the alarm time is reached, the ALARM 1 (ALARM 2) LED indicator blinks and the beep alarm will sound for 1 Minute. - The unit automatically goes into Auto-snooze mode if no other button has been pressed. The ALARM 1 (ALARM 2) LED indicator blinks.
-
Page 20: Sleep Timer Function
USB port. Please refer to your device user manual before you attempt to charge them. 2.) It is normal for the JILS-525iB to be warm while the USB port is in use and charging your smart phone or portable device. -
Page 21: Resetting The Unit
RESETTING THE UNIT If this unit was exposed to a power surge or electric shock, it is possible that the internal micro-controller may lock up and the unit will not respond to any commands from the front panel controls or remote control. In this event, you can do one of the following: 1. -
Page 22: Troubleshooting Guide
TROUBLESHOOTING GUIDE Symptom Possible Problem Solution AC Adaptor is not plugged into a wall outlet or the con- Plug the AC adaptor into a wall outlet and The unit does nector is not plugged into plug the connector into the DC Jack on not respond (no the DC Jack on the back of the unit again with special attention. -
Page 23: Specifications
SPECIFICATIONS POWER REQUIREMENT Main Unit AC-DC adaptor Input: AC 120V~ 60Hz Output: DC 5V 3500mA Clock / Memory back-up battery 1 x 3V type CR2032 Lithium battery Remote Control 1 x 3V type CR2025 Lithium Battery “Made for iPod” and “Made for iPhone” mean that an electronic accessory has been designed to connect specifically to iPod or iPhone respectively and has been certified by the developer to meet Apple performance standards. - Page 24 You must pay all shipping charges required to ship the product to SPECTRA for warranty service. If the product is repaired or replaced under warranty, the return charges will be at SPECTRA’s expense. There are no other express warranties other than those stated herein. This warranty is valid only in accordance with the conditions set forth below: 1.