Table of Contents
Advertisement
Thank you for purchasing an Onkyo Stereo Receiver.
Please read this manual thoroughly before making
connections and plugging in the unit.
Following the instructions in this manual will enable
you to obtain optimum performance and listening
enjoyment from your new Stereo Receiver.
Please retain this manual for future reference.
Contents
Introduction
..................................En-
Connections
.............................. En-
Enjoying Audio Sources
Appendix
Troubleshooting
..................... En-
Specifications
......................... En-
2
11
19
...... En-
32
34
E
n
Advertisement
Table of Contents

Related Manuals for Onkyo TX-8020


Summary of Contents for Onkyo TX-8020
- Page 1 Introduction ........En- Connections ......En- Enjoying Audio Sources ..En- Appendix Thank you for purchasing an Onkyo Stereo Receiver. Troubleshooting ..... En- Please read this manual thoroughly before making Specifications ......En- connections and plugging in the unit. Following the instructions in this manual will enable you to obtain optimum performance and listening enjoyment from your new Stereo Receiver.
-
Page 2: Important Safety Instructions
WARNING: AVIS WARNING RISK OF ELECTRIC SHOCK RISQUE DE CHOC ELECTRIQUE TO REDUCE THE RISK OF FIRE OR ELECTRIC DO NOT OPEN NE PAS OUVRIR SHOCK, DO NOT EXPOSE THIS APPARATUS The lightning flash with arrowhead symbol, within an TO RAIN OR MOISTURE. equilateral triangle, is intended to alert the user to the presence of uninsulated “dangerous voltage”... -
Page 3: Precautions
7. Never Touch this Unit with Wet Hands—Never handle this unit or its power cord while your hands are wet or damp. If water or any other liquid gets inside this unit, have it checked by your Onkyo dealer. - Page 4 Precautions—Continued For Canadian Models For European Models NOTE: Declaration of Conformity THIS CLASS B DIGITAL APPARATUS We declare, under our sole COMPLIES WITH CANADIAN ICES-003. responsibility, that this product For models having a power cord with a polarized plug: CAUTION: complies with the standards: TO PREVENT ELECTRIC SHOCK, –...
-
Page 5: Table Of Contents
Supplied Accessories ........6 Using RDS (European model only)......28 Installing the Batteries..........6 Aiming the Remote Controller........6 iPod/iPhone Playback via Onkyo Dock ..30 Using the Onkyo Dock ..........30 Getting to Know the Receiver ......7 Controlling Your iPod/iPhone .........31 Front Panel .............. -
Page 6: Features
❑ Speaker A/B Terminals ❑ Remote Interactive (RI) Input for Integrated Installing the Batteries Control of Compatible Onkyo Components ❑ Headphone Jack ❑ 40 FM/AM Random Presets ❑ Preset Station Naming (Up to 8 Characters) ❑... -
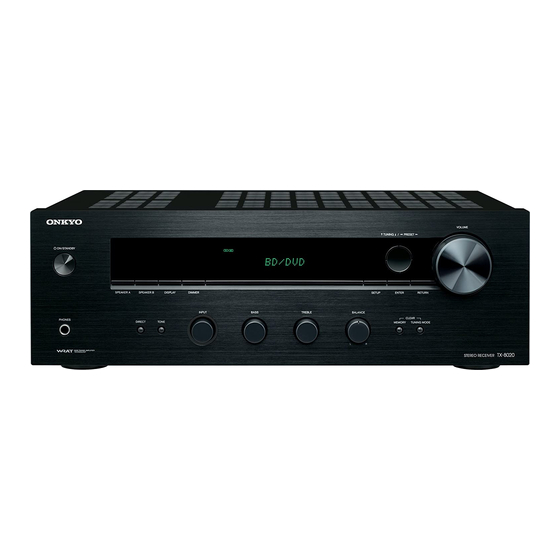
Page 7: Getting To Know The Receiver
Getting to Know the Receiver Front Panel For detailed information, see the pages in parentheses. ON/STANDBY button (19, 30, 32) PHONES jack (20) SPEAKERS A and B buttons (20) DIRECT, TONE buttons (21, 22) DISPLAY button (27, 29) INPUT selector (20, 23, 24, 25) DIMMER button (21) BASS control (21) SETUP button (13, 19, 22, 24, 27) -
Page 8: Rear Panel
Getting to Know the Receiver —Continued Rear Panel North American model 678 9 j European model 678 9 j For detailed information, see the pages in parentheses. REMOTE CONTROL jack (17) DOCK IN jacks (16) FM ANTENNA jack and AM ANTENNA TAPE IN/OUT jacks (16, 18) terminal (14) TV IN jacks (16) -
Page 9: Display
Getting to Know the Receiver —Continued Display For detailed information, see the pages in parentheses. A/B speaker indicators (20) MUTING indicator (32) Headphone indicator SLEEP indicator (21) Message area ASb (Auto Standby) indicator (19) Tuning indicators Digital input indicator (European model) •... -
Page 10: Remote Controller
Getting to Know the Receiver —Continued Remote Controller For detailed information, see the pages in parentheses. button (13, 19, 22) INPUT SELECTOR buttons (20, 23, 25, 31) Number buttons (25, 26) D.TUN button (25, 26) CLEAR button (27) BASS / buttons (21) TREBLE /... -
Page 11: Connecting The Receiver
Connecting the Receiver Disconnect the power cord from the electrical outlet before making any connections. Speaker Connection Precautions Connecting the Speaker Cables The receiver allows you to connect two sets of speakers. Strip about 5/8" (15 mm) When two sets of speakers are connected, you can select 5/8"... -
Page 12: Connecting A Powered Subwoofer
—Continued Connecting the Receiver Connecting a Powered Subwoofer Using a suitable cable, connect the receiver’s SUBWOOFER PRE OUT to the input on your powered subwoofer. If your subwoofer is unpowered and you’re using an external amplifier, connect the SUBWOOFER PRE OUT to the amp’s input. Note: Powered subwoofer... -
Page 13: Configuring The Speaker Impedance
Connecting the Receiver —Continued Configuring the Speaker Impedance On the receiver, the factory default for speaker impedance is “6 Ω”. If you need to change the speaker impedance setting, read “Speaker Connection Precautions” on page 11 carefully before performing the procedure below. Note: Be sure to minimize the volume level on the receiver before configuring the speaker impedance. -
Page 14: Connecting Antennas
Connecting Antennas This section explains how to connect the supplied indoor FM antenna and AM loop antenna. The receiver won’t pick up any radio signals if no antenna is connected, so you must connect the antenna to use the tuner. Insert the plug fully into the jack. -
Page 15: Connecting Your Components
Connecting Your Components About Connections Connecting components : Audio Receiver Blu-ray Disc/ CD player DVD player TV, projector, etc. • Before making any connections, read the manuals supplied with your components. • Don’t connect the power cord until you’ve completed and double-checked all connections. •... - Page 16 Connecting Your Components —Continued Illustration below shows European model No. Jack Connectable components PHONO IN Turntable CD IN CD player, Turntable BD/DVD IN Blu-ray Disc/DVD player DOCK IN RI dock TAPE IN Cassette tape deck TV IN DIGITAL IN (OPTICAL, COAXIAL) OPTICAL: TV (European model only) COAXIAL: CD, BD/DVD...
-
Page 17: Connecting Onkyo Components
CD player Dock cable cable • Connect only Onkyo components to jacks. Make sure that each Onkyo component is Connecting other manufacturer’s components may connected with an analog audio cable cause a malfunction. -
Page 18: Connecting A Recording Component
Connecting Your Components —Continued Connecting a Recording Component See “Recording” for an explanation of recording ( page 23). Analog audio cable Cassette tape deck, CDR, etc. Notes: • The receiver must be turned on for recording. Recording is not possible while it’s in Standby mode. •... -
Page 19: Turning On The Receiver
Turning On the Receiver MON/STANDBY & ( # 5 ENTER SETUP Turning On and Standby Use the arrow []/[] buttons to select “Auto Standby,” and then press [ENTER]. Press the [ON/STANDBY] button. Alternatively, press the remote controller’s [] button. The receiver comes on, and the display lights up. Switch the ASb On/ASb Off using the arrow To turn the receiver off, press the [ON/STANDBY] []/[] buttons. -
Page 20: Enjoying Audio Sources
Enjoying Audio Sources SPEAKERS A, B VOLUME INPUT SELECTOR MUTING VOLUME + / – PHONES INPUT Selecting the Speaker Set Muting the Receiver (remote controller only) Rotate the receiver’s [INPUT] selector, or You can temporarily mute the output of the receiver. press the remote controller’s INPUT SELECTOR buttons to select the source Press the remote controller’s [MUTING] button. -
Page 21: Setting The Display Brightness
Enjoying Audio Sources —Continued DIMMER SLEEP DIMMER TONE BASS TREBLE TONE BASS [F]/[H] BALANCE TREBLE [F]/[H] Setting the Display Brightness Using the Tone and Balance Controls You can adjust the brightness of the display. This section explains the following functions that can be used with any input source. -
Page 22: Setting The Direct Function
—Continued Enjoying Audio Sources MON/STANDBY TONE DIRECT & ( # 5 ENTER DIRECT TONE SETUP Setting the DIRECT Function Press the [] button to turn on the power. Press the [DIRECT] button. The message Press the [SETUP] button on the remote “DIRECT MODE”... -
Page 23: Recording
Recording Unless you have the full consent of the copyright holder, copyright laws prohibit using your recordings for anything other than personal enjoyment! This section explains how to record the selected input source to a component with recording capability, and how to record audio from different sources. -
Page 24: Listening To The Radio
Listening to the Radio TUNING F/H Number buttons D.TUN INPUT TUNING MODE ENTER & /( / # /5 / ENTER SETUP Radio Frequency Setup Use the arrow []/[] buttons to specify the frequency. or radio tuning to work properly, you must specify the North American model radio frequency step used in your area. -
Page 25: Listening To Am/Fm Stations
Listening to the Radio —Continued The frequency changes in 0.05 MHz steps (or 0.05 MHz Listening to AM/FM Stations to 0.2 MHz for North American model) for FM, and With the built-in tuner, you can enjoy AM and FM radio 9 kHz (or 10 kHz) steps for AM. - Page 26 Listening to the Radio —Continued ■ Selecting Presets Presetting AM/FM Stations PRESET C/U To select a preset, use the remote controller’s arrow []/[] buttons or the receiver’s PRESET []/[] buttons. ■ Selecting Preset by entering Preset number You can tune to AM and FM stations directly by entering the appropriate preset number.
- Page 27 Listening to the Radio —Continued ■ Name Edit select “Shift,” and press the ENTER button to make the other character string pattern appear. You can enter a custom name for radio preset for easy identification. When entered, the custom name will appear on the display.
-
Page 28: Using Rds (European Model Only)
Listening to the Radio —Continued RDS Program Types (PTY) Using RDS (European model only) RDS only works in areas where RDS broadcasts are Type Display available. When tuned into an RDS station, the RDS None NONE indicator appears. News reports NEWS RDS indicator Current affairs... - Page 29 Listening to the Radio —Continued Displaying Radio Text (RT) Finding Stations by Type (PTY) PRESET C/U DISPLAY DISPLAY ENTER You can search for radio stations by type. When tuned to an RDS station that’s broadcasting text information, the text can be displayed. Use the [DISPLAY] button to display PTY.
-
Page 30: Ipod/Iphone Playback Via Onkyo Dock
RI Dock, be careful that it’s not set too loud before you reconnect your Before using an Onkyo Dock, update your iPod/ earphones. iPhone with the latest software, available from the Apple web site. -
Page 31: Controlling Your Ipod/Iphone
Playback via Onkyo Dock —Continued Available buttons: Controlling Your iPod/iPhone 1 /, ENTER See the Dock’s instruction manual for more information. 2 REPEAT • Set the RI Dock’s RI MODE switch to “HDD” or 3 SHUFFLE “HDD/DOCK”. 4 RETURN •... -
Page 32: Troubleshooting
• Make sure that the speaker cables are not shorting. Can’t control other components • Make sure that the inputs and outputs of all • If it is an Onkyo component, make sure that the components are connected properly. cable and analog audio cable are connected properly. -
Page 33: Recording
Onkyo is not responsible for damages (such as CD rental fees) due to unsuccessful recordings caused by the unit’s malfunction. Before you record important data, make sure that the material will be recorded correctly. -
Page 34: Specifications
Specifications Amplifier Section General (North American) (North American) Rated Output Power Power Supply 50 watts minimum continuous power AC 120 V, 60 Hz per channel, 8 Ω loads, 2 channels (European) driven from 20 Hz to 20 kHz with a AC 230 V, 50 Hz maximum total harmonic distortion of 0.08 % (FTC) - Page 35 Memo...
- Page 36 Tel: 86-21-52131366 Fax: 86-21-52130396 http://www.cn.onkyo.com/ Asia, Oceania, Middle East, Africa Please contact an Onkyo distributor referring to Onkyo SUPPORT site. http://www.intl.onkyo.com/support/ The above-mentioned information is subject to change without prior notice. Visit the Onkyo web site for the latest update.