Onkyo TX-8522 Instruction Manual
Onkyo instruction manual stereo receiver tx-8522, tx-8222
Hide thumbs
Also See for TX-8522:
- Brochure & specs (8 pages) ,
- Instruction manual (8 pages) ,
- Service manual (53 pages)
Table of Contents
Advertisement
TX- 85228222_En.book 1 ページ 2006年5月4日 木曜日 午前11時51分
Stereo Receiver
TX-8522/
TX-8222
Instruction Manual
Thank you for purchasing an Onkyo Stereo Receiver.
Please read this manual thoroughly before making
connections and plugging in the unit.
Following the instructions in this manual will enable
you to obtain optimum performance and listening
enjoyment from your new Stereo Receiver.
Please retain this manual for future reference.
Contents
Introduction .................................... 2
Connections ................................. 12
Enjoying Audio Sources.............. 20
Troubleshooting .............................. 32
Specifications .................................. 34
E
n
Advertisement
Table of Contents

Related Manuals for Onkyo TX-8522


Summary of Contents for Onkyo TX-8522
-
Page 1: Table Of Contents
Stereo Receiver TX-8522/ TX-8222 Instruction Manual Thank you for purchasing an Onkyo Stereo Receiver. Please read this manual thoroughly before making connections and plugging in the unit. Following the instructions in this manual will enable you to obtain optimum performance and listening enjoyment from your new Stereo Receiver. -
Page 2: Important Safety Instructions
TX- 85228222_En.book 2 ページ 2006年5月4日 木曜日 午前11時51分 WARNING: TO REDUCE THE RISK OF FIRE OR ELECTRIC SHOCK, DO NOT EXPOSE THIS APPARATUS TO RAIN OR MOISTURE. CAUTION: TO REDUCE THE RISK OF ELECTRIC SHOCK, DO NOT REMOVE COVER (OR BACK). NO USER-SERVICEABLE PARTS INSIDE. REFER SERVICING QUALIFIED PERSONNEL. -
Page 3: Precautions
5. Never Touch this Unit with Wet Hands— Never handle this unit or its power cord while your hands are wet or damp. If water or any other liquid gets inside this unit, have it checked by your Onkyo dealer. 6. Handling Notes •... -
Page 4: Table Of Contents
Using the Sleep Timer (remote controller only) ... 22 Using the Tone and Balance Controls... 23 Setting the DIRECT Function (TX-8522 only) ... 23 Enjoying the Pure Audio Sound (TX-8522 only) ... 23 Recording ... 24 Recording the Input Source... 24 Recording Audio and Video from Separate Sources (TX-8522 only) ... -
Page 5: Installing The Batteries
• Expired batteries should be removed as soon as possible to prevent damage from leakage or corrosion. Features TX-8522 ❑ 100 Watts/Channel @ 8 ohms (FTC) (USA & CANADA) ❑ 100 Watts/Channel @ 4 ohms (IEC) (EUROPE) ❑... -
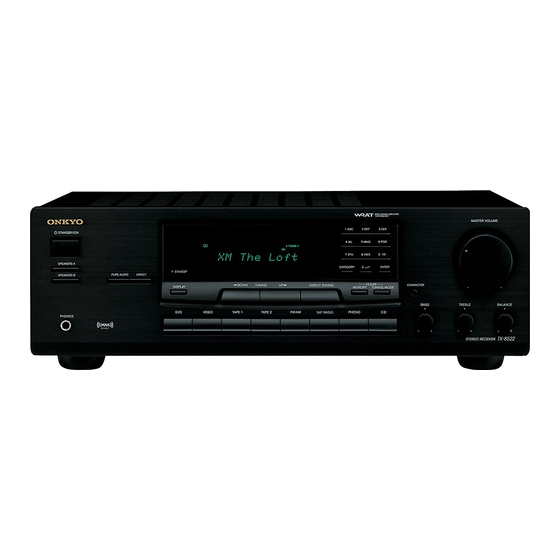
Page 6: Getting To Know The Receiver
TX- 85228222_En.book 6 ページ 2006年5月4日 木曜日 午前11時51分 Getting to Know the Receiver Front Panel TX-8522 North American Model TX-8522 Other Models * The name of the buttons and other controls varies according to the shipping destination. For details, refer to the description on the next page. - Page 7 TX- 85228222_En.book 7 ページ 2006年5月4日 木曜日 午前11時51分 Getting to Know the Receiver —Continued Some button number sections (such as 9 and K ) contain multiple button descriptions because the name and function vary according to the model or shipping destination. Refer to the description corresponding to your model.
-
Page 8: Rear Panel
REMOTE CONTROL jacks These (Remote Interactive) jacks can be connected to the jacks on your other Onkyo audio components. The receiver’s remote controller can then be used to control all of your components. To use , you must make an analog audio connection between the receiver and each component. -
Page 9: Display
Indicator B lights up when speaker set B is on. MUTING indicator Flashes while the receiver is muted. DIRECT indicator (TX-8522 only) Lights up while the DIRECT function is enabled. Radio indicators TUNED: Lights up when tuned to a radio station. -
Page 10: Remote Controller
TX- 85228222_En.book 10 ページ 2006年5月4日 木曜日 午前11時51分 Remote Controller TX-8522 North American model (RC-664S) Using the Remote Controller Point the remote controller toward the remote control sensor. Remote control sensor Notes: • The remote controller may not work reliably if the receiver is subjected to bright light, such as direct sunlight or inverter-type fluorescent lights. - Page 11 TX- 85228222_En.book 11 ページ 2006年5月4日 木曜日 午前11時51分 Remote Controller —Continued For detailed information, see the pages in parentheses. ON/STANDBY button (20) Sets the receiver to On or Standby. SLEEP button (22) Used with the Sleep function. INPUT SELECTOR buttons (21) and number buttons (26) When any of these buttons is pressed, the input source will be changed to the one shown below the...
-
Page 12: Connecting Your Speakers
4 and 16 ohms. For the North American model TX-8522, when the speaker impedance is 4 or 6 ohms, set the speaker impedance setting on the receiver to 6 ohms (see next page for details). -
Page 13: Configuring The Speaker Impedance (Tx-8522 North American Model Only)
TX- 85228222_En.book 13 ページ 2006年5月4日 木曜日 午前11時51分 Connecting Your Speakers —Continued Configuring the Speaker Impedance (TX-8522 North American model only) In this model, the factory default for speaker impedance is “8 ohms.” When you change the speaker impedance setting, read “Speaker Connection Precautions” on page 12 carefully before performing the procedures below. -
Page 14: Connecting Antenna
TX- 85228222_En.book 14 ページ 2006年5月4日 木曜日 午前11時51分 Connecting Antenna This section explains how to connect the supplied indoor FM antenna and AM loop antenna, and how to connect commercially available outdoor FM and AM antennas. The receiver won’t pick up any radio signals without any antenna connected, so you must connect the antenna to use the tuner. -
Page 15: Connecting An Outdoor Fm Antenna
TX- 85228222_En.book 15 ページ 2006年5月4日 木曜日 午前11時51分 Connecting Antenna —Continued Connecting an Outdoor FM Antenna If you cannot achieve good reception with the supplied indoor FM antenna, try a commercially available outdoor FM antenna instead. Notes: • Outdoor FM antennas work best outside, but usable results can sometimes be obtained when installed in an attic or loft. -
Page 16: Connections
Use red plugs to connect right- channel audio inputs and outputs (typically labeled “R”). Use white plugs to connect left-channel audio inputs and outputs (typically labeled “L”). And use yellow plugs to connect composite video inputs and outputs. (TX-8522) Analog audio Left (white) Right (red) -
Page 17: Connecting A Recording Component
flip the RI MODE switch to “HDD” which is located on the underside. Connecting a DVD Player For the TX-8522, use an analog audio cable to connect the TX-8522’s DVD IN L/R jacks to the analog audio output jacks on the DVD player, and use a video cable to connect the TX-8522’s DVD IN V jack to the composite... -
Page 18: Connecting A Vcr
Audio Output For the TX-8522, use an analog audio cable to connect the unused audio input L/R jacks on the TX-8522 to the analog audio output jacks on the connected component. For the TX-8222, use an analog audio cable to connect the TX-8222’s LINE 1/DVD IN L/R or LINE 2 IN L/R... -
Page 19: Connecting The Power Cords Of Other Components
3_Connection_En 19 ページ 2006年5月4日 木曜日 午後2時38分 Connecting Your Components —Continued With (Remote Interactive), you can control your -compatible Onkyo CD player, RI Dock, and so on with the receiver’s remote controller. • To use , you must make an analog audio connection between the receiver and each audio component. -
Page 20: Turning On The Receiver
“HDD” for one of the buttons below, the display name for the other button cannot be changed to “HDD.” TX-8522: TAPE 1, VIDEO TX-8222: TAPE 1, LINE 2 After you changed the input display name to “HDD,”... -
Page 21: Enjoying Audio Sources
The A and B speaker indicators show whether each speaker set is on or off. Indicators Note for TX-8522 North American model: When you connect a set of speakers whose impedance is 4 or 6 ohms and... -
Page 22: Muting The Receiver (Remote Controller Only)
Alternatively, you can use the Remote controller [DIMMER] button on the TX-8522 (other than North American model) and TX-8222. Using the Sleep Timer (remote controller only) With the sleep timer, you can set the receiver so that it turns off automatically after a specified period. -
Page 23: Using The Tone And Balance Controls
PURE AUDIO TREBLE BASS BALANCE Setting the DIRECT Function (TX-8522 only) The [DIRECT] button turns the DIRECT function on and off. When the DIRECT function is off, the tone controls can be used to adjust the sound, and the DIRECT indicator goes off. -
Page 24: Recording
This section explains how to record the selected input source to a component with recording capability. Recording the Input Source For the TX-8522, you can record an audio signal on a recording component connected to the TAPE 1 OUT, TAPE 2 OUT or VIDEO OUT jacks. -
Page 25: Recording Audio And Video From Separate Sources (Tx-8522 Only)
Amplifier PLAY Recording Audio and Video from Separate Sources (TX-8522 only) You can overdub audio onto your video recordings by simultaneously recording audio and video from two separate sources. This is possible because only the audio source is switched when an audio-only input source, such as TAPE, FM/AM, or CD, is selected, the video source remains the same. -
Page 26: Listening To The Radio
Number buttons TUNING DOWN/UP FM/AM TUNING MODE TX-8522 North American model AM Frequency Step Setup (not North America and Europe) You must specify the AM frequency step used in your area. Note that when this setting is changed, all radio presets are deleted. - Page 27 To select a preset, use the Receiver number buttons on the receiver, or the remote controller’s PRESET [ For the TX-8522 other than North American model, the PRESET Remote ] buttons on the receiver also controller can be used to select a preset.
-
Page 28: Using Rds (European Models Only)
TX- 85228222_En.book 28 ページ 2006年5月4日 木曜日 午前11時51分 Listening to the Radio —Continued Using RDS (European Models Only) RDS only works with European models and only in areas where RDS broadcasts are available. When tuned into an RDS station, the RDS indicator appears. RDS indicator I What is RDS? RDS stands for Radio Data System and is a method of... - Page 29 TX- 85228222_En.book 29 ページ 2006年5月4日 木曜日 午前11時51分 Listening to the Radio —Continued Displaying Radio Text (RT) RT/PTY/TP When tuned to an RDS station that’s broadcasting text information, the text can be displayed. Press the [RT/PTY/TP] button once. RT/PTY/TP The RT information scrolls across the display.
-
Page 30: Naming Preset Channels
Entering a Name As an example, assume an FM station with a frequency of 89.50 MHz has been stored in preset number 2 and will be given the name “ONKYO.” Select the desired preset channel. (Refer to “Selecting Presets” on page 27.) -
Page 31: Others
In order to use the remote controller to control the receiver from a remote location, you will need to prepare a multiroom kit (sold separately) such as one listed below: • Onkyo’s Multi-Room System kits (IR Remote Controller Extension System) • Multiroom A/V distribution and control system such ®... -
Page 32: Troubleshooting
1 hour. After that, reconnect the power cord and press the [STANDBY/ON] button again. If you can not resolve the problem, contact your Onkyo dealer. Audio There’s no sound or it’s very quiet •... - Page 33 -capable Onkyo DS-A1 Remote Interactive Dock to the TAPE 1 or VIDEO jacks on the TX-8522 (or TAPE 1 or LINE 2 jacks on the TX-8222), for the remote controller to work prop- erly, you must set the input display to HDD (see page 20).
-
Page 34: Specifications
TX- 85228222_En.book 34 ページ 2006年5月4日 木曜日 午前11時51分 Specifications (TX-8522) Amplifier Section Rated Output Power (FTC) (North American) All channels: 100 watts minimum continuous power per channel, 8 ohm loads, 2 channels driven from 20 Hz to 20 kHz, with a maximum total harmonic distortion of 0.08 %... -
Page 35: Audio Outputs
TX- 85228222_En.book 35 ページ 2006年5月4日 木曜日 午前11時51分 Specifications (TX-8222) Amplifier Section Rated Output Power (FTC) (North American) All channels: 50 watts minimum continuous power per channel, 8 ohm loads, 2 channels driven from 20 Hz to 20 kHz, with a maximum total harmonic distortion of 0.08 % Rated Output Power (IEC) (European and Australian) ×... - Page 36 Units 2102-2107, Metroplaza Tower I, 223 Hing Fong Road, Kwai Chung, N.T., HONG KONG Tel: 852-2429-3118 Fax: 852-2428-9039 http://www.ch.onkyo.com/ SN 29344234 (C) Copyright 2006 ONKYO CORPORATION Japan. All rights reserved. HOMEPAGE http://www.onkyo.com/ D0604-1 * 2 9 3 4 4 2 3 4 *...