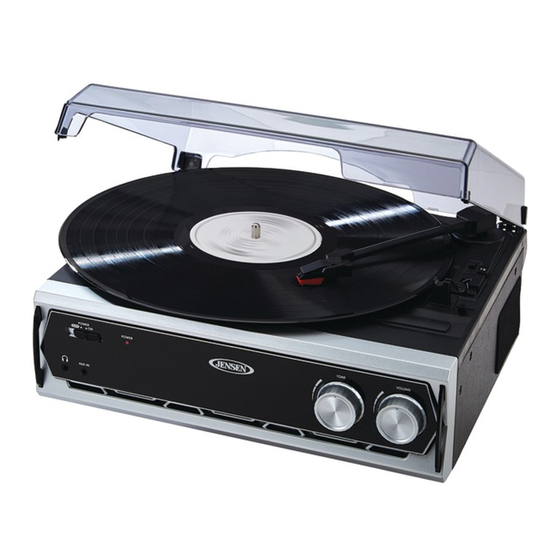
Summary of Contents for Jensen JTA-232
- Page 1 3-SPEED STEREO TURNTABLE WITH BUILT-IN SPEAKERS AND SPEED ADJUSTMENT USER MANUAL JTA-232 PLEASE READ THIS USER MANUAL COMPLETELY BEFORE OPERATING THIS UNIT AND RETAIN THIS BOOKLET FOR FUTURE REFERENCE.
-
Page 2: Dear Jensen® Customer
The serial number of this product is found on its back cover. You should note the serial number of this unit in the space provided as a permanent record of your purchase to aid in identification in the event of theft of loss. Model Number: JTA-232 Serial Number: ____________________... -
Page 3: Important Safety Instructions
WARNING TO PREVENT FIRE OR SHOCK HAZARD, DO NOT USE THIS PLUG WITH AN EXTENSION CORD, RECEPTACLE OR OTHER OUTLET UNLESS THE BLADES CAN BE FULLY INSERTED TO PREVENT BLADE EXPOSURE. TO PREVENT FIRE OR SHOCK HAZARD, DO NOT EXPOSE THIS APPLIANCE TO RAIN OR MOISTURE. IMPORTANT SAFETY INSTRUCTIONS 1. - Page 4 13. Unplug this apparatus during lightning storms or when unused for a long periods of time. 14. Power Sources - The appliance should be connected to a power supply only of the type described in the operating instructions or as marked on the appliance. Do not overload wall outlet.
-
Page 5: Compliance With Fcc Regulations
IMPORTANT NOTES Avoid installing the unit in locations described below: Places exposed to direct sunlight or close to heat radiating appliances such as electric heaters. Places subject to constant vibration. Dusty, humid or moist places. COMPLIANCE WITH FCC REGULATIONS This device complies with Part 15 of the FCC Rules. -
Page 6: Accessories Included
ACCESSORIES INCLUDED Application CD USB cable User Manual 45 RPM Record Adaptor GETTING STARTED CONNECTING THE AC POWER CORD 1. Unwind the AC power cord fully and connect it to any convenient household 120V~ 60Hz AC outlet 2. Turn on the power and the Power LED indicator will light. Your system is now ready to play your music. -
Page 7: Tone Control
STEREO PHONOGRAPH OPERATION Please Note - Before Use Remove the stylus protector. Make sure that the tone arm is unlocked and free Cartridge to move from the tone arm rest prior to operating. Lock the tone arm in place again when not in use. 1. -
Page 8: Line Out Connection
3. Turn on unit power and your external audio device. 4. The volume level can now be controlled through the main unit. Operate all other functions on the auxiliary device as usual. Note: (1). If the Line Out Jack of your external device is connected, then you only need to adjust the volume control of this system. - Page 9 INSTALL THE USB DRIVE 1. Use the included USB cable to connect the turntable to your computer. 2. Your computer will detect the JTA-232 as a “USB PnP Audio Device” & start to install USB drivers for it automatically. 3. Waiting for the installation complete until your computer shows a pop up a message that it is installed properly and ready to use.
- Page 10 4. In the Sound Recording field, click the pull down menu to select “USB PnP Audio Device” as Default device of sound recording. 5. Click the Volume button under the Sound recording tab to open ”Recording Control“ interface; 6. Adjust the line in volume to a level without distortion. You can play a record on the turntable and use the Sound Recorder to record a short clip of music for testing.
- Page 11 1. Run the Audacity from the Windows start menu or double click the Audacity icon on your computer desktop. 2. The Audacity main screen appears. You will find the Record, Play, Pause, Stop, Skip to Start and Skip to End control buttons here. Use the File, Edit, View, Transport, Tracks, Generate, Effect and Analyze menus from your computer screen to Save, Export or Edit the music.
- Page 12 4. Adjust the input and output volume by sliding the Input and Output Volume bars. Output Volume Input Volume 5. Click the record button to start recording, left and right tracks will show on your computer screen. If you cannot see the sound waves appear on the Interface when recording, adjust the Input volume bar.
- Page 13 6. Use the Audacity control panel to record or listen the music you have recorded - Click button to start recording. - Click the button to skip to start; - Click the button to skip to end; - Click the button to play;...
-
Page 14: Care And Maintenance
Fig. 1 Fig.2 CARE AND MAINTENANCE 1. Avoid operating your unit under direct sunlight or in hot, humid or dusty places. 2. Keep your unit away from heating appliances and sources of electrical noise such as fluorescent lamps or motors. 3. -
Page 15: Troubleshooting Guide
TROUBLESHOOTING GUIDE SHOULD YOU EXPERIENCE DIFFICULTIES IN THE USE OF THIS PLAYER PLEASE REFER TO THE FOLLOWING CHART OR CALL 1-800-777-5331 FOR CUSTOMER SERVICE. PROBLEM POSSIBLE CAUSE SOLUTION AC power cord is not plugged into a Plug the AC power cord into a wall wall outlet. - Page 16 90 DAY LIMITED WARRANTY AND SERVICE VALID IN THE U.S.A ONLY SPECTRA MERCHANDISING INTERNATIONAL, INC. warrants this unit to be free from defective materials or factory workmanship for a period of 90 days from the date of original customer purchase and provided the product is utilized within the U.S.A.


