Table of Contents
Advertisement
Quick Links
Download this manual
See also:
User Manual
Advertisement
Table of Contents

Related Manuals for Akai AMD60


Summary of Contents for Akai AMD60
- Page 1 Microset; Radio/ DVD-player with USB-port ALD1915H AMD60 User manual Gebruiksaanwijzing NL 28 Manuel de l’utilisateur FR 56 Manual de instrucciones ES 84 Gebrauchsanleitung DE 112 Οδηγίες χρήσεως EL 142 Brugsanvisning DA 171...
-
Page 2: Table Of Contents
Table of contents Safety ................3 Intended use ..............3 Labels in this manual ............3 General safety instructions ..........4 Preparations for use ........... 4 Unpacking ................4 Package contents ............5 Installation ..............5 Installing the speakers .............6 Connecting random equipment ........7 Connecting the units ............9 Connecting to the mains ..........9 Remote control...............10 Functions .............. -
Page 3: Safety
AMD60 Safety Intended use The DVD Micro System plays music from CD and radio and music, videos and photos from DVDs and USB. The appliance also plays photos from Kodak picture CDs. Read the manual carefully before first use. Due to the great variety of products with external memory connection (USB, SD/MMC, etc.) and their sometimes quite... -
Page 4: General Safety Instructions
A note gives additional information, e.g. for a procedure. General safety instructions WARNING Do not put force on the appliance. The appliance can fall and can cause serious injury. CAUTION Do not spill any liquid on the appliance. WARNING Do not insert any objects in the ventilation holes. CAUTION Do not block the ventilation holes. -
Page 5: Package Contents
AMD60 This is the only way to safely protect the product against damage in transit. If you do dispose of the carton and the packing materials, please remember to recycle with due care to the environment. Package contents The following items are included in the received package:... -
Page 6: Installing The Speakers
This appliance is equipped with rubber feet to prevent it from moving. The feet are made from non-migrating material specially formulated to avoid leaving any marks or stains on furniture. However, certain types of furniture polishes, wood preservatives or cleaning sprays cause the rubber to soften and leave marks or a residue on the furniture, and potentially risk the surface to become damaged. -
Page 7: Connecting Random Equipment
AMD60 Connection to speakers ● Press the latches to open the terminals. ● Connect the wire ends to the speakers matching the (+) and (-) polarity markings. ● Lift the latches to lock the wire ends. Connection to the appliance ●... -
Page 8: Video Connections
Audio connections (input) ● Stereo audio: Connect a suitable cable to the L/R channels of the AUX IN connection. Audio connections (output) The appliance has the following audio outputs: ● Stereo audio: Connect a suitable cable to the L/R channels of the AUDIO OUT connection. -
Page 9: Connecting The Units
AMD60 Connecting the units ● Insert the power connection cable into the CABLE connections to connect the units. Connecting to the mains ● Connect the adaptor plug on the adaptor cable to the AC connection. ● Connect the mains plug to a wall... -
Page 10: Remote Control
Remote control Installing the batteries ● Remove the battery cover. ● Insert the batteries matching the (+) and (-) polarity markings. ● Re-install the battery cover. CAUTION Incorrect installation can cause battery leakage and corrosion which will damage the appliance. Corrosion, oxidation, battery leakage and any other gradually acidic defect of this nature... -
Page 11: Functions
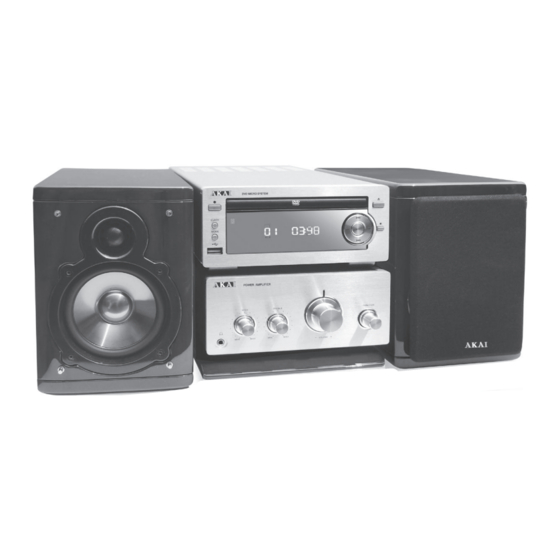
AMD60 Functions DVD Micro System Front panel 10 Volume dial Disc tray 11 FUNCTION dial STANDBY button 12 Display CLOCK button 13 PREV button MODE button 14 BACKWARD button USB slot 15 NEXT button Remote control sensor 16 STOP button... -
Page 12: Remote Control
Remote control General functions 20 STANDBY button 21 Function buttons 22 P-EQ button 23 DIM button 24 LOUDNESS button 25 SETUP button 26 Arrow buttons 27 ENTER button 28 CLOCK button 29 Digit buttons (0-10+) 30 VOL +/- button 31 SLEEP/TIMER button 32 AUDIO button 33 S-BASS button 34 MUTE button... -
Page 13: Operation
AMD60 DVD/VCD/CD functions 35 TITLE button 36 SUBTITLE button 37 ZOOM button 38 PLAY/PAUSE button 39 NEXT button 40 PREV button 41 BACKWARD button 42 MODE button 43 OSD/RDS button 44 GOTO button 45 PROGRAM button 46 FORWARD button 47 STOP button... -
Page 14: Radio Functions
● To adjust the tone (bass/treble), press the LOUDNESS button (24) or the S-BASS button (33). ● To switch between sound effects (USER/ROCK/CLASSIC/JAZZ/POPS), press the P-EQ button (22). Press the P-EQ button (22) again to exit the function. ● To mute or restore sound, press the MUTE button (34). ●... -
Page 15: Cd/Dvd Functions
AMD60 CD/DVD functions After the disc has been loaded, a content menu will display on the TV screen. ● Press the arrow buttons (26) to select a menu item. ● Press ENTER to enter the selected menu item. During playback, the following functions are available: ●... -
Page 16: Using The Program Function
● Press the GOTO button (44). ● Press the arrow buttons (26) to select an entry. The possible entries for DVD are: Disc time Chapter Title Chapter time Title time The possible entries for CD are: Track time Specific track ●... -
Page 17: Radio Functions
AMD60 ● Press the PROGRAM button (45) to change the mode. Press the ENTER button (27) to confirm. ● Press the PLAY/PAUSE button (38) to hold the slide show at the current picture. ● Press the PREV button (40) or the NEXT button (39) to select the previous or next picture. -
Page 18: Usb Functions
USB functions After the device has been connected, a content menu will display on the TV screen. ● Press the arrow buttons (up and down) (26) to select a folder or a file. ● Press the ENTER button (27) to enter the selected folder or file. You can also use the digit buttons (29) to select a folder or to play the file. -
Page 19: General Setup Menu Operation (Dvd Mode Only)
AMD60 Setting the daily timer The daily timer can be set to switch on the appliance automatically at a certain time every day. The daily timer can only be set in standby mode. ● Press the SLEEP/TIMER button (31). The hour digits start flashing. - Page 20 ● Press the ENTER button (27) to select a setting, or the left arrow button to cancel the selection. ● Press the SETUP button (25) to store the settings and exit. General setup page ● In the TV DISPLAY section, press the arrow buttons to choose 4:3 Pan Scan, 4:3 Letterbox or 16:9.
- Page 21 AMD60 AUDIO SYNC ● Set the delay time when the image and the sound cannot be played at the same time (0 ~ 200 ms). Video setup page COMPONENT ● Select S-VIDEO if the S-VIDEO connection is used to connect the appliance to the TV.
-
Page 22: Cleaning And Maintenance
AUDIO This function is only available when the disc supports the function. ● Select the audio language: English/French/Spanish/Chinese/Japanese/ Korean/Russian/Thai. SUBTITLE This function is only available when the disc supports the function. ● Select the subtitle language: English/French/Spanish/Chinese/Japanese/ Korean/Russian/Thai. DISC MENU This function is only available when the disc supports the function. -
Page 23: Handle And Care Of A Disc
AMD60 ● Clean the outside of the appliance with a soft cloth. When the appliance is very dirty, dampen the cloth slightly with water and a neutral solution. Handle and care of a disc ● Hold the disc with fingers. Hold the disc outer edge and/or the centre spindle hole. -
Page 24: Mp3 Playback
DVD/CD Trouble Action No playback There is no disc inserted. Load a disc in the appliance. Disc is loaded upside down. Place the disc with the label facing upward. Rating level of the disc is higher than the rating level setting of the appliance. -
Page 25: Technical Data
AMD60 USB playback Trouble Action No playback USB device is not installed or installed incorrectly. Insert USB device into slot. Incompatible USB device used. Playback using any USB device cannot be guaranteed. Please try another USB device. Trouble Action No sound on the unit system Input source is low. -
Page 26: Speaker System
Tuner Parameter Value FM radio 87.5 mHz - 108 MHz Disc output Parameter Value Laser type Semiconductor Signal/noise ratio ≥ 40 dB (1 kHz) Frequency range 87.5 mHz - 108 MHz Distortion < 1% Wow and flutter Below the limit of the appliance Television system PAL/NTSC Frequency response... -
Page 27: Disposal Of Used Electrical And Electronic Equipment
For more detailed information about recycling of this product, please contact your local city office, your household waste disposal service or the shop where you purchased the product. For more information and warranty conditions, please visit: www.akai.eu...