Moffat BLUE SEAL turbofan E32D5 Installation And Operation Manual
30dseries
Hide thumbs
Also See for BLUE SEAL turbofan E32D5:
- Installation and operation manual (21 pages) ,
- Installation and operation manual (27 pages)

Related Manuals for Moffat BLUE SEAL turbofan E32D5


Summary of Contents for Moffat BLUE SEAL turbofan E32D5
- Page 1 30DSERIES E 3 2 D 5 ( D i g i t a l O p e r a t i o n ) I n s t a l l a t i o n a n d O p e r a t i o n M a n u a l 234782-1...
- Page 2 The reproduction or copying of any part of this manual by any means whatsoever is strictly forbidden unless authorized previously in writing by the manufacturer. In line with policy to continually develop and improve its products, Moffat Ltd. reserves the right to change the specifications and design without prior notice.
-
Page 3: Table Of Contents
E32 Turbofan Convection Oven. Model Numbers Covered in this Manual E32D5 - Turbofan Oven - 5 Tray Convection Oven. Introduction ... 2 Safety Information Specifications ... 3 Installation... 4 Installation Requirements Unpacking Location Clearances Stand Mounted Ovens Electrical Connection Water Connection... -
Page 4: Introduction
Before using your new oven, please read this instruction manual carefully, pay particular attention to any information labelled ‘WARNING’, ‘CAUTION’, ‘IMPORTANT’ or ‘NOTE’ in this manual. Indicates a hazardous situation Warning which, if not avoided, will result in death or serious injury. Indicates a hazardous situation which, if not avoided, will result in Caution... -
Page 5: Specifications
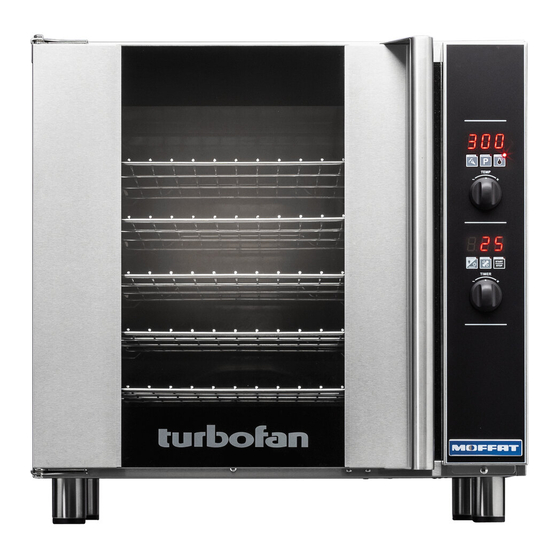
E32D5 Oven Power Ratings Tray Capacity Oven Tray Details Tray Spacing Max Water Pressure Water Connection Connection Size Specifications 208V, 50/60Hz, 5.8 kW 220 - 240V, 50/60Hz, 6.5 kW 5 x US Full Pan 85 mm / 3 ” 80 psi / 550 kPa. ”... -
Page 6: Installation
For ovens that are to be mounted to a stand, the oven feet are used to level the oven on the stand. Refer to the instructions supplied with separately ordered stands for mounting details. Oven Serial Number Oven Current Draw Model Number MOFFAT LIMITED E22M3 ***** MODEL USE22M3 ******* CODE xxxxxx SERIAL... -
Page 7: Electrical Connection
Electrical Connection Warning This oven must be earthed / grounded. Each oven should be connected to an adequately protected power supply with an appropriate three wire power cord. An isolation switch must be mounted adjacent to, but not behind the oven and must be readily accessible to the operator. -
Page 8: Reversing The Oven Door
Reversing the Oven Door NOTE: This operation should only be carried out by a suitably competent person. Remove the Oven Door Inner Glass. 1. Open the oven door and Remove Screw and open the door inner glass. 2. Remove the screw securing the inner glass retaining clip and remove the clip. - Page 9 16. Remove the Blanking Screw and Door Catch from the front of the oven and swap around. Door Catch 17. Fit the door spacers removed at Item 13 opposite to the lower hinge pivot bolt. Oven Door Re-Fitting Fit the Door. 1.
-
Page 10: Operation
Operation Guide Warning Some parts of this oven will become VERY HOT during use and could cause burns if touched. • Turbofan Ovens have been designed to provide simple operation. • This oven is intended for use in a commercial kitchen and must only be put to the use for which it was intended, i.e. cooking food product. -
Page 11: Using The Oven - Manual Mode
Using the Oven - Manual Mode TURN ‘ON’. Press ‘On-Off’ button. Temperature Dislay. Temperature Display will show actual temperature. SET TEMPERATURE. + to increase the temperature. - to decrease the temperature. Time Display. Time Display will show actual time set. SET TIME. -
Page 12: Cooking In Program Mode
Cooking in Program Mode TURN ‘ON’. Press ‘On-Off’ button. Press ‘Programs’ button. Temperature Dislay. Temperature Display will show program selected. SELECT A PROGRAM + to scroll forward through programs. - to scroll backward through programs. Time Display. Time Display will show ‘Pre-Heating’. Program cannot be started until pre-heating is completed. -
Page 13: Setting The Oven Programs
Setting the Oven Programs Oven can be pre-programmed with up to 20 Program’s. When you receive your oven, the controller is not programmed. To set programs, carry out the following for each program required:- ENTER PROGRAMMING MODE. Press ‘Programs’ button to enter ‘Programming’... -
Page 14: Oven Racks
Oven Racks The oven is supplied with four general purpose oven racks. • Self Supporting: When fitted, the oven racks are self supporting and will not drop or angle down when the racks are withdrawn during operation, when loading and unloading products onto racks or when attending to the product being cooked during it’s cook cycle. -
Page 15: Operator Accessible Parameters
Operator Accessible Parameters Setting the Operator Accessible Parameters ENTER THE OPERATOR PARAMETER MODE. Press 'Steam' and 'Start / Stop' buttons together. ‘Temperature’ Display will show ‘PAS’. The ‘Time’ Display will flash. SET PASSWORD Rotate ‘Timer Control’ to set password; (123) (Operator Password). Press ‘Light On / Off’... -
Page 16: Cleaning
Cleaning Guidelines Caution Always turn electrical mains supply before commencing cleaning. This oven is not water proof. water jet spray to clean interior or exterior of the appliance. To achieve the best results, cleaning must be regular and thorough. If any small faults occur, have them looked at promptly. - Page 17 Side Racks Re-Fitting Right Rack a. Align the bottom of the rack with the 2 brackets in the bottom RH side of the oven. RH Lower Mounting Brackets b. Tilt the rack upwards and hook the top rear of the rack onto the locating peg in the top rear of the oven.
- Page 18 Door Seal a. To remove the door seal, pull the 1 piece seal forward until it pulls out of the location groove around the oven. Note the way the seal is fitted to the oven, with the lip facing inwards. b.
-
Page 19: Fault Finding
This section provides a reference to the more common problems that may occur during the operation of your oven. This fault finding guide is intended to help you correct and accurately diagnose problems with your oven. When fault finding a problem, always use a process of elimination starting with the simplest solution and working through to the most complex. -
Page 20: Electrical Schematics
Electrical Schematics Electrical Schematic E32D5 Turbofan Oven... -
Page 21: Replacement Parts List
Replacement Parts List Only genuine authorized replacement parts should be used for the servicing and repair of this oven. The instructions supplied with the parts should be followed when replacing components. For further information and servicing instructions, contact your nearest authorized service provider or Turbofan Dealer. When ordering replacement parts, please quote the part number and the description as listed below.