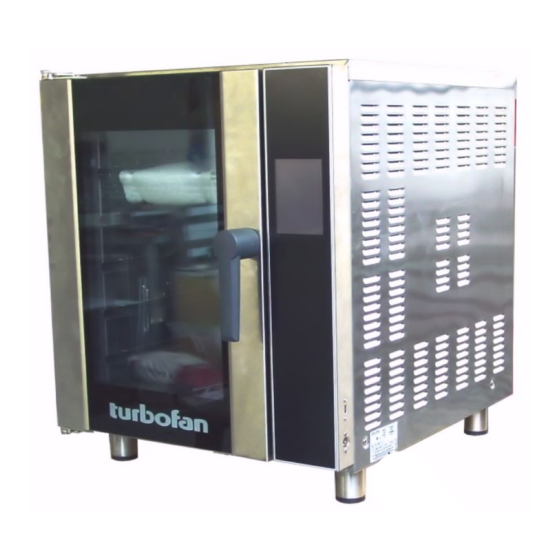
Moffat turbofan 30D Series Installation And Operation Manual
Hide thumbs
Also See for turbofan 30D Series:
- Service manual (30 pages) ,
- Installation and operation manual (29 pages) ,
- Installation and operation manual (22 pages)

Related Manuals for Moffat turbofan 30D Series


Summary of Contents for Moffat turbofan 30D Series
- Page 1 E 3 2 T 4 ( T o u c h S c r e e n ) I n s t a l l a t i o n a n d O p e r a t i o n M a n u a l 236231-4...
- Page 2 The reproduction or copying of any part of this manual by any means whatsoever is strictly forbidden unless authorized previously in writing by the manufacturer. In line with policy to continually develop and improve its products, Moffat Ltd. reserves the right to change the specifications and design without prior notice.
- Page 3 Contents List Safety Information Installation Requirements Unpacking Location Clearances Stand Mounted Ovens Electrical Connection Water Connection Recommended Water Specifications Positioning and Levelling of Oven Initial Start-Up Commissioning Manual Mode Manual Mode - with Shelves Manual Mode - (Optional Core Probe) Core Temp Probe - Use Guide Recipe Mode Recipe Mode - with Shelves...
- Page 4 Contents List Cleaning Guidelines Periodic Maintenance Error Messages...
- Page 5 Introduction Before using your new oven, please read this instruction manual This manual must be kept by the owner for future reference. carefully, pay particular attention to any information labelled Date of Purchase, Date of Installation Serial A record of ‘WARNING’, ‘CAUTION’, ‘IMPORTANT’...
-
Page 6: Specifications
Specifications E32T4 208 - 220V, 50/60Hz, 6.5 kW. Oven Power Ratings 230 - 240V, 50/60Hz, 6.5 kW. 4, 18” x 26” / 460 x 660 Full Size Sheet Pan Capacity. Tray Capacity 4, 600 x 400 Tray Capacity. Oven Tray Details 110mm / 4⅜”. -
Page 7: Installation
Installation Installation shall comply with local electrical, health and safety requirements. It is most important that this oven is installed correctly and that oven operation is correct before use. If you have any questions regarding the proper installation and / or operation of this oven, please contact your local Turbofan distributor. - Page 8 Installation 1. Correctly locate the oven into its final operating position and using a spirit level, adjust the oven feet so that the oven is level and at the correct height. This oven must be earthed / grounded. Each oven should be connected to an adequately protected power supply with an appropriate three wire power cord.
- Page 9 Operation - Manual Mode Press key to turn control ON. Press to show HELP screen. (All screens). Press to turn oven light On/Off. Press MANUAL to set the Manual Mode Parameters. Press to cool down oven. Oven Pre-Heating w ill occur autom atically. Press to turn OFF controller.
- Page 10 Operation - Manual Mode OISTURE EVEL CREEN Enter moisture level required. Range 0 - 5. Press to confirm. Press to cancel. Press to show HELP screen. Press to return to previous screen. Press to select the cook temperature. Press and hold to display Actual Temperature.
- Page 11 Operation - Manual Mode Press to show HELP screen. Press to return to previous screen. Press to select Fan Speed. HEAT OFF Toggle through the following screens to select fan speed required, either High or Low. Press to confirm. Press to cancel.
- Page 12 Operation - Manual Mode with Shelves Press to show HELP screen. Press to return to previous screen. Press to select shelf. HEAT OFF Shelf Mode can be used to cook different product with the same cook temperature, where individual shelf times can be set for each shelf.
- Page 13 Operation - Manual Mode with Shelves Once all shelves to be used are programmed, load product onto shelves and close oven door. Press to start each shelf. Press to cancel program for each shelf. When shelf timers are running, the Shelf Mode Screen will alternate between Time Left to Run and Shelf Setting, (either Timer or Manual Mode).
- Page 14 Operation - Manual Mode with Core Probe Press key to turn control ON. Press to show HELP screen. (All screens). Press MANUAL to set the Manual Mode Parameters. Oven Pre-Heating w ill occur autom atically. Connect the Core Probe to the connector on the lower right side of the control panel.
- Page 15 Operation - Manual Mode with Core Probe OISTURE EVEL CREEN Enter moisture level required. Range 0 - 5. Press to confirm. Press to cancel. Press to show HELP screen. Press to return to previous screen. Press to select the cook temperature. Press and hold to show Actual Temperature.
- Page 16 Operation - Manual Mode with Core Probe Press to show HELP screen. Press to return to previous screen. Press to select Fan Speed. HEAT OFF Toggle through the following screens to select fan speed required, either High or Low. Press to confirm.
- Page 17 Operation - Manual Mode with Core Probe With core probe cooking, it is important to position the probe in the very centre of the food. The probe should always be positioned from the top downwards at the centre of the food to be cooked.
- Page 18 Operation - Recipe Mode Press key to turn control ON. Press to show HELP screen. (All screens). Press RECIPES to select the Recipe Mode Parameters. Oven Pre-Heating w ill occur autom atically. Press to turn oven light On/Off. Press to cool down oven. Press to turn OFF controller.
- Page 19 Operation - Recipe Mode Press to show HELP screen. Press to return to Main screen. The following settings can be adjusted for the currently active stage. Press to return to previous Time. screen. Temperature. Moisture Level. Press and hold to show Actual Fan Speed.
- Page 20 Operation - Recipe Mode Shelf Mode can be used to cook different recipes with the same cook temperature, where individual shelf times can be set for each shelf / product. Press RECIPES to select the product required. Oven Pre-Heating w ill occur autom atically. HEAT ON Press to show HELP screen.
- Page 21 Operation - Recipe Mode Press to return to previous screen. A product Screen with products with the same cook temperature will appear. Press to show HELP screen. Select further products or timers as required. Load shelves and close oven door Press to start each shelf.
- Page 22 Operation-Recipe Mode-Recipe Editing Press to show HELP screen. Press R ECI P ES to enter R ecipe M ode. HEAT ON Press to enter Recipe Edit m ode. ENTER Recipe Passcode (4500). Press to confirm. Press to cancel. Press to show HELP screen. Press to return to previous screen.
- Page 23 Operation-Recipe Mode-Recipe Editing Press to show HELP screen. In the Edit Recipe screen. Press to return to previous screen. Press recipe nam e to edit name. Edit / add recipe name using keypad. Press to confirm. Press to cancel. Display will return to Edit Recipe screen. Press I m age in Edit Recipe screen.
- Page 24 Operation-Recipe Mode-Recipe Editing In the Edit Recipe screen. Press to edit Recipe Stages. The Stages Screen for the recipe will appear. Press to create a new Stage. Press to set stage m ode for Moisture. To delete a Stage, press and Mode Press to set stage m ode for Convection.
- Page 25 Operation - Manager Mode - Settings Press to show HELP screen. Press SETTINGS. HEAT ON Press MANAGER to enter Manager Mode. ENTER Manager Passcode (4500). Press to confirm. Press to cancel. Press to show HELP screen. Press to exit MANAGER screens. Press to return to previous screen Press to enable M anual M ode.
- Page 26 Operation - Manager Mode - Settings Press to show HELP screen. ECIPE MAGE AINTENANCE Press to return to previous screen. Press to Copy Recipes from USB drive. Press to Delete Recipe images. Select individual image to be deleted. Press to delete ALL Images. Press to confirm.
- Page 27 Operation - Manager Mode - Settings UTOSTART CREEN Press to show HELP screen. Press to enable / disable Autostart m ode. Press to return to Manager Press Autostart to display keypad. Enter Auto- Screen start tim e. Press Tem perature Key to display keypad. Enter Auto-start tem perature.
- Page 28 Operation - Manager Mode - Settings Press to show HELP screen. Press to enable / disable Cook Cooldown. Press to exit MANAGER screens. If enabled and Oven Actual Tem perature is higher than Recipe Set Temperature, will prompt cooldown of oven before starting the new recipe. Press to return to previous screen.
- Page 29 Operation - Manager Mode - Settings Press to show HELP screen. Press to exit MANAGER screens. Press to enter / change real tim e settings. Press to change from AM to PM. Press to enter / change real date settings. Press to enter Language selection.
- Page 30 Operation - Manager Mode - Settings Press to show HELP screen. Press to exit MANAGER screens. Press to adjust screen BRIGHTNESS. Press to return to previous screen. Press to enter AUTO DIM SETTINGS. Press to enter PASSCODE MAINTENANCE. Press to RE-CALIBRATE TOUCHSCREEN. ETTINGS CREEN Press Time...
- Page 31 Operation - Manager Mode - Settings CALIBRATE OUCH CREEN Press to Re-Calibrate Touch Screen. NOTE; This should only be carried out if the touch positions on the screen become difficult to operate. Warning Reboot Unit? screen w ill appear. Press to confirm.
-
Page 32: Cleaning And Maintenance
Cleaning and Maintenance b. Lift up and unhook the rear of the rack from the locating peg at the rear of the oven. To achieve the best results, cleaning must be regular and thorough. If any small faults occur, have them looked at promptly. Don't wait until they cause a complete breakdown. - Page 33 Cleaning and Maintenance Side Racks Re-Fitting Oven Lamp a. Remove the LH side rack as shown previously. Right Rack a. Align the bottom of the rack with the 2 brackets in the bottom RH side of the oven. RH Lower Mounting Brackets b.
- Page 34 Cleaning and Maintenance Door Seal Door Glass Cleaning a. To remove the door seal, pull the 1 piece seal forward until Ensure that the oven door is cool before cleaning the oven it pulls out of the location groove around the oven. Note door glass.
-
Page 35: Fault Finding
Fault Finding This section provides a reference to the more common problems You may encounter a problem not covered in this section, please that may occur during the operation of your oven. This fault finding contact your service provider who will require the following guide is intended to help you correct and accurately diagnose information:- problems with your oven. - Page 36 Fault Finding Error Message Error Description Fault Remedy (Screen Display) Oven temperature probe open Call For Service. circuit. Cavity Probe Error Temp Probe error. Call For Service Oven temperature probe short Call For Service. circuit. Cavity High Temperature Error Oven Temp too high. Heating control circuit fault.
-
Page 37: Electrical Schematics
Electrical Schematics... -
Page 38: Replacement Parts List
Replacement Parts List Only genuine authorized replacement parts should be used for the servicing and repair of this oven. The instructions supplied with the parts should be followed when replacing components. For further information and servicing instructions, contact your nearest authorized service provider or Turbofan Dealer. When ordering replacement parts, please quote the part number and the description as listed below.