Table of Contents
Advertisement
Available languages
Available languages
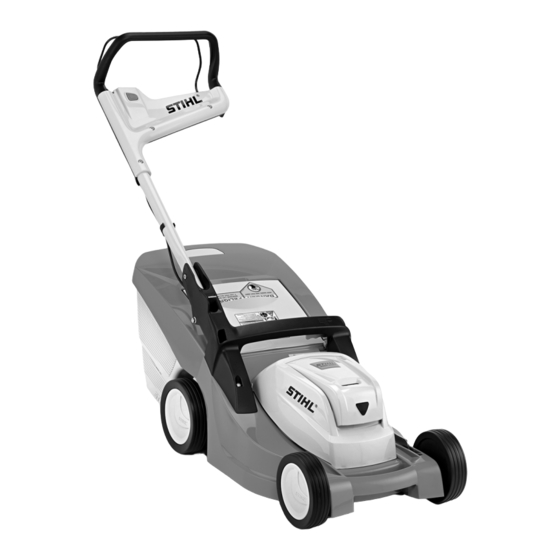
STIHL RMA 410 C
{
Instruction Manual
Manual de instrucciones
WARNING
Read Instruction Manual thoroughly
before use and follow all safety
precautions – improper use can
cause serious or fatal injury.
ADVERTENCIA
Antes de usar la máquina lea y siga
todas las precauciones de
seguridad dadas en el manual de
instrucciones – el uso incorrecto
puede causar lesiones graves o
mortales.
Advertisement
Chapters
Table of Contents

Related Manuals for Stihl RMA 410 C


Summary of Contents for Stihl RMA 410 C
- Page 1 STIHL RMA 410 C Instruction Manual Manual de instrucciones WARNING Read Instruction Manual thoroughly before use and follow all safety precautions – improper use can cause serious or fatal injury. ADVERTENCIA Antes de usar la máquina lea y siga todas las precauciones de seguridad dadas en el manual de instrucciones –...
- Page 2 Instruction Manual 1 - 34 Manual de instrucciones 35 - 69...
-
Page 3: Table Of Contents
For further information you can Mounting the Handlebar go to www.stihlusa.com. Grass Box Contact your STIHL dealer or the STIHL Adjusting Cutting Height distributor for your area if you do not Connecting Charger to Power understand any of the instructions in this Supply manual. -
Page 4: Guide To Using This Manual
Wear heavy duty work gloves (e.g. your STIHL dealer or the STIHL contain item numbers that appear in the made of leather or other wear- distributor for your area for assistance. -
Page 5: Safety Precautions And Working Techniques
SAVE THESE INSTRUCTIONS When not in use, lawn mower Have your STIHL dealer show you how should be stored in an indoor dry to operate your lawn mower. Observe all and locked place – out of reach of applicable local safety regulations, children. - Page 6 Most of these safety precautions and long pants to help pro- strenuous. If you have any condition that warnings apply to the use of all STIHL tect your legs. Do not might be aggravated by strenuous work, lawn mowers. Different models may wear shorts.
- Page 7 In case of spilled liquids. Use inert absorbent to Good footing is very doubt, have it checked by your STIHL absorb spilled liquids. important. Wear sturdy servicing dealer.
- Page 8 41 °F (5 °C) and 104 °F battery to generate heat, rupture or for the STIHL battery and keep it in a (40 °C). ignite or explode. Never use or charge a safe place.
- Page 9 Never operate your lawn mower if it is damaged, improperly adjusted or Unplug the power supply cord from the maintained, or not completely or outlet when charger is not in use. securely assembled. RMA 410 C...
- Page 10 Special care must be taken in slippery conditions and in difficult, overgrown terrain. Watch for hidden obstacles such as tree stumps, roots and ditches to avoid stumbling. Tall grass can hide obstacles and RMA 410 C...
- Page 11 50 feet (15 m) manual. the instructions and warnings that away. To reduce the risk of damage to accompanied the substance involved. property, also maintain this distance from such objects as vehicles or windows. RMA 410 C...
- Page 12 If the machine should start to vibrate (power, etc.) which may used, STIHL may deny coverage. abnormally, stop the motor, remove the be carrying electric fuse key and battery and check for the current.
-
Page 13: General Safety Warnings And Instructions For Battery-Powered Products
Do Recharge only with the charger not attempt any mainte- specified by STIHL. A charger that nance or repair work not is suitable for one type of battery described in your instruc- may create a risk of fire when used tion manual. -
Page 14: Using The Unit
– Allowing lawn to dry before mowing. 10. Have servicing performed by a – qualified repair person using only authorized replacement parts. This will help maintain the safety and performance of the product. RMA 410 C... -
Page 15: Disposal
During mowing, clippings can be collected in the grass box in the usual way. Alternatively, the grass box can be STIHL products must not be thrown in removed and the rear ejection chute the garbage can. Take the product, used. For mulching, the grass box is... -
Page 16: Mounting The Handlebar
The handlebar can be folded down to clean, transport or store your cordless Fit the locknut (3) in the recess in lawn mower. the fork head. Tighten down the screw (4) to 20 - 25 Nm. RMA 410 C... -
Page 17: Grass Box
Engage the lugs (3) of the grass position of guides (arrows). box (2) in the recesses (3) on the back of the mower. Close the flap (1). Push the pins (3) through the holes from inside until they snap into position. RMA 410 C... -
Page 18: Adjusting Cutting Height
(without bumps and hollows). Open the flap (1) and hold it in position. Lift the grass box (2) and remove it to the rear. Close the flap (1). RMA 410 C... -
Page 19: Connecting Charger To Power Supply
Slide the battery (1) into the 1 second, then red and goes off again. charger (2) until you start to feel resistance – then push it in until it engages. RMA 410 C... -
Page 20: Leds On Battery
The battery and charger heat up during the charging process. LED flashes red. AL 300, AL 500 Chargers The AL 300 and AL 500 chargers are equipped with a battery cooling fan, which can be heard during operation. RMA 410 C... - Page 21 / warmed up. During operation: Power tool cuts out – allow battery to cool down; it may be necessary to take the battery out of the power tool for this purpose. RMA 410 C...
-
Page 22: Led On Charger
The LED (1) on the charger may glow Open the battery compartment has a malfunction and must be continuously green or flash red. checked by a servicing dealer – STIHL recommends an authorized Green continuous light ... STIHL servicing dealer..indicates the following: The battery is being charged –... -
Page 23: Switching Off
3 seconds after the switch lever is released. The battery compartment must always be closed during operation. Switching On Do not start the motor in high grass or in the lowest setting since this makes starting more difficult. RMA 410 C... -
Page 24: Storing The Machine
Store indoors in a dry and safe location. Keep out of the reach of children and other unauthorized persons and protected from contamination. Pull the fuse key (4) out of the Do not store spare batteries unused socket (5). – use in rotation. RMA 410 C... -
Page 25: Inspection And Maintenance By User
Cleaning Position Remove the battery. If dirt cannot be removed with water, brush or cloth, STIHL recommends you Disconnect the plug from the wall use a special cleaner (e.g. STIHL outlet. special cleaner). WARNING... -
Page 26: Sharpening Instructions
= 39 mm (1.53 in). Clean the cutting blade and inspect Cutting edges may be filed back no it for wear and/or damage (nicks or more than d = 15 mm (0.59 in). cracks), replace if necessary. RMA 410 C... - Page 27 – the blade and measure how far it has retaining lugs (3) must engage the been filed back. STIHL recommends that you have the holes (4) in the blade. blade resharpened by your STIHL Blade thickness must not be less than servicing dealer.
- Page 28 English WARNING To reduce the riosk of injury, install the blade mounting screw with Loctite and tighten it down to the specified torque. RMA 410 C...
-
Page 29: Maintenance And Care
Clean Battery Visual inspection Clean Battery compartment Check operation (eject battery) Visual inspection Clean Cutting blade Sharpen Replace Coasting brake Check operation All accessible screws and nuts Retighten Safety labels Replace STIHL recommends a STIHL servicing dealer. RMA 410 C... -
Page 30: Main Parts
Cutting Height Adjustment Lever 10 Battery Compartment Cover 11 Battery Compartment 12 Lower Carrying Grip 13 Cutting Blade 14 Fuse Key 15 Battery 16 Charger 17 Power Supply Cord 18 Trailing Shield 19 Ejection Chute Serial Number 10,11 RMA 410 C... -
Page 31: Specifications
Supplies electric current to charger. energy content of the battery. Connects upper handlebar to motor 18. Trailing Shield STIHL AP series rechargeable batteries housing. may be charged only with original The trailing shield is designed to 5. Handlebar Release Lever STIHL AL series chargers. - Page 32 570 W of the following measures: be fulfilled by the user to transport Charge current: 12 A STIHL batteries by road to the power reorient or relocate the receiving – Insulation: II, E (double tool’s operating site. Check and comply...
-
Page 33: Troubleshooting
Machine cuts out during operation cutting height cutting height to suit conditions Feed speed too high Allow power tool to cool down, reduce speed Cooling inlets dirty Allow power tool to cool down, clean cooling air openings in motor housing RMA 410 C... - Page 34 LED on charger flashes red LEDs continue to flash, the battery has a about 5 seconds) malfunction and must be replaced. Malfunction in charger Have charger checked by servicing dealer STIHL recommends an authorized STIHL servicing dealer. RMA 410 C...
-
Page 35: Maintenance And Repairs
STIHL parts symbol K. The responsible. This commitment does not symbol may appear alone on small stop when the product leaves the STIHL parts. dealer. STIHL has partnered with the RBRC (Rechargeable Battery Recycling... -
Page 36: Addresses
ElastoStart ™ Any unauthorized use of these Ematic ™ trademarks without the express written FixCut ™ consent of ANDREAS STIHL AG & Co. KG, HT Plus ™ Waiblingen is strictly prohibited. IntelliCarb ™ Master Control Lever ™ Micro ™ Pro Mark ™... - Page 37 Conexión del cargador al Comuníquese con su concesionario suministro de energía eléctrica STIHL o con el distribuidor STIHL de su Carga de la batería región si no entiende alguna de las instrucciones incluidas en este manual. LED en batería...
-
Page 38: Instrucciones Importantes De Seguridad
Muchas de las instrucciones de uso y de la zona de trabajo. seguridad vienen acompañadas de Use vestimenta apropiada – ilustraciones. La filosofía de STIHL es mejorar No utilice ropa suelta ni artículos de continuamente todos sus productos. Los pasos individuales o joyería. Estos pueden ser Como resultado de ello, periódicamente... -
Page 39: Medidas De Seguridad Y Técnicas De Manejo
Cuando no esté en uso, guardar el mortales. repuesto idénticas. cortacéspedes bajo techo, en un Pida a su concesionario STIHL que le GUARDE ESTAS INSTRUCCIONES lugar seco y bajo llave - fuera del enseñe el manejo de la herramienta alcance de los niños. - Page 40 Utilice únicamente repuestos originales operador debe usar el equipo protector utilizando la máquina. Pueden suceder STIHL, incluyendo la cuchilla. Estas han adecuado. accidentes trágicos si el operador no sido diseñadas específicamente para su está...
- Page 41 STIHL y expresamente autorizados calor, reventarse o incendiarse. El uso nes cortos. por STIHL para usarse con el modelo de las baterías de esta manera también específico de STIHL. Si bien es posible Evite el uso de chaquetas sueltas,...
- Page 42 Utilice baterías STIHL sólo con manual de instrucciones de la batería reviente o se incendie. Nunca utilice ni herramientas motorizadas STIHL y STIHL y consérvelo en un lugar seguro. cargue una batería defectuosa, dañada, cárguelas únicamente con cargadores agrietada, deformada o con fugas.
- Page 43 español / EE.UU Para evitar el riesgo de sacudidas Nunca tire del cordón eléctrico para ADVERTENCIA eléctricas y de incendios, conecte el desconectarlo del tomacorriente de la cargador únicamente a un suministro de pared. Para desenchufarlo, sujete el Para reducir el riesgo de choque energía eléctrica que brinde el voltaje y enchufe y no el cordón.
- Page 44 español / EE.UU USO DE LA HERRAMIENTA ADVERTENCIA MOTORIZADA No maneje nunca un cortacéspedes que esté dañado, mal ajustado o mantenido Traslado de la unidad o que no fue armado completa y debidamente. ADVERTENCIA Mantenga los mangos limpios y secos Para reducir el riesgo lesiones debido al en todo momento;...
- Page 45 español / EE.UU Revise los contactos del compartimiento Permanezca detrás del mango cuando ADVERTENCIA de la batería en busca de materia el motor esté en marcha. extraña. Manténgalos limpios. El cortacéspedes es una máquina para una sola persona. No deje que otras ADVERTENCIA Instale la batería correctamente.
- Page 46 español / EE.UU No tire de la máquina hacia atrás a sea imposible eliminar ADVERTENCIA menos que ello sea absolutamente significativamente la inhalación del necesario. Siempre mire hacia abajo y polvo, es decir mantener el nivel cerca La cuchilla giratoria puede arrojar hacia atrás al cortar dando marcha del valor ambiente, el operador y las objetos extraños a gran distancia directa...
- Page 47 español / EE.UU La máquina no debe utilizarse para fusible y la batería y compruebe que la Encender y apagar la máquina transportar a personas, en especial a cuchilla se haya detenido antes de frecuentemente en un período breve niños, ni objetos. despejar la zona.
-
Page 48: Advertencias De Seguridad E Instrucciones Generales Para Productos Alimentados Por Baterías
El prescritas para productos de baterías deterioro. uso de piezas no fabricadas por STIHL contenidas en la norma UL 2595. puede causar lesiones graves o Es posible que los componentes mortales. -
Page 49: Uso
español / EE.UU 4. Utilice el cortacéspedes No exponga la batería ni el únicamente con las baterías cortacéspedes a fuego ni a específicamente designadas para temperaturas excesivas. La el mismo. El uso de baterías exposición al fuego o a Corte de césped diferentes puede crear un riesgo de temperaturas superiores a 100°C incendio o explosión y lesiones... -
Page 50: Desecho
Durante el corte, el pasto picado puede recogerse en la caja para pasto de la manera usual. Como alternativa, se No se debe botar los aparatos STIHL en puede retirar la caja para pasto y utilizar el basurero. Lleve el producto, los el tubo de descarga trasero. -
Page 51: Montaje Del Mango
español / EE.UU Resultados del mullido Montaje del mango Requisitos para un buen resultado en el mullido: Montaje del mango Altura de corte óptima (posiciones – entre 3 y 5) El césped deberá estar seco – Utilice hojas debidamente afiladas –... -
Page 52: Caja Para Pasto
español / EE.UU Caja para pasto Armado de la caja para pasto Aplique una presión leve para ADVERTENCIA enganchar la cubierta (1) en la base (2). El mango superior puede plegarse hacia abajo por medio de accionar la palanca Fijación de la caja para pasto de soltado –... -
Page 53: Ajuste De La Altura De Corte
español / EE.UU Indicador de nivel Ajuste de la altura de corte Se pueden seleccionar cinco alturas de corte diferentes. Abra la traba (3) de la caja para pasto y gire la cubierta (4) para abrirla. La caja para pasto está provista de un Sujete la caja para pasto por sus indicador de nivel (1). -
Page 54: Conexión Del Cargador Al Suministro De Energía Eléctrica
español / EE.UU Ajuste de la altura de corte Conexión del cargador al Carga de la batería suministro de energía eléctrica La batería no está completamente cargada cuando se la entrega. El voltaje de la red de electricidad y el voltaje operacional deben ser iguales Se recomienda cargar la batería entre sí. -
Page 55: Led En Batería
español / EE.UU Cargador AL 100 LED en batería El cargador AL 100 no tiene ventilador y Cuatro diodos fotoemisores indican el espera a que la batería se enfríe para estado de carga de la batería y cualquier iniciar el proceso de carga. La batería se problema que pueda ocurrir en ésta o en enfría por medio de transferir el calor al la herramienta motorizada. - Page 56 español / EE.UU Durante el proceso de carga Durante el funcionamiento Si los diodos fotoemisores se iluminan continuamente/destellan en rojo Los diodos fotoemisores se encienden Los diodos fotoemisores verdes se continuamente o destellan para indicar encienden continuamente o destellan el progreso de la carga. para indicar el progreso de la carga.
-
Page 57: Led En Cargador
Interferencias electromagnéticas o concesionario de servicio que lo defecto. Saque la batería de la El diodo fotoemisor (1) del cargador revise. STIHL recomienda acudir a herramienta y vuélvala a colocar en puede iluminarse verde de modo un concesionario STIHL autorizado su lugar. -
Page 58: Encendido De La Máquina
español / EE.UU Instale la batería. Encendido de la máquina Una batería de fábrica nueva no está completamente cargada. Se recomienda cargar la batería completamente antes de usarla por primera vez. Pulse el botón de bloqueo (1) con la Instalación de la batería mano derecha y sujételo en esa Coloque la batería (5) en su posición. -
Page 59: Apagado De La Máquina
español / EE.UU Extracción de la batería Retiro de la llave fusible Apagado de la máquina Abra el compartimiento de la batería Saque la llave fusible (4) del receptáculo (5). Para apagar el motor, suelte la palanca de interruptor (1) – la Presione la pestaña (1) hacia Cierre del compartimiento de la batería cuchilla se detiene luego de girar en... -
Page 60: Almacenamiento De La Máquina
español / EE.UU Para garantizar la máxima vida útil de la Almacenamiento de la Inspección y mantenimiento batería: máquina por el usuario Guárdela a un temperatura entre Retire la batería. 10 °C (50 °F) y 20 °C (68 °F). Limpie la máquina a fondo después de cada uso. -
Page 61: Instrucciones De Afilado
Si no es posible quitar la tierra con agua, siempre sustituya el tornillo de montaje con un cepillo o un trapo, STIHL si presenta daños. recomienda el uso de un limpiador especial (por ejemplo, limpiador especial. - Page 62 STIHL recomienda que se solicite al El grosor de la cuchilla no deberá ser El grosor de la cuchilla no deberá ser concesionario que afile la cuchilla. Una...
- Page 63 español / EE.UU Afile los filos con un ángulo de 30°. ADVERTENCIA Utilice arpillera fina para eliminar las Sustituya el tornillo de montaje si rebabas de los filos después de presenta daños. haberlos afilado. Cubra el tornillo de montaje con Instalación de la cuchilla ®...
-
Page 64: Información Para Mantenimiento
Revisar el funcionamiento (extraer la batería) Inspección visual Limpiar Cuchilla Afilar Reemplazar Freno de rueda libre Comprobar el funcionamiento Todos los tornillos y tuercas accesibles Volver a apretar Etiquetas de seguridad Reemplazar STIHL recomienda acudir a un concesionario STIHL para servicio. -
Page 65: Componentes Importantes
español / EE.UU Componentes importantes Palanca de interruptor Mango superior Bloqueo de palanca de interruptor Mango inferior Palanca de soltado del mango Asidero superior Indicador de nivel Caja para pasto Palanca de ajuste de altura de corte 10 Cubierta de compartimiento de batería 11 Compartimiento de batería 12 Asidero inferior... -
Page 66: Especificaciones
15. Batería La máquina puede usarse únicamente 3. Bloqueo de palanca de interruptor Suministra energía eléctrica al con baterías recargables STIHL AP Hay que oprimirlo antes de poder motor. originales. activar la palanca de interruptor. 16. Cargador El tiempo de uso depende del contenido 4. - Page 67 Las baterías STIHL cumplen con los pudieran causar un funcionamiento manual, puesto que el hacerlo podría requisitos descritos en el Manual-UN no deseado.
-
Page 68: Localización De Averías
español / EE.UU Localización de averías Siempre retire la batería antes de realizar algún trabajo en la herramienta motorizada. Condición Causa Solución No hay contacto eléctrico entre la herramienta Extraiga la batería, revise los contactos y vuelva a motorizada y la batería. colocarla La batería tiene poca carga Cargue la batería. - Page 69 (4 diodos fotoemisores en la batería destellan rojo tella rojo diodos fotoemisores continúan destellando, la por aprox. 5 segundos) batería está averiada y es necesario reemplazarla. Cargador averiado Solicite al concesionario de servicio que revise el cargador STIHL recomienda acudir a un concesionario STIHL autorizado para servicio.
-
Page 70: Acerca De Este Manual De Marcas Comerciales
Baterías Recargables) para fomentar pequeñas. la recolección y el reciclado de baterías de ion de litio STIHL en los Estados Unidos y Canadá. En todas las baterías recargables STIHL se puede encontrar el sello de la RBRC, que indica que la empresa aportó... -
Page 71: Instrucciones 36 Direcciones
ElastoStart ™ Queda terminantemente prohibido todo Ematic ™ uso de estas marcas comerciales sin el FixCut ™ consentimiento expreso por escrito de ANDREAS STIHL AG & Co. KG, HT Plus ™ Waiblingen. IntelliCarb ™ Master Control Lever ™ Micro ™... - Page 72 State of California to cause consideradas por el Estado de California como cancer, birth defects causantes de cáncer, defectos de nacimiento u or other reproductive harm. otra toxicidad reproductora. 0458-715-8621-A englisch / spanisch USA englisch / spanisch USA www.stihl.com *04587158621A* 0458-715-8621-A...