Sign In
Upload
Manuals
Brands
Zontes Manuals
Scooter
ZT125T-D
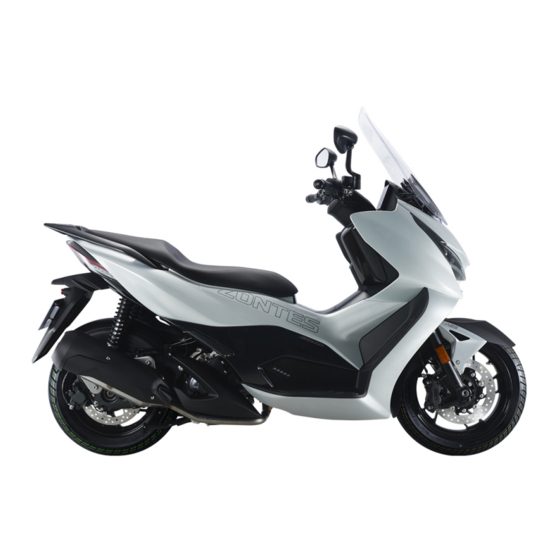
Zontes ZT125T-D Manuals
Manuals and User Guides for Zontes ZT125T-D. We have
1
Zontes ZT125T-D manual available for free PDF download: Maintenance Manual
Zontes ZT125T-D Maintenance Manual (183 pages)
Brand:
Zontes
| Category:
Scooter
| Size: 48.09 MB
Table of Contents
Table of Contents
4
Content
4
Vehicle Information
12
Know before Service
12
Body Label
13
D350 Technical Specification
14
Front Wheel/Steering System
14
Rear Wheel/Suspension System
14
Brake System
14
Battery/Charging System
15
Lamp/Speedometer/Switch Description
15
D125 Technical Specification
16
Front Wheel/Steering System
16
Rear Wheel/Suspension System
16
Brake System
17
Battery/Charging System
17
Tightening Torque
17
Bolt Tightening Torque of General Tightening Part
17
Cable/Cable/Pipe/Electrical Device Distribution Map
18
Distribution Map of Lamps and Lanterns
18
Throttle Cable
19
Brake Upper Pump and Brake Hose
19
Calipers, Brake Hoses and Wheel Speed Sensors
20
Distribution Map of Brake System Accessories
21
D350
21
D125
23
Oil Supply System
23
D350 Fuel Evaporation
23
M125 Fuel Evaporation
23
D350 Fuel Supply
24
M125 Fuel Supply
24
Distribution Map of Cooling System Accessories
25
D350
25
M125
25
Electrical Device Layout
26
D350
26
M125
28
Intake and Exhaust System
31
D350
31
Md125
32
Tool
33
Swell Nail Description
34
Maintenance
35
Know before Service
35
D350 Maintenance Schedule
36
D125 Maintenance Schedule
38
D350 Air Filter (Filter Element), Air Inlet Filter Element
39
Support the Vehicle Firmly
39
Remove the Left Engine Cover
39
Remove the Air Inlet Cover
39
Replace the Air Inlet Filter
39
Remove the Air Filter Housing
39
Replace Air Filter Element
40
Inspection Air Filter Waste Oil Pipe
40
Reinstall
40
M125 Air Filter (Filter Element), Air Inlet Filter Element
42
Support the Vehicle Firmly
42
Remove the Left Engine Cover
42
Replace the Air Inlet Filter
42
Remove the Air Filter Housing
42
Replace Air Filter Element
43
Inspection Air Filter Waste Oil Pipe
43
Reinstall
43
Bolts and Nuts of Muffler
44
Check for Air Leaks at the Engine Exhaust
44
Check for Nut and Bolts at the Muffler
44
D350 Spark Plug
45
Disassemble the Spark Plug
45
D350
45
D125
46
Check the Spark Plug
47
D350
47
D125
47
Refer to the Steps to Remove the Spark Plug to Restore All Parts
47
Engine Oil
48
D350
48
Drain the Oil
48
Replace Fine Filter
48
Add Oil
49
Change Gear Box Oil
49
Confirm the Oil Level
49
M125
50
Drain the Oil
50
Replace Fine Filter
50
Add Oil
50
Change Gear Box Oil
51
Confirm the Oil Level
51
D350 Throttle Valve Body
51
Do Not Dismantle the Throttle Body to Clean up Carbon Deposits
51
Remove the Stepper Motor and Clean up Carbon Deposits
51
Remove the Throttle Valve Body Assembly to Clean up Carbon Deposits
52
Disassemble the Sensor
53
Throttle Valve Body Troubleshooting Process
54
M125 Throttle Valve Body
55
Do Not Dismantle the Throttle Body to Clean up Carbon Deposits
55
Remove the Stepper Motor and Clean up Carbon Deposits
55
Remove the Throttle Valve Body Assembly to Clean up Carbon Deposits
56
Disassemble the Sensor
56
Throttle Valve Body Troubleshooting Process
56
Throttle Cable
57
Inspection
57
Adjust the Throttle Cable Clearance
57
Lube Door Cable
57
Idle Speed
58
Check Idle Speed
58
Fuel Evaporative Pollutant Control System
59
D350 Fuel Evaporation
59
M125 Fuel Evaporation
60
Radiator
61
Check the Coolant
61
Add Coolant (Antifreeze) to the Coolant Expansion Tank
61
D350 Add Coolant to the Radiator
61
Put Coolant
62
D350
62
M125
62
Check Whether the Fins of the Radiator Water Tank Are Deformed or the Air Duct Is Blocked
62
M125
63
Check All Water Pipes for Leaks; Aging
63
D350
63
M125
64
Fuel Pipe
65
Check the Fuel Pipe for Leaks with the Help of an Endoscope with LED Light
65
Replace High Pressure Oil Pipe
65
Fuel Pump
66
Use Oil Pressure Gauge to Measure Fuel Pressure
66
Simple Test of Fuel Pump
67
Treatment of Abnormal Fuel Pressure
67
Braking System
68
D350 Braking System Component Diagram
68
D125 Braking System Component Diagram
68
Check the Brake Components
69
Check the Front and Rear Brake Switches
70
Check the Brake Switch
70
Replace the Brake Switch
70
Lubricate the Movable Parts of the Brake Handle
70
Lubricate the Front Brake Handle
70
After Lubricating the Brake Handle
70
Replacing the Brake Handle
71
Adjust the Brake Handle
71
Replace the Brake Pads
71
Replace the Front Brake Pads
71
D350
71
D125
72
Replace the Rear Brake Pads
72
Abnormal Sound of Brake Pads
73
Replace the Brake Disc
73
Replacing the Front Brake Disc
74
Replacing the Rear Brake Disc
74
Brake Hose
75
Brake Fluid
75
Add Brake Fluid to the Main Pumps of the Front and Rear Disc Brakes
75
Replace the Brake Fluid
75
Replace the Front Brake Brake Fluid
76
Replace the Rear Brake Fluid
76
Brake System Exhaust
76
Tire
76
Check the Tires
77
Replace Tires
77
Steering Mechanism
77
Check the Steering Mechanism
78
Adjust the Steering Mechanism
78
D350
78
D125
78
Maintain Steering Bearings
79
Malfunction
79
Front Fork
79
Check the Appearance
79
Check the Shock Absorption Performance
80
Remove the Front Shock Absorption
80
Correct the Front Fork Tube
80
Troubleshooting
80
Rear Shock Absorption
80
Check
81
Adjust the Preload
81
Adjust the Right Rear Shock Absorption
81
D125
81
M350
81
Adjust the Left Rear Shock Absorption
81
D350
81
Replace the Shock Absorption
81
Bolts and Nuts for Body and Engine Installation
82
Check the Fasteners for the Critical Parts
82
Check Engine Fasteners
82
D350
82
D125
83
Side Bracket
83
Check
83
Lubrication
84
Main Bracket
84
Check
84
Lubrication
85
Install the Main Bracket
85
Replace the Return Spring Post of the Main Support
85
Sound, Light, and Electrical Device Inspection
86
Check
86
Headlight Height Adjustment
87
Fuse Box
88
Troubleshooting
89
Right Hand Switch
89
Right Hand Handle Vice Switch
89
Left Hand Handle Auxiliary Switch
90
Horn
90
Left Hand Switch
91
Light
92
Windshield Failure
92
EFI System
93
Know before Service
93
Error Code
94
D350 Read the Fault Code through the Meter
94
Read the Fault Code through the Diagnostic Tool
94
Error Code
95
Clear Fault Code
95
Manually Clear
95
Use the Diagnostic Tool to Clear
95
EFI Parts Layout
96
Fault Diagnosis and Elimination of EFI Parts
97
Dump Switch
97
OBD Port
98
Fuel Pump
98
Carbon Canister Solenoid Valve
98
EFI Relay
99
Fuel Injector
99
Ignition Coils
99
D350
100
D125
100
Throttle Valve Body
101
Common Failure Phenomena
101
Disassembly
101
Troubleshooting Process
101
Sensor
101
D350 Sensor
101
M125 Sensor
101
Water and Oil Shared Sensor
101
Oxygen Sensor
102
Check
102
Replace
102
D350
102
D125
103
Ecu
103
D350
103
D125
104
Crankshaft Position Sensor
104
The Engine Cannot Start and There Is no Sign of Fault Diagnosis Process
105
The Engine Cannot be Started and There Is a Car Symptom Fault Diagnosis Process
105
Poor Acceleration
106
High Idling Speed of Hot Car
106
Unsteady Idle Speed of Cooling Car
106
Unsteady Idling, Easy to Cutoff
107
Analysis Flow Chart of EFI Failure Indicator Light Always on
108
Electrical Schematic Diagram of EFI System
109
Ignition System
110
Know before Service
110
Troubleshooting
111
Ignition System Layout
112
Electrical Schematic Diagram of Ignition System
112
Ignition System Inspection
113
Ignition Timing
113
Ignition Coils
114
Starting System
115
Know before Service
115
Troubleshooting
115
Starting Relay
115
Starter Motor
116
The Starter Motor Runs Slowly
116
The Starter Motor Is Working Normally, but the Engine Cannot be Started
116
Ignition System Layout
116
Starting System Electrical Schematic Diagram
117
Starter Motor
117
Remove the Starter Motor
117
Disassemble the Starter Motor
118
Examination
119
Starter Motor Front Cover
119
Motor Back Cover
119
Denki
119
Check the Starting Relay
120
Operation Check
120
Check the Relay Coil
120
Input Line
120
Ground Wire
120
Disassembly and Assembly of the Starting Relay
120
Fuel Supply System
121
Know before Service
121
Fuel Tank Removal
121
Disassemble the Fuel Tank Assembly
121
Disassemble the Fuel Pump
122
Remove the External Parts of the Fuel Tank Assembly
123
Examination
123
Fuel Pressure Test
123
Fuel Pump Inspection
123
Oil Level Sensor
123
Cooling System
124
Know before Service
124
Troubleshooting
124
The Engine Temperature Is too High
124
The Engine Temperature Is too Low
124
Coolant Leakage
124
Coolant System Distribution Map
125
D350
125
D125
125
Coolant Flow Diagram
126
D350
126
D125
127
Cooling System Disassembly
127
D125 Remove the Radiator Assembly
127
D350 Remove the Radiator Assembly
128
D350 Coolant System Hoop/Clamp Distribution Map
129
D350 Thermostat Assembly and Small Loop
129
Cooling System Accessories
130
D350 Main Water Tank
131
D350 Attention to the Water Tank Filling Port
131
Overall Tightness Inspection
131
Pressure Relief Valve Inspection
131
Auxiliary Water Tank
131
Water and Oil Shared Sensor
131
Thermostat
132
Inspection
132
Failure Phenomenon
132
Disassembly
132
Thermostat Core Inspection
133
Water Pipe
133
Check the Water Pump Cover Assembly
133
Braking System
134
Know before Service
134
Trouble Shooting
135
Soft Feeling from Brake Lever
135
Hard Feeling from Brake Lever
135
Disassemble the Disc Brake Main Pump and Calipers
135
Disassemble the Front Disc Brake Main Pump
135
Disassemble the Rear Disc Brake Main Pump
136
Disassemble the Front Disc Brake Caliper
136
D350
136
D125
136
Disassemble the Rear Disc Brake Caliper
137
Brake Hose and Wheel Speed Sensor
138
Check the Gap between the Wheel Speed Sensor and the Induction Ring Gear
138
Remove the Brake Hose and Wheel Speed Sensor
138
Release Brake Fluid
138
FMC-HU and RMC-HU
139
FC-HU and Wheel Speed Sensor (Front Wheel)
139
RC-HU and Wheel Speed Sensor (Rear Wheel)
139
ABS System Layout
140
ABS Hydraulic Control Unit
141
Disassemble
141
ABS Troubleshooting
142
Battery/Charging System
143
Know before Service
143
Troubleshooting
144
Charging System Layout Diagram
145
Electrical Schematic Diagram
145
Battery Disassembly
146
Disassembly
146
Check
146
Charging
146
Charging System Check
146
Leakage Test
146
Check the Charging Voltage
146
Inspection of Magneto Stator Charging Coil
146
Remove the Rectifier
147
Front Fork Assembly
148
Know before Service
148
Exploded View of Front Fork Components
149
D350 Directional Exploded View
149
D125 Directional Exploded View
150
Front Fork Exploded View
151
D350
151
D125
152
Exploded View of Lower Link Board
153
D350
153
D125
154
Change the Direction of the Handle
155
Remove the Direction of the Handle
155
Remove the Components
155
Installation of the Direction Component
156
Installation of the Direction Handle Cover
156
Replace the Front Wheel
157
Remove the Front Wheel Assembly
157
Install the Front Wheel Assembly
157
Front Wheel Assembly Exploded View
158
D350
158
D125
158
Inspection and Maintenance of Front Wheel Assembly
159
Disc Brake
159
The Service Life of the Disc Brake Disc
159
Disc Brake Replacement Method
159
Front Wheel Oil Seals and Bearings
159
Service Life of Front Wheel Oil Seals and Bearings
159
Replacement Method of Front Wheel Oil Seal and Bearing
159
Front Wheel Rims and Tires
159
The Service Life of the Front Wheel Rim and Tire
159
How to Replace the Front Wheel Rim and Tire
159
Dynamic Balance
160
D350 Replacement of the Front Shock Absorber
160
Disassemble the Front Wheel and Front Fender Assembly
160
Remove the Left and Right Front Shock Absorbers
160
Reinstall the Shock Absorber, Front Fender, Front Wheel and Other Components
161
D125 Replacement of the Front Shock Absorber
161
Disassemble the Front Wheel and Front Fender Assembly
161
Remove the Left and Right Front Shock Absorbers
162
Reinstall the Shock Absorber, Front Fender, Front Wheel and Other Components
162
Replace the Lower Link Board
162
Disassemble Parts Ahead of Time
162
Remove the Faucet Lock
162
Removing the Direction Pad
163
D350
163
D125
163
Remove the Lower Link Board Assembly
163
Install the Lower Link Board Assembly
163
D125
164
Install Other Disassembly Components
164
Disassemble the Engine of the Vehicle
165
Disassemble the Storage Box
165
Remove the Cover
165
Put the Coolant and Pull out the Connection Plug
166
Disassemble the Engine
168
D350
168
D125
169
Install the Engine
169
D350
169
D125
170
Disassembly and Assembly of Vehicle Covering Parts
171
Disassembly and Assembly of Vehicle Panel
173
Windshield Removal
173
Removal of the Front Sun Visor
173
Removal of the Front Cover and the Front Panel
173
Disassembly of the Left &Right Side Cover
174
Disassembly of the Cushion
174
Disassembly of the Storage Box
174
Disassembly of the Left, Right Fuel Tank Cover
175
Removal of the Front Left and Right Panels
175
Disassembly of the of the Speedometer Panel
175
Removal of Front Left and Right Panel Bottom Lining
176
Disassembly of Headlights
176
Removal of Windshield Base
177
Disassembly the Middle Cover of the Fuel Tank
178
Disassembly the Left and Right Storage Boxes
179
Removal of Front Storage Box Panel
179
Removal of Left and Right Pedals and Surrounding Left and Right Parts
180
Disassembly of the Surrounding Bottom
181
Removal of the Surrounding Middle Part
181
Radiator Deflector Removal
181
Disassembly of the Rear Hand Rest
181
Removal of Tail Skirt and Tail Lamp
182
Removal of Rear Mud Flap
182
Advertisement
Advertisement
Related Products
Zontes ZT350T-D
Zontes ZT350E
Zontes ZT125-U
Zontes ZT125-U1
Zontes ZT125-Z2
Zontes ZT125-G1 2020
Zontes ZT125-GK
Zontes ZT125/310T-M
Zontes ZT125-M 2022
Zontes ZT125-G1
Zontes Categories
Motorcycle
Engine
Scooter
Bicycle
Racks & Stands
More Zontes Manuals
Login
Sign In
OR
Sign in with Facebook
Sign in with Google
Upload manual
Upload from disk
Upload from URL